10 Creative Cheesecake Decorating Ideas to Impress Your Guests
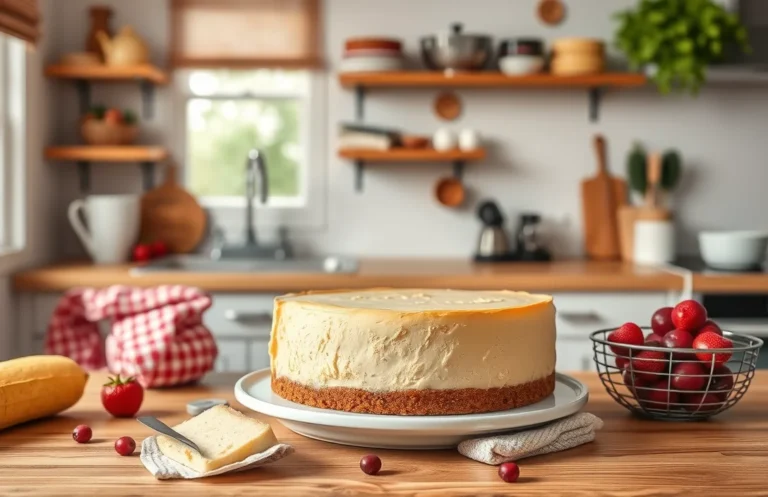
Cheesecake is one of those desserts that can turn any occasion into a celebration. Its creamy texture and rich flavor make it a favorite among friends and family, and with the right decorations, it becomes a stunning centerpiece. Imagine a luscious cheesecake adorned with fresh fruits, decadent chocolate drips, or a sprinkle of edible flowers—each bite is a moment of bliss!
You’ll discover 10 creative decorating ideas for cheesecakes, complete with step-by-step instructions, tips for success, and recommended tools and ingredients. This guide is suitable for all skill levels and will help you impress your guests at any gathering.
| Prep Time | 30 minutes |
|---|---|
| Cook Time | 1 hour |
| Total Time | 1 hour 30 minutes |
| Servings | 8 |
| Difficulty | Medium |
History of Cheesecake
The history of cheesecake is rich and varied, reflecting the diverse cultures that have embraced this delightful dessert. Understanding its origins not only highlights its significance but also inspires creative decorating ideas that honor its legacy.
- Ancient Roots: Cheesecake has roots tracing back to ancient Greece, where it was made with simple ingredients like cheese, flour, and honey. It was served to athletes during the first Olympic Games in 776 BC, symbolizing nourishment and celebration.
- Roman Influence: The Romans adapted the Greek version, adding eggs and creating a more structured dessert. They referred to it as “libum,” and it was often offered to the gods, showcasing its importance in rituals and festivities.
- European Variations: As cheesecake spread throughout Europe, each region added its unique twist. In Italy, ricotta became a staple, while in Germany, quark cheese was favored. These variations opened the door for endless decorating possibilities, reflecting local ingredients and aesthetics.
- Modern Popularity: The 20th century brought cheesecake into the limelight, particularly in America with the famous New York-style cheesecake. This creamy version has inspired countless decorating techniques, from fruit toppings to chocolate ganache, elevating the dessert to a centerpiece at gatherings.
Essential Decorating Ingredients
Decorating your cheesecake can elevate it from delicious to stunning, and having the right ingredients on hand is crucial. This section outlines the essential components you’ll need to create beautiful and mouth-watering cheesecake decorations, from fresh fruits to rich chocolate and crunchy nuts.
| Item | Amount/Specification | Notes |
|---|---|---|
| Fresh Berries | 1-2 cups assorted (strawberries, blueberries, raspberries) | Choose ripe, vibrant berries for best flavor and appearance. |
| Chocolate | 4 oz (113g) dark or milk chocolate | Chop finely for drizzling or shavings. |
| Caramel Sauce | ½ cup (120ml) | Store-bought or homemade; warm slightly for easier drizzling. |
| Nuts (e.g., pecans, walnuts) | ½ cup (60g) chopped | Toast for enhanced flavor before sprinkling. |
| Whipped Cream | 1 cup (240ml) | Use heavy cream for a stable whip; sweeten to taste. |
| Spices (e.g., cinnamon, nutmeg) | ½ teaspoon (2g) | Sprinkle on top for a warm flavor accent. |
- Tip: Use seasonal fruits for the best flavor and presentation.
- Consider using edible flowers for a decorative touch.
- Always taste your toppings before using them to ensure balance with the cheesecake’s flavor.
- For a gluten-free option, ensure all sauces and toppings are certified gluten-free.
Necessary Tools and Equipment
To achieve stunning cheesecake decorations, having the right tools and equipment is essential. This section covers the must-have items that will help you create beautiful designs and elevate your cheesecake presentation. With these tools in hand, you’ll be able to transform your cheesecake into a showstopper.
| Item | Amount/Specification | Notes |
|---|---|---|
| Piping Bags | 1-2 bags, 12-18 inches | Reusable or disposable; use with various tips for different designs. |
| Piping Tips | Assorted sizes | Choose star, round, and leaf tips for different effects. |
| Offset Spatula | 1 | Ideal for spreading toppings evenly and smoothing surfaces. |
| Cake Turntable | 1 | Helps in decorating evenly; allows you to rotate the cake easily. |
| Bench Scraper | 1 | Useful for creating clean edges and smoothing sides. |
- Tip: If using piping bags for the first time, practice on parchment paper before decorating your cheesecake.
- Tip: Use a turntable to apply a consistent layer of frosting or ganache, ensuring even coverage.
- Tip: Keep your tools clean and dry to avoid any unwanted mess during the decorating process.
- Tip: Experiment with different piping tips to achieve unique and intricate designs.
Step-by-Step Decorating Techniques
Decorating your cheesecake can elevate it from a simple dessert to a stunning centerpiece. Below are ten practical decorating techniques that will not only enhance the visual appeal of your cheesecake but also add delightful flavors and textures.
-
Fruit Topping
Select your favorite fruits such as strawberries, blueberries, or kiwi. Rinse and slice them as needed. Arrange the fruit in a decorative pattern on top of the cheesecake for a fresh and vibrant look.
-
Chocolate Drizzle
Melt ½ cup of semi-sweet chocolate chips in a microwave-safe bowl for 30 seconds, stirring until smooth. Use a spoon to drizzle the melted chocolate over the cheesecake in a zigzag pattern for a rich finish.
-
Whipped Cream Flowers
Whip 1 cup of heavy cream with 2 tablespoons of powdered sugar until stiff peaks form. Use a piping bag fitted with a star tip to pipe small flowers around the edges for a delicate touch.
-
Nuts and Crunch
Chop ¼ cup of toasted nuts like pecans or almonds. Sprinkle them over the top of the cheesecake for added texture and a nutty flavor.
-
Caramel Swirls
Warm ¼ cup of caramel sauce in the microwave for 10 seconds if it’s too thick. Drizzle it over the cheesecake, using a toothpick to create swirls for an eye-catching design.
-
Meringue Kisses
Pipe small dollops of meringue on a baking sheet and bake at 200°F (93°C) for 1.5 hours until dry. Once cooled, place them on the cheesecake for a light and airy decoration.
-
Edible Flowers
Choose edible flowers like pansies or nasturtiums. Rinse them gently and place them strategically on top of the cheesecake to add a pop of color and elegance.
-
Colorful Sprinkles
Simply sprinkle ¼ cup of colorful sprinkles over the cheesecake for a fun and festive look, perfect for birthdays or celebrations.
-
Themed Decorations
For a holiday theme, use cookie cutters to cut shapes out of fondant or chocolate. Place them on top of the cheesecake, customizing it for special occasions.
Chef’s tip: Always allow your cheesecake to cool completely before decorating to ensure that your toppings adhere well and maintain their shape.
Pro Tips for Perfect Decorations
Decorating your cheesecake can be the difference between an ordinary dessert and a showstopper. With the right techniques, you can elevate your cheesecake to a visually stunning masterpiece while avoiding common pitfalls. Here are some expert tips to help you achieve a flawless finish.
Avoiding Sogginess
One of the main challenges when decorating cheesecakes is preventing a soggy crust or toppings. Here are some tips:
- Cool completely: Ensure your cheesecake is completely cooled before adding any toppings. This usually takes about 2 hours at room temperature.
- Use a thick layer: If you’re using fruit toppings, opt for thicker options like fruit preserves or compotes instead of fresh fruit, which can release moisture.
- Don’t over-saturate: When drizzling sauces, do so lightly to avoid a soggy bottom.
Achieving Smooth Finishes
A smooth finish can make your cheesecake look professionally made. Here’s how to get that perfect look:
- Use a spatula: After pouring your topping, use a small offset spatula to spread it evenly across the surface.
- Chill before serving: Allow your decorated cheesecake to chill for at least 2 hours in the refrigerator. This helps the toppings set and the cheesecake firm up.
Color Combinations
Color can enhance the appeal of your cheesecake. Consider these combinations:
“Pairing vibrant fruits with neutral tones like creamy white cheesecake creates a stunning visual contrast.”
Some popular combinations include:
| Fruit | Cheesecake Base |
|---|---|
| Raspberry | Vanilla |
| Mango | Coconut |
| Blueberry | Lemon |
By following these tips, you’ll create a cheesecake that’s not only delicious but also a feast for the eyes!
Variations for Dietary Needs
When decorating your cheesecake, it’s essential to consider dietary preferences and restrictions to ensure everyone can enjoy a slice. Here are some creative ideas that cater to gluten-free, vegan, and low-sugar diets, allowing for both deliciousness and inclusivity.
Gluten-Free Options
For a gluten-free cheesecake, use a crust made from ground almonds or gluten-free cookies. Here are some ideas:
- Crust: Substitute 1½ cups of graham cracker crumbs with 1½ cups of almond flour or crushed gluten-free cookies.
- Toppings: Use fresh fruits like strawberries or blueberries, which are naturally gluten-free and add a vibrant pop of color.
- Gluten-Free Chocolate: Drizzle with melted gluten-free dark chocolate for an indulgent finish.
Vegan Alternatives
If you’re looking for vegan cheesecake decorating ideas, consider these substitutions:
- Crust: Use 1½ cups of crushed nuts mixed with ½ cup of pitted dates for a raw, vegan crust.
- Filling: Blend 3 cups of soaked cashews with ½ cup of coconut milk and sweeten with maple syrup instead of cream cheese.
- Toppings: Decorate with coconut whipped cream and sprinkle with cacao nibs for a crunchy texture.
Low-Sugar Ideas
For a lower-sugar cheesecake, you can still achieve beautiful decorations:
- Sweetener: Replace sugar with ½ cup of erythritol or stevia in your cheesecake mix.
- Toppings: Use fresh berries or a low-sugar fruit compote to add natural sweetness without additional sugar.
- Chocolate: Opt for unsweetened cocoa powder for a rich chocolate layer without the sugar.
Chef’s tip: Always taste your decorations before adding them to ensure they meet your preferred sweetness level!
Serving and Plating Suggestions
Presenting your cheesecake in a visually appealing way can elevate its charm and make it even more enjoyable for your guests. Here are some thoughtful ideas for plate selection, garnishing techniques, and pairing suggestions that will turn your cheesecake into a showstopper.
Plate Selection
- Choose a simple white plate to make the colors of your cheesecake pop.
- For a rustic touch, opt for a wooden or slate board — it adds a warm, inviting feel.
- Consider using a cake stand to elevate the cheesecake, giving it a centerpiece quality.
Garnishing Techniques
Garnishing can transform your cheesecake from ordinary to extraordinary. Here are some ideas:
- Drizzle with 1/2 cup chocolate ganache or 1/2 cup fruit coulis for a rich finish.
- Add a sprinkle of 1 tablespoon finely chopped nuts for texture and crunch.
- Top with fresh berries, like 1/2 cup raspberries or 1/2 cup blueberries, for a pop of color and freshness.
Chef’s tip: Always garnish just before serving to keep the toppings fresh and vibrant.
Pairing Suggestions
Enhancing the flavors of your cheesecake can be as simple as pairing it with complementary items:
- Serve with a side of whipped cream mixed with 1 teaspoon vanilla extract.
- Offer a small glass of dessert wine or coffee to balance the sweetness.
- Include a small scoop of vanilla ice cream for added indulgence.
| Garnish | Amount |
|---|---|
| Chocolate Ganache | 1/2 cup |
| Fruit Coulis | 1/2 cup |
| Chopped Nuts | 1 tablespoon |
With these serving and plating suggestions, your cheesecake is sure to impress both in flavor and presentation. Enjoy the process, and don’t be afraid to get creative!
Quick Summary
| Prep Time | 30 minutes |
|---|---|
| Cook Time | 1 hour |
| Total Time | 1 hour 30 minutes |
| Servings | 8 |
- Choose your base: Use a classic graham cracker crust or a chocolate cookie crust for added flavor.
- Cool completely: Allow the cheesecake to cool in the oven with the door ajar to prevent cracking.
- Layer toppings: Use fresh fruits, chocolate ganache, or caramel sauce for a stunning finish.
- Chill before serving: Refrigerate for at least 4 hours to set the flavors and textures.
- Use a sharp knife: Dip it in hot water before slicing to achieve clean edges.
- Tip: Always use room temperature cream cheese for a smooth batter.
- Tip: Decorate just before serving to keep toppings fresh.
Frequently Asked Questions
Can I make this ahead of time? How to store and reheat?
You can definitely make your cheesecake ahead of time; it actually tastes better after chilling in the fridge for at least 4-6 hours. Store it covered in the fridge, and avoid reheating as it’s best enjoyed cold.
What can I substitute for cream cheese?
If you need a substitute for cream cheese, you can use mascarpone cheese or a blend of Greek yogurt and sour cream for a lighter option. Just keep in mind that the flavor and texture might vary slightly.
How do I know when my cheesecake is done?
Your cheesecake is done when the edges are set but the center still has a wobble when you gently shake the pan, usually around 50-60 minutes at 325°F (163°C). It will firm up as it cools, so don’t overbake!
Can I freeze my cheesecake? How long does it last?
You can freeze your cheesecake for up to 3 months if wrapped tightly in plastic wrap and aluminum foil. Just remember to let it thaw in the fridge overnight before serving.
What if I don’t have a springform pan?
If you don’t have a springform pan, you can use a regular cake pan lined with parchment paper for easy removal. Just be careful when slicing to avoid damaging the sides of the cheesecake.

- 10 Best Cheese Knife With Holes For Smooth Slice 2026 - March 9, 2026
- Make Cheesecake Up to 3 Days Ahead: Tips for Best Flavor & Texture - March 4, 2026
- Easy No-Bake Cool Doen Cheesecake: Quick Recipe & Tips - March 4, 2026