Is It Safe to Eat Cheesecake During Pregnancy? Key Facts Inside
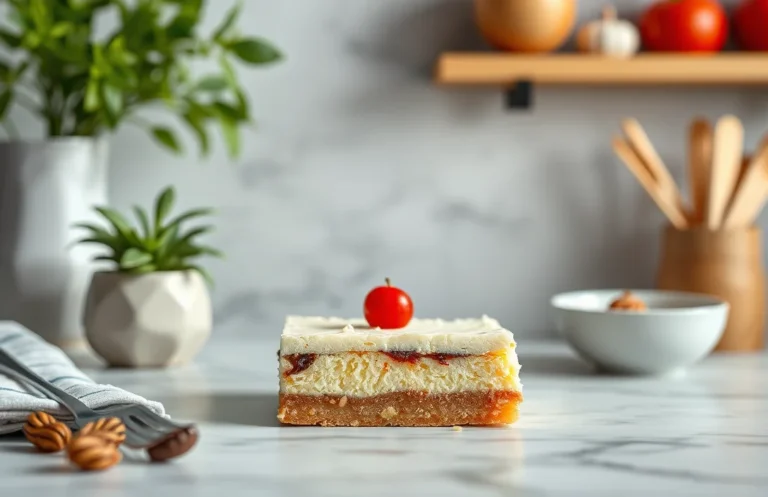
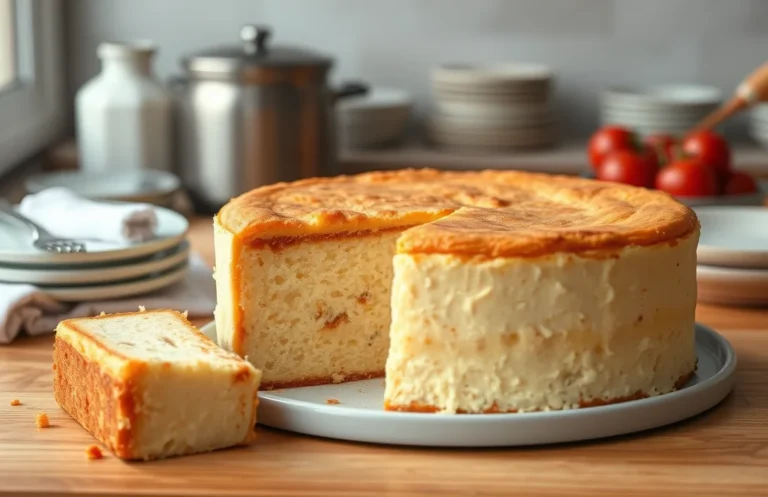
There’s something incredibly satisfying about a creamy, rich cheesecake, especially one that’s perfectly baked and chilled. This cheesecake is a crowd-pleaser at gatherings, and it’s also a comforting dessert to enjoy after a long day. Just imagine cutting into that luscious slice, the smooth texture melting in your mouth—pure bliss!
Wondering if you can enjoy cheesecake while pregnant? This recipe provides clear instructions, exact measurements, and specific cooking times to guide you. Total time is approximately 1 hour and 30 minutes, it’s moderately easy, and makes 8 servings.
| Prep Time | 30 minutes |
|---|---|
| Cook Time | 60 minutes |
| Total Time | 1 hour 30 minutes |
| Servings | 8 |
| Difficulty | Moderate |
History of Cheesecake
The origins of cheesecake date back thousands of years, with its rich flavors and creamy texture making it a beloved dessert across various cultures. Understanding its history not only enriches our appreciation for this delightful treat but also helps us navigate its consumption, especially during pregnancy.
- Ancient Beginnings: Cheesecake is believed to have originated in ancient Greece, where it was served to athletes during the first Olympic Games in 776 B.C. The Greeks used simple ingredients like cheese, flour, and honey, setting the foundation for what we now know as cheesecake.
- Roman Adaptation: The Romans later adopted the Greek recipe, adding their own twist by incorporating eggs and baking the mixture. This adaptation spread across Europe, influencing various regional recipes and leading to the diverse styles of cheesecake we enjoy today.
- Cultural Significance: Over the centuries, cheesecake has evolved into a symbol of celebration in many cultures. In the United States, for example, New York-style cheesecake is often associated with special occasions. Understanding this cultural backdrop can make the dessert feel even more special for expectant mothers looking to indulge.
- Modern Variations: Today, cheesecake recipes abound, ranging from light and fluffy to dense and rich. While many traditional recipes use raw eggs, which can pose risks during pregnancy, knowing the history helps in making informed choices about which variations are safe to enjoy.
Ingredients for Safe Cheesecake
Creating a safe cheesecake during pregnancy requires careful selection of ingredients to ensure both flavor and safety. In this section, I’ll outline the specific ingredients you need, their quantities, and any important notes about their selection, particularly focusing on pasteurized options for safety.
| Item | Amount/Specification | Notes |
|---|---|---|
| Cream Cheese | 16 ounces (450g) | Use pasteurized cream cheese to avoid listeria. |
| Sugar | 1 cup (200g) | Granulated sugar works best for sweetness and texture. |
| Eggs | 3 large | Ensure eggs are pasteurized to prevent salmonella. |
| Graham Cracker Crust | 1 ½ cups (150g) crushed graham crackers | Look for brands without additives; you can use gluten-free options. |
| Butter | ½ cup (113g) | Unsalted butter is recommended for better control of saltiness. |
- For an alternative crust, consider using crushed nuts or oats mixed with coconut oil.
- Always check labels for pasteurization when selecting dairy products.
- Keep all ingredients at room temperature for smoother mixing.
Essential Kitchen Tools
Making a delicious cheesecake requires some essential kitchen tools that ensure your dessert turns out perfectly. The right equipment allows you to mix, bake, and serve your cheesecake with ease, especially when considering safety for those who are pregnant. Here’s what you need to have on hand.
| Item | Amount/Specification | Notes |
|---|---|---|
| Mixing Bowls | 2 (1 large, 1 medium) | Use glass or stainless steel for easy cleaning and safety. |
| Springform Pan | 9-inch | This allows easy removal of the cheesecake without breaking. |
| Mixer | Stand or handheld | A stand mixer is ideal for hands-free mixing, but a handheld mixer works well too. |
- Tip: Always ensure your mixing bowls are clean to avoid any cross-contamination, especially important in pregnancy.
- Choose a springform pan that has a tight seal to prevent leaks.
- If using a handheld mixer, be careful to avoid splatters when mixing the cream cheese.
Step-by-Step Cheesecake Preparation
Preparing a cheesecake that is safe for pregnant women involves careful attention to both ingredients and cooking methods. This section will guide you through the crust preparation, filling preparation, and baking process, ensuring a delicious and safe dessert.
Crust Preparation
- Preheat your oven to 350°F (175°C). This temperature is essential for achieving a golden crust.
- In a medium bowl, combine 1 ½ cups (150g) of graham cracker crumbs, ½ cup (100g) of granulated sugar, and ½ cup (115g) of melted unsalted butter. Mix until the crumbs are evenly coated.
- Press the crumb mixture firmly into the bottom of a 9-inch (23 cm) springform pan. Use the bottom of a measuring cup to create an even layer. Bake for 10 minutes, until lightly golden. Set aside to cool.
Filling Preparation
- In a large mixing bowl, beat 24 ounces (680g) of cream cheese at room temperature until smooth and creamy, about 2-3 minutes. This ensures there are no lumps.
- Gradually add 1 cup (200g) of granulated sugar and continue to beat until fluffy, about 2 minutes. The mixture should be light and airy.
- Incorporate 3 large eggs, one at a time, mixing well after each addition. The batter should look glossy and well combined.
- Mix in 1 teaspoon of vanilla extract and ¼ cup (60ml) of sour cream until fully integrated. The filling should be smooth and creamy.
Baking Process
- Pour the filling over the cooled crust in the springform pan. Smooth the top with a spatula.
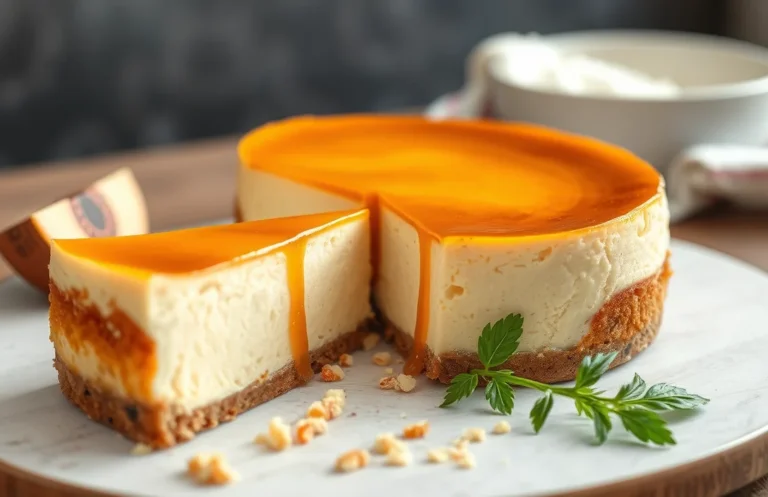
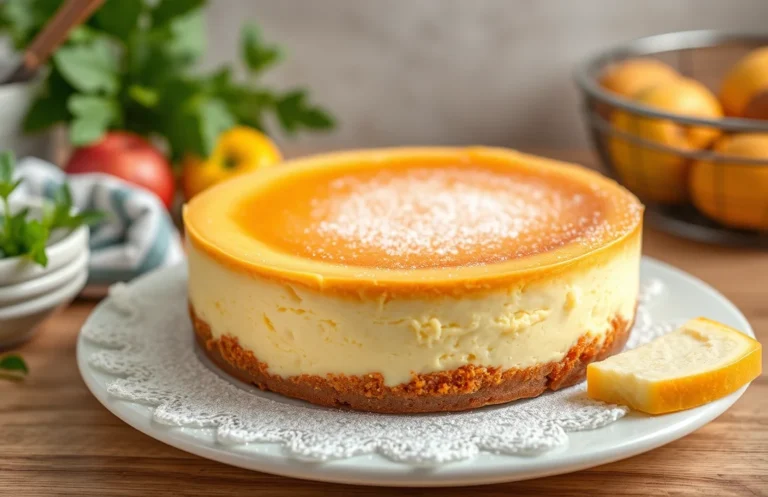
- Bake in the preheated oven for 50-60 minutes. The cheesecake is done when the edges are set, but the center still has a slight jiggle.
- Once baked, turn off the oven and crack the door to let the cheesecake cool slowly for 1 hour. This step helps prevent cracking.
- After cooling, refrigerate the cheesecake for at least 4 hours before serving. This allows it to firm up and develop flavor.
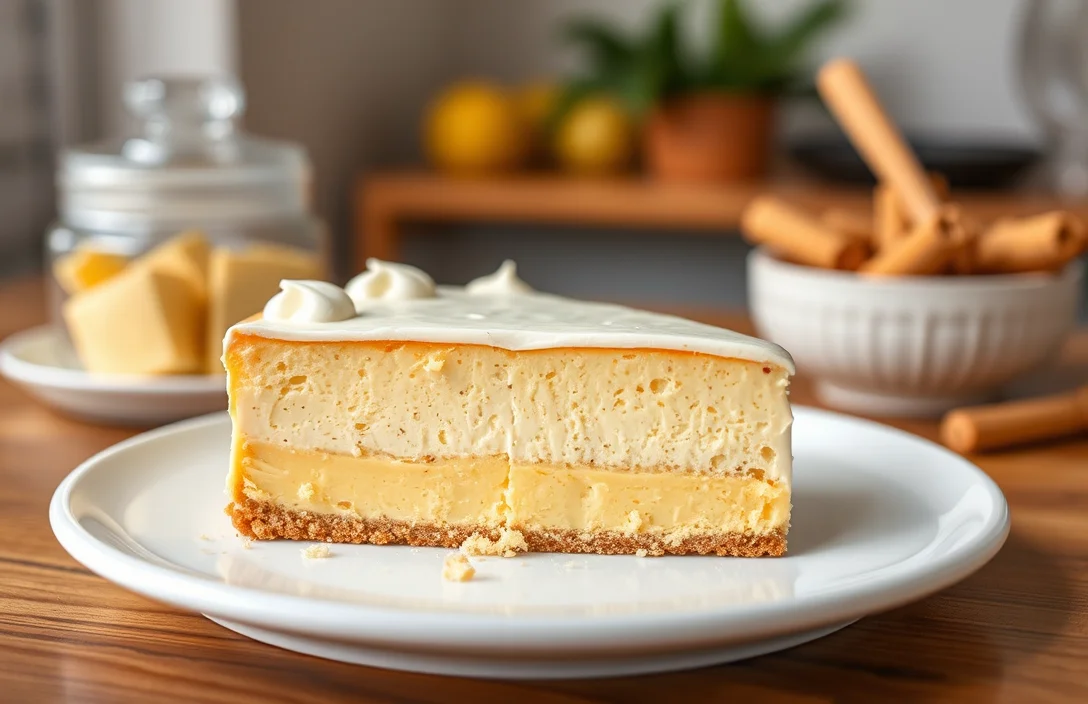
Chef’s tip: If your cheesecake cracks, don’t worry! You can cover it with a layer of fruit topping or whipped cream.
Pro Tips for Perfect Cheesecake
Making a cheesecake that is smooth, creamy, and crack-free is a culinary art. This section will provide you with essential tips to help you avoid common pitfalls when preparing cheesecake, especially important if you’re considering enjoying cheesecake while pregnant. Ensuring food safety and achieving the perfect texture is key!
Preventing Cracks
- Use room temperature ingredients: Always make sure your cream cheese, eggs, and sour cream are at room temperature before starting. This helps achieve a smooth batter and reduces the risk of cracks during baking.
- Don’t overmix: When combining the ingredients, mix just until smooth. Overmixing incorporates too much air, leading to cracks as the cheesecake bakes and cools.
- Bake in a water bath: Place your cheesecake pan in a larger pan filled with hot water before baking. This technique helps maintain even heat and moisture, reducing the risk of cracking.
Cooling Tips
- Cool gradually: After baking, turn off the oven and crack the door, allowing the cheesecake to cool in the oven for about 1 hour. This gradual cooling process minimizes the shock that can cause cracks.
- Chill completely: Once cooled to room temperature, cover the cheesecake and refrigerate it for at least 4 hours, preferably overnight. This allows the flavors to meld and the texture to set properly.
- Keep it covered: To prevent any surface drying or unwanted smells from the fridge, wrap the cheesecake tightly with plastic wrap after it has cooled.
Cheesecake Variations and Substitutions
When you’re pregnant, it’s essential to consider the ingredients in your cheesecake, especially if you have dietary restrictions or preferences. This section explores gluten-free and vegan alternatives, ensuring that you can enjoy cheesecake while prioritizing your health and the baby’s well-being.
Gluten-Free Options
If you’re avoiding gluten, you can easily make a delicious gluten-free cheesecake. Here’s how:
- Use 1 ½ cups gluten-free graham cracker crumbs (about 150g) for the crust.
- Substitute regular flour with ½ cup almond flour (50g) in the filling if needed.
Ensure your ingredients are labeled gluten-free to avoid any cross-contamination. The crust should be golden brown and slightly firm when baked at 350°F (175°C) for 10-12 minutes.
Vegan Alternatives
If you’re looking for a dairy-free option, consider these substitutions:
- Replace cream cheese with 1 ½ cups soaked cashews (about 200g), blended until smooth.
- Use ½ cup coconut cream (120ml) for added creaminess.
- For the crust, opt for 1 ½ cups crushed vegan cookies (about 150g).
Bake the vegan cheesecake at 350°F (175°C) for about 25-30 minutes. It should set around the edges while remaining slightly jiggly in the center.
Chef’s tip: Allow the cheesecake to chill in the refrigerator for at least 4 hours before serving for the best texture.
Serving and Pairing Suggestions
Serving cheesecake during pregnancy can be a delightful experience when paired with the right garnishes and beverages. These suggestions not only elevate the dish but also ensure that you enjoy a safe and delicious treat.
Garnishes
- Consider topping your cheesecake with fresh berries such as strawberries, blueberries, or raspberries. Aim for about 1 cup of mixed berries for a vibrant and flavorful contrast. The berries should be plump and bright, adding a refreshing tartness that balances the richness of the cheesecake.
- Drizzle with a homemade fruit compote. To make this, simmer 1 cup of your favorite fruit (like peaches or cherries) with 2 tablespoons of sugar and a splash of lemon juice for 5-10 minutes until thickened. This adds a luxurious sweetness and a glossy finish to your cheesecake.
- Whipped cream is a classic choice! Whip 1 cup of heavy cream with 2 tablespoons of powdered sugar until soft peaks form. Spoon it over each slice just before serving for a light and airy touch that complements the dense cheesecake.
Beverage Pairings
- A cup of herbal tea, such as chamomile or peppermint, can be a soothing accompaniment. Brew the tea according to package instructions and serve warm to create a comforting experience.
- If you prefer something sparkling, opt for sparkling water with a squeeze of fresh lemon or lime juice. This refreshing drink cleanses the palate between bites, making each taste of cheesecake enjoyable.
- For a non-alcoholic twist on a classic pairing, consider serving a milkshake made with vanilla ice cream and milk. Blend 2 cups of vanilla ice cream with 1 cup of milk for a creamy, nostalgic drink that enhances the cheesecake experience.
Quick Summary
| Prep Time | Cook Time | Total Time | Servings |
|---|---|---|---|
| 15 minutes | 60 minutes | 1 hour 15 minutes | 8 servings |
- Use Pasteurized Ingredients: Ensure cream cheese and eggs are pasteurized to reduce health risks.
- Chill Properly: Let the cheesecake cool for at least 4 hours in the fridge before serving.
- Preheat Oven: Always preheat your oven to 325°F (160°C) for even baking.
- Water Bath Method: Use a water bath to prevent cracking and ensure even cooking.
- Check Doneness: The center should slightly jiggle when done; it will firm up as it cools.
- Ingredient Quality Matters: Use high-quality cream cheese for the best flavor and texture.
- Don’t Overmix: Mix just until combined to avoid a dense cheesecake.
Frequently Asked Questions
Can I make cheesecake ahead of time? How do I store it?
You can absolutely make cheesecake ahead of time; it actually tastes better after chilling! Store it in an airtight container in the fridge for up to 5 days.
What can I substitute for cream cheese?
If you need a substitute for cream cheese, you can use Mascarpone cheese or a dairy-free cream cheese alternative, though the texture may vary slightly.
How do I know when the cheesecake is done?
Your cheesecake is done when the edges are set, but the center still slightly jiggles when shaken, which usually takes about 50-60 minutes at 325°F (163°C).
Can I freeze cheesecake? How long does it last?
You can freeze cheesecake for up to 3 months; just wrap it tightly in plastic wrap and then in aluminum foil to prevent freezer burn.
What if I don’t have a springform pan?
If you don’t have a springform pan, you can use a regular cake pan, but be sure to line it with parchment paper for easy removal after baking.

- Make Cheesecake Up to 3 Days Ahead: Tips for Best Flavor & Texture - March 4, 2026
- Easy No-Bake Cool Doen Cheesecake: Quick Recipe & Tips - March 4, 2026
- Decadent Dulce de Leche Cheesecake: Easy Step-by-Step Recipe - March 4, 2026