Make-Ahead Cheesecake: Tips for Perfect Preparation and Storage
Cheesecake is one of those desserts that can make any occasion feel special. Its creamy, rich texture and sweet, luscious flavor create a heavenly experience that’s hard to resist. Whether it’s for a birthday, a gathering, or a cozy night in, cheesecake is always a crowd-pleaser that leaves everyone wanting more.
If you’re wondering can you make cheesecake in advance, the answer is yes! You can prep it ahead of time, and with the right techniques, it’ll taste just as fresh as the day you made it. Expect a total time of 6 hours, with easy difficulty, serving 8 people.
| Prep Time | Cook Time | Total Time | Servings | Difficulty |
|---|---|---|---|---|
| 30 minutes | 1 hour | 6 hours | 8 | Easy |
Cheesecake Origins and Appeal
Understanding the origins and appeal of cheesecake not only enhances our appreciation for this beloved dessert but also guides us in preparing it for special occasions. Cheesecake has a rich history that dates back to ancient Greece, evolving through various cultures and becoming a staple in celebrations worldwide.
- Ancient Roots: The first recorded cheesecake was made in ancient Greece around 2000 B.C. and was served to athletes during the first Olympic Games.
- Roman Influence: The Romans adapted the Greek recipe, adding more flavors and ingredients, which paved the way for modern variations.
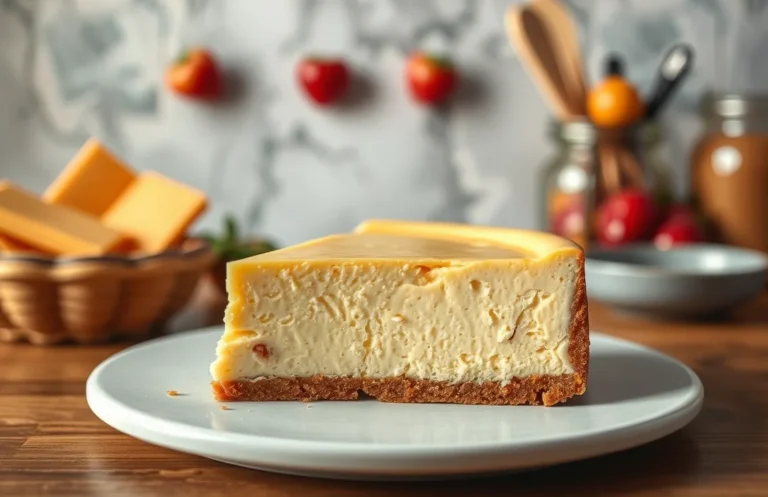
- New York Style: The iconic New York-style cheesecake emerged in the 19th century, characterized by its rich, creamy texture thanks to the use of cream cheese.
Cheesecake’s creamy, indulgent nature makes it a perfect choice for various occasions, including:
- Birthdays
- Weddings
- Holidays
- Family gatherings
Chef’s tip: Cheesecake is best when made in advance, allowing the flavors to meld and giving it time to set for the perfect texture.
When planning to serve cheesecake, making it ahead of time can be a game-changer. Proper storage is essential to maintain its freshness:
| Storage Method | Duration |
|---|---|
| Refrigerator (covered) | Up to 5 days |
| Freezer (wrapped tightly) | Up to 3 months |
For best results, allow cheesecake to cool completely before refrigerating. If you notice any cracks forming on the surface, don’t worry! Topping it with fresh fruit or whipped cream can elegantly hide imperfections while adding flavor.
Ingredients for Make-Ahead Cheesecake
When planning to make a cheesecake in advance, having the right ingredients is crucial. This list includes everything you’ll need to create a delicious cheesecake that can be prepared ahead of time, ensuring it maintains its creamy texture and rich flavor. Here’s what to gather for a classic cheesecake recipe.
| Item | Amount/Specification | Notes |
|---|---|---|
| Graham cracker crumbs | 1 ½ cups (150g) | Finely crushed for the crust |
| Granulated sugar | ½ cup (100g) | For the crust and filling |
| Unsalted butter | ⅓ cup (75g), melted | To bind the crust |
| Cream cheese | 24 ounces (680g), softened | Ensure it’s at room temperature |
| Sour cream | 1 cup (240g) | For creaminess |
| Vanilla extract | 1 teaspoon | For flavor |
| Large eggs | 3 | Room temperature for better mixing |
| All-purpose flour | 2 tablespoons (15g) | Helps with structure |
- Tip: For a gluten-free option, use gluten-free graham cracker crumbs or almond flour for the crust.
- Make sure all ingredients are at room temperature to avoid lumps in the filling.
- Pre-measure ingredients to streamline the process and avoid last-minute scrambles.
- Check that your cream cheese is fully softened; it should feel soft and spreadable, not cold or hard.
Essential Kitchen Equipment
Having the right kitchen equipment can significantly streamline your cheesecake-making process, especially when preparing in advance. Below is a list of essential items that will help you create a flawless cheesecake while ensuring it can be stored properly for later enjoyment.
- Springform Pan: A 9-inch (23cm) springform pan is ideal for cheesecakes. The removable sides allow for easy release without damaging the cake. Make sure it’s tightly sealed to prevent leaks when adding the crust and filling.
- Mixing Bowls: Use a large mixing bowl (at least 4 quarts) for combining the cream cheese and other ingredients. A medium bowl is also helpful for mixing your crust ingredients. Choose glass or stainless steel for easy cleaning and durability.
- Hand Mixer or Stand Mixer: A hand mixer can simplify the cream cheese mixing process, but a stand mixer will provide a more thorough blend. Whip until smooth without lumps, which usually takes about 3-5 minutes on medium speed.
- Rubber Spatula: A flexible rubber spatula is essential for folding in ingredients and scraping the sides of your bowl. This ensures everything is evenly mixed and helps achieve a creamy texture.
- Food Processor: If you’re making a graham cracker crust, a food processor can quickly crush the crackers to a fine crumb. Pulse until you achieve a sand-like consistency, usually about 15-20 seconds.
- Plastic Wrap or Airtight Container: For storing your cheesecake, use plastic wrap to tightly cover the top, or place it in an airtight container. This prevents the cheesecake from absorbing any odors from your fridge, preserving its flavor.
Step-by-Step Cheesecake Preparation
Making cheesecake in advance can save you time and stress, especially for special occasions. Proper preparation and storage ensure that your cheesecake retains its creamy texture and delicious flavor. Here’s how to make, store, and serve your cheesecake for the best results.
- 8 ounces (225g) cream cheese, softened
- ½ cup (100g) granulated sugar
- 2 large eggs
- 1 teaspoon vanilla extract
- 1 cup (240ml) sour cream
- 1 pre-made graham cracker crust (9-inch)
- Prepare the Cheesecake Mixture: In a large mixing bowl, beat 8 ounces of softened cream cheese with an electric mixer on medium speed until smooth, about 2-3 minutes. Gradually add ½ cup of granulated sugar and mix until fully combined and fluffy.
- Add Eggs and Flavorings: Reduce the mixer speed to low and add 2 large eggs one at a time, mixing just until blended. Scrape down the bowl and mix in 1 teaspoon of vanilla extract and 1 cup of sour cream until the mixture is smooth and creamy.
- Pour into the Crust: Preheat your oven to 325°F (160°C). Pour the cheesecake mixture into the pre-made graham cracker crust, smoothing the top with a spatula. Bake for 55-60 minutes, or until the edges are set but the center slightly jiggles when gently shaken.
- Cool and Chill: After baking, turn off the oven and let the cheesecake cool inside for 1 hour. Then, refrigerate for at least 4 hours, preferably overnight, to allow it to set properly.
- Store Properly: If making in advance, cover the cheesecake with plastic wrap or foil. It can be stored in the refrigerator for up to 5 days. For longer storage, freeze the cheesecake for up to 2 months. Thaw in the refrigerator overnight before serving.
Chef’s tip: To prevent cracks, avoid opening the oven door during baking and let the cheesecake cool gradually.
Expert Tips and Common Pitfalls
Making cheesecake in advance can save you time and stress, but there are specific tips to ensure your dessert shines. Proper storage and preparation techniques can enhance flavor and texture, while avoiding common mistakes will lead to a successful cheesecake every time.
- Cool Completely Before Storing: After baking, let your cheesecake cool in the pan on a wire rack for at least 1 hour. This helps it set properly and prevents condensation from forming when wrapped.
- Wrap It Right: Once cooled, wrap the cheesecake tightly in plastic wrap and then in aluminum foil. This protects it from freezer burn if you’re storing it for an extended period, ensuring it maintains its creamy texture.
- Refrigerate or Freeze: For short-term storage (up to 5 days), keep your cheesecake in the refrigerator. For longer storage, freeze it for up to 3 months. To thaw, place it in the refrigerator for 24 hours before serving.
- Serve Chilled: Cheesecake tastes best when served chilled. Allow it to sit at room temperature for about 30 minutes before slicing to enhance flavor and make cutting easier.
- Check for Cracks: If you notice cracks on the surface, don’t worry! A layer of sour cream or fruit topping can cover imperfections beautifully. You can mix 1 cup of sour cream with 2 tablespoons of sugar and a splash of vanilla for a quick topping.
- Don’t Overmix the Batter: When combining your filling ingredients, mix just until smooth. Overmixing introduces air, which can cause cracks during baking.
Cheesecake Variations and Substitutions
If you’re planning to make cheesecake in advance, there are several delicious variations and substitutions you can consider to accommodate different tastes and dietary needs. These options not only ensure your cheesecake is prepped ahead of time but also allow you to customize the flavors and textures, making your dessert even more enjoyable.
Common Substitutions
- Gluten-Free: Replace the traditional graham cracker crust with a mixture of 1½ cups almond flour and ¼ cup melted butter.
- Dairy-Free: Use 16 ounces of soaked cashews blended with ½ cup coconut milk instead of cream cheese.
- Lower Sugar: Substitute ½ cup of granulated sugar with ½ cup of stevia or erythritol to reduce calories.
Make-Ahead Flavor Variations
Creating variations of your cheesecake can be a fun way to change things up while still making it in advance. Here are a few flavor ideas:
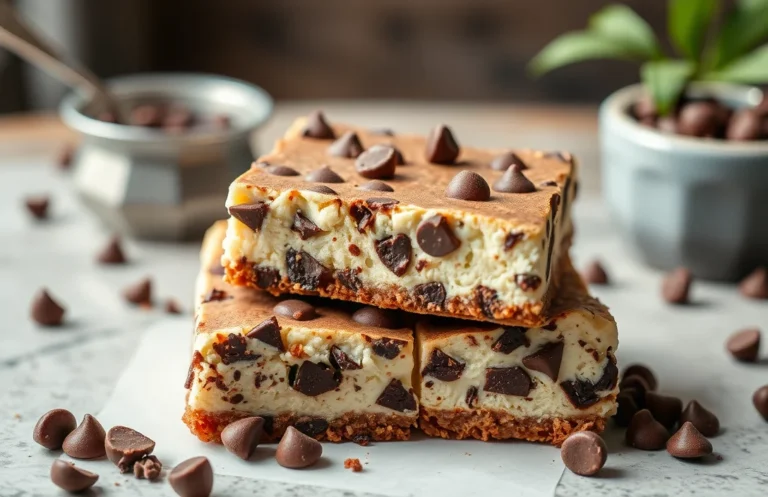
- Chocolate Cheesecake: Add ½ cup of unsweetened cocoa powder to the filling for a rich chocolate flavor.
- Fruit Swirl: Gently fold in 1 cup of fruit puree such as raspberry or strawberry before pouring the filling into the crust.
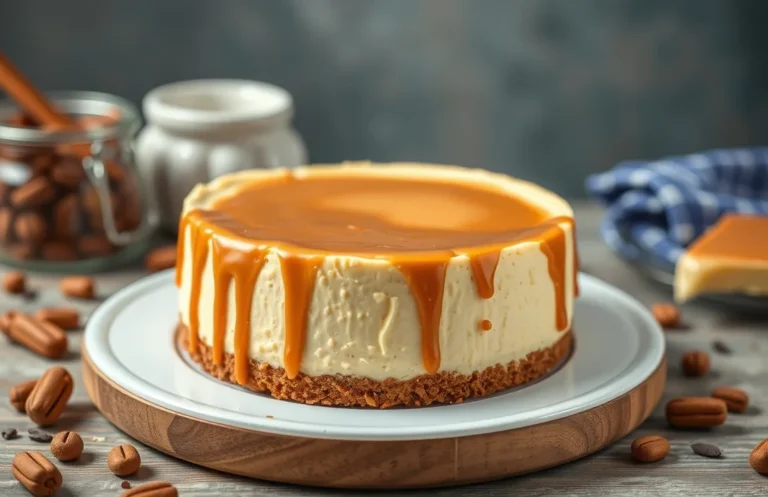
- Nutty Delight: Incorporate ½ cup of chopped nuts like pecans or walnuts into the crust for added texture.
Pro Tip: For best results, refrigerate your cheesecake for at least 6 hours, or overnight, to allow the flavors to meld beautifully.
| Ingredient | Substitution |
|---|---|
| Graham Crackers | Almond Flour |
| Cream Cheese | Soaked Cashews |
| Sugar | Stevia/Erythritol |
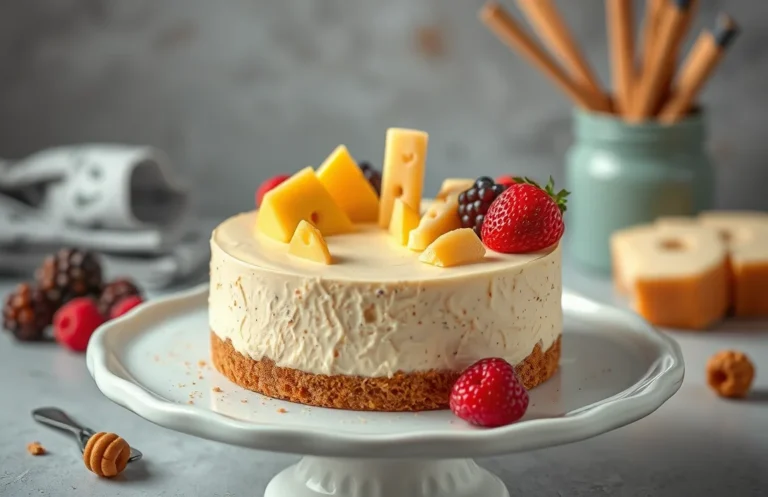
Serving and Plating Ideas
Serving and plating your cheesecake thoughtfully can elevate the dessert experience, especially when you’ve made it in advance. With the right accompaniments and presentation techniques, you can impress your guests and make the most of your make-ahead cheesecake.
Presentation Techniques
- Use a cake stand to elevate your cheesecake, creating a beautiful centerpiece for your table.
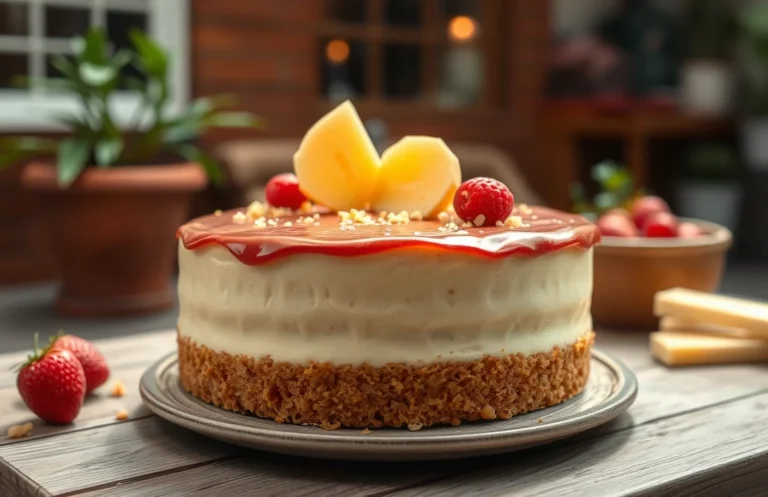
- Drizzle a sauce, like raspberry coulis or chocolate ganache, over the top just before serving for added flavor and visual appeal.
- Garnish with fresh fruits, such as berries or citrus slices, to provide a pop of color and freshness.
Flavor Pairings
Enhance the flavor of your cheesecake with these delicious pairings:
- Fruit Compote: A warm or cold fruit compote (like blueberry or strawberry) adds a sweet and tangy layer.
- Coffee: Serve with a fresh espresso or a cappuccino to balance the richness of the cheesecake.
- Whipped Cream: A dollop of lightly sweetened whipped cream can add a light texture contrast.
Chef’s tip: If you’re serving a flavored cheesecake, match the toppings to the main flavor for a cohesive dessert experience!
Storage Tips
To maintain freshness when making cheesecake in advance, follow these storage tips:
- Wrap your cheesecake tightly in plastic wrap or aluminum foil before refrigerating to prevent drying out.
- For longer storage, freeze your cheesecake (well-wrapped) for up to 3 months. Thaw it in the refrigerator overnight before serving.
With these serving and plating ideas, your make-ahead cheesecake will shine at any gathering!
Quick Summary
| Prep Time | 20 minutes |
|---|---|
| Cook Time | 55 minutes |
| Total Time | 5 hours (including cooling) |
| Servings | 8 |
- Prepare the crust: Blend 1 ½ cups of graham cracker crumbs with ½ cup melted butter.
- Mix the filling: Blend 24 oz cream cheese, 1 cup sugar, and 3 large eggs until smooth.
- Bake at 325°F: Pour filling into the crust and bake for 55 minutes.
- Cool completely: Let cheesecake cool at room temperature for 1 hour before refrigerating.
- Chill overnight: For best texture, refrigerate for at least 4 hours before serving.
- Key Tip: Use room temperature ingredients for a smoother filling.
- Key Tip: Wrap the cooled cheesecake tightly to prevent cracks and odor absorption.
Frequently Asked Questions
Can I make this ahead of time? How to store and reheat?
You can absolutely make cheesecake ahead of time! Store it in the refrigerator, wrapped tightly in plastic wrap, for up to 5 days; it’s best served chilled, so no need to reheat.
What can I substitute for cream cheese?
If you’re out of cream cheese, you can use ricotta cheese or mascarpone as a substitute, but the texture and flavor will be slightly different. Blend them well to achieve a smooth consistency.
How do I know when it’s done?
Your cheesecake is done when the edges are set but the center has a slight jiggle; it will continue to firm up as it cools. A gentle shake of the pan will help you assess the doneness.
Can I freeze this? How long does it last?
You can freeze cheesecake for up to 3 months if wrapped tightly in plastic wrap and aluminum foil. Thaw it in the refrigerator overnight before serving for the best texture.
Why did my cheesecake turn out cracked?
Cracks often form due to rapid temperature changes or overmixing the batter, which incorporates too much air. To prevent this, bake in a water bath and avoid overmixing after adding the eggs.

- Decadent Peanut Butter No-Bake Cheesecake: Easy Recipe to Indulge - April 3, 2026
- Delicious Mango No-Bake Cheesecake: Step-by-Step Recipe - April 3, 2026
- Decadent Raspberry No-Bake Cheesecake: Easy Step-by-Step Recipe - April 3, 2026