Decadent Cannoli Cheesecake: Step-by-Step Recipe with Tips
If you’re looking for a dessert that hits all the right notes of creamy, sweet, and crunchy, this cannoli cheesecake is the answer. It perfectly combines the rich, velvety texture of cheesecake with the delightful flavors of traditional cannoli, making it a show-stopping treat for any occasion. Your family and friends will be begging for seconds!
Key details: Total time: 1 hour 30 minutes, Difficulty: Medium, Servings: 10.
| Prep Time | Cook Time | Total Time | Servings | Difficulty |
|---|---|---|---|---|
| 30 minutes | 60 minutes | 1 hour 30 minutes | 10 | Medium |
Cannoli Cheesecake History
Cannoli cheesecake combines two beloved desserts, each with rich histories and cultural significance. Understanding their origins gives depth to this delightful fusion, making it even more special for your celebrations.
- Origin of Cannoli: Cannoli originated in Sicily, Italy, traditionally filled with sweetened ricotta cheese. This iconic pastry dates back to the Arab rule in Sicily during the 9th century, where it was created as a festive treat for Carnevale. Its crispy shell and creamy filling symbolize indulgence and celebration.
- Cheesecake Evolution: Cheesecake has roots in ancient Greece, where it was served to athletes at the first Olympic Games. The recipe evolved over centuries, with variations emerging across Europe, particularly in Italy, where ricotta became a popular ingredient. The American cheesecake, often made with cream cheese, gained popularity in the 19th century and has since become a staple dessert.
- Perfect for Special Occasions: The combination of cannoli and cheesecake creates a unique dessert that is perfect for celebrations like birthdays, holidays, and weddings. Its rich flavors and creamy texture make it a crowd-pleaser, bringing a touch of Italian heritage to any gathering.
Ingredients for Cannoli Cheesecake
This section provides a comprehensive list of ingredients you’ll need to create a delightful Cannoli Cheesecake. Each ingredient is essential for achieving the perfect balance of flavors and textures in this dessert, ensuring your cheesecake is creamy, rich, and reminiscent of traditional cannoli.
| Item | Amount/Specification | Notes |
|---|---|---|
| Graham cracker crumbs | 1½ cups (150g) | For the crust |
| Granulated sugar | ½ cup (100g) | For crust and filling |
| Unsalted butter | ½ cup (113g), melted | Helps bind the crust |
| Cream cheese | 16 oz (450g), softened | Ensure it’s at room temperature |
| Sour cream | 1 cup (240g) | Adds creaminess and tang |
| Granulated sugar | ¾ cup (150g) | For filling |
| Vanilla extract | 1 teaspoon | Enhances flavor |
| Eggs | 3 large | Room temperature for better blending |
| Ricotta cheese | 1 cup (240g) | Must be well-drained |
| Mini chocolate chips | ½ cup (90g) | Optional, for mixing in |
| Pistachios or chopped almonds | ¼ cup (30g) | Optional, for topping |
- For a gluten-free crust, substitute graham cracker crumbs with gluten-free cookie crumbs.
- If you’re lactose intolerant, consider using lactose-free cream cheese and sour cream.
- Ensure all dairy ingredients are at room temperature for a smoother filling.
- Don’t skip the chilling time; it’s vital for the cheesecake to set properly.
Essential Kitchen Tools
Gathering the right kitchen tools is crucial for making a delicious cannoli cheesecake. Having the proper equipment not only streamlines the process but also ensures consistent results. Below is a list of essential tools and equipment you’ll need to prepare this delightful dessert.
- Springform Pan (9-inch) – This is essential for baking the cheesecake. The removable sides allow for easy release, giving you a beautiful presentation. Make sure to line the bottom with parchment paper to prevent sticking.
- Mixing Bowls – Use at least two medium-sized mixing bowls for combining ingredients. Glass or stainless steel bowls are preferred, as they help retain temperature and are easy to clean.
- Electric Mixer – A stand mixer or hand mixer is highly recommended for beating the cream cheese and sugar until smooth. This will help achieve that creamy texture you want in your cheesecake.
- Rubber Spatula – Perfect for folding in ingredients gently without deflating the mixture. It’s also great for scraping down the sides of the mixing bowl to ensure everything is well combined.
- Measuring Cups and Spoons – Accurate measurements are key to baking success. Have both dry and liquid measuring tools handy for precise ingredient amounts.
- Whisk – Use a whisk for beating eggs and combining dry ingredients. A balloon whisk is best for incorporating air, which helps with the cheesecake’s texture.
- Cooling Rack – After baking, the cheesecake needs to cool gradually. A cooling rack ensures air circulation around the cheesecake, preventing soggy bottoms.
- Food Processor – Optional, but helpful for crushing the cannoli shells into fine crumbs for the crust. This will give you a nice, uniform texture.
Step-by-Step Recipe
This section provides detailed instructions for preparing the crust and filling of your cannoli cheesecake, along with the baking process. Following these steps will ensure a delicious dessert with the perfect texture and flavor.
Preparing the Crust
- Preheat your oven to 350°F (175°C). This is crucial for achieving a golden-brown crust.
- In a medium bowl, combine 1 ½ cups (150g) of graham cracker crumbs, ½ cup (100g) of granulated sugar, and ½ teaspoon of ground cinnamon. Mix well until all ingredients are evenly distributed.
- Pour in ½ cup (115g) of melted unsalted butter and stir until the mixture resembles wet sand. You want it to hold together when pressed.
- Press the crumb mixture firmly into the bottom and slightly up the sides of a 9-inch (23cm) springform pan. Use the bottom of a measuring cup for an even layer.
- Bake the crust in the preheated oven for 10 minutes or until it is set and slightly golden. Remove from the oven and let it cool while you prepare the filling.
Making the Filling
- In a large mixing bowl, beat 16 ounces (450g) of cream cheese at room temperature with an electric mixer until smooth and creamy, about 2 minutes.
- Add ½ cup (100g) of granulated sugar, ¼ cup (50g) of packed brown sugar, and 1 teaspoon of vanilla extract to the cream cheese. Continue mixing until well combined and fluffy.
- In a separate bowl, whisk together 2 large eggs until frothy. Gradually add the eggs to the cream cheese mixture while mixing on low speed until just combined. Avoid overmixing to prevent a dense cheesecake.
- Fold in 1 cup (240g) of ricotta cheese and ½ cup (90g) of mini chocolate chips using a spatula, ensuring even distribution without deflating the batter.
Baking Instructions
- Pour the filling over the cooled crust, spreading it evenly with a spatula. Tap the pan gently on the counter to release any air bubbles.
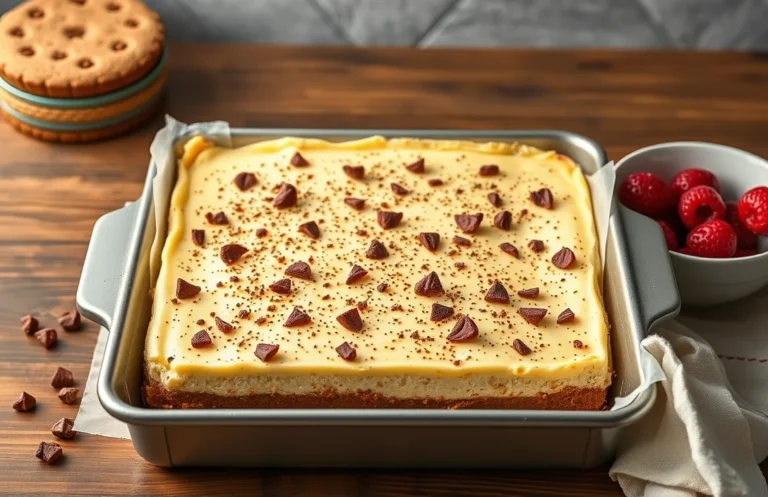
- Bake in the preheated oven for 50-60 minutes until the edges are set and the center still has a slight jiggle. The cheesecake will firm up as it cools.
- Once done, turn off the oven and crack the door open, allowing the cheesecake to cool slowly for about 1 hour. This helps prevent cracking.
- After cooling, refrigerate the cheesecake for at least 4 hours or overnight before serving. This enhances the flavors and improves the texture.
Chef’s tip: For a creamier texture, make sure all your ingredients are at room temperature before mixing.
Pro Tips for Success
Getting the perfect cannoli cheesecake requires attention to detail, particularly when it comes to texture and flavor. Here are some expert tips to help you create a creamy, delicious cheesecake while avoiding common pitfalls.
Texture Tips
- Use Room Temperature Ingredients: Ensure your cream cheese and ricotta are at room temperature before mixing. This helps achieve a smooth, lump-free filling.
- Avoid Overmixing: When combining the cheese mixture, mix just until smooth. Overmixing can incorporate too much air, leading to cracks in the cheesecake.
- Cooling Gradually: After baking, turn off the oven and leave the cheesecake inside with the door ajar for an hour. This helps prevent sudden temperature changes that can cause cracks.
Flavor Enhancements
- Quality Ingredients: Use high-quality ricotta and vanilla extract for the best flavor. Look for whole milk ricotta for a creamier texture.
- Cannoli Flavor: Add ½ teaspoon of cinnamon and a pinch of nutmeg to the filling for that authentic cannoli flavor.
- Chocolate Chips: Stir in ½ cup of mini chocolate chips for added sweetness and texture.
Baking Mistakes
Chef’s tip: Always check for doneness by gently shaking the pan; the center should slightly jiggle but not be liquid.
- Don’t Rush Cooling: Allow the cheesecake to cool completely before refrigerating. If you rush this step, it may not set properly.
- Check Oven Temperature: Use an oven thermometer to ensure your oven is at the correct temperature (325°F/163°C) for even baking.
| Common Mistakes | Solution |
|---|---|
| Cracks on the surface | Mix ingredients gently and cool gradually in the oven. |
| Cheesecake sinking in the middle | Ensure it’s fully baked and cooled before refrigeration. |
Variations and Substitutions
This section offers creative alternatives and substitutions for the cannoli cheesecake recipe, ensuring that everyone can enjoy this delightful dessert, regardless of dietary restrictions or taste preferences. Whether you’re looking for gluten-free options, vegan alternatives, or unique flavor variations, I’ve got you covered!
Gluten-Free Options
| Item | Amount/Specification | Notes |
|---|---|---|
| Gluten-Free Crust | 1 ½ cups gluten-free graham cracker crumbs | Ensure the brand is certified gluten-free |
| All-Purpose Flour | 1 tablespoon cornstarch | To help with texture if needed |
Vegan Alternatives
| Item | Amount/Specification | Notes |
|---|---|---|
| Ricotta Cheese | 1 ½ cups silken tofu | Blend until smooth for a similar texture |
| Eggs | 1 tablespoon ground flaxseed + 2.5 tablespoons water | Let sit for 5 minutes to thicken |
Flavor Variations
- For a chocolate twist, add ¼ cup cocoa powder to the cheesecake mixture.
- For a citrus flavor, incorporate the zest of 1 lemon or 1 orange into the filling.
- Swap out traditional cannoli filling by folding in ½ cup mini chocolate chips or chopped pistachios.
Chef’s tip: Experiment with flavored extracts like almond or hazelnut to elevate your cheesecake!
Serving and Plating Ideas
Presenting your cannoli cheesecake beautifully can elevate the dining experience and impress your guests. Here are some effective plating techniques, pairing suggestions, and garnishing tips to make your dessert truly shine.
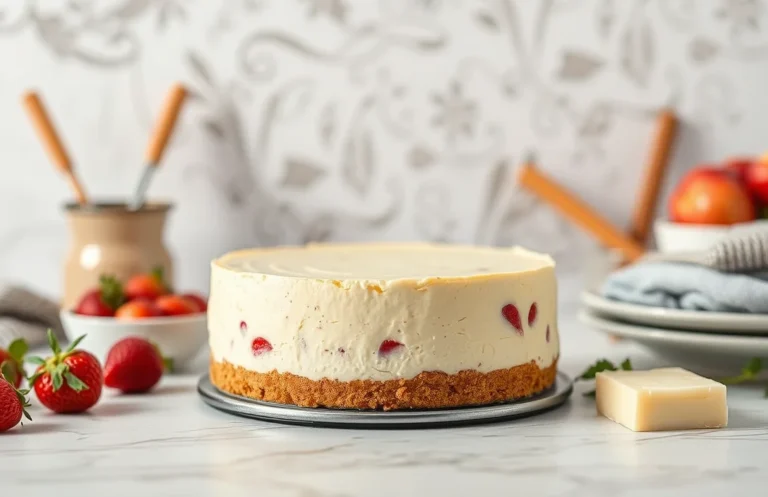
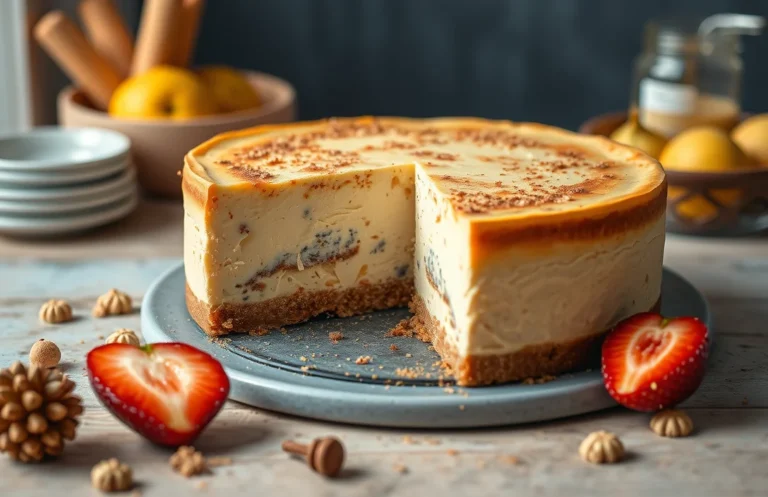
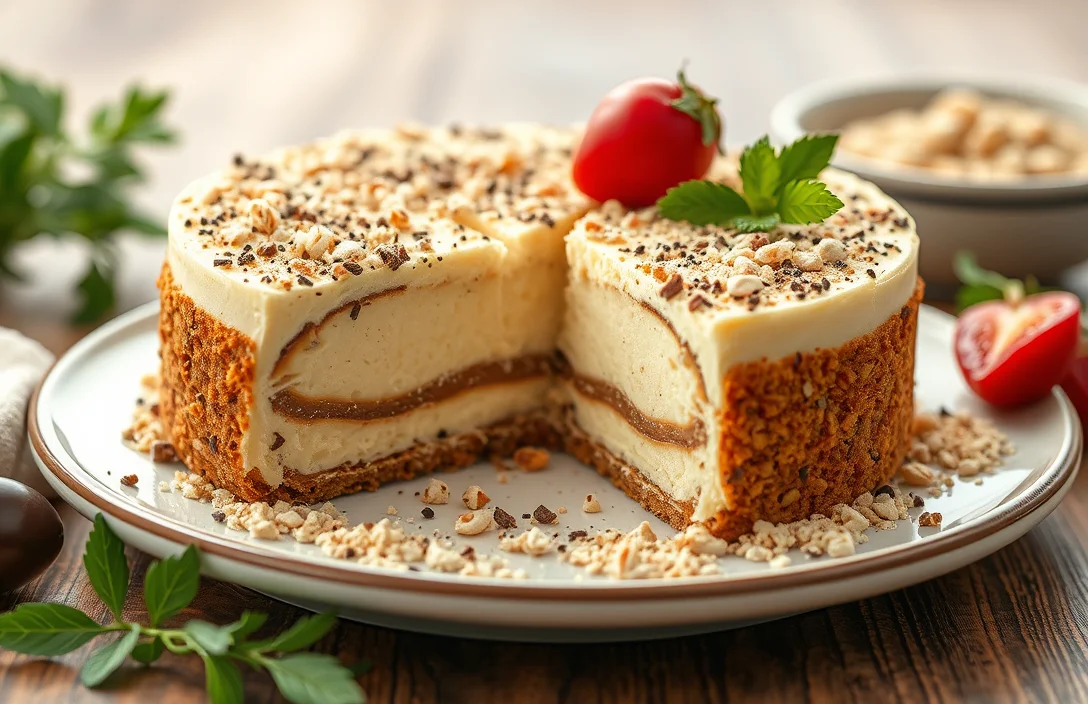
- Plating Techniques: Start by slicing the cheesecake into even pieces, about 1.5 inches wide for a generous serving. Use a hot knife (run it under hot water and dry it) to ensure clean cuts. Place each slice on a chilled dessert plate for a professional look.
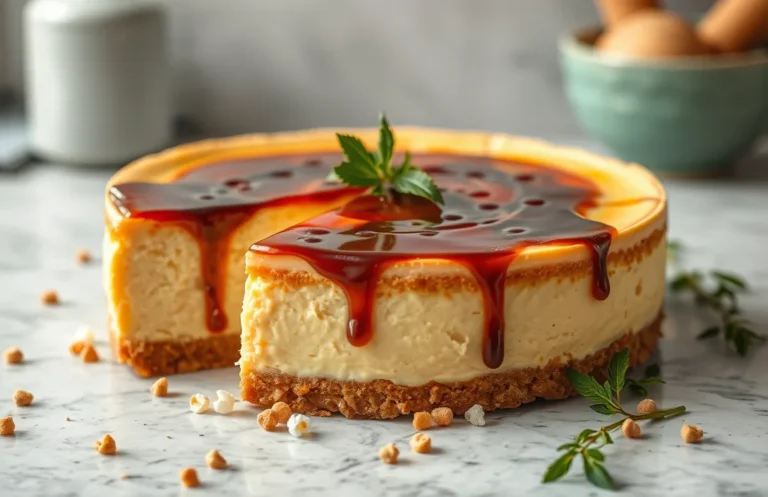
- Pairing Suggestions: Cannoli cheesecake pairs wonderfully with fresh berries. Consider serving it alongside a handful of raspberries or strawberries for a pop of color and tartness. A drizzle of chocolate or caramel sauce can also enhance the flavor profile without overpowering the cheesecake.
- Garnishing Tips: Finish your cheesecake with a sprinkle of powdered sugar for an elegant touch. For added texture, top with mini chocolate chips or crushed pistachios to mimic traditional cannoli filling. Add a dollop of whipped cream on the side and a mint leaf for a refreshing touch.
- Serving Temperature: Serve the cheesecake chilled, ideally after being in the refrigerator for at least 4 hours. This allows the flavors to meld beautifully and ensures a creamy texture that holds its shape when sliced.
Chef’s tip: For an extra special touch, consider making a homemade cannoli cream to pipe on top of each slice for an authentic finish.
Quick Recipe Summary
This section provides a quick reference to the essential components of the Cannoli Cheesecake recipe, ensuring you have everything you need at a glance. It’s designed for efficiency, highlighting the key ingredients, cooking time, and serving size to help streamline your baking experience.
Ingredients Recap
- For the Crust:
- 1 ½ cups graham cracker crumbs (150g)
- ½ cup unsalted butter, melted (113g)
- ¼ cup granulated sugar (50g)
- For the Filling:
- 16 oz cream cheese, softened (450g)
- 1 cup ricotta cheese (240g)
- ¾ cup powdered sugar (90g)
- 3 large eggs
- 1 teaspoon vanilla extract
- ¾ cup mini chocolate chips (135g)
- For the Topping:
- ½ cup whipped cream (120ml)
- 2 tablespoons chocolate chips (30g)
- Chopped pistachios for garnish (optional)
Cooking Time and Serving Size
Total Time: Approximately 1 hour 30 minutes (includes cooling time)
Prep Time: 30 minutes
Bake Time: 50 minutes at 325°F (163°C)
Chill Time: 4 hours or overnight for best texture.
Serving Size: 12 slices
Pro Tip: Always let the cheesecake cool completely before refrigerating to prevent cracks.
| Nutritional Information (per slice) | Calories | Fat | Sugar |
|---|---|---|---|
| Cannoli Cheesecake | 350 | 22g | 15g |
Common Mistake: Avoid overmixing the filling, as this can lead to cracks in your cheesecake.
Quick Summary
| Prep Time | 30 minutes |
|---|---|
| Cook Time | 60 minutes |
| Total Time | 90 minutes |
| Servings | 12 |
- Prepare the crust: Mix 1 ½ cups of crushed cannoli shells with ½ cup of melted butter.
- Make the filling: Beat 16 oz of cream cheese with 1 cup of sugar and 1 tsp of vanilla until smooth.
- Add ricotta: Fold in 1 cup of ricotta cheese and ½ cup of mini chocolate chips.
- Bake the cheesecake: Pour filling into crust and bake at 325°F for 60 minutes.
- Cool completely: Let the cheesecake cool in the fridge for at least 4 hours before serving.
- Tip: Use room temperature cream cheese for a smoother texture.
- Tip: Refrigerate leftovers in an airtight container for up to 5 days.
Frequently Asked Questions
Can I make this ahead of time? How to store and reheat?
You can absolutely make cannoli cheesecake ahead of time; it keeps well in the fridge for up to 3 days. Store it covered in plastic wrap or in an airtight container, and serve it chilled — no need to reheat!
What can I substitute for ricotta cheese?
If you can’t find ricotta, you can substitute with mascarpone cheese for a creamier texture or use a mixture of cream cheese and sour cream for a similar flavor profile. Just keep the total amount the same at 15 ounces.
How do I know when it’s done?
Your cannoli cheesecake is done when the center is set but still slightly jiggly, which usually takes about 60 to 65 minutes at 325°F. It will firm up as it cools, so don’t worry if it seems a bit soft in the oven!
Can I freeze this? How long does it last?
You can freeze cannoli cheesecake for up to 2 months if wrapped tightly in plastic wrap and aluminum foil. Thaw it in the refrigerator overnight before serving for the best texture.
What if I don’t have a springform pan?
If you don’t have a springform pan, you can use a regular 9-inch round cake pan, but be sure to line the bottom and sides with parchment paper for easy removal. Just let it cool completely before attempting to take it out of the pan!

- Decadent Peanut Butter No-Bake Cheesecake: Easy Recipe to Indulge - April 3, 2026
- Delicious Mango No-Bake Cheesecake: Step-by-Step Recipe - April 3, 2026
- Decadent Raspberry No-Bake Cheesecake: Easy Step-by-Step Recipe - April 3, 2026