Delicious Cheesecake Emulsion Filling: Tips & Flavor Variations
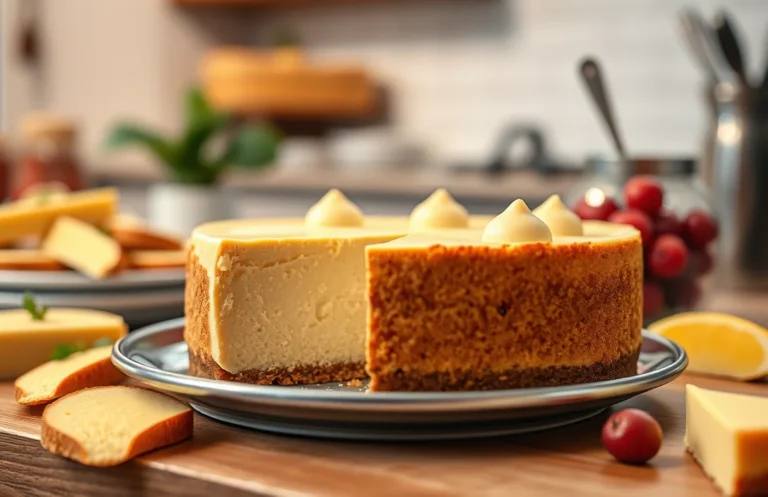
Cheesecake emulsion filling is that creamy, dreamy layer that takes your desserts from good to absolutely irresistible. With its velvety texture and rich flavor, it’s perfect for special occasions or a cozy family dinner. Once you try this filling, you’ll find yourself craving it on everything from classic cheesecakes to cupcakes and beyond.
Get ready for a delightful experience with this cheesecake emulsion filling that takes just 20 minutes to prepare, has a moderate difficulty, and serves 8 people.
| Prep Time | Cook Time | Total Time | Servings | Difficulty |
|---|---|---|---|---|
| 15 minutes | 5 minutes | 20 minutes | 8 | Moderate |
Origin of Cheesecake Filling
The cheesecake filling has a rich history that intertwines with various cultures and culinary traditions. Understanding its origins can deepen your appreciation for this beloved dessert and inspire your own baking adventures.
- Ancient Roots: The earliest known cheesecake dates back to ancient Greece, where it was served to athletes during the first Olympic Games around 776 B.C. Made with simple ingredients like cheese, honey, and flour, this early version laid the groundwork for what we now know as cheesecake.
- Roman Influence: The Romans adopted and adapted the Greek cheesecake. They added more ingredients, such as eggs, which transformed the texture and flavor, making it creamier and richer. It was during this time that cheesecake began to spread across Europe.
- European Variations: In the 18th century, different regions began creating their own variations. The English introduced the idea of a crust made from biscuit or pastry, while the Italians developed the famous ricotta cheesecake. Each culture contributed unique flavors and techniques, leading to diverse cheesecake styles.
- American Innovation: The modern cheesecake we know today largely originated in the United States, particularly in New York. In the late 19th century, cream cheese was introduced, creating an incredibly smooth and rich filling. This version became a staple in American baking, especially as it gained popularity in diners and restaurants.
Ingredients for Emulsion Filling
This section provides a comprehensive list of ingredients necessary for creating a rich and creamy cheesecake emulsion filling. Each ingredient plays a crucial role in achieving the perfect texture and flavor, so precise measurements are key to your success in the kitchen.
| Item | Amount/Specification | Notes |
|---|---|---|
| Cream cheese | 16 ounces (450g) | Softened to room temperature for easier mixing |
| Sour cream | ½ cup (120g) | Adds creaminess and tanginess |
| Granulated sugar | ¾ cup (150g) | Adjust to taste, can substitute with a sweetener if desired |
| Vanilla extract | 1 teaspoon (5ml) | Use pure vanilla extract for best flavor |
| Eggs | 2 large | At room temperature for better emulsification |
| Heavy cream | ½ cup (120ml) | Whipped to soft peaks for a light texture |
| All-purpose flour | 2 tablespoons (15g) | Helps provide structure to the filling |
- Make sure all refrigerated items are at room temperature for smooth blending.
- For a gluten-free option, substitute all-purpose flour with cornstarch.
- If you prefer a citrus flavor, consider adding 1 tablespoon of lemon juice or zest.
- Ensure the cream cheese is fully softened to avoid lumps in your filling.
Essential Kitchen Equipment
Creating a smooth and flavorful cheesecake emulsion filling requires the right tools to ensure everything blends perfectly. Here’s a list of essential kitchen equipment you’ll need, along with some tips to make your preparation seamless and enjoyable.
- Measuring Cups and Spoons: Accurate measurements are crucial for the success of your emulsion filling. Use dry measuring cups for ingredients like cream cheese and flour, and liquid measuring cups for items like vanilla extract and heavy cream.
- Mixing Bowls: Have at least two medium-sized mixing bowls ready—one for the cream cheese and one for combining liquid ingredients. Glass or stainless steel bowls are preferred as they help maintain temperature and won’t absorb odors.
- Electric Mixer: A stand mixer or handheld electric mixer works best for achieving a creamy, lump-free consistency. Start on low speed to combine ingredients, then increase to medium for thorough mixing.
- Spatula: A silicone spatula is essential for scraping down the sides of your mixing bowl to incorporate all ingredients evenly. This ensures every bite of your filling is rich and creamy.
- Rubber Gloves (Optional): If you’re sensitive to the texture of the filling while mixing by hand, wearing rubber gloves can help you maintain control without feeling squeamish.
- Food Processor (Optional): If you prefer a super-smooth filling, a food processor can be used instead of an electric mixer. Just be careful not to over-process, as this can incorporate too much air into the filling.
Chef’s tip: Make sure all your dairy ingredients are at room temperature before mixing. This helps achieve a smoother texture without lumps.
Step-by-Step Instructions
Creating a cheesecake emulsion filling requires careful attention to detail to ensure a smooth and creamy texture. Follow these steps closely for a filling that is rich in flavor and perfectly set.
- Prep the Ingredients: Gather all your ingredients: 16 ounces (450g) cream cheese, softened; ½ cup (100g) granulated sugar; ½ cup (120ml) heavy cream; 2 large eggs; 1 teaspoon vanilla extract; and a pinch of salt. Make sure the cream cheese is softened to room temperature for easy mixing.
- Blend the Cream Cheese: In a large mixing bowl, use an electric mixer on medium speed to beat the cream cheese until smooth and creamy, about 2-3 minutes. Scrape down the sides of the bowl with a spatula to ensure even mixing. The mixture should be free of lumps and have a velvety consistency.
- Add Sugar and Mix: Gradually add the granulated sugar while continuing to beat the mixture. This should take about 1-2 minutes. The filling will become glossy and slightly aerated, which is essential for a light texture.
- Incorporate Eggs: Add one egg at a time, mixing well after each addition. This should take about 30 seconds per egg. The filling should look smooth and well combined; if it appears curdled, continue mixing until smooth.
- Mix in Heavy Cream and Flavorings: Pour in the heavy cream, vanilla extract, and a pinch of salt. Mix on low speed until fully incorporated, about 1 minute. The filling should be thick but pourable, and smell delightful from the vanilla.
- Check for Consistency: Use a spatula to scrape the bottom of the bowl and ensure everything is combined. The mixture should be thick but not stiff, resembling a creamy custard. If it’s too thick, you can add a tablespoon of milk to lighten it.
- Prepare for Baking: Preheat your oven to 325°F (160°C). Pour the emulsion filling into a prepared graham cracker crust (store-bought or homemade). Smooth the top with a spatula for an even bake.
Chef’s tip: Baking your cheesecake in a water bath helps to prevent cracking and ensures even cooking.
Pro Tips and Common Mistakes
Creating a perfect cheesecake emulsion filling requires attention to detail and a few expert techniques. This section will guide you through essential tips and common pitfalls to ensure your filling is smooth, creamy, and bursting with flavor.
- Use room temperature ingredients: Ensure your cream cheese, eggs, and sour cream are at room temperature (about 70°F/21°C) before mixing. This helps achieve a silky texture and prevents lumps in your filling.
- Whisk thoroughly: Use a hand mixer or stand mixer to whisk the filling for 2-3 minutes until it’s light and fluffy. This incorporates air and creates a lighter filling, enhancing the overall texture.
- Don’t overmix: While it’s important to blend well, overmixing can incorporate too much air, leading to cracks in the cheesecake during baking. Mix until just combined and smooth.
- Check for lumps: If you notice lumps in your cream cheese while mixing, consider sifting it before adding to the bowl or blending it in a food processor for a smoother consistency.
- Use a water bath: Baking your cheesecake in a water bath (bain-marie) at 325°F (160°C) ensures even cooking and helps prevent cracks. Place your cheesecake pan in a larger pan filled with hot water, covering about halfway up the sides.
- Cool gradually: After baking, let the cheesecake cool in the oven with the door ajar for 1 hour. This gradual cooling helps prevent sudden temperature changes that can cause cracks.
- Chill before serving: For the best texture and flavor, refrigerate your cheesecake for at least 4 hours or overnight before slicing. This allows the filling to set properly and enhances the flavors.
Flavor Variations and Modifications
When it comes to cheesecake emulsion filling, the possibilities for flavor variations are endless! Whether you’re looking to cater to dietary restrictions or simply want to experiment with different tastes, this section will guide you through some delicious alternatives and modifications.
Flavor Enhancements
- Vanilla Bean: Replace 1 teaspoon of vanilla extract with the seeds from 1 vanilla bean for a more intense flavor.
- Citrus Twist: Add the zest of 1 lemon or lime to brighten up the filling. This pairs beautifully with traditional cheesecake.
- Chocolate Delight: Fold in ½ cup of melted dark chocolate (70% cocoa) into the emulsion for a rich chocolate cheesecake.
- Fruit Infusions: Puree ½ cup of strawberries, raspberries, or blueberries and fold into the filling for a fruity twist.
Dietary Modifications
If you’re accommodating dietary needs, consider the following substitutions:
- Dairy-Free: Substitute cream cheese with a dairy-free alternative like vegan cream cheese (8 oz / 225g) and use coconut cream instead of sour cream.
- Low-Sugar: Use ½ cup of erythritol or another sugar substitute in place of granulated sugar for a lower-calorie option.
- Gluten-Free: Ensure your crust is made with gluten-free graham crackers or almonds.
Chef’s tip: Always taste your filling before baking! Adjust sweetness or acidity as needed by adding more sugar or lemon juice.
| Flavor Variation | Ingredients Needed |
|---|---|
| Chocolate | ½ cup melted dark chocolate |
| Fruit | ½ cup fruit puree |
| Citrus | Zest of 1 lemon/lime |
Serving and Pairing Suggestions
Understanding how to serve and pair your cheesecake emulsion filling can elevate your dessert experience. Whether you’re hosting a gathering or enjoying a quiet evening, the right accompaniments will enhance the flavor and presentation of your cheesecake.
Serving Suggestions
- Chill the cheesecake for at least 4 hours before serving to achieve the perfect texture.
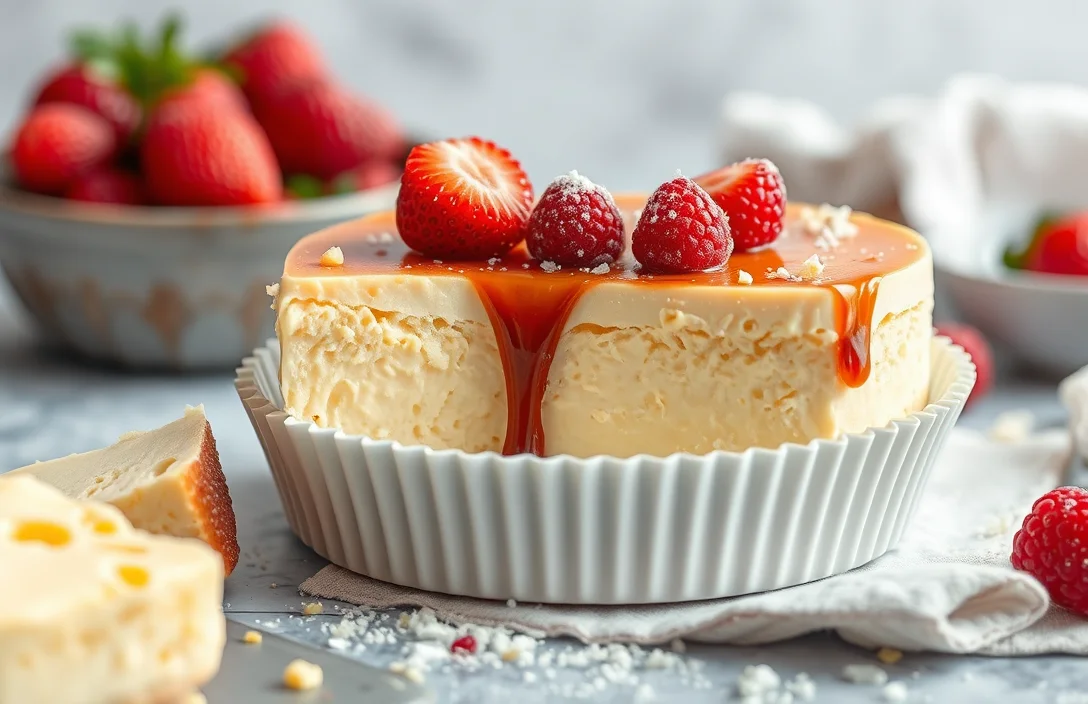
- Garnish with fresh fruit like sliced strawberries, blueberries, or raspberries for a burst of color and flavor.
- Drizzle with a homemade fruit coulis or chocolate sauce for added sweetness and visual appeal.
- Sprinkle with crushed nuts or graham cracker crumbs to provide a satisfying crunch.
Flavor Pairings
To complement the richness of the cheesecake emulsion filling, consider these flavor pairings:
| Flavor | Pairing Suggestion |
|---|---|
| Vanilla | Infuse the emulsion with 1 teaspoon of pure vanilla extract for a classic flavor. |
| Citrus | Add the zest of 1 lemon or orange for a refreshing note. |
| Chocolate | Fold in ¼ cup of melted dark chocolate for a decadent touch. |
| Spices | Incorporate 1 teaspoon of cinnamon or nutmeg for warmth and depth. |
Chef’s tip: Experiment with different flavors by adding extracts or spices, but start with small amounts to ensure they don’t overpower the cheesecake.
With these serving and pairing ideas, your cheesecake emulsion filling will not only taste great but also look stunning on the plate!
Quick Recipe Summary
This section provides a concise overview of the cheesecake emulsion filling recipe, highlighting key details such as ingredients, preparation time, and tips for success. Having this summary allows you to quickly reference essential information while preparing your delicious filling.
Ingredients
- 16 ounces (450g) cream cheese, softened
- ½ cup (100g) granulated sugar
- ½ cup (120ml) heavy cream
- 2 large eggs
- 2 teaspoons vanilla extract
- 1 tablespoon lemon juice
- ½ teaspoon salt
Preparation and Cooking Time
Prep Time: 15 minutes
Cook Time: 45-50 minutes
Steps to Make Cheesecake Emulsion Filling
- Preheat your oven to 325°F (160°C). Grease a 9-inch (23cm) springform pan with butter or non-stick spray.
- In a mixing bowl, combine the softened cream cheese and granulated sugar. Beat with an electric mixer on medium speed until smooth and creamy, about 2-3 minutes.
- Add the heavy cream, eggs, vanilla extract, lemon juice, and salt. Mix until well combined, scraping down the sides as needed. The mixture should be smooth and slightly thickened.
- Pour the filling into the prepared springform pan. Tap the pan gently on the counter to release any air bubbles.
- Bake in the preheated oven for 45-50 minutes. The edges should be set while the center remains slightly jiggly.
- Turn off the oven and crack the door open, allowing the cheesecake to cool gradually for about 1 hour. This helps prevent cracks.
- Remove from the oven and refrigerate for at least 4 hours before serving to achieve the perfect texture.
Chef’s tip: For a smoother texture, ensure all ingredients are at room temperature before mixing.
Common Mistakes to Avoid
- Don’t overmix the filling after adding eggs, as this can introduce too much air and lead to cracks.
- Do not rush the cooling process in the oven; gradual cooling prevents cracks in the surface.
- Check for doneness carefully; the center should still have a slight jiggle when you remove it from the oven.
Nutritional Information (per serving)
| Nutrient | Amount |
|---|---|
| Calories | 320 |
| Protein | 6g |
| Fat | 28g |
| Carbohydrates | 17g |
Quick Summary
| Prep Time | Cook Time | Total Time | Servings |
|---|---|---|---|
| 15 minutes | 0 minutes | 15 minutes | 8 servings |
- Combine ingredients: Whisk together 16 oz cream cheese, 1 cup powdered sugar, and 1 tsp vanilla extract until smooth.
- Incorporate emulsion: Gradually add 2-3 tablespoons of lemon emulsion for flavor.
- Check consistency: Ensure mixture is creamy and free of lumps before using.
- Chill filling: Refrigerate for at least 1 hour to allow flavors to meld.
- Use immediately: Spread filling onto cooled crust or store in an airtight container for up to 3 days.
- Tip: Use room temperature cream cheese to avoid lumps.
- Tip: Taste the filling before chilling; adjust sweetness if necessary.
- Tip: Emulsions are more potent than extracts, so use them sparingly.
Frequently Asked Questions
Can I make this ahead of time? How to store and reheat?
You can make cheesecake emulsion filling up to 2 days in advance. Store it in an airtight container in the refrigerator, and simply stir it before using.
What can I substitute for cream cheese?
If you’re looking for a substitute for cream cheese, you can use mascarpone cheese for a similar texture and flavor, or blended silken tofu for a dairy-free option.
How do I know when it’s done?
Your cheesecake filling is done when it is smooth and slightly thickened, and it should hold its shape when you lift the whisk out of the mixture.
Can I freeze this? How long does it last?
You can freeze cheesecake emulsion filling for up to 2 months. Make sure to store it in a freezer-safe container and let it thaw in the refrigerator before using.
What if I don’t have a food processor?
If you don’t have a food processor, you can use a hand mixer or whisk to blend the ingredients until smooth, just be prepared for a bit more elbow grease!

- Decadent Peanut Butter No-Bake Cheesecake: Easy Recipe to Indulge - April 3, 2026
- Delicious Mango No-Bake Cheesecake: Step-by-Step Recipe - April 3, 2026
- Decadent Raspberry No-Bake Cheesecake: Easy Step-by-Step Recipe - April 3, 2026