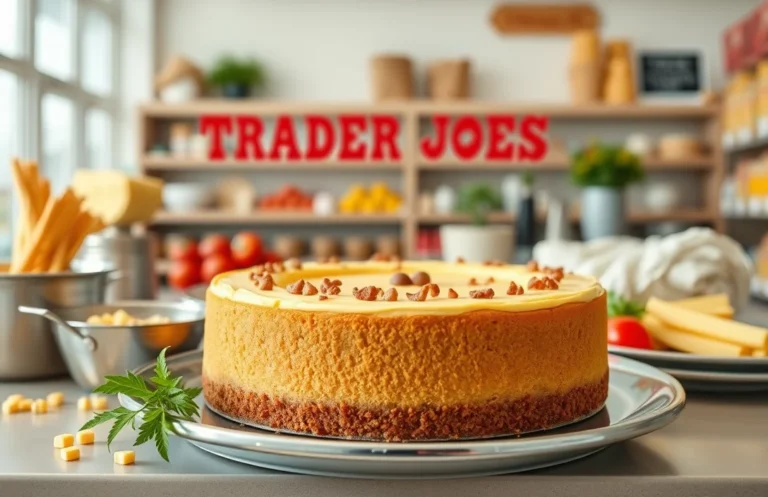
5 Easy Cheesecake Filling Recipes: Vegan, No-Bake, and More!
There’s something truly irresistible about creamy cheesecake filling that brings comfort and joy to any occasion. Whether it’s a family gathering or a cozy weeknight treat, this luscious filling transforms any dessert into a star attraction, leaving everyone coming back for seconds. You’ll find yourself craving it long after the last bite!
Get ready for simple yet delightful recipes that include classic, no-bake, vegan, and low-sugar options. Total time: 15 minutes prep, 0 minutes cook; serves 8; difficulty: easy.
| Prep Time | Cook Time | Total Time | Servings | Difficulty |
|---|---|---|---|---|
| 15 minutes | 0 minutes | 15 minutes | 8 | Easy |
Cheesecake Filling Origins
Understanding the history and cultural significance of cheesecake fillings enhances our appreciation for this beloved dessert. Cheesecake has roots that trace back to ancient Greece, where it was served to athletes during the first Olympic Games in 776 B.C. Today, variations of cheesecake fillings are celebrated across cultures, embodying unique flavors and traditions.
Cultural Significance
Cheesecake has evolved into a popular dish around the world, with each culture offering its own twists on the classic filling. Here are a few notable mentions:
- New York Style: Known for its dense, creamy texture, this version often features a rich cream cheese filling, making it a favorite at celebrations.
- Italian Ricotta: Italian cheesecakes utilize ricotta cheese, offering a lighter texture and a distinct flavor, often enjoyed during holidays such as Easter.
- Japanese Cotton Cheesecake: This airy, fluffy version is a delightful treat, often enjoyed with tea and known for its melt-in-your-mouth quality.
Popular Occasions
Cheesecake is often the centerpiece of many celebrations, including:
- Birthdays: A classic choice for birthday parties, often customized with favorite flavors and toppings.
- Holidays: Many families prepare cheesecakes during holidays like Christmas and Thanksgiving, featuring seasonal flavors like pumpkin or peppermint.
- Weddings: Tiered cheesecakes have become a trendy alternative to traditional wedding cakes, offering a delicious focal point for the reception.
Pro tip: To ensure your cheesecake filling is perfectly smooth, allow your cream cheese to come to room temperature before mixing.
Ingredients for Cheesecake Fillings
This section provides a comprehensive list of ingredients needed for various cheesecake fillings, ensuring you have everything on hand for your baking adventures. Whether you’re making a classic, vegan, or low-sugar cheesecake filling, these precise measurements will guide you in creating a delicious dessert that suits your taste and dietary needs.
| Item | Amount/Specification | Notes |
|---|---|---|
| Classic Cream Cheese Filling | 16 oz (450g) cream cheese, softened | Full-fat for best texture |
| ½ cup (100g) granulated sugar | Can be substituted with coconut sugar for a healthier option | |
| 2 large eggs | Room temperature for better mixing | |
| 1 teaspoon vanilla extract | Use pure extract for best flavor | |
| Vegan Filling | 1 cup (240g) soaked cashews | Soak for at least 4 hours |
| ½ cup (120ml) coconut cream | Use the thick part from canned coconut milk | |
| ½ cup (100g) maple syrup | Adjust sweetness to taste | |
| Low-Sugar Filling | 16 oz (450g) cream cheese, softened | Light cream cheese works too |
| ½ cup (80g) erythritol or your choice of sweetener | Check conversion ratios for different sweeteners |
- For the Classic Filling: Make sure your cream cheese is fully softened to avoid lumps.
- For Vegan Options: Blend until completely smooth for a creamy texture.
- For Low-Sugar Variants: Taste the mixture before baking to ensure it’s sweet enough for your palate.
Necessary Kitchen Equipment
Preparing a delicious cheesecake filling requires some essential kitchen tools to ensure a smooth and successful process. Having the right equipment not only makes your task easier but also helps achieve the perfect texture and flavor in your cheesecake.
- Mixing Tools: A sturdy mixing bowl (preferably 4-6 quart) is essential for combining your ingredients. Use a handheld electric mixer or a stand mixer with a paddle attachment to cream the cheese and sugar together effectively. This will help you achieve a light and airy texture.
- Measuring Cups and Spoons: Accurate measurements are crucial in baking. Make sure you have dry measuring cups for ingredients like flour and sugar, as well as liquid measuring cups for items like cream and milk. A set of measuring spoons will also be helpful for smaller quantities of flavorings.
- Baking Equipment: A 9-inch springform pan is ideal for your cheesecake. It allows for easy removal without damaging the sides. You’ll also need parchment paper for lining the bottom to prevent sticking. If you’re making a no-bake cheesecake, a standard pie dish works well.
- Spatula: A silicone spatula is perfect for scraping down the sides of the bowl and folding in any delicate ingredients like whipped cream. This ensures everything is well incorporated without deflating your batter.
- Storage Containers: Once your cheesecake filling is ready, you’ll need airtight containers to store any leftovers in the refrigerator. Glass containers are a great option because they don’t stain and are easy to clean.
Step-by-Step Preparation
This section provides a detailed walkthrough for creating the perfect cheesecake filling, ensuring your dessert is creamy and flavorful. Follow the steps closely for a delicious result that will impress your friends and family.
- Prepare the Cream Cheese: Start with 16 ounces (450g) of softened cream cheese. Place the cream cheese in a large mixing bowl and use an electric mixer on medium speed for about 2-3 minutes until it’s smooth and creamy, with no lumps. You want it to have a velvety texture that will set the foundation for your filling.
- Add Sugar and Flavorings: Gradually add 1 cup (200g) of granulated sugar and 1 teaspoon of vanilla extract to the cream cheese. Continue mixing for another 2 minutes until well combined and the mixture is light and fluffy. You should smell the sweet vanilla aroma filling your kitchen.
- Incorporate Eggs: Next, add 3 large eggs, one at a time, mixing on low speed for about 30 seconds after each addition. Scrape down the sides of the bowl as needed. The mixture should be smooth and glossy, indicating that the eggs are fully incorporated.
- Add Sour Cream and Heavy Cream: Mix in ½ cup (120ml) of sour cream and ½ cup (120ml) of heavy cream. Beat on low speed for an additional minute. This adds a rich creaminess to your filling and a slight tang to balance the sweetness.
- Chill the Filling: Once everything is well combined, cover the bowl with plastic wrap and refrigerate for at least 30 minutes. This chilling time helps the flavors meld together and makes the filling easier to spread into the crust.
- Final Touches: Before pouring the filling into your prepared crust, give it a final stir to ensure it’s smooth. If you want to add any mix-ins, such as chocolate chips or fruit puree, gently fold them in now. Your filling should be thick and creamy, ready to be baked or set.
Pro Tips and Mistakes
Creating the perfect cheesecake filling requires attention to detail and a few expert tips to ensure creamy texture and balanced flavors. Here are essential pointers to help you avoid common pitfalls and achieve cheesecake perfection.
Achieving Creaminess
- Use room temperature ingredients: Ensure your cream cheese, eggs, and sour cream are at room temperature (about 70°F or 21°C) before mixing. This helps create a smooth, lump-free filling.
- Beat gently: Whisk the cream cheese until smooth before adding other ingredients. Overmixing can introduce too much air, resulting in a dense texture.
Avoiding Cracks
- Don’t overbake: Bake your cheesecake at 325°F (160°C) until the edges are set but the center still has a slight jiggle (it will firm up as it cools). Typically, this takes around 50-60 minutes.
- Cool gradually: After baking, turn off the oven and crack the door open, allowing the cheesecake to cool slowly for about an hour. This prevents rapid temperature changes that can cause cracks.
Flavor Balance
- Taste as you go: When adding flavors like vanilla or citrus zest, start small (1 teaspoon vanilla extract or zest from 1 lemon). You can always add more, but you can’t take it out!
- Consider acidity: Balance the sweetness of the filling with a touch of lemon juice (1 tablespoon) for brightness. This enhances the overall flavor without overpowering the cheesecake.
Filling Variations and Modifications
Creating a cheesecake filling is versatile, allowing for a range of flavors and dietary modifications. Whether you’re gluten-free, looking for nut-free options, or want to add a unique twist to the classic recipe, these variations will help you customize your cheesecake to fit your needs and preferences.
| Item | Amount/Specification | Notes |
|---|---|---|
| Gluten-Free Crust | 1 ½ cups almond flour (150g) | Replace graham cracker with almond flour and coconut oil for a gluten-free option. |
| Flavor Variation: Chocolate | ½ cup cocoa powder (50g) | Add to the cream cheese mixture for a rich chocolate flavor. |
| Flavor Variation: Fruit | 1 cup fruit puree (e.g., raspberry or strawberry) | Fold into the filling for a fruity twist. |
| Nut-Free Option | 1 ½ cups crushed gluten-free cookies | Use gluten-free cookies instead of nut-based crusts. |
| No-Bake Version | 1 cup whipped cream | Incorporate whipped cream for a lighter, no-bake filling. |
| Low-Sugar Option | ¾ cup erythritol or your preferred sweetener | Substitute sugar with erythritol for a low-sugar cheesecake. |
- For a vegan option: Replace cream cheese with cashew cream (soaked cashews blended with coconut cream).
- When adding flavors: Start with 1 teaspoon of extract (vanilla, almond, etc.) and adjust to taste.
- For consistency: Ensure all ingredients are at room temperature before mixing for a smooth filling.
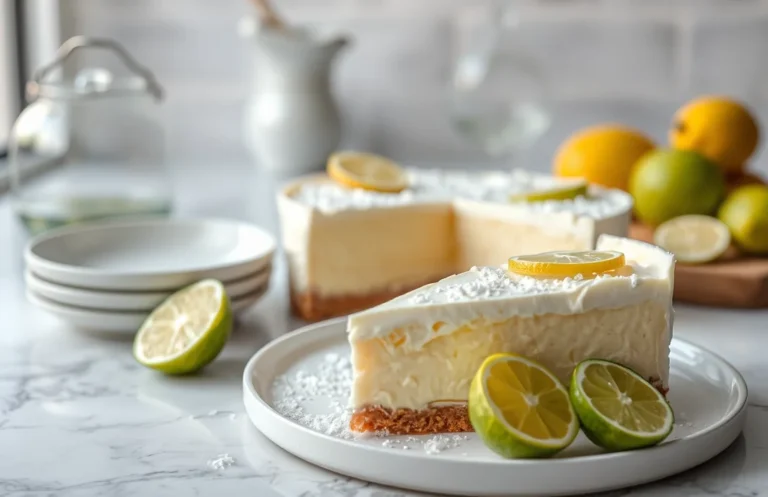
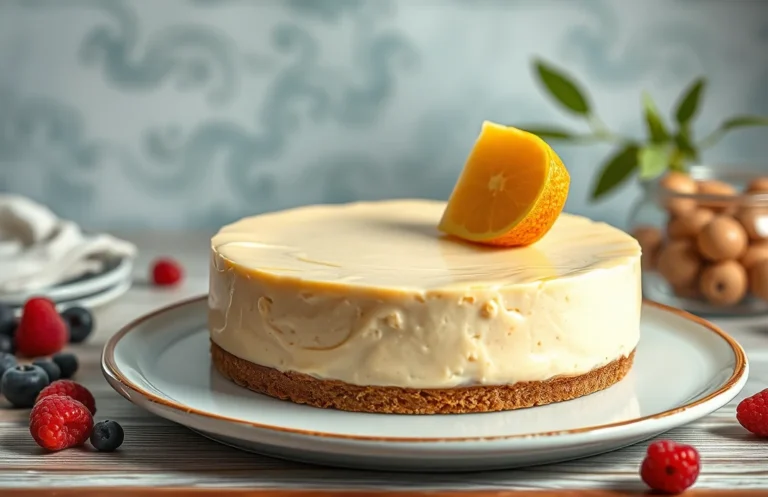
Serving and Plating Ideas
Serving cheesecake filling is where you can truly get creative, elevating the presentation and enhancing the flavor. Whether you’re serving it in a traditional cheesecake or as a delightful dip, there are plenty of garnishing options and pairing suggestions to make your dessert shine.
Garnishing Tips
- Top with fresh fruit: Use berries like strawberries, blueberries, or raspberries for a refreshing contrast. A handful of fresh mint leaves can add a pop of color and flavor.
- Drizzle with sauces: Chocolate or caramel sauce adds sweetness and a beautiful visual. For a tangy kick, try a raspberry or passion fruit coulis.
- Sprinkle with nuts: Chopped walnuts or pecans provide a nice crunch. Toast them lightly for extra flavor.
- Creamy additions: A dollop of whipped cream or a scoop of ice cream can make each bite indulgent.
Pairing Desserts
Cheesecake filling pairs beautifully with various desserts:
- Layer it in trifles with sponge cake and fruit.
- Use it as a filling for pastries or eclairs.
- Serve it alongside cookies for a fun dessert platter.
Serving Temperature
For the best flavor and texture, serve cheesecake filling chilled. Refrigerate it for at least 4 hours or overnight before serving. This allows the flavors to meld beautifully. If it becomes too firm, let it sit at room temperature for about 15-20 minutes to soften slightly before serving.
Chef’s tip: Always taste the filling before serving and adjust sweetness or flavorings as needed for your palate.
Quick Summary
| Prep Time | 15 minutes |
|---|---|
| Cook Time | 1 hour |
| Total Time | 1 hour 15 minutes |
| Servings | 8 servings |
- Use room temperature ingredients: This ensures a smooth texture.
- Beat cream cheese well: Mix until completely smooth before adding other ingredients.
- Don’t overmix: Mix just until combined to prevent cracking.
- Preheat oven to 325°F: Essential for even cooking.
- Bake in a water bath: Helps maintain moisture and prevents cracks.
Frequently Asked Questions
Can I make this ahead of time? How to store and reheat?
You can make the cheesecake filling up to 2 days in advance. Store it in an airtight container in the refrigerator, and there’s no need to reheat it before using.
What can I substitute for cream cheese?
You can substitute cream cheese with mascarpone cheese for a creamier texture or use a vegan cream cheese for a dairy-free option. Keep in mind that the flavor will slightly change.
How do I know when it’s done?
The cheesecake filling is done when it appears smooth and slightly set in the center, with a slight jiggle remaining. It should not be sloshy or overly firm.
Can I freeze this? How long does it last?
Yes, you can freeze the cheesecake filling for up to 3 months in an airtight container. Thaw it overnight in the refrigerator before using, but note that the texture may change slightly.
What if I don’t have a mixer?
If you don’t have a mixer, you can use a sturdy whisk and a large bowl to mix the ingredients by hand. Just be prepared for a bit more elbow grease to achieve that creamy consistency!

- Make Cheesecake Up to 3 Days Ahead: Tips for Best Flavor & Texture - March 4, 2026
- Easy No-Bake Cool Doen Cheesecake: Quick Recipe & Tips - March 4, 2026
- Decadent Dulce de Leche Cheesecake: Easy Step-by-Step Recipe - March 4, 2026