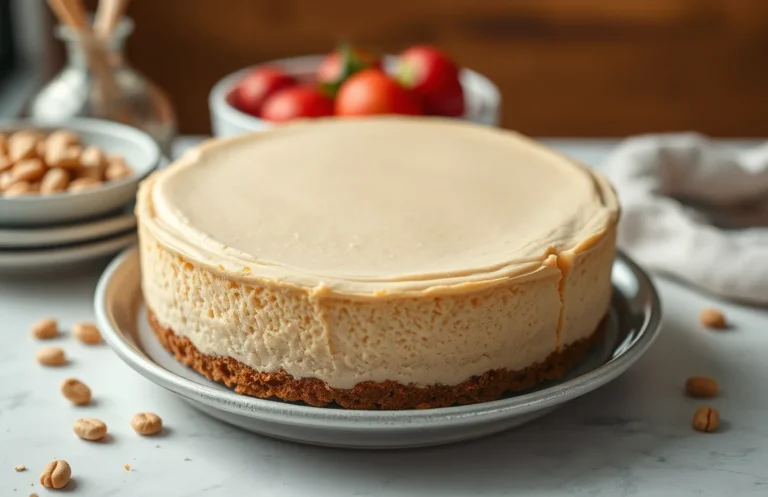
Decadent Preppy Kitchen Cheesecake: Step-by-Step Recipe Guide
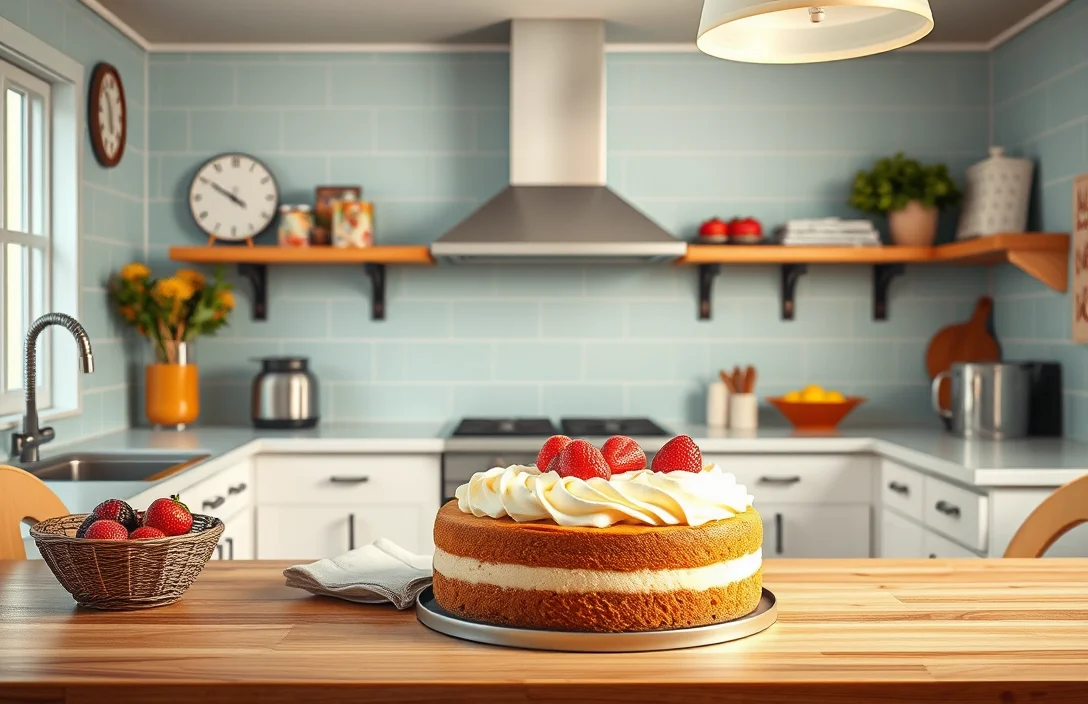
There’s something incredibly indulgent about a slice of creamy cheesecake, especially when it’s made with love in your own kitchen. This cheesecake is not just a dessert; it’s a celebration of rich flavor and velvety texture that turns any gathering into a special occasion. Imagine the joy on your friends’ faces as they savor each bite!
This recipe features a total time of 6 hours, including chilling, serves 8, and is moderate in difficulty. You’ll have a classic dessert that’s sure to impress with every forkful.
| Prep Time | Cook Time | Total Time | Servings | Difficulty |
|---|---|---|---|---|
| 20 minutes | 1 hour | 6 hours | 8 | Moderate |
History of Cheesecake
Understanding the history of cheesecake is essential in appreciating its evolution, especially when considering the Preppy Kitchen style that emphasizes elegance and tradition. Cheesecake has a rich heritage, with roots that trace back to ancient civilizations, and its journey to modern culinary art speaks to its enduring appeal.
- Ancient Origins: Cheesecake’s earliest known origins date back to ancient Greece, where it was served to athletes during the first Olympic Games in 776 B.C. Made with fresh cheese, honey, and wheat, it was considered a source of energy and nourishment.
- Roman Influence: The Romans adopted and adapted the Greek cheesecake, adding flavors like eggs and cream. They also spread the concept throughout their empire, leading to regional variations that emerged across Europe.
- New York Style Evolution: The modern cheesecake we recognize today, particularly the creamy New York style, was developed in the early 20th century. Using rich cream cheese, this version became a staple in American dessert culture, renowned for its dense yet creamy texture.
- Preppy Kitchen Aesthetic: The Preppy Kitchen style embraces classic recipes with a refined touch. Cheesecake fits perfectly within this aesthetic, showcasing a blend of traditional flavors and elegant presentation. Think of a beautifully decorated cheesecake topped with fresh berries or a subtle swirl of fruit puree.
Throughout its history, cheesecake has not only been a dessert but also a symbol of celebration, bringing people together at gatherings and special occasions. Its versatility allows for endless variations, making it a beloved choice in both casual and formal settings.
Ingredients for Perfect Cheesecake
Gathering the right ingredients is crucial for achieving that creamy, rich texture and delightful flavor characteristic of a Preppy Kitchen cheesecake. Below, you’ll find a detailed list of everything you need, along with specific measurements and helpful notes to ensure your cheesecake turns out perfectly.
| Item | Amount/Specification | Notes |
|---|---|---|
| Graham cracker crumbs | 1 ½ cups (150g) | For the crust; can substitute with gluten-free crumbs. |
| Granulated sugar | 1/4 cup (50g) | For the crust; adjust to taste. |
| Unsalted butter | 1/2 cup (115g), melted | Provides richness to the crust. |
| Softened cream cheese | 24 oz (680g) | Make sure it’s at room temperature for easy mixing. |
| Sour cream | 1 cup (240g) | Adds creaminess; can be substituted with Greek yogurt. |
| Granulated sugar | 1 cup (200g) | For the filling; adjust to personal preference. |
| Vanilla extract | 2 teaspoons | For flavor; use pure vanilla for the best taste. |
| Large eggs | 3 | Ensure they are at room temperature for even mixing. |
| All-purpose flour | 2 tablespoons (15g) | Helps stabilize the filling; can omit for gluten-free. |
- Tip: Soften cream cheese by leaving it out for about 2 hours before mixing to avoid lumps.
- Warning: Avoid over-mixing the batter after adding eggs to prevent cracks during baking.
- For a flavored cheesecake, consider adding lemon zest or chocolate to the filling.
Essential Equipment and Prep
To create a delicious cheesecake inspired by the Preppy Kitchen style, having the right tools and preparing your ingredients is essential. This section outlines the necessary equipment and prep steps to ensure your cheesecake turns out perfectly every time.
- Gather Your Equipment: You’ll need a 9-inch springform pan, a mixing bowl, a stand mixer or hand mixer, and a rubber spatula. Additionally, have a measuring cup and spoons on hand for precise measurements. A food processor is also helpful for crushing the graham crackers for the crust.
- Prepare Your Baking Setup: Preheat your oven to 325°F (160°C). This temperature is ideal for baking the cheesecake evenly without cracking. While the oven heats, line the bottom of your springform pan with parchment paper for easy removal once baked.
- Prep the Ingredients: Measure out your ingredients before you begin mixing. This includes 2 cups (200g) of crushed graham crackers, ½ cup (100g) of granulated sugar, and ½ cup (115g) of unsalted butter, melted. Having everything ready will streamline the process.
- Make the Crust: In a mixing bowl, combine the crushed graham crackers, sugar, and melted butter. Mix until the mixture resembles wet sand. Press this mixture firmly into the bottom of your springform pan, creating an even layer. It should feel slightly sticky to the touch but hold together when pressed.
- Common Mistakes to Avoid: Ensure you do not overmix the cream cheese when preparing the filling, as this can incorporate too much air and lead to cracks. Also, avoid opening the oven door during baking, as sudden temperature changes can cause the cheesecake to collapse.
Step-by-Step Baking Instructions
This section provides you with clear, numbered steps for making a delicious cheesecake inspired by the Preppy Kitchen style. Each step includes precise measurements, cooking times, and tips to ensure your cheesecake turns out perfectly creamy and flavorful.
- Prepare the crust: Preheat your oven to 350°F (175°C). In a medium bowl, combine 1 ½ cups (150g) of graham cracker crumbs, ½ cup (100g) of granulated sugar, and ½ teaspoon of salt. Pour in ½ cup (115g) of melted unsalted butter and mix until the crumbs are evenly moistened. Press the mixture firmly into the bottom of a 9-inch (23cm) springform pan and bake for 10 minutes. The crust should be lightly golden and fragrant.
- Make the filling: In a large mixing bowl, beat 4 (8 oz each) packages of softened cream cheese with an electric mixer on medium speed for 2-3 minutes until smooth and creamy. Gradually add 1 cup (200g) of granulated sugar, 1 teaspoon of vanilla extract, and ½ teaspoon of salt, mixing until well combined. The mixture should be fluffy and free of lumps.
- Add the eggs: With the mixer on low speed, add 4 large eggs one at a time, mixing just until incorporated after each addition. Be careful not to overmix; the batter should be smooth and glossy. Stop mixing as soon as you see no visible egg streaks.
- Pour the filling: Carefully pour the cheesecake filling over the pre-baked crust in the springform pan. Use a spatula to smooth the top, ensuring an even layer. Tap the pan gently on the counter to release any air bubbles.
- Bake the cheesecake: Bake in the preheated oven for 50-60 minutes, or until the edges are set but the center still jiggles slightly when shaken. The top should be lightly golden and may have small cracks. Do not open the oven door during the first 30 minutes to prevent sinking.
- Cool and chill: Once baked, turn off the oven and let the cheesecake cool in the oven with the door cracked for about 1 hour. This helps prevent cracking. Afterward, refrigerate for at least 4 hours, or overnight for the best flavor and texture.
Expert Tips for Success
Creating the perfect cheesecake requires attention to detail and a few insider tips that can elevate your baking game. Here are some expert insights and common pitfalls to avoid while making your Preppy Kitchen-inspired cheesecake.
- Room Temperature Ingredients: Ensure your cream cheese, eggs, and sour cream are at room temperature (about 70°F or 21°C). This helps achieve a smooth, lump-free batter. If you’re in a hurry, you can microwave the cream cheese for about 10-15 seconds, but be careful not to melt it.
- Mixing Technique: When mixing the batter, use a low speed to prevent incorporating too much air, which can cause cracks during baking. Aim for a silky texture, which should look glossy and smooth.
- Water Bath (Bain-Marie): Using a water bath can help prevent the cheesecake from cracking. Wrap the outside of your springform pan with aluminum foil to avoid water seepage, and place it in a larger pan filled with about 1 inch of hot water during baking.
Chef’s tip: Allow the cheesecake to cool in the oven with the door ajar for about an hour after baking. This gradual cooling helps prevent cracks.
Common Mistakes to Avoid
- Overbaking: Keep an eye on the cheesecake; it should be set at the edges but still slightly jiggly in the center when you take it out. An internal temperature of about 150°F (65°C) is ideal.
- Skipping Chilling Time: Patience is key! Chill the cheesecake in the refrigerator for at least 4 hours, preferably overnight, to let the flavors meld and achieve the perfect texture.
- Neglecting the Crust: Ensure your crust is well-pressed into the pan and pre-bake it at 350°F (175°C) for 10 minutes before adding the filling to enhance its flavor and crunchiness.
| Ingredient | Amount |
|---|---|
| Cream Cheese | 24 oz (680g) |
| Sour Cream | 1 cup (240g) |
| Granulated Sugar | 1 cup (200g) |
| Eggs | 4 large |
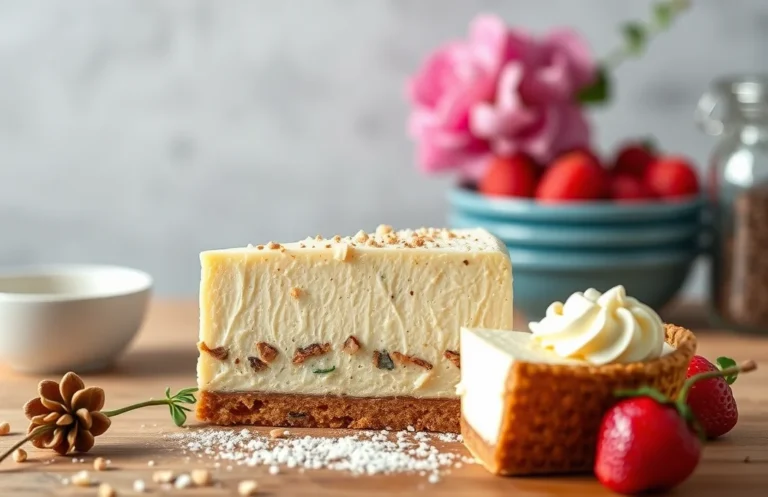
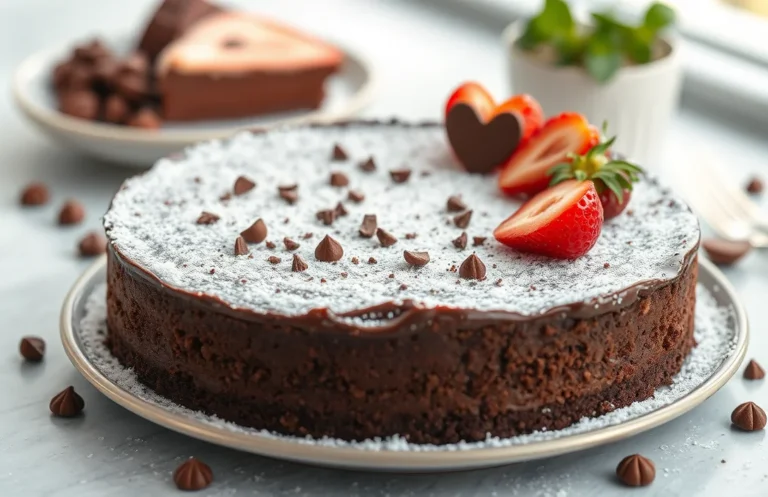
Cheesecake Variations to Try
Cheesecake is a versatile dessert that can be tailored to suit various tastes and dietary needs. In this section, we’ll explore several delightful variations and substitutions you can make to create your perfect cheesecake, ensuring everyone can enjoy this classic treat.
Flavor Variations
- Chocolate Swirl Cheesecake: Add ½ cup melted dark chocolate (90g) to the cream cheese mixture before pouring it into the crust. Swirl gently with a knife for beautiful marbling.
- Fruit-Infused Cheesecake: Puree 1 cup fresh strawberries or raspberries and fold into the batter for a fruity twist. You can also top your cheesecake with fresh fruit after baking.
- Matcha Cheesecake: Incorporate 2 tablespoons matcha powder into the cream cheese mixture for a vibrant green color and unique flavor.
Dietary Modifications
For those with specific dietary preferences or restrictions, consider these substitutions:
- Dairy-Free: Use 24 oz (680g) of dairy-free cream cheese and coconut milk instead of heavy cream.
- Gluten-Free: Swap the graham cracker crust for a mixture of almond flour and melted butter, using 1½ cups almond flour (150g) and 6 tablespoons melted butter (85g).
- Lower Sugar: Substitute ½ cup granulated sugar (100g) with ½ cup erythritol or your preferred sugar alternative.
Chef’s tip: Experiment with different extracts, such as almond or lemon, to elevate the flavor profile of your cheesecake.
| Variation | Main Ingredient |
|---|---|
| Chocolate Swirl | ½ cup melted dark chocolate |
| Fruit-Infused | 1 cup pureed fruit |
| Matcha | 2 tablespoons matcha powder |
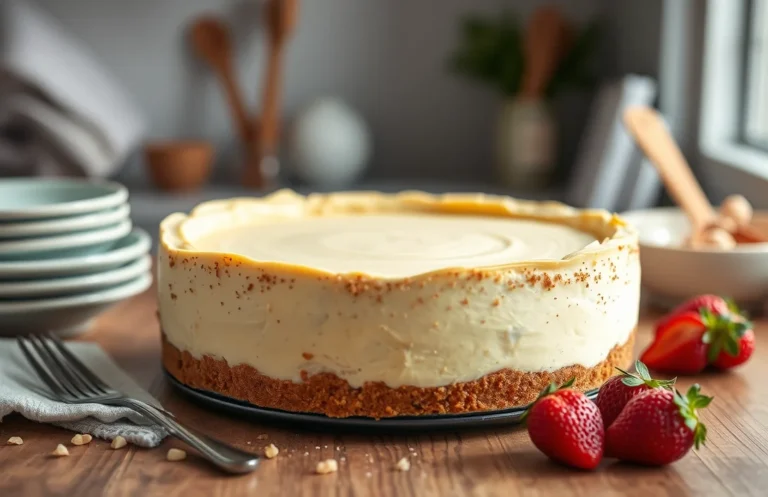
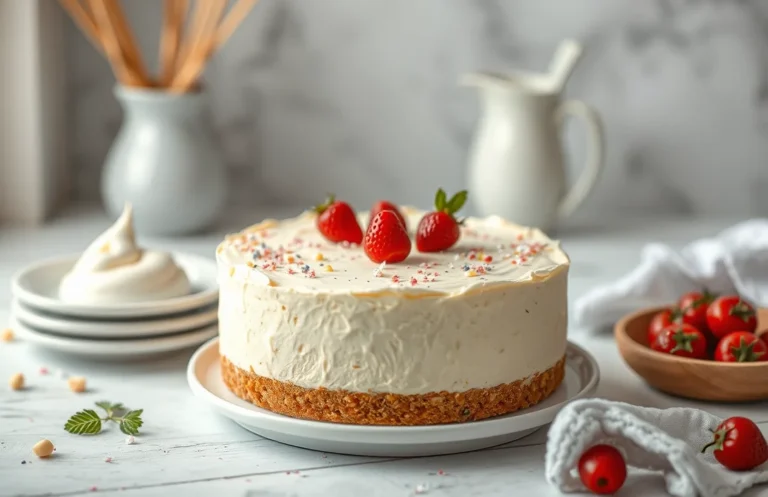
Serving and Plating Ideas
Presenting your cheesecake beautifully enhances the overall experience and makes it even more enjoyable for your guests. Here are some thoughtful ways to serve and plate your Preppy Kitchen-inspired cheesecake, along with complementary flavors that will elevate your dessert.
Plating Suggestions
- Use a simple white plate to make the cheesecake’s color pop. A classic style enhances the preppy aesthetic.
- Garnish each slice with a dollop of freshly whipped cream (about 2 tablespoons per slice) and a sprinkle of finely grated lemon zest for a refreshing touch.
- Add a few fresh berries (such as strawberries, blueberries, or raspberries) around the cheesecake to add color and a hint of tartness.
- Drizzle with a homemade berry coulis made from simmering 1 cup of mixed berries with 2 tablespoons of sugar until thickened.
Complementary Flavors and Beverages
Pair your cheesecake with beverages that enhance its creamy texture and rich flavor:
- A glass of chilled Prosecco or sparkling wine adds a celebratory touch.
- For a non-alcoholic option, serve with a refreshing mint-infused iced tea.
- Consider pairing with a scoop of vanilla bean ice cream for added decadence.
Chef’s tip: If you want to impress, serve your cheesecake with a side of homemade strawberry sauce. Blend 1 cup of strawberries with 2 tablespoons of sugar and a squeeze of lemon juice, then strain for a silky finish.
| Ingredient | Amount |
|---|---|
| Fresh berries | 1 cup |
| Whipped cream | 2 tablespoons per slice |
| Lemon zest | 1 teaspoon |
Remember, the goal is to create an inviting display that reflects the cheerful and sophisticated vibe of the Preppy Kitchen style. Enjoy your deliciously crafted cheesecake!
Quick Summary
| Prep Time | 20 minutes |
|---|---|
| Cook Time | 1 hour |
| Total Time | 1 hour 20 minutes |
| Servings | 8 |
- Preheat oven to 325°F for even baking.
- Create a water bath to prevent cracks in your cheesecake.
- Beat cream cheese thoroughly until smooth to avoid lumps.
- Chill for at least 4 hours before slicing for best texture.
- Use room temperature ingredients for a creamy consistency.
- Top with fresh berries for added flavor and presentation.
- Tip: Avoid overmixing once eggs are added to prevent cracks.
- Tip: Use a springform pan for easy removal.
Frequently Asked Questions
Can I make this cheesecake ahead of time? How to store and reheat?
You can absolutely make this cheesecake up to 3 days in advance and store it covered in the refrigerator. Just let it sit at room temperature for about 30 minutes before serving to soften slightly.
What can I substitute for cream cheese?
If you need a substitute for cream cheese, you can use mascarpone cheese or a vegan cream cheese alternative in equal amounts for a similar texture. Keep in mind that the flavor might differ slightly, so adjust your sweetness if needed.
How do I know when my cheesecake is done?
Your cheesecake is done when the edges are set, but the center still has a slight jiggle, which typically takes 60-70 minutes at 325°F (163°C). It will continue to firm up as it cools, so don’t overbake!
Can I freeze this cheesecake? How long does it last?
You can freeze the cheesecake for up to 2 months, wrapped tightly in plastic wrap and then aluminum foil. Thaw it in the refrigerator overnight before serving for the best texture.
What if I don’t have a springform pan?
If you don’t have a springform pan, you can use a regular 9-inch round cake pan lined with parchment paper for easy removal. Just be gentle when removing it, as it might not come out as neatly as from a springform pan.

- Make Cheesecake Up to 3 Days Ahead: Tips for Best Flavor & Texture - March 4, 2026
- Easy No-Bake Cool Doen Cheesecake: Quick Recipe & Tips - March 4, 2026
- Decadent Dulce de Leche Cheesecake: Easy Step-by-Step Recipe - March 4, 2026