Preppy Cheesecake Recipes: Stylish Desserts for Elegant Gatherings
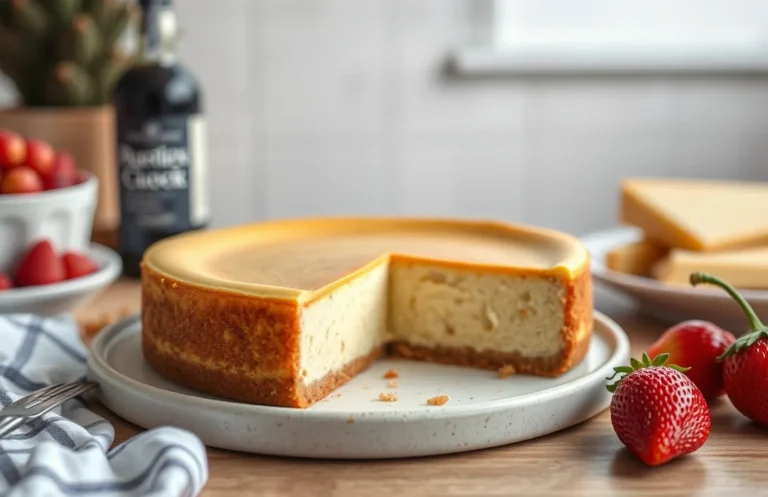
There’s nothing like a slice of cheesecake to bring a smile to your face, is there? Whether it’s a special occasion or a simple weeknight treat, this creamy delight never fails to impress. The luscious texture, combined with a buttery crust, makes it a go-to dessert that’s sure to please your family and friends.
Get ready for a delightful cheesecake experience! Each recipe takes about 30 minutes to prepare, with a cook time of 60 minutes, serves 8, and is moderately easy to make.
| Prep Time | Cook Time | Total Time | Servings | Difficulty |
|---|---|---|---|---|
| 30 minutes | 60 minutes | 1 hour 30 minutes | 8 | Moderate |
Cheesecake Origins
Understanding the origins of cheesecake not only enriches your appreciation of this delightful dessert but also highlights its timeless appeal in any preppy kitchen. With roots tracing back to ancient Greece, cheesecake has evolved into a luxurious treat that embodies sophistication and elegance.
Historical Background
The history of cheesecake dates back over 4,000 years to ancient Greece, where it was served to athletes at the first Olympic Games. The Greeks made a simple version using fresh cheese, honey, and flour, which was baked on a hot stone. This dish was later adopted by the Romans, who added their own flair with ingredients like eggs and cream.
- In the 18th century, cheesecake made its way to America, where cream cheese was introduced, giving rise to the creamy texture we know today.
- By the 20th century, New York-style cheesecake became a beloved classic, characterized by its dense and rich filling.
Cultural Significance
Cheesecake holds a special place in many cultures, often associated with celebrations and gatherings. Its versatility allows for endless variations, making it suitable for any occasion from casual family dinners to elegant parties.
“A slice of cheesecake is not just dessert; it’s a symbol of indulgence and celebration.”
In a preppy kitchen, cheesecake embodies a sophisticated yet approachable dessert that can be dressed up with delightful toppings or served simply for a casual gathering. Its timelessness resonates with the refined aesthetic of preppy decor, making it a staple for stylish entertaining.
| Year | Significance |
|---|---|
| 4000 BC | First recorded use in ancient Greece |
| 18th Century | Introduction of cream cheese in America |
| 20th Century | New York-style cheesecake popularized |
Ingredients for Preppy Cheesecake
This section provides you with the essential ingredients needed for a classic preppy cheesecake, along with some delightful flavor variations that can elevate your dessert to a whole new level. Knowing the exact measurements and specifications ensures that your cheesecake turns out perfectly every time, reflecting that stylish and sophisticated vibe you’re aiming for.
| Item | Amount/Specification | Notes |
|---|---|---|
| Graham cracker crumbs | 1 ½ cups (150g) | For the crust; can substitute with gluten-free crumbs |
| Granulated sugar | ½ cup (100g) | Adjust based on desired sweetness |
| Unsalted butter | ⅓ cup (75g), melted | Gives richness to the crust |
| Cream cheese | 24 ounces (680g), softened | Ensure it’s at room temperature for easy mixing |
| Sour cream | 1 cup (240ml) | Adds creaminess; can substitute with Greek yogurt |
| Vanilla extract | 2 teaspoons | Use pure vanilla for best flavor |
| Eggs | 3 large | Room temperature for better incorporation |
| Fresh fruit, chocolate, or caramel | For toppings | Customize to your taste! |
- For a chocolate cheesecake, add ½ cup (45g) of cocoa powder to the cream cheese mixture.
- To make a fruit-flavored cheesecake, fold in 1 cup (240ml) of pureed fruit or ½ cup (120g) of fruit preserves into the cream cheese mixture.
- Always bake your cheesecake in a water bath to prevent cracking — wrap the springform pan with aluminum foil to keep water out.
- If your cheesecake cracks, don’t worry! You can cover it with a topping to hide the imperfections.
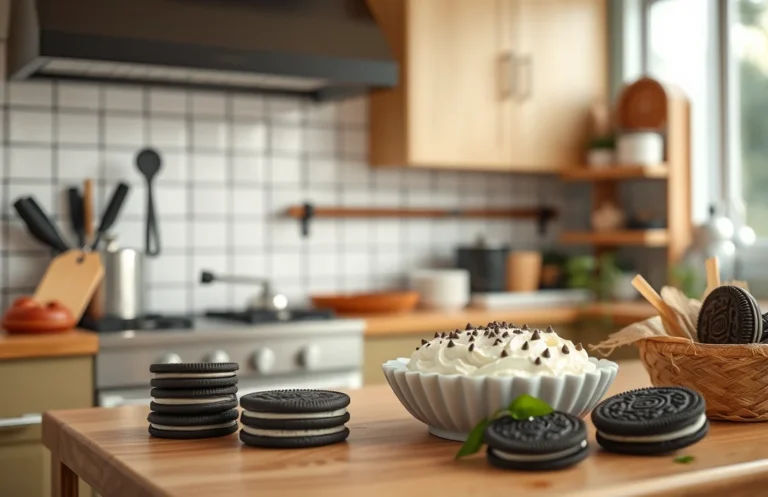
Essential Kitchen Tools
Having the right tools on hand is essential for crafting the perfect cheesecake, especially when aiming for that preppy kitchen aesthetic. These tools not only simplify the process but also ensure a polished presentation that will impress guests. Here’s a list of must-have items for your cheesecake-making adventure.
- Springform Pan: A 9-inch springform pan is ideal for cheesecakes. It allows for easy removal of the cake without damaging the sides. Ensure it has a tight seal to prevent any batter leakage.
- Mixing Bowls: Use a set of mixing bowls in various sizes, preferably glass or stainless steel. These materials are non-reactive and help maintain the integrity of your ingredients. For cheesecakes, a large bowl for the cream cheese mixture and a smaller bowl for the crust is essential.
- Electric Mixer: A hand or stand mixer will save you time and effort in achieving a smooth, creamy consistency. Mix on medium speed until the mixture is light and fluffy, which usually takes about 2-3 minutes.
- Rubber Spatula: A sturdy rubber spatula is crucial for scraping down the sides of your mixing bowl. This ensures that every bit of cream cheese is incorporated and helps avoid lumps in your cheesecake.
- Measuring Cups and Spoons: Accurate measurements are key in baking. Use standard measuring cups for dry ingredients and liquid measuring cups for wet ingredients. This prevents any fluctuations in the recipe and ensures consistent results.
- Food Processor: A food processor is perfect for making a smooth crust from graham crackers or cookies. Pulse until you achieve a fine crumb, but be careful not to over-process into powder.
- Offset Spatula: For a professional-looking finish, an offset spatula helps smooth the top of your cheesecake. Use it gently to create a clean, even surface.
Step-by-Step Recipe Instructions
This section provides you with clear, detailed instructions for mixing the cheesecake ingredients, baking it to perfection, and chilling it for that creamy finish. Following these steps will ensure your cheesecake not only tastes fabulous but also has the smooth, elegant texture that is a hallmark of preppy kitchen aesthetics.
- Mixing Ingredients: Start by preheating your oven to 325°F (163°C). In a large mixing bowl, combine 2 cups (240g) of graham cracker crumbs, ½ cup (100g) of granulated sugar, and ½ cup (115g) of melted unsalted butter. Mix thoroughly until the mixture resembles wet sand. Press this mixture firmly into the bottom of a 9-inch (23cm) springform pan to create an even crust.
- Preparing the Filling: In another bowl, beat 24 ounces (680g) of cream cheese at room temperature until smooth and creamy. Gradually add 1 cup (200g) of granulated sugar while continuing to beat. Add 3 large eggs, one at a time, mixing well after each addition. Finally, fold in 1 teaspoon of vanilla extract and ½ cup (120ml) of sour cream until fully incorporated. The mixture should be smooth and glossy.
- Baking Process: Pour the cheesecake filling over the prepared crust and smooth the top with a spatula. Place the springform pan in the oven and bake for 50-60 minutes. The edges should be set while the center remains slightly jiggly. Check for doneness by inserting a toothpick; it should come out clean or with a few moist crumbs.
- Chilling Time: Once baked, turn off the oven and crack the door open, allowing the cheesecake to cool gradually for about 1 hour. This helps prevent cracks. Afterward, refrigerate for at least 4 hours, or overnight for best results. The cheesecake should feel firm to the touch and have a smooth surface when fully chilled.
Professional Tips for Success
Creating the perfect cheesecake can be a rewarding experience, but it does come with its challenges. By understanding common errors and following some tested success tips, you can elevate your cheesecake game to stylish new heights.
Common Errors
- Overmixing the batter: This can introduce too much air, leading to cracks during baking. Mix just until the ingredients are combined, and stop once you see a smooth texture.
- Skipping the water bath: A water bath helps maintain a moist environment, preventing the cheesecake from drying out. If you skip it, your cheesecake may crack or have a dense texture.
- Opening the oven door: Do not open the oven door during the first 30 minutes of baking, as this can cause the temperature to drop and may lead to uneven baking.
- Baking at the wrong temperature: Always bake at 325°F (160°C) for a gentle, even cook. Baking at too high a temperature can cause the cheesecake to puff up and crack.
Success Tips
- Use room temperature ingredients: Allow cream cheese, eggs, and other ingredients to sit out for about 30 minutes before mixing. This promotes a smooth batter and helps avoid lumps.
- Cool gradually: After baking, turn off the oven and crack the door open for an hour before removing the cheesecake. This gradual cooling reduces the risk of cracks.
- Chill properly: Let your cheesecake cool at room temperature for at least 1 hour before refrigerating for at least 4 hours or overnight. This helps develop the flavor and texture.
- Garnish with style: For that preppy aesthetic, consider topping your cheesecake with fresh berries or a drizzle of fruit coulis. Presentation matters, so choose colorful, fresh ingredients that pop!
Cheesecake Variations
Creating the perfect cheesecake can be adapted to fit various dietary needs and preferences without compromising on flavor or elegance. Whether you’re looking for gluten-free options or vegan alternatives, these variations will allow you to enjoy a sophisticated cheesecake that aligns with your preppy kitchen aesthetic.
Gluten-Free Options
For those avoiding gluten, a simple swap can make your cheesecake base just as delightful. Here’s how:
- Use 1 ½ cups almond flour instead of traditional graham crackers for the crust.
- Mix in 2 tablespoons melted coconut oil and 2 tablespoons honey for sweetness and binding.
After pressing the crust into the pan, bake it at 350°F (175°C) for 10 minutes until lightly golden and fragrant. Let it cool before adding your cheesecake filling.
Vegan Alternatives
If you’re looking for a dairy-free version, here’s a vegan cheesecake recipe that maintains that creamy texture:
- For the filling, blend together 2 cups soaked cashews, ½ cup coconut milk, ½ cup maple syrup, and the juice of 2 lemons until smooth.
- Use 1 ½ cups crushed gluten-free cookies mixed with ¼ cup melted coconut oil for the crust.
Pour the filling over the crust and refrigerate for at least 4 hours, or until set. The result should be a rich, creamy cheesecake with a slightly nutty flavor.
Chef’s tip: Always soak cashews for at least 4 hours to ensure a smooth consistency in your vegan cheesecake.
| Ingredient | Gluten-Free | Vegan |
|---|---|---|
| Crust | 1 ½ cups almond flour | 1 ½ cups crushed gluten-free cookies |
| Sweetener | 2 tablespoons honey | ½ cup maple syrup |
| Filling | Traditional cream cheese | 2 cups soaked cashews |
Don’t hesitate to experiment with flavors and toppings for both gluten-free and vegan cheesecakes, such as fresh berries, chocolate ganache, or a drizzle of caramel sauce, to create a truly stunning dessert for your next gathering!
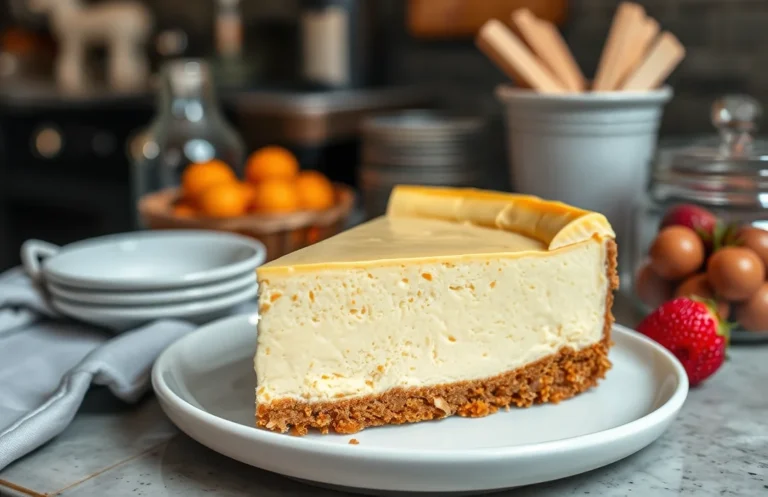
Presentation and Serving Ideas
Creating a stylish presentation for your cheesecake not only enhances its appeal but also reflects the sophisticated preppy aesthetic. Here are some plating techniques and pairing suggestions that will elevate your cheesecake experience.
Plating Techniques
- Layered Elegance: For a stunning visual, consider layering your cheesecake with fresh fruit, such as sliced strawberries or blueberries, between the layers. This not only adds flavor but also creates a beautiful contrast of colors.
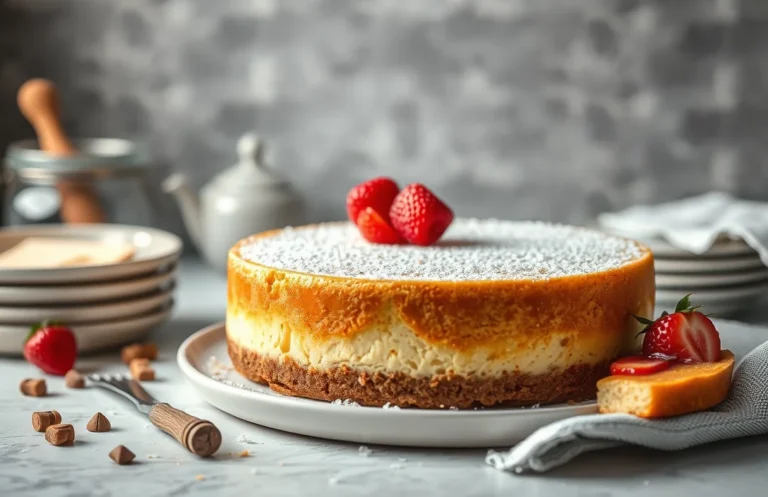
- Chic Garnishes: A simple sprinkle of powdered sugar or a drizzle of chocolate sauce can transform a plain cheesecake into a work of art. Use a sieve for powdered sugar to achieve a delicate finish.
- Elegant Serveware: Present your cheesecake on a classic white porcelain plate or a patterned platter to enhance its visual appeal. This simple choice can elevate the overall dining experience.
Pairing Suggestions
- Coffee or Tea: Serve your cheesecake with a side of freshly brewed coffee or a fragrant Earl Grey tea. The warm beverages complement the richness of the cheesecake beautifully.
- Fruit Compote: A homemade fruit compote made from simmering berries with a touch of sugar can add a refreshing tartness. Aim for a balance of sweetness and acidity to cut through the creamy cheesecake.
- Whipped Cream: A dollop of lightly sweetened whipped cream is always a classic pairing. Consider adding a splash of vanilla extract for extra depth of flavor.
Quick Recipe Summary
This section provides a concise overview of the essential ingredients and steps for creating the perfect cheesecake that embodies a preppy kitchen aesthetic. Having these details at a glance will make your baking process smoother and more enjoyable!
Quick Ingredients List
- Crust:
- 1 ½ cups graham cracker crumbs (150g)
- ½ cup unsalted butter, melted (115g)
- ¼ cup granulated sugar (50g)
- Filling:
- 4 (8 oz) packages cream cheese, softened (900g)
- 1 ¼ cups granulated sugar (250g)
- 1 teaspoon vanilla extract
- 4 large eggs
- 1 cup sour cream (240g)
- ¼ cup all-purpose flour (30g)
Basic Steps Overview
- Preheat your oven to 325°F (163°C). This ensures your cheesecake bakes evenly.
- Prepare the crust: In a mixing bowl, combine graham cracker crumbs, melted butter, and sugar. Mix until crumbly, then press firmly into the bottom of a 9-inch springform pan.
- Mix the filling: In a large bowl, beat the cream cheese until smooth. Gradually add sugar and vanilla, mixing until well combined. Add eggs one at a time, mixing on low until just blended.
- Finish the filling: Fold in sour cream and flour gently. Pour over the crust, smoothing the top with a spatula.
- Bake for 50-60 minutes. The center should slightly jiggle when you gently shake the pan. Turn off the oven and crack the door; let it cool inside for 1 hour.
- Chill the cheesecake in the fridge for at least 4 hours, preferably overnight, before slicing.
Chef’s tip: For a crack-free surface, avoid overmixing the batter and ensure your cream cheese is at room temperature.
Quick Summary
| Prep Time | Cook Time | Total Time | Servings |
|---|---|---|---|
| 20 minutes | 60 minutes | 3 hours (including chilling) | 8 |
- Prepare the crust: Combine 1 ½ cups graham cracker crumbs, ½ cup melted butter, and ¼ cup sugar.
- Mix the filling: Blend 24 oz cream cheese, ¾ cup sugar, and 3 eggs until smooth.
- Bake at 325°F: Pour filling into the crust and bake for 60 minutes.
- Cool and chill: Let it cool for 1 hour, then refrigerate for at least 2 hours.
- Top with fruit: Add fresh berries or fruit compote before serving.
- Tip: Ensure cream cheese is at room temperature for a lump-free batter.
- Tip: Bake in a water bath to prevent cracks on the surface.
Frequently Asked Questions
Can I make this cheesecake ahead of time? How to store and reheat?
Absolutely! You can make the cheesecake up to 2 days in advance; store it in the refrigerator covered tightly with plastic wrap, and it doesn’t need reheating—just serve it chilled.
What can I substitute for cream cheese?
You can use mascarpone cheese or a blend of ricotta and sour cream as a substitute for cream cheese, but the texture and flavor might be slightly different.
How do I know when it’s done?
Your cheesecake is done when the edges are set but the center still has a slight jiggle; it will firm up as it cools. It should also have a light golden color around the edges.
Can I freeze this cheesecake? How long does it last?
You can freeze the cheesecake for up to 3 months wrapped tightly in plastic and then aluminum foil. Just thaw it in the fridge overnight before serving for the best texture.
What if I don’t have a springform pan?
If you don’t have a springform pan, you can use a regular cake pan lined with parchment paper; just ensure it’s tightly sealed when baking to prevent leaks. Keep in mind, it may be a bit tricky to remove without the springform feature.

- Make Cheesecake Up to 3 Days Ahead: Tips for Best Flavor & Texture - March 4, 2026
- Easy No-Bake Cool Doen Cheesecake: Quick Recipe & Tips - March 4, 2026
- Decadent Dulce de Leche Cheesecake: Easy Step-by-Step Recipe - March 4, 2026