Stylish Strawberry Cheesecake Recipe: Easy & Elegant for Any Occasion
Strawberry cheesecake is the ultimate dessert that feels like a warm hug. Creamy, rich, and adorned with vibrant strawberries, it’s perfect for celebrations or a simple weeknight treat. Each slice melts in your mouth, making it a favorite among friends and family. Trust me, you’ll want to go back for seconds!
Get ready for a deliciously simple strawberry cheesecake that takes just 30 minutes to prepare, has a cook time of 60 minutes, serves 8, and is easy enough for any home cook to master.
| Prep Time | 30 minutes |
|---|---|
| Cook Time | 60 minutes |
| Total Time | 90 minutes |
| Servings | 8 |
| Difficulty | Easy |
Story of Strawberry Cheesecake
The story of strawberry cheesecake is a delightful blend of rich history and vibrant flavors. This dessert has roots that trace back to ancient Greece, evolving over centuries into the creamy, luscious treat we know today, especially when adorned with fresh strawberries.
- Origin of Cheesecake: Traditional cheesecake has origins in ancient Greece, where it was served to athletes during the first Olympic Games in 776 B.C. It was made with simple ingredients like cheese, honey, and flour. Over time, variations developed, particularly in Italy and New York, leading to the rich, dense cheesecakes that are beloved worldwide today.
- Strawberry Variations: The addition of strawberries to cheesecake became popular in the 20th century, as fresh fruits were increasingly used to elevate desserts. The vibrant red berries not only add a pop of color but also provide a refreshing contrast to the creamy cheesecake base, making it a favorite choice for summer gatherings.
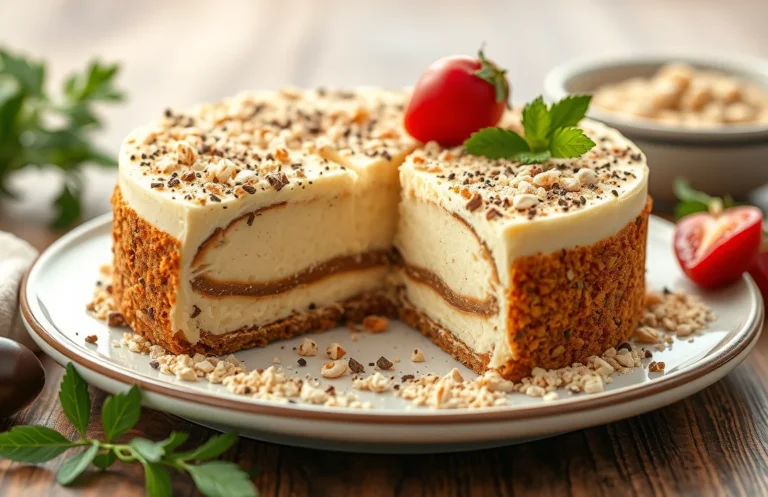
- Special Occasions for Serving: Strawberry cheesecake is often associated with celebrations and special occasions. Whether it’s a birthday, anniversary, or holiday gathering, this dessert brings a touch of elegance to any table. Its stylish presentation, especially when topped with glossy strawberry glaze, makes it a showstopper that impresses guests.
Ingredients for Strawberry Cheesecake
This section provides a complete list of ingredients needed to create a delicious strawberry cheesecake, emphasizing the key components that contribute to its rich flavor and creamy texture. Having all your ingredients ready and measured out will streamline your baking process, ensuring a smooth preparation and successful outcome.
| Item | Amount/Specification | Notes |
|---|---|---|
| Cream Cheese | 24 ounces (680g) | Softened, full-fat for best flavor |
| Sugar | 1 cup (200g) | Granulated sugar |
| Sour Cream | 1 cup (240g) | Full-fat for creaminess |
| Vanilla Extract | 2 teaspoons | Pure vanilla for best flavor |
| Eggs | 3 large | Room temperature for even mixing |
| Strawberries | 1 ½ cups (225g) | Fresh, hulled and sliced |
| Graham Cracker Crumbs | 1 ½ cups (150g) | Finely crushed for crust |
| Unsalted Butter | ½ cup (115g) | Melted |
| Salt | ¼ teaspoon | Enhances sweetness |
- For a gluten-free option, substitute graham cracker crumbs with crushed gluten-free cookies.
- If you prefer a lighter version, you can use low-fat cream cheese and sour cream.
- Ensure the cream cheese is fully softened to avoid lumps in your cheesecake batter.
- Fresh strawberries are ideal, but you can use frozen strawberries; just thaw and drain excess liquid.
Necessary Kitchen Equipment
Before diving into creating your strawberry cheesecake, it’s essential to gather the right tools to ensure a smooth preparation process. Having the proper equipment on hand not only saves time but also helps achieve the best results in texture and flavor.
- Mixing Bowls: You will need at least two medium-sized mixing bowls. One will be for the cream cheese filling and the other for mixing the crust ingredients. Make sure they are sturdy and easy to handle, as you will be using a hand mixer or a stand mixer to blend the cream cheese until smooth.
- Springform Pan: A 9-inch springform pan is vital for this cheesecake recipe. It allows for easy removal of the cheesecake once it’s set. Ensure that the pan is properly sealed to prevent any water from the water bath leaking in during baking, which could ruin your cheesecake’s texture.
- Oven Preheating: Preheat your oven to 325°F (160°C) about 15-20 minutes before you plan to bake your cheesecake. This helps maintain an even temperature right from the start, which is crucial for a perfectly baked cheesecake. Remember to check that your oven temperature is accurate with an oven thermometer if you have one.
Chef’s tip: If you notice the cheesecake starting to crack during baking, it may be due to high heat. Consider reducing the temperature slightly for future bakes.
Step-by-Step Instructions
In this section, we’ll break down the process of making your strawberry cheesecake, focusing on three main components: preparing the crust, making the filling, and baking the cheesecake. Each step is crucial for achieving a creamy and delicious dessert, so follow along closely!
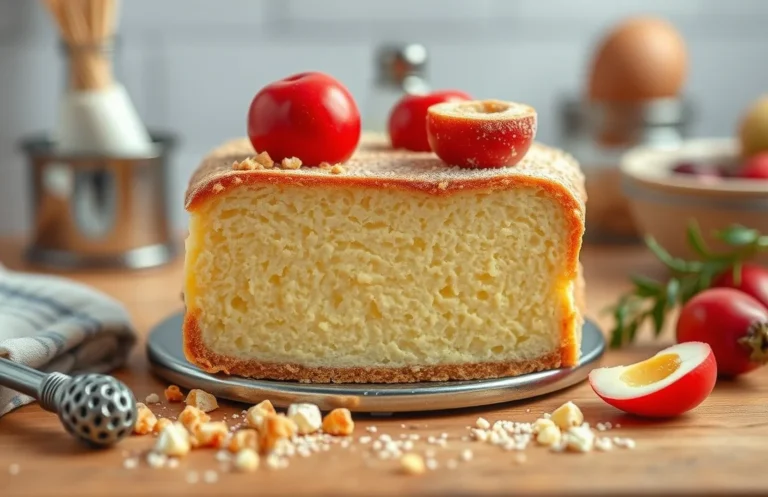
- Prepare the Crust: Preheat your oven to 350°F (175°C). In a mixing bowl, combine 1 ½ cups (150g) of graham cracker crumbs, ⅓ cup (40g) of granulated sugar, and ½ cup (115g) of melted unsalted butter. Mix until the crumbs are evenly moistened and resemble wet sand. Press this mixture firmly into the bottom of a 9-inch (23cm) springform pan to create an even layer.
- Make the Filling: In a large mixing bowl, beat 16 ounces (450g) of cream cheese at room temperature until it’s smooth and creamy, about 2-3 minutes. Gradually add 1 cup (200g) of granulated sugar and beat until well combined. Then, mix in 3 large eggs, one at a time, ensuring each is fully incorporated before adding the next. The mixture should be silky and slightly fluffy. Finally, fold in 1 teaspoon of vanilla extract and 1 cup (240ml) of sour cream until just combined.
- Bake and Cool: Pour the filling over the prepared crust, spreading it evenly. Bake in the preheated oven for 50-60 minutes, or until the edges are set and the center has a slight jiggle. Once baked, turn off the oven and let the cheesecake cool inside for an hour. This helps prevent cracking. Afterward, remove it from the oven and refrigerate for at least 4 hours, preferably overnight, before serving.
Pro Tips and Common Mistakes
Creating a perfectly smooth and creamy strawberry cheesecake can be a challenge, but with the right techniques and precautions, you can avoid common pitfalls. This section shares professional tips to help you achieve that luscious texture while avoiding cracks and ensuring proper cooling.
- Achieving a Creamy Texture: Start with room temperature ingredients, especially the cream cheese. This ensures a smooth batter without lumps. Beat the cream cheese until it’s soft and creamy, about 2-3 minutes on medium speed. Incorporate the eggs one at a time, mixing just until blended to avoid overmixing.
- Avoiding Cracks: To prevent cracks in your cheesecake, remember to bake it in a water bath. Wrap your springform pan with aluminum foil to keep water out, then place it in a larger pan filled with hot water. This helps maintain even baking and moisture. Also, avoid opening the oven door frequently during baking, as this can cause temperature fluctuations.
- Proper Cooling Techniques: After baking, turn off the oven but leave the cheesecake inside for an additional hour. This gradual cooling helps reduce the likelihood of cracks. Once cooled, let it chill in the refrigerator for at least 4 hours or overnight. The cheesecake should feel firm but still slightly jiggly in the center when you remove it from the fridge.
Variations and Substitutions
Creating a delicious strawberry cheesecake can be tailored to fit dietary preferences and ingredient availability. This section covers gluten-free options, vegan alternatives, and flavor variations, ensuring everyone can enjoy this delightful dessert.
Gluten-Free Options
| Item | Amount/Specification | Notes |
|---|---|---|
| Graham cracker crumbs | 1 ½ cups (150g) | Use gluten-free graham crackers or almond flour for the crust. |
| All-purpose flour | 0 | Omit; not needed in a gluten-free version. |
Vegan Alternatives
| Item | Amount/Specification | Notes |
|---|---|---|
| Cream cheese | 2 cups (450g) | Substitute with vegan cream cheese or soaked cashews blended until smooth. |
| Eggs | 3 large | Replace with 1 cup of unsweetened applesauce or flaxseed meal mixed with water (1 tablespoon flaxseed meal + 2.5 tablespoons water = 1 egg). |
Flavor Variations
- Chocolate Strawberry Cheesecake: Add ½ cup of cocoa powder to the cream cheese mixture for a chocolate twist.
- Mint Strawberry Cheesecake: Include 1 teaspoon of mint extract for a refreshing flavor.
- Mixed Berry Cheesecake: Substitute half the strawberries with raspberries or blueberries for a berry medley.
Chef’s tip: Always taste your filling before baking; adjust the sweetness or acidity to your liking!
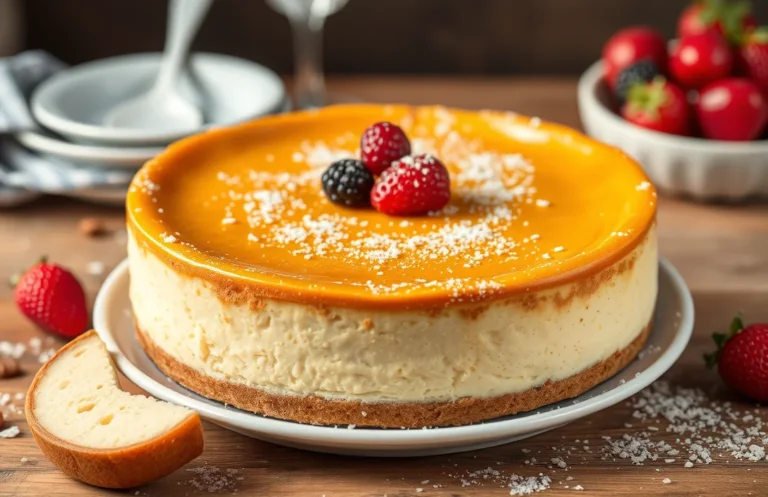
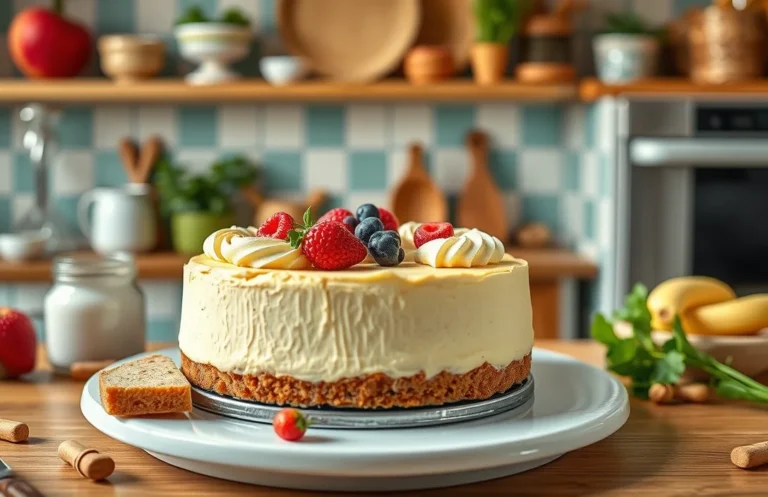
Serving and Plating Suggestions
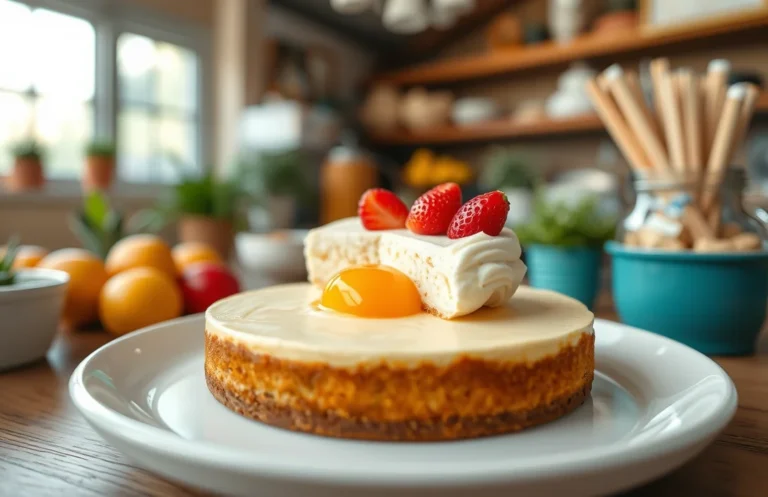
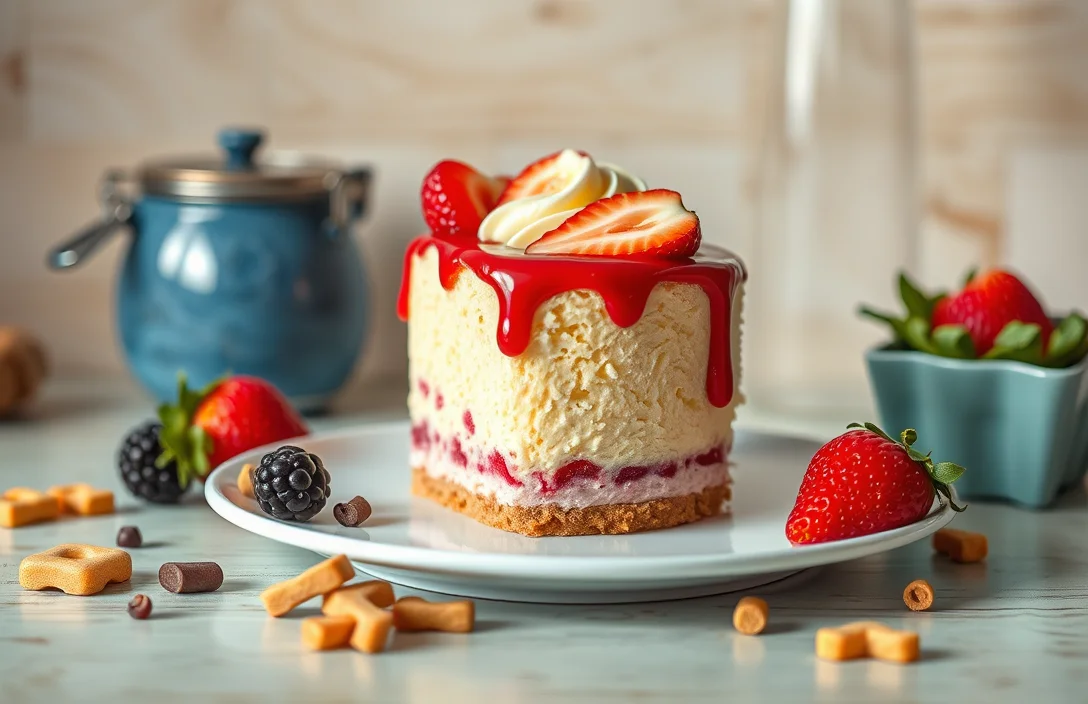
Serving your strawberry cheesecake beautifully can elevate its appeal and make it feel extra special. Here are some ideas for garnishing and pairing that will enhance both the presentation and the flavor of your dessert.
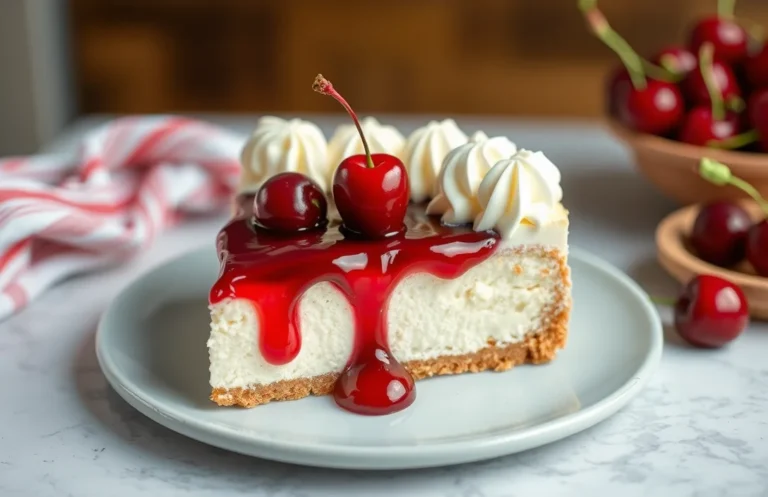
Garnishing with Strawberries
- Fresh Strawberries: Arrange whole or halved fresh strawberries on top of the cheesecake for a vibrant look. Aim for about 10-12 strawberries to cover the surface.
- Strawberry Purée: Drizzle a homemade or store-bought strawberry purée around the cheesecake. To make your own, blend 1 cup of fresh strawberries with 2 tablespoons of sugar until smooth.
- Mint Leaves: Add a few fresh mint leaves for a pop of green color and a refreshing flavor contrast. Place them strategically around the strawberries for an attractive display.
Serving with Whipped Cream
Whipped cream adds a light and airy touch to your cheesecake. Here’s how to serve it:
- Make Fresh Whipped Cream: Whip 1 cup of heavy cream with 2 tablespoons of powdered sugar and 1 teaspoon of vanilla extract until soft peaks form.
- Pipe or Dollop: Use a piping bag to create decorative swirls on top of the cheesecake or simply dollop it on each slice before serving.
Pairing Suggestions
| Pairing | Description |
|---|---|
| Tea | A light herbal or green tea complements the richness of cheesecake. |
| Coffee | A smooth coffee with a bit of cream balances the sweetness perfectly. |
| Wine | A glass of moscato offers a sweet contrast to the cheesecake. |
Chef’s tip: Always chill your cheesecake for at least 4 hours before serving for the best texture and flavor.
Quick Summary
| Prep Time | Cook Time | Total Time | Servings |
|---|---|---|---|
| 25 minutes | 60 minutes | 85 minutes | 8 |
- Prepare crust: Mix 1 ½ cups graham cracker crumbs with ½ cup melted butter.
- Beat filling: Whisk 24 oz cream cheese with 1 cup sugar and 3 eggs until smooth.
- Mix strawberries: Blend 2 cups fresh strawberries with ¼ cup sugar and 1 tbsp lemon juice.
- Bake cheesecake: Pour filling into crust and bake at 325°F for 60 minutes.
- Cool properly: Let cheesecake cool in the oven for 1 hour, then chill in the fridge for 4 hours.
- Tip: Use room temperature cream cheese for a smoother texture.
- Tip: Don’t overmix to prevent cracks in the cheesecake.
- Tip: Always chill overnight for the best flavor and texture.
Frequently Asked Questions
Can I make this cheesecake ahead of time? How do I store and reheat it?
You can absolutely make this cheesecake up to two days in advance. Store it in the refrigerator, covered tightly with plastic wrap, and serve it chilled, as reheating is not recommended for the best texture.
What can I substitute for cream cheese in this recipe?
If you’re looking for a substitute, you can use mascarpone cheese for a similar creamy texture or Greek yogurt for a lighter version, adjusting the sweetness accordingly.
How do I know when my cheesecake is done?
Your cheesecake is done when the edges are set and the center is slightly jiggly, which usually takes about 55-60 minutes at 325°F (165°C). It will continue to firm up as it cools, so don’t worry if it seems a bit soft in the middle.
Can I freeze this cheesecake? How long does it last?
You can freeze this cheesecake for up to three months if wrapped tightly in plastic wrap and aluminum foil. Just thaw it in the fridge overnight before serving for the best texture.
What if I don’t have a springform pan?
If you don’t have a springform pan, you can use a 9-inch round cake pan lined with parchment paper; just be sure to let it cool completely before trying to remove it, as it will be more delicate.

- Decadent Peanut Butter No-Bake Cheesecake: Easy Recipe to Indulge - April 3, 2026
- Delicious Mango No-Bake Cheesecake: Step-by-Step Recipe - April 3, 2026
- Decadent Raspberry No-Bake Cheesecake: Easy Step-by-Step Recipe - April 3, 2026