Perfect Cheesecake Recipe: Tips & Variations for Preppy Kitchen Style
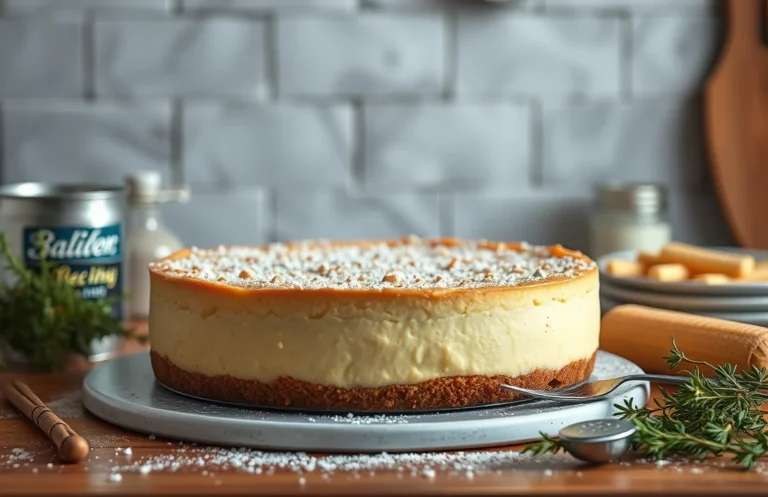
If you’re craving a dessert that’s creamy, dreamy, and utterly satisfying, this cheesecake recipe inspired by the Preppy Kitchen is just what you need. With a buttery graham cracker crust and a rich filling that melts in your mouth, it’s the kind of treat that turns any meal into a special occasion, whether it’s a cozy weeknight dinner or a festive gathering.
This cheesecake is easy to make and is sure to impress. Total time: 6 hours (including chilling), Difficulty: Easy, Servings: 8. Follow along for step-by-step instructions that will guide you through achieving the perfect texture and flavor, plus tips for variations that will make it your own.
| Prep Time | Cook Time | Total Time | Servings | Difficulty |
|---|---|---|---|---|
| 20 minutes | 1 hour | 6 hours | 8 | Easy |
Cheesecake Story
Cheesecake holds a special place in dessert culture, rich with history and tradition. Its creamy texture and delightful flavors have made it a beloved treat across the world, perfect for celebrations and special occasions.
History of Cheesecake
The origins of cheesecake date back to ancient Greece, where it was served to athletes during the first Olympic Games in 776 B.C. Made from simple ingredients like cheese, flour, and honey, it was considered a source of energy. Over the centuries, different cultures embraced and adapted the recipe:
- Roman Era: The Romans introduced cheesecake to Europe, refining the recipe with eggs and creating a firmer texture.
- Medieval Europe: In medieval England, cheesecakes became popular at banquets, often flavored with fruits and spices.
- Modern Era: The New York-style cheesecake, characterized by its dense and creamy texture, emerged in the 20th century and remains a classic favorite today.
Special Occasions for Cheesecake
Cheesecake is often the star of many celebrations:
- Birthdays: A rich cheesecake can be the perfect birthday cake substitute, topped with fresh fruit or chocolate.
- Holidays: During festive seasons, it’s common to find variations like pumpkin or peppermint cheesecake.
- Weddings: Couples are increasingly opting for tiered cheesecake instead of traditional cakes.
“A slice of cheesecake can turn an ordinary day into a celebration.”
Understanding the history and significance of cheesecake enhances our appreciation for this delightful dessert. It’s not just a treat; it’s a part of culinary heritage that continues to evolve in kitchens everywhere.
Ingredients List
To create a delicious cheesecake, having the right ingredients in precise amounts is essential. Below, you’ll find a complete list of everything you’ll need for the creamy filling and the crust, ensuring your cheesecake is rich, flavorful, and has the perfect texture.
| Item | Amount/Specification | Notes |
|---|---|---|
| Cream Cheese | 24 ounces (680g) | Softened, at room temperature |
| Sugar | 1 cup (200g) | Granulated sugar |
| Eggs | 4 large | At room temperature |
| Sour Cream | 1 cup (240g) | For creaminess |
| Vanilla Extract | 2 teaspoons | Pure vanilla for flavor |
| Graham Crackers | 1 ½ cups (150g) | Crushed for crust |
| Unsalted Butter | ½ cup (115g) | Melted for crust |
| Salt | ¼ teaspoon | Enhances flavor |
- For a gluten-free option, substitute graham crackers with almond flour or gluten-free cookie crumbs.
- Make sure the cream cheese is fully softened to avoid lumps in your filling.
- Room temperature eggs incorporate better than cold ones, leading to a smoother batter.
Kitchen Equipment
To create a perfect cheesecake, having the right kitchen equipment is crucial. The tools you choose can significantly impact the texture and overall outcome of your dessert. Here’s a list of essential items you’ll need to make your cheesecake effortlessly.
- Mixing Bowls: You will need at least two mixing bowls — one large for the cream cheese mixture and a smaller one for the crust ingredients. A glass or stainless steel bowl is ideal for mixing, as they are easy to clean and won’t retain odors. Ensure that your bowls are completely dry before starting to avoid any issues with the batter.
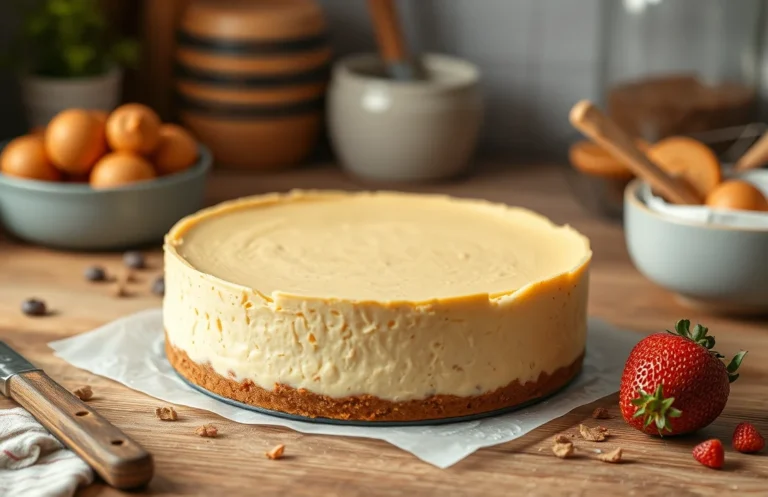
- Springform Pan: A 9-inch springform pan is perfect for this cheesecake. Its removable sides allow for easy release, ensuring your cheesecake maintains its beautiful shape. Before pouring in the batter, line the bottom with parchment paper to prevent sticking and make it easier to lift out after baking.
- Electric Mixer: A stand mixer or hand mixer will make achieving a smooth and creamy batter much easier. If using a stand mixer, start on low speed to combine the ingredients, then increase to medium-high. This helps incorporate air into the batter, giving your cheesecake a light texture. If you have a hand mixer, be patient and mix thoroughly to avoid lumps.
Chef’s tip: Always allow your cream cheese to come to room temperature for about 30 minutes before mixing. This ensures a smoother batter and prevents lumps.
Cooking Instructions
In this section, we will walk through the essential steps to prepare a delicious cheesecake inspired by Preppy Kitchen. From creating a buttery crust to achieving a smooth, creamy filling, each step requires careful attention to detail for the best results.
- Preparing the Crust: Preheat your oven to 350°F (175°C). In a medium mixing bowl, combine 1 ½ cups (150g) of graham cracker crumbs, ½ cup (100g) of granulated sugar, and ½ cup (115g) of melted unsalted butter. Stir until the mixture resembles wet sand. Press the mixture firmly into the bottom of a 9-inch (23cm) springform pan, making sure it’s even. Bake for 8-10 minutes until slightly golden and fragrant, then allow it to cool completely.
- Making the Filling: In a large mixing bowl, beat 24 ounces (680g) of cream cheese with an electric mixer on medium speed until smooth and creamy, about 2-3 minutes. Gradually add 1 cup (200g) of granulated sugar and continue mixing until fully incorporated, about 1 minute. Add 3 large eggs, one at a time, mixing well after each addition. Finally, mix in 1 teaspoon of vanilla extract and ½ cup (120ml) of sour cream until the filling is velvety and well combined.
- Baking Process: Pour the cheesecake filling over the cooled crust in the springform pan. Smooth the top with a spatula. To prevent cracking, place a shallow pan of water on the lower rack of the oven. Bake for 50-60 minutes until the edges are set and the center still has a slight jiggle. Turn off the oven and leave the cheesecake inside for 1 hour to cool gradually. Remove from the oven, and refrigerate for at least 4 hours, or overnight for best results.
Pro Tips
Achieving the perfect cheesecake texture requires attention to detail and a few expert techniques. Follow these tips to avoid common pitfalls and ensure your cheesecake is creamy and crack-free.
Avoiding Cracks
- Mix ingredients gently: When combining the cream cheese and sugar, mix on low speed until just smooth. Overmixing introduces air, which can lead to cracks during baking.
- Use a water bath: Place your cheesecake pan in a larger pan filled with hot water while baking. This gentle cooking method helps maintain moisture and prevents cracks, giving your cheesecake a smooth top.
- Cool gradually: After baking, turn off the oven and crack the door open. Let the cheesecake cool in the oven for about 1 hour. This gradual cooling helps prevent sudden temperature changes that can cause cracks.
Proper Cooling Techniques
- Chill completely: Once your cheesecake has cooled in the oven, transfer it to the refrigerator. Allow it to chill for at least 4 hours, or ideally overnight. This resting period helps the flavors meld and the texture to set perfectly.
- Remove from pan carefully: When ready to serve, run a thin knife around the edge of the cheesecake before releasing it from the springform pan. This step helps prevent any sticking or tearing.
- Store properly: Keep any leftovers covered in the refrigerator for up to 5 days. To freeze, wrap tightly in plastic wrap and then foil for up to 3 months. Thaw in the fridge overnight before serving.
Variations and Substitutions
This section explores delicious variations and substitutions for your cheesecake, allowing you to customize it to fit different flavors, dietary needs, and preferences. Whether you’re looking to experiment with unique flavors or need a gluten-free option, these tips will help you create a cheesecake that suits your style.
Flavored Cheesecakes
Transform your classic cheesecake into a flavor sensation! Here are some delightful options:
- Chocolate Cheesecake: Add ½ cup (50g) unsweetened cocoa powder to the cream cheese mixture for a rich chocolate flavor.
- Fruit Cheesecake: Fold in 1 cup (150g) of pureed fruit (like strawberries, raspberries, or mango) into the batter for a fresh twist.
- Matcha Cheesecake: Mix in 2 tablespoons (15g) of matcha powder to the cream cheese for a vibrant green hue and unique flavor.
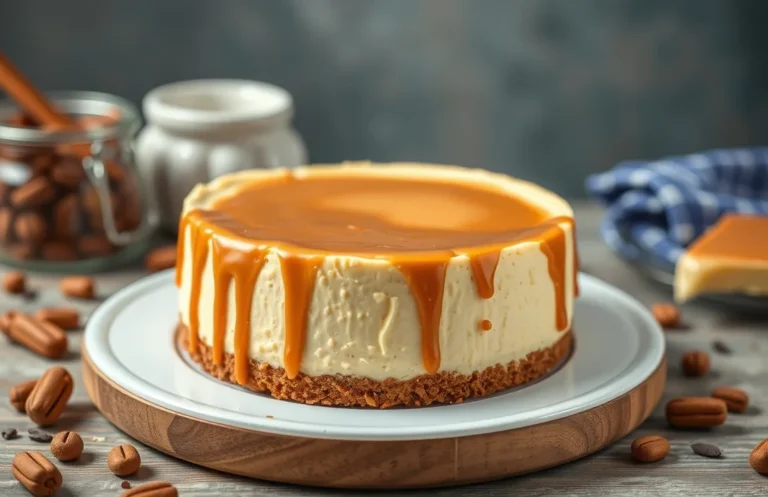
- Caramel Pecan Cheesecake: Swirl ½ cup (120ml) of caramel sauce into the batter and top with chopped pecans before baking.
Gluten-Free Options
If you or your guests have gluten sensitivities, you can easily make your cheesecake gluten-free:
- Crust: Use 1 ½ cups (150g) of almond flour mixed with 3 tablespoons (45g) of melted butter and 2 tablespoons (30g) of sugar as a crust alternative.
- Sweeteners: Substitute granulated sugar with coconut sugar or a sugar substitute like erythritol for a lower-carb option.
“Chef’s tip: Always check your labels when using pre-made crusts or ingredients to ensure they are gluten-free.”
| Variation | Ingredient Change |
|---|---|
| Chocolate | ½ cup cocoa powder |
| Fruit | 1 cup pureed fruit |
| Matcha | 2 tablespoons matcha powder |
| Gluten-Free Crust | 1 ½ cups almond flour |
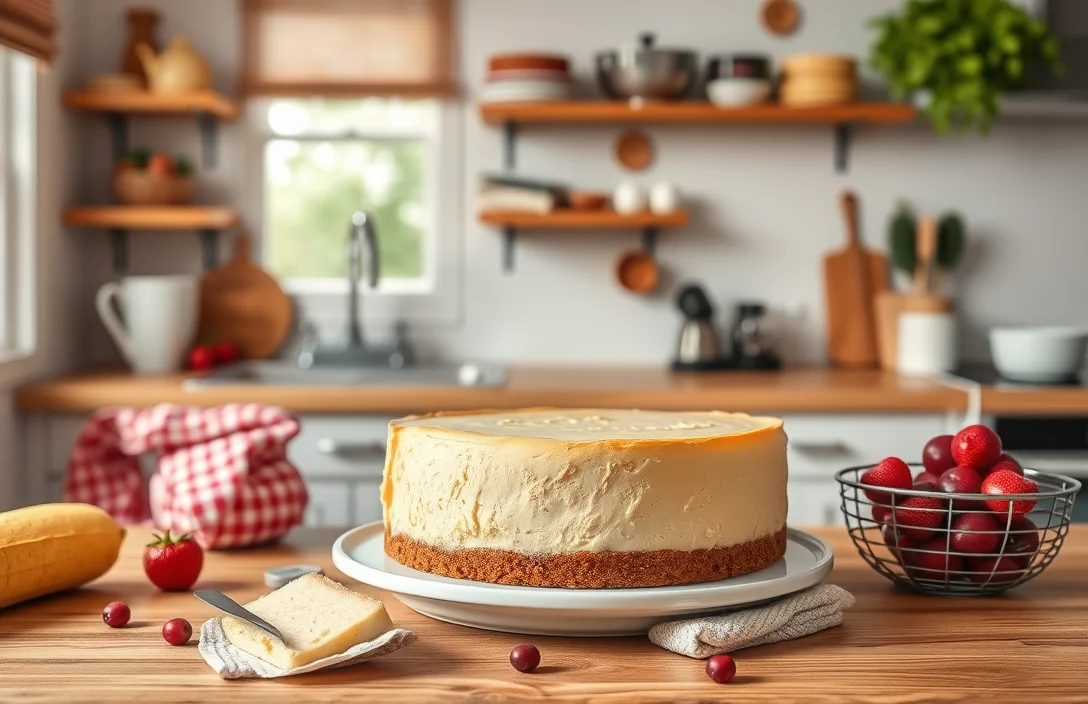
Serving Suggestions
Presenting your cheesecake beautifully can elevate the dessert experience. By adding garnishes and pairing with sauces, you not only enhance the visual appeal but also complement the rich flavors of the cheesecake. Here are some creative ideas to make your cheesecake shine on any occasion.
Garnishing
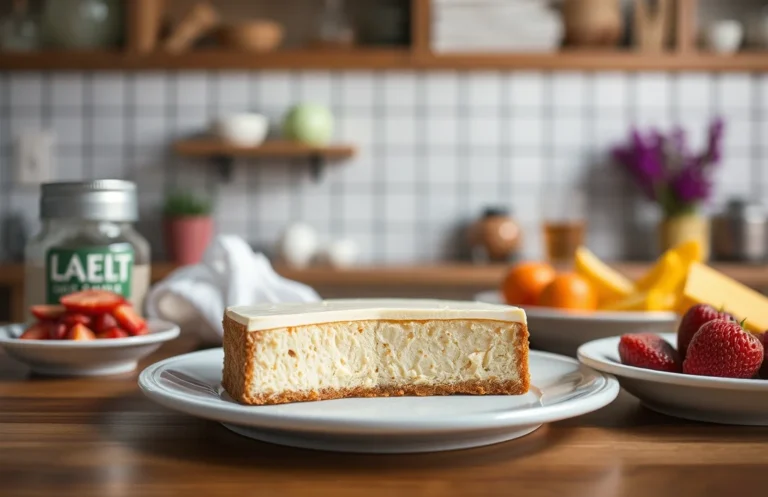
- Fresh Berries: Top your cheesecake with a mix of strawberries, blueberries, and raspberries for a pop of color and a burst of acidity. Aim for about 1 cup (150g) of mixed berries.
- Mint Leaves: Scatter a few fresh mint leaves around the plate for a refreshing touch, adding about 5-6 leaves.
- Chocolate Shavings: Use a vegetable peeler to create shavings from a chocolate bar. About 2 ounces (57g) will do for a delightful chocolaty contrast.
Pairing with Sauces
Adding a sauce can enhance the cheesecake’s flavor profile and provide a delightful contrast in texture. Here are some classic and simple sauces you can prepare:
| Sauce | Ingredients | Instructions |
|---|---|---|
| Raspberry Sauce | 1 cup (150g) raspberries, ¼ cup (50g) sugar, 2 tablespoons lemon juice | Combine all ingredients in a saucepan over medium heat. Cook for 5-7 minutes until berries break down, then strain to remove seeds. |
| Chocolate Ganache | 4 ounces (113g) dark chocolate, ½ cup (120ml) heavy cream | Heat the cream until just simmering, pour over chopped chocolate, and stir until smooth. |
Pro Tip: Serve the cheesecake slightly chilled for the best texture and flavor. Enjoy your beautifully plated dessert!
Quick Summary
| Prep Time | Cook Time | Total Time | Servings |
|---|---|---|---|
| 20 minutes | 60 minutes | 1 hour 20 minutes | 8 servings |
- Create the crust: Combine 1 ½ cups of graham cracker crumbs with ½ cup of melted butter.
- Prepare the filling: Beat 16 oz of cream cheese with 1 cup of sugar until smooth.
- Add eggs: Mix in 3 large eggs one at a time for a creamy texture.
- Bake in a water bath: Prevent cracks by placing the cheesecake in a pan with hot water.
- Chill before serving: Refrigerate for at least 4 hours to set properly.
- Tip: Use room temperature ingredients for a smoother batter.
- Tip: Avoid overmixing after adding eggs to prevent air bubbles.
Frequently Asked Questions
Can I make this cheesecake ahead of time? How to store and reheat?
You can make this cheesecake up to 2 days in advance. Store it covered in the refrigerator, and if you need to reheat, do so gently in an oven preheated to 300°F for about 10 minutes.
What can I substitute for cream cheese?
You can substitute mascarpone cheese for a creamier texture, or use a mix of ricotta and sour cream for a lighter version. Just keep in mind that the flavor and consistency may vary slightly.
How do I know when the cheesecake is done?
The cheesecake is done when the edges are set but the center still has a slight jiggle, which usually takes about 55-60 minutes at 325°F. It will continue to firm up as it cools, so don’t overbake!
Can I freeze this cheesecake? How long does it last?
Yes, you can freeze the cheesecake for up to 3 months. Allow it to cool completely, then wrap it tightly in plastic wrap and aluminum foil before placing it in the freezer.
What if I don’t have a springform pan?
If you don’t have a springform pan, you can use a 9-inch round cake pan lined with parchment paper to help with removal. Just be gentle when serving, as it may be more challenging to get out in one piece.

- Make Cheesecake Up to 3 Days Ahead: Tips for Best Flavor & Texture - March 4, 2026
- Easy No-Bake Cool Doen Cheesecake: Quick Recipe & Tips - March 4, 2026
- Decadent Dulce de Leche Cheesecake: Easy Step-by-Step Recipe - March 4, 2026