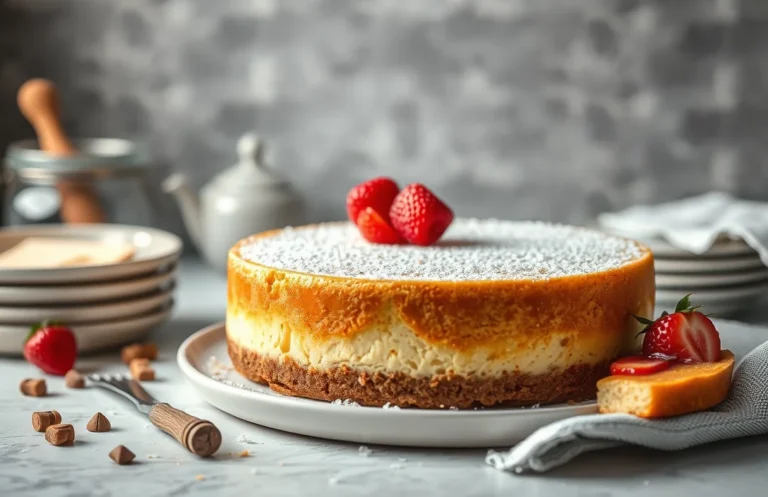
Decadent Cheesecake with Brownie Bottom: Easy Step-by-Step Recipe
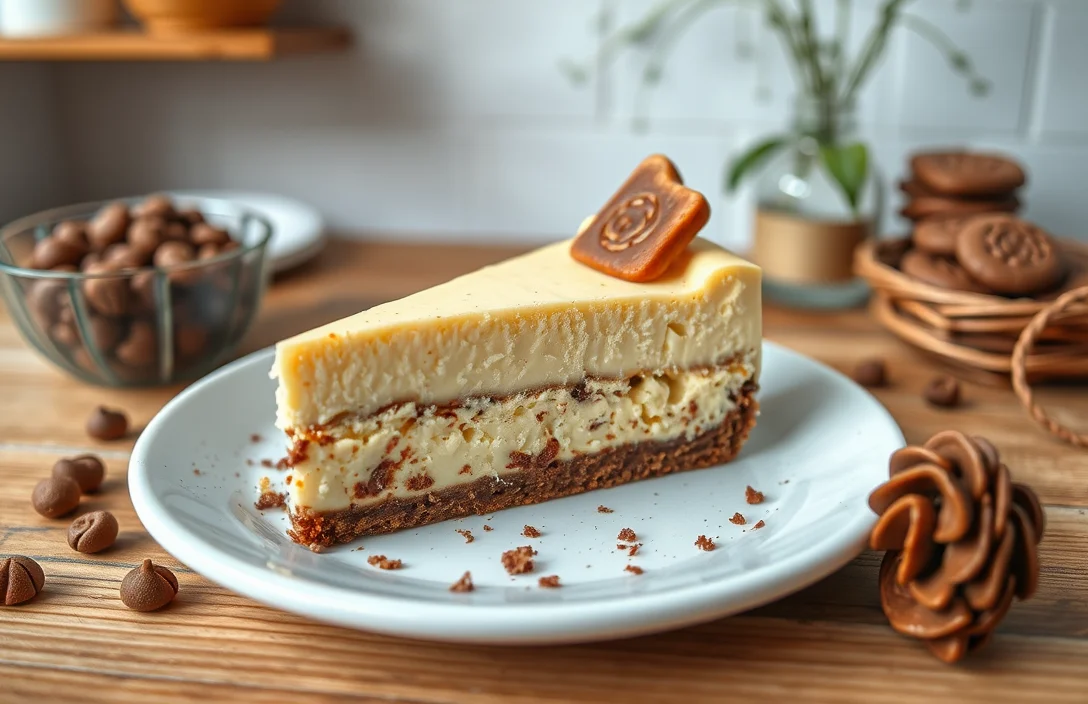
If you’re craving something rich and indulgent, this cheesecake with a brownie bottom is what you need. The fudgy brownie base perfectly contrasts the creamy cheesecake, creating a dessert that’s both decadent and comforting. Imagine serving this at a gathering or enjoying a slice after dinner—your taste buds will be forever grateful!
Total Time: 2 hours 30 minutes Difficulty: Medium Servings: 12
| Prep Time | Cook Time | Total Time | Servings | Difficulty |
|---|---|---|---|---|
| 30 minutes | 1 hour | 2 hours 30 minutes | 12 | Medium |
Origins of Brownie Cheesecake
The brownie cheesecake, a delightful fusion of two beloved desserts, boasts a rich history steeped in American culture. This unique combination marries the fudgy, chocolatey goodness of brownies with the creamy, tangy texture of cheesecake, creating a decadent treat that has become a favorite for many special occasions.
Cultural Background
Brownies originated in the United States in the late 19th century, while cheesecakes have roots tracing back to ancient Greece. The idea of combining the two desserts likely arose in the mid-20th century, as home bakers began experimenting with flavor profiles and textures. This innovative treat reflects the American spirit of creativity in the kitchen, allowing for variations that cater to different tastes and dietary preferences.
Special Occasions
Brownie cheesecake is often served at various celebrations, from birthdays to holidays, due to its indulgent nature. Its appealing presentation and rich flavors make it a showstopper at gatherings. Here are some occasions where brownie cheesecake shines:
- Birthdays: A delicious alternative to traditional cake.
- Holidays: Perfect for festive gatherings and potlucks.
- Family Reunions: A crowd-pleaser that brings everyone together.
Chef’s tip: Serve with a drizzle of chocolate or caramel sauce for an extra touch!
Whether enjoyed at a festive gathering or a quiet evening at home, brownie cheesecake’s unique blend of textures and flavors continues to captivate dessert lovers everywhere.
Ingredients for Brownie Base
The brownie base is the heart of this cheesecake, adding a rich chocolate flavor and a fudgy texture that perfectly complements the creamy cheesecake layer. It’s essential to use high-quality ingredients for the best results, so let’s get into the specifics of what you’ll need to create this decadent layer.
| Item | Amount/Specification | Notes |
|---|---|---|
| Unsalted butter | ½ cup (115g) | For richness; melted and slightly cooled |
| Granulated sugar | 1 cup (200g) | Sweetness; helps create a shiny top |
| Brown sugar | ½ cup (100g) | Adds moisture and a hint of caramel flavor |
| Cocoa powder | ⅓ cup (40g) | Use unsweetened for best results |
| All-purpose flour | ½ cup (60g) | For structure; sifted |
| Salt | ¼ teaspoon | Enhances flavor |
| Eggs | 2 large | Room temperature for better mixing |
| Chocolate (semisweet or dark) | 4 ounces (113g) | Chopped; for a fudgy texture |
- Tip: If you’re lactose intolerant, you can substitute the butter with a dairy-free alternative such as coconut oil or margarine.
- Tip: For a less sweet brownie base, you can reduce the granulated sugar by ¼ cup.
- Tip: Ensure your chocolate is finely chopped to melt evenly; this prevents lumps in your batter.
Ingredients for Cheesecake Filling
This section outlines the essential ingredients you’ll need to create a creamy and delicious cheesecake filling that pairs perfectly with the rich brownie bottom. Each ingredient plays a crucial role in achieving that velvety texture and balanced sweetness.
| Item | Amount/Specification | Notes |
|---|---|---|
| Cream Cheese | 24 ounces (680g) | Softened to room temperature for easy mixing |
| Sugar | 1 cup (200g) | Granulated sugar is ideal for sweetness |
| Sour Cream | ½ cup (120g) | Adds creaminess and tanginess |
| Vanilla Extract | 2 teaspoons | Use pure vanilla extract for best flavor |
| Eggs | 3 large | At room temperature for even mixing |
| All-purpose Flour | 2 tablespoons (15g) | Helps stabilize the cheesecake |
- Ensure the cream cheese is softened to prevent lumps; you can microwave it for 10-15 seconds if needed.
- For a lower-fat version, you can substitute part of the cream cheese with Greek yogurt.
- Watch for overmixing once the eggs are added; this can cause cracks in the cheesecake.
Essential Kitchen Tools
To create the perfect cheesecake with a brownie bottom, having the right kitchen tools at your disposal is essential. These tools will streamline your preparation, ensuring that you achieve a smooth batter and a beautifully baked dessert.
| Item | Amount/Specification | Notes |
|---|---|---|
| Mixing Bowls | 2 medium-sized | One for brownie batter, one for cheesecake filling |
| Baking Pan | 9-inch springform pan | Ensures easy removal of the cheesecake |
| Electric Mixer | N/A | Hand or stand mixer for smooth cheesecake filling |
| Spatula | 1 large | For folding in ingredients and smoothing the batter |
| Measuring Cups and Spoons | 1 set each | For accurate measurements of ingredients |
| Rubber Scraper | 1 medium | To scrape down the sides of the bowls |
- For best results, ensure your cream cheese is at room temperature before mixing to avoid lumps.
- Consider lining the bottom of the springform pan with parchment paper for easy removal.
- Keep your tools and workspace clean to prevent cross-contamination and ensure an enjoyable baking experience.
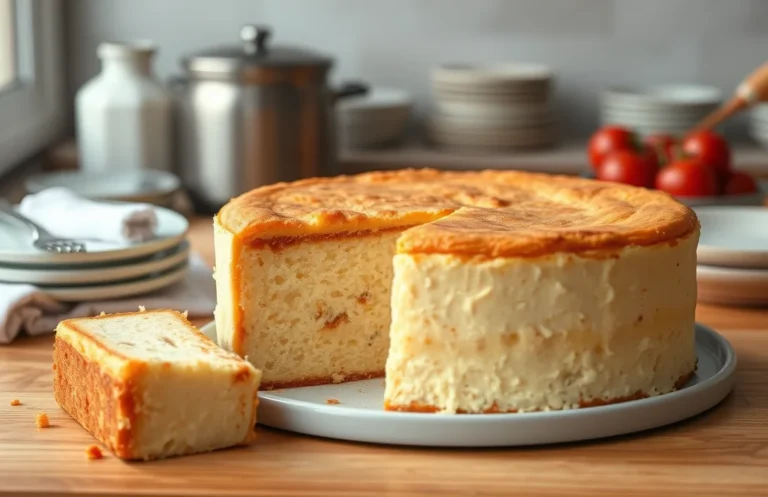
Step-by-Step Baking Instructions
In this section, we’ll walk through the detailed steps to create the rich brownie base and the creamy cheesecake filling. Each step is essential for achieving the perfect cheesecake with a brownie bottom, ensuring a delightful texture and flavor combination.
Preparing the Brownie Base
- Preheat your oven to 350°F (175°C). Prepare an 8-inch (20 cm) round springform pan by greasing it lightly with butter or cooking spray, and lining the bottom with parchment paper for easy removal.
- In a medium saucepan, melt ½ cup (115g) unsalted butter over low heat. Once melted, remove from heat and stir in 1 cup (200g) granulated sugar until well combined. The mixture should look glossy.
- Whisk in 2 large eggs, one at a time, mixing well after each addition until smooth. Add 1 teaspoon of vanilla extract and mix until fully incorporated.
- In a separate bowl, combine ⅓ cup (40g) unsweetened cocoa powder, ½ cup (65g) all-purpose flour, and a pinch of salt. Gradually fold this dry mixture into the wet ingredients until just combined. Be careful not to overmix; the batter should be thick and fudgy.
- Pour the brownie batter into the prepared springform pan and spread it evenly. Bake for 20-25 minutes, or until a toothpick inserted in the center comes out with a few moist crumbs. Let it cool completely before adding the cheesecake filling.
Making the Cheesecake Filling
- In a large mixing bowl, beat 16 ounces (450g) of cream cheese at room temperature with a handheld mixer until smooth and creamy, about 2-3 minutes. Ensure there are no lumps as this will affect the texture.
- Gradually add ½ cup (100g) granulated sugar and continue to beat until combined and fluffy. This should take about 2 minutes. The mixture should feel light and airy.
- Mix in 2 large eggs, one at a time, beating well after each addition. Then add 1 teaspoon of vanilla extract and ½ cup (120ml) sour cream, mixing until smooth. The filling should be creamy and glossy.
- Carefully pour the cheesecake filling over the cooled brownie base, smoothing the top with a spatula. Tap the pan lightly on the counter to remove any air bubbles.
- Bake the cheesecake for 50-60 minutes, or until the edges are set and the center has a slight jiggle. Turn off the oven, crack the door open, and let the cheesecake cool in the oven for about 1 hour. This prevents cracking.
Pro Tips for Perfect Cheesecake
Creating a cheesecake with a brownie bottom can be a delightful challenge, but with the right techniques, you can avoid common pitfalls and achieve a creamy, crack-free dessert. Here are some practical tips to ensure your cheesecake turns out perfectly every time.
Preventing Cracks
- Use a water bath: A water bath, or bain-marie, helps maintain an even temperature while baking. Wrap the bottom of your cheesecake pan with aluminum foil to prevent water from seeping in, and place it in a larger pan filled with hot water. This method keeps your cheesecake moist and reduces the chance of cracks.
- Don’t overbeat the batter: Overmixing can incorporate too much air, leading to cracks as the cheesecake cools. Mix the cream cheese and sugar until smooth, then gently fold in the eggs, mixing just until combined.
- Cool gradually: Once your cheesecake has finished baking, turn off the oven and crack the door ajar. Let it cool in the oven for about an hour before transferring it to the counter. This gradual cooling process helps prevent cracks caused by sudden temperature changes.
Achieving the Right Texture
- Use room temperature ingredients: Make sure your cream cheese, eggs, and sour cream (if using) are at room temperature. This ensures a smoother batter and contributes to a creamy texture. Aim for about 70°F (21°C) for optimal mixing.
- Don’t skip the sour cream: Adding ½ cup (120g) of sour cream enhances the creaminess and adds a slight tang, balancing the sweetness of the brownie base. If you prefer, Greek yogurt can be a great substitute.
- Check for doneness: The cheesecake is done when the edges are set but the center still has a slight jiggle. It will continue to firm up as it cools. This typically takes about 55-65 minutes at 325°F (160°C).
Possible Variations and Substitutions
This section highlights how you can customize your cheesecake with brownie bottom to cater to different dietary preferences and needs. Whether you’re gluten-free or vegan, there are simple substitutions that will still yield a delicious dessert.
Gluten-Free Options
- For a gluten-free brownie base, substitute the all-purpose flour with ½ cup (60g) gluten-free flour blend. Make sure the blend contains xanthan gum for better texture.
- Check that your cocoa powder is labeled gluten-free, as some brands may cross-contaminate during processing.
- Use certified gluten-free chocolate chips if adding to your brownie batter.
Vegan Alternatives
- Replace the cream cheese in the cheesecake layer with 1 cup (240g) of vegan cream cheese. Brands like Tofutti or Kite Hill work well.
- Substitute eggs with ½ cup (120ml) unsweetened applesauce or 2 tablespoons of ground flaxseed mixed with 6 tablespoons of water (let sit for 5 minutes to thicken).
- Use a dairy-free butter alternative for the brownie base, like Earth Balance or coconut oil.
Chef’s tip: Always taste your batter before baking, especially when using substitutes, to ensure the flavors are balanced.
| Ingredient | Substitution |
|---|---|
| All-purpose flour | Gluten-free flour blend |
| Cream cheese | Vegan cream cheese |
| Eggs | Applesauce or flaxseed mixture |
These substitutions will help you cater to various dietary restrictions while still enjoying a rich and satisfying cheesecake with a brownie base.
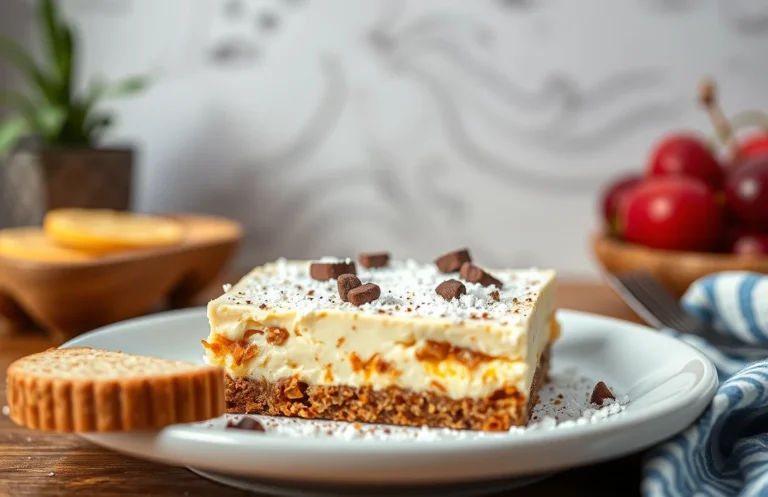
Serving and Plating Ideas
Presenting your cheesecake with brownie bottom can elevate the whole dining experience. Thoughtful garnishing and pairing can enhance the flavors and impress your guests, making each slice not just a dessert, but a beautiful treat.
Garnishes
- Whipped Cream: A dollop of freshly whipped cream on top adds a light and airy contrast to the dense cheesecake and brownie. Whip 1 cup of heavy cream with 2 tablespoons of sugar until soft peaks form.
- Chocolate Shavings: Use a vegetable peeler to create chocolate shavings from a chocolate bar for a decorative touch.
- Berries: Fresh raspberries or strawberries provide a tart contrast to the sweetness. Scatter them around the plate for a pop of color.
- Mint Leaves: A few fresh mint leaves can add a refreshing aromatic element and enhance the presentation.
Beverage Pairings
Choosing the right beverage can really complement the rich flavors of your cheesecake. Here are some great options:
- Coffee: A strong cup of coffee or espresso pairs beautifully with the chocolate flavor of the brownie bottom.
- Red Wine: Consider a light Merlot or a fruity Pinot Noir, which can balance the richness of the cheesecake.
- Milk: For a comforting classic, serve with cold milk, perfect for dipping your fork in between bites.
Chef’s tip: Chill your cheesecake for at least 4 hours before serving; it allows the flavors to meld beautifully.
Quick Summary
| Prep Time | Cook Time | Total Time | Servings |
|---|---|---|---|
| 30 minutes | 50 minutes | 80 minutes | 12 servings |
- Preheat oven to 325°F (163°C) before starting.
- Prepare brownie base by mixing melted butter, sugar, eggs, and cocoa powder.
- Blend cheesecake filling with cream cheese, sugar, eggs, and vanilla until smooth.
- Bake the brownie base for 20 minutes before adding the cheesecake layer on top.
- Cool completely in the fridge for at least 4 hours before serving.
- Tip 1: Use room temperature cream cheese for a lump-free filling.
- Tip 2: Line the pan with parchment paper for easy removal.
- Tip 3: Let the cheesecake cool in the oven with the door cracked to prevent cracks.
Frequently Asked Questions
Can I make this cheesecake with brownie bottom ahead of time? How do I store and reheat it?
You can absolutely make this cheesecake ahead of time; it actually tastes better after chilling overnight. Store it in the refrigerator, covered tightly with plastic wrap, and enjoy it cold or let it sit at room temperature for about 30 minutes before serving.
What can I substitute for cream cheese in the cheesecake layer?
If you’re looking for a substitute, you can use Mascarpone cheese for a similar creamy texture, or Greek yogurt for a lighter option, though it will slightly change the flavor. Just keep in mind that the texture may be a bit different with these alternatives.
How do I know when the cheesecake is done baking?
The cheesecake is done when the edges are set but the center still has a slight jiggle; it will firm up as it cools. You can also check with a toothpick; it should come out mostly clean with a few moist crumbs.
Can I freeze this cheesecake with brownie bottom? How long does it last?
Yes, you can freeze it for up to 3 months without compromising flavor. Just wrap it tightly in plastic wrap and then aluminum foil to prevent freezer burn.
What if I don’t have a springform pan?
If you don’t have a springform pan, you can use a regular round cake pan; just make sure to line the bottom and sides with parchment paper for easy removal. You may need to chill it longer before slicing to help maintain its shape.

- Make Cheesecake Up to 3 Days Ahead: Tips for Best Flavor & Texture - March 4, 2026
- Easy No-Bake Cool Doen Cheesecake: Quick Recipe & Tips - March 4, 2026
- Decadent Dulce de Leche Cheesecake: Easy Step-by-Step Recipe - March 4, 2026