Cherry Cheese Dump Cake: Quick No-Bake Cheesecake Recipe
If you’re craving a dessert that’s as easy as it is delicious, this cherry cheese dump cake is your answer. With layers of creamy cheesecake flavor and sweet, tart cherries, it’s the perfect dish to impress your friends or satisfy your family’s sweet tooth. Get ready for a warm, comforting treat that feels like a hug on a plate!
In this recipe, you’ll find exact measurements, step-by-step instructions, and tips to ensure your dump cake turns out perfectly every time. The total time is 45 minutes, and it serves 8. This cake is beginner-friendly, making it a great choice for any home cook.
| Prep Time | Cook Time | Total Time | Servings | Difficulty |
|---|---|---|---|---|
| 15 minutes | 30 minutes | 45 minutes | 8 | Easy |
Origin of Cherry Cheese Dump Cake
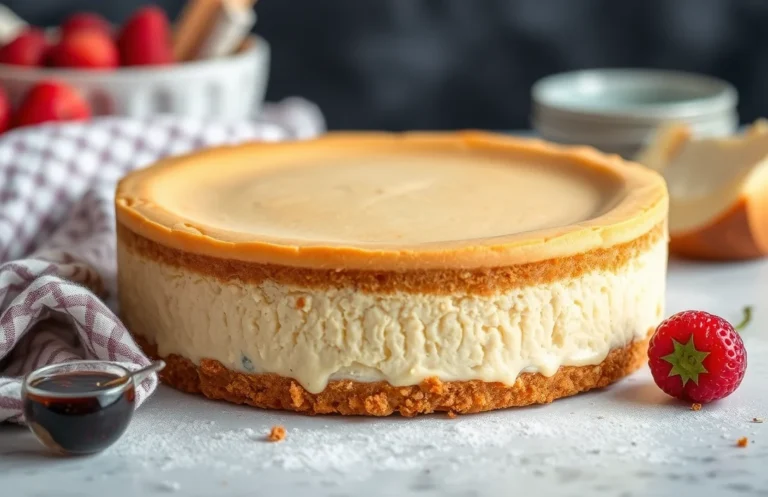
The Cherry Cheese Dump Cake is a delightful dessert that combines the rich flavors of cream cheese with the tart sweetness of cherries. This dessert not only satisfies a sweet tooth but also carries a meaningful cultural background and is often featured in special occasions.
- Cultural Background: The dump cake, a beloved American dessert, gained popularity in the 1970s, particularly due to its ease of preparation. The combination of fruit and cake mix, often made with variations like cherry, pineapple, or peach, reflects the home-cooking style of the time, where convenience was key. Incorporating Philadelphia’s no-bake cheesecake elements adds a creamy texture and richness that elevates this traditional dessert.
- Special Occasions: The Cherry Cheese Dump Cake is frequently served at potlucks, family gatherings, and holiday celebrations. Its simple assembly makes it an ideal choice for busy hosts who still want to impress guests. The vibrant red cherry topping not only looks appealing but also evokes nostalgia for many, as it often reminds them of cherished family recipes passed down through generations.
Ingredients for Cherry Cheese Dump Cake
In this section, you’ll find a detailed list of all the necessary ingredients for making a delicious cherry cheese dump cake, inspired by the Philadelphia no-bake cheesecake recipe. Each ingredient is carefully measured to ensure your cake turns out perfectly every time, so let’s get started!
| Item | Amount/Specification | Notes |
|---|---|---|
| Cherry pie filling | 1 can (21 oz or 595g) | Use your favorite brand for the best flavor. |
| Philadelphia no-bake cheesecake mix | 1 package (8 oz or 226g) | Follow package instructions for mixing. |
| Milk | 1 cup (240ml) | Use whole milk for a creamier texture. |
| All-purpose flour | 1 cup (120g) | For a denser cake, consider using cake flour. |
| Sugar | ½ cup (100g) | Adjust to taste; brown sugar can add a richer flavor. |
| Baking powder | 2 teaspoons | Ensure it’s fresh for proper leavening. |
| Salt | ½ teaspoon | Balances the sweetness. |
| Butter | ½ cup (113g), melted | Unsalted butter is preferred. |
| Eggs | 2 large | Room temperature for better mixing. |
- Tip: You can substitute the cherry pie filling with other fruit fillings like blueberry or peach based on your preference.
- For a gluten-free option, use a gluten-free flour blend in place of all-purpose flour.
- Make sure all your ingredients are at room temperature to ensure an even mix and better texture.
Kitchen Equipment and Prep Steps
Before you dive into making the cherry cheese dump cake using Philadelphia no-bake cheesecake recipe, it’s essential to gather the right tools and prepare your ingredients. Having everything ready will streamline your cooking process and ensure a successful outcome.
- Gather Essential Kitchen Tools: You will need a 9×13-inch baking dish, mixing bowls (one large and one medium), a whisk, a spatula, and measuring cups and spoons. A hand mixer or stand mixer will be helpful for achieving a smooth cheesecake filling.
- Prepare Your Ingredients: Start by measuring out all your ingredients. For the cherry topping, you’ll need one can of cherry pie filling (21 oz or 595g). For the cheesecake layer, measure 1 cup (240ml) of cold milk and 1 package (8 oz or 226g) of Philadelphia cream cheese. Having everything at room temperature helps with mixing.
- Preheat the Oven: Set your oven to 350°F (175°C). This temperature is key for baking the cake layer evenly. While the oven is heating, you can prepare the cake mixture.
- Prepare Your Baking Dish: Grease your 9×13-inch baking dish with cooking spray or a thin layer of butter. This will prevent the cake from sticking and ensure easy serving later on.
- Mix the Cheesecake Filling: In a mixing bowl, combine the cream cheese and cold milk. Use a hand mixer on medium speed for about 2-3 minutes until it’s smooth and creamy. You want a thick, spreadable texture without any lumps.
Pro tip: Make sure to scrape the sides of the bowl with a spatula to incorporate all the cream cheese for a perfectly smooth filling.
Step-by-Step Cooking Instructions
This section provides you with clear, numbered steps to create your cherry cheese dump cake using the Philadelphia no-bake cheesecake technique. Following these instructions will ensure a delicious dessert with the perfect combination of flavors and textures.
- Preheat your oven: Begin by preheating your oven to 350°F (175°C). This is essential for even baking, so don’t skip this step!
- Prepare the ingredients: Gather your ingredients: 1 (20 oz) can of cherry pie filling, 1 (8 oz) package of Philadelphia cream cheese (softened), 1 (8 oz) container of whipped topping, 1 cup powdered sugar, and 1 (15.25 oz) box of vanilla cake mix. Having everything ready will streamline the process.
- Mix the cheesecake filling: In a medium bowl, beat the softened cream cheese with an electric mixer on medium speed until smooth, about 2 minutes. Gradually add the powdered sugar, mixing until fully incorporated. Fold in the whipped topping until the mixture is light and fluffy.
- Layer the ingredients: In a greased 9×13 inch baking dish, evenly spread the cheesecake mixture on the bottom. Pour the cherry pie filling over the cheesecake layer, ensuring it covers the surface completely.
- Add the cake mix: Sprinkle the dry vanilla cake mix evenly over the cherry filling. Do not stir; the cake mix will bake into a crust on top. This is crucial for achieving the dump cake texture.
- Bake the cake: Place the baking dish in the preheated oven and bake for 45-50 minutes. The top should be lightly golden brown, and the filling may bubble slightly around the edges. Keep an eye on it during the last 10 minutes.
- Cool before serving: Once baked, remove the cake from the oven and allow it to cool at room temperature for at least 30 minutes. This cooling time helps the layers set properly, making it easier to cut and serve.
Pro Tips for Perfect Texture
Getting the texture just right in your cherry cheese dump cake is essential for achieving that delightful balance between creamy and crumbly. Here are some expert tips to ensure your dessert is a hit and avoids common pitfalls.
Achieving Creaminess
- Use room temperature ingredients: Make sure your 8 oz (226g) Philadelphia cream cheese and 1 cup (240ml) heavy whipping cream are at room temperature before mixing. This helps create a smooth, lump-free mixture.
- Whisk thoroughly: When combining the cream cheese with the 1 cup (120g) powdered sugar, use an electric mixer on medium speed for about 2-3 minutes until the mixture is light and fluffy. This will also prevent any graininess in the texture.
- Fold gently: When incorporating the whipped cream into the cream cheese mixture, use a spatula to fold gently. This maintains the airiness, resulting in a lighter filling.
Preventing Sogginess
- Layer strategically: Spread the cherry pie filling evenly over the cake mix without stirring. This allows the cake mix to absorb moisture without becoming too soggy.
- Bake at the right temperature: Preheat your oven to 350°F (175°C) and bake for 45-50 minutes. The top should be golden brown, and a toothpick inserted should come out clean.
Chef’s tip: If you notice the edges of the cake browning too quickly, cover them with aluminum foil halfway through baking to prevent burning.
| Ingredient | Amount |
|---|---|
| Philadelphia cream cheese | 8 oz (226g) |
| Powdered sugar | 1 cup (120g) |
| Heavy whipping cream | 1 cup (240ml) |
Variations and Substitutions
This section highlights some fantastic variations and substitutions for your cherry cheese dump cake using Philadelphia’s no-bake cheesecake recipe. Whether you’re accommodating dietary restrictions or simply looking to change things up, these options can enhance your cake while keeping it delicious.
Gluten-Free Options
| Item | Amount/Specification | Notes |
|---|---|---|
| Gluten-free cake mix | 1 box (15.25 oz) | Look for brands like Betty Crocker or Pillsbury |
| Almond flour | 1 ½ cups (150g) | Can be used for a homemade crust |
Vegan Alternatives
| Item | Amount/Specification | Notes |
|---|---|---|
| Vegan cream cheese | 8 oz | Brands like Tofutti or Kite Hill work well |
| Vegan butter | ½ cup (113g) | Use in place of regular butter |
| Non-dairy milk | ½ cup (120ml) | Almond, soy, or oat milk are great choices |
- For gluten-free options: Always check the labels to ensure that all ingredients are certified gluten-free.
- For vegan substitutes: Make sure to taste the filling as you mix; adjustments may be necessary for sweetness and texture.
- Feel free to experiment with different fruit toppings, like blueberries or peaches, for a refreshing twist!
Serving and Plating Suggestions
Presenting your cherry cheese dump cake beautifully can elevate the dessert experience. Here are some practical tips for serving and pairing it to make the most out of this delightful treat.
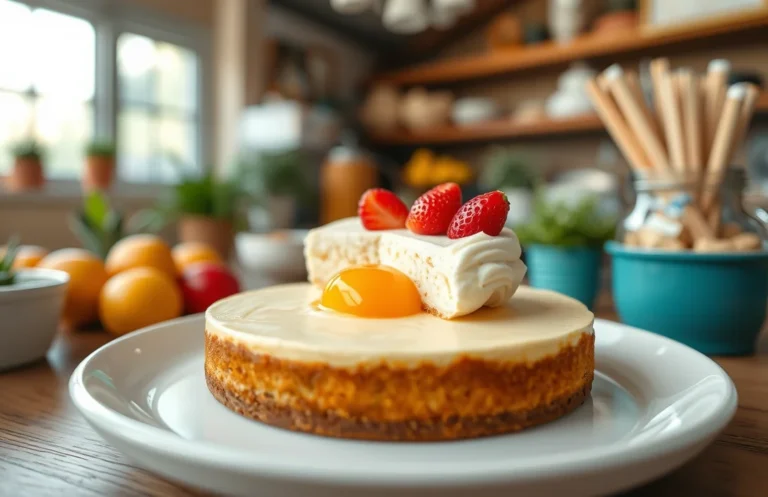
- Choose the Right Serving Dish: A clear glass or ceramic dish allows the vibrant layers of cherry, cream cheese, and cake to shine through. Consider using a rectangular baking dish, as it makes for easy cutting and serving.
- Garnish for Appeal: Before serving, sprinkle some finely chopped fresh mint leaves on top for a pop of color and freshness. Alternatively, a dusting of powdered sugar can add a touch of elegance.
- Serving Temperature: Allow the cake to cool for at least 20 minutes after baking. Serve it slightly warm or at room temperature to enhance the flavors. The creamy texture will be inviting, and the cherries will still retain their delicious tartness.
- Portion Sizes: Cut the cake into squares or rectangles, about 2-3 inches wide. This size is perfect for individual servings, allowing guests to enjoy it without feeling overwhelmed.
- Pairing Ideas: Serve your cherry cheese dump cake with a scoop of vanilla ice cream or a dollop of whipped cream to complement the creaminess of the cheesecake layer. A drizzle of chocolate or caramel sauce can also add an extra layer of indulgence.
Chef’s tip: For an extra burst of flavor, consider serving with a homemade cherry sauce by simmering fresh or frozen cherries with sugar and a splash of lemon juice for about 10 minutes.
Quick Summary
| Prep Time | 15 minutes |
|---|---|
| Cook Time | 45 minutes |
| Total Time | 1 hour |
| Servings | 8-10 |
- Preheat oven to 350°F (175°C) before starting.
- Mix cheesecake filling using 1 package of Philadelphia No Bake Cheesecake mix.
- Layer cherry pie filling evenly on the bottom of a greased 9×13 inch pan.
- Spread cheesecake mixture over the cherry filling layer.
- Top with cake mix and drizzle melted butter evenly on top.
- Bake for 45 minutes until golden brown and bubbly.
- Tip 1: Use room temperature cream cheese for smoother filling.
- Tip 2: Allow the cake to cool completely for easier slicing.
- Tip 3: Serve with whipped cream for added richness.
Frequently Asked Questions
Can I make this ahead of time? How to store and reheat?
You can absolutely make this cherry cheese dump cake a day in advance. Store it covered in the refrigerator for up to 3 days, and simply enjoy it cold or warm it up in the microwave for about 15-30 seconds.
What can I substitute for the Philadelphia No Bake Cheesecake mix?
If you don’t have the No Bake Cheesecake mix, you can use an equal amount of homemade cheesecake filling made from 8 oz cream cheese, 1 cup powdered sugar, and 1 cup whipped cream.
How do I know when it’s done?
Your cherry cheese dump cake is done when the top is golden brown and bubbly, which usually takes about 35-40 minutes at 350°F (175°C). A toothpick inserted into the center should come out clean or with just a few crumbs.
Can I freeze this? How long does it last?
You can freeze the cherry cheese dump cake for up to 2 months. Just make sure to wrap it tightly in plastic wrap and foil to prevent freezer burn.
What if I don’t have a 9×13 inch baking dish?
If you don’t have a 9×13 inch baking dish, you can use a 2-quart casserole dish or an 8×8 inch square dish, but adjust the baking time, as it may take a little longer to bake in a smaller dish.

- Decadent Peanut Butter No-Bake Cheesecake: Easy Recipe to Indulge - April 3, 2026
- Delicious Mango No-Bake Cheesecake: Step-by-Step Recipe - April 3, 2026
- Decadent Raspberry No-Bake Cheesecake: Easy Step-by-Step Recipe - April 3, 2026