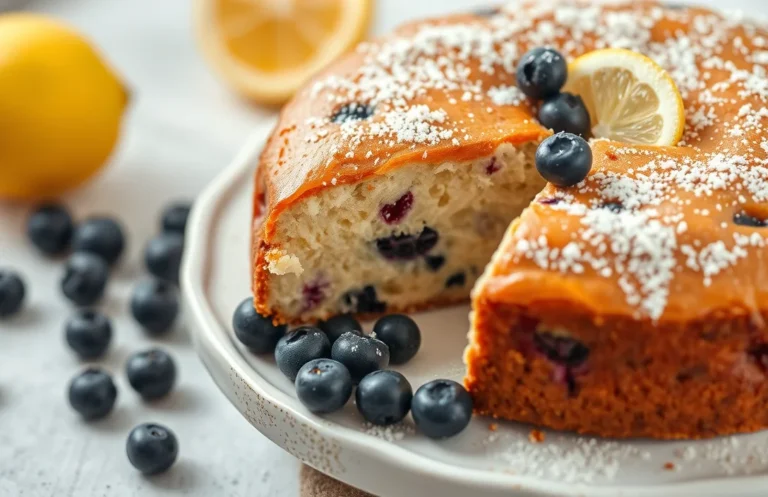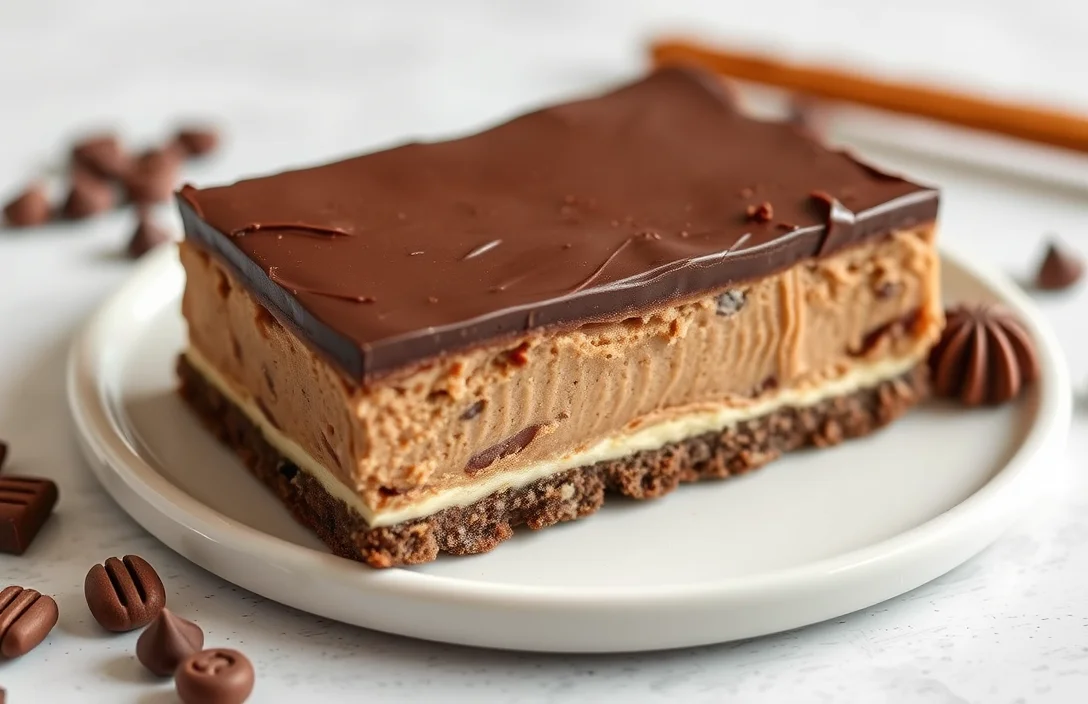
Decadent Chocolate Cheesecake Bars in a 9×13 Pan – Easy Recipe
Chocolate cheesecake bars are the ultimate dessert that combines rich, velvety chocolate with the creamy goodness of cheesecake, all in a convenient bar form. Perfect for weeknight indulgence or as a crowd-pleaser at gatherings, these bars are sure to satisfy any sweet tooth and leave everyone asking for seconds!
Key details: Total time: 1 hour 30 minutes, Difficulty level: Easy, Servings: 12.
| Prep Time | Cook Time | Total Time | Servings | Difficulty |
|---|---|---|---|---|
| 20 minutes | 40 minutes | 1 hour 30 minutes | 12 | Easy |
Story Behind Chocolate Cheesecake Bars
Chocolate cheesecake bars have a rich history that combines the indulgent flavors of chocolate with the creamy texture of cheesecake, making them a beloved dessert across various cultures. Their appeal lies not just in their taste, but also in their versatility for different occasions.
Cultural Significance
Originating from the classic cheesecake, which has roots in ancient Greece, chocolate cheesecake bars represent a modern twist that has become popular in many households. They often find their way into:
- Celebrations: Birthday parties, anniversaries, and holidays are perfect for serving these decadent bars.
- Potlucks: Their easy-to-slice nature makes them ideal for sharing with friends and family.
- Everyday Treats: A delightful dessert to enjoy after dinner or as a special weekend indulgence.
Perfect Occasions
Chocolate cheesecake bars can elevate any gathering, and here are a few occasions where they truly shine:
| Occasion | Why They Fit |
|---|---|
| Birthday Celebrations | Rich and satisfying, perfect for sweet-toothed guests. |
| Holiday Gatherings | Festive and easy to prepare ahead of time. |
| Casual Get-Togethers | A crowd-pleaser that can be enjoyed by all. |
Whether you’re baking for a special occasion or just treating yourself, chocolate cheesecake bars bring joy and satisfaction, making them a must-try recipe in your kitchen.
Ingredients for 9×13 Pan
To create rich and creamy chocolate cheesecake bars, you’ll need a precise selection of ingredients for both the chocolate and cheesecake layers. Each ingredient plays a vital role in achieving the luscious texture and decadent flavor that makes these bars a favorite. Below is a detailed list to ensure your baking experience is smooth and successful.
| Item | Amount/Specification | Notes |
|---|---|---|
| Graham cracker crumbs | 1 ½ cups (150g) | For the crust |
| Granulated sugar | ⅓ cup (67g) | For the crust |
| Unsalted butter | ½ cup (113g), melted | Ensure it’s cooled slightly before mixing |
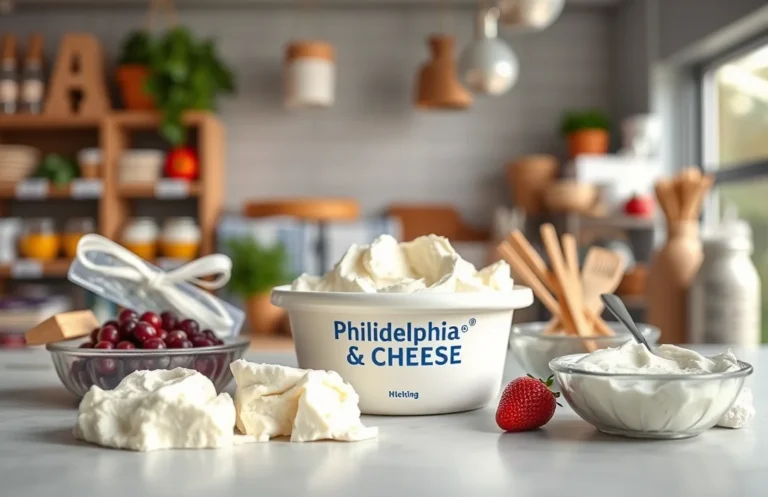
| Cream cheese | 2 (8-ounce) packages, softened | Let it sit at room temperature for easier mixing |
| Granulated sugar | 1 cup (200g) | For the cheesecake layer |
| Large eggs | 3 | Bring to room temperature for better incorporation |
| Vanilla extract | 1 teaspoon | For flavor enhancement |
| Unsweetened cocoa powder | ⅓ cup (30g) | Use a high-quality cocoa for best results |
| Semisweet chocolate | 8 ounces, chopped | Melted and slightly cooled; can substitute dark chocolate |
- For a gluten-free option, use gluten-free graham cracker crumbs.
- Make sure to beat the cream cheese and sugar well to avoid lumps in your cheesecake.
- If you prefer a sweeter cheesecake, adjust the sugar slightly, but keep in mind that the chocolate adds sweetness too.
Necessary Kitchen Equipment
Before diving into making your chocolate cheesecake bars, it’s essential to gather the right tools. Having the proper kitchen equipment will streamline your process and ensure your bars turn out perfectly. Here’s what you’ll need to create these delightful treats in a 9×13 inch pan.
- 9×13 inch baking pan: This will be your primary vessel for baking the cheesecake bars. Make sure it’s greased or lined with parchment paper for easy removal.
- Mixing bowls: You’ll need one large bowl for mixing the cream cheese and another for the chocolate mixture. Use a medium-sized bowl as well for the crust ingredients.
- Electric mixer or whisk: An electric mixer will make blending the cream cheese smooth and easy, but a whisk can work if you prefer a more hands-on approach. Aim for a creamy consistency without lumps.
- Rubber spatula: This is perfect for folding ingredients together and scraping down the sides of your mixing bowls to ensure everything is well combined.
- Measuring cups and spoons: Accurate measurements are crucial for the success of your recipe, so be sure to have both dry and liquid measuring tools on hand.
- Microwave-safe bowl: You’ll need this for melting the chocolate. Ensure it’s large enough to accommodate your chocolate chips or chunks without spilling.
- Cooling rack: After baking, your cheesecake bars should cool completely on a wire rack to prevent sogginess.
- Knife or pizza cutter: For slicing the cooled cheesecake bars into neat squares or rectangles before serving.
Step-by-Step Cooking Instructions
This section will guide you through the detailed process of making chocolate cheesecake bars, including the preparation of the crust, the cheesecake filling, and the baking and cooling steps. Following these instructions closely will ensure that your bars turn out perfectly every time.
- Prepare the Crust: Preheat your oven to 350°F (175°C). In a medium bowl, combine 1 ½ cups (150g) of graham cracker crumbs, ½ cup (100g) of granulated sugar, and ½ cup (115g) of melted unsalted butter. Mix until the crumbs are fully coated and resemble wet sand. Press the mixture evenly into the bottom of a greased 9×13 inch baking pan, creating a compact crust. Bake for 10 minutes until set and lightly golden, then remove from oven and let cool slightly.
- Make the Cheesecake Filling: In a large mixing bowl, beat 2 (8-ounce) packages of cream cheese at room temperature until smooth, about 2 minutes. Gradually add 1 cup (200g) of granulated sugar and 1 teaspoon of vanilla extract, mixing until well combined. Add 2 large eggs, one at a time, mixing on low speed just until incorporated. Finally, fold in ½ cup (120ml) of sour cream and ½ cup (120ml) of melted bittersweet chocolate until smooth and creamy.
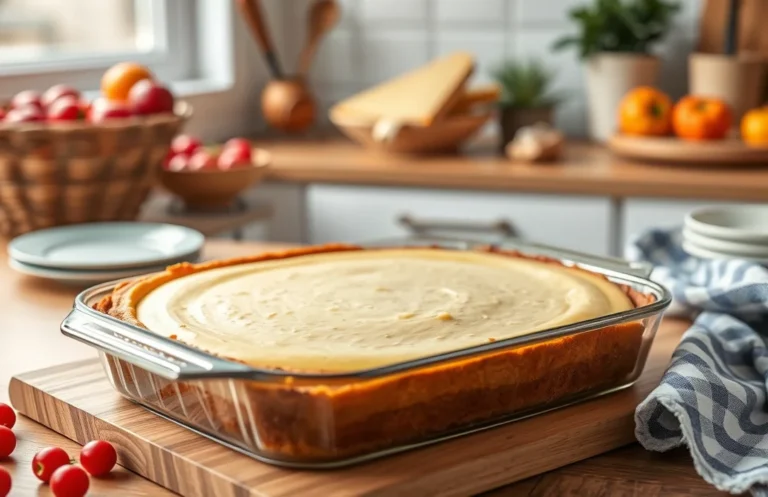
- Bake and Cool: Pour the cheesecake filling over the pre-baked crust, spreading it evenly. Return the pan to the oven and bake for 25-30 minutes, or until the edges are set and the center still has a slight jiggle. Turn off the oven and crack the door, letting the bars cool in the oven for 1 hour. Afterward, transfer the pan to a wire rack and cool to room temperature. Refrigerate for at least 4 hours or overnight before cutting into bars.
Pro Tips for Perfect Bars
Creating the perfect chocolate cheesecake bars requires attention to detail, from the mixing process to baking. Here are some essential tips to ensure you achieve a smooth, crack-free texture and rich flavor every time.
Avoiding Cracks
- Cool Gradually: After baking, turn off the oven and leave the cheesecake inside for about 1 hour. This gradual cooling helps prevent cracks caused by sudden temperature changes.
- Water Bath Method: For an even creamier texture, place the cheesecake pan inside a larger pan filled with hot water during baking. This keeps the temperature stable and reduces the risk of cracks.
- Don’t Overmix: When combining your filling ingredients, mix just until smooth. Overmixing can incorporate too much air, leading to cracks as the bars cool.
Texture Tips
- Room Temperature Ingredients: Ensure your cream cheese, eggs, and sour cream are at room temperature before mixing. This helps create a smoother batter without lumps.
- Do Not Overbake: Bake the bars at 325°F (160°C) for 25-30 minutes. The center should still be slightly jiggly when you take them out. They will firm up as they cool.
- Chill Thoroughly: After baking, refrigerate the bars for at least 4 hours, preferably overnight. This allows the flavors to meld and the texture to set properly.
Variations and Substitutions
Making chocolate cheesecake bars can be a delightful experience, and there are plenty of ways to customize the recipe to fit dietary needs and flavor preferences. Whether you’re looking for gluten-free options or want to experiment with different flavors, these variations can help tailor the bars to your taste.
Gluten-Free Options
- For a gluten-free crust, substitute the 1 ½ cups of all-purpose flour with 1 ½ cups of gluten-free all-purpose flour blend.
- Ensure all other ingredients, like baking powder and chocolate, are labeled gluten-free.
- Be aware that gluten-free flours may absorb more moisture; you might need to slightly adjust the amount of melted butter in the crust.
Flavoring Ideas
If you want to switch up the flavor profile of your chocolate cheesecake bars, consider these options:
- Replace half of the cocoa powder (½ cup) with powdered peanut butter for a rich peanut butter chocolate flavor.
- Add 1 teaspoon of espresso powder to the cheesecake mixture for a mocha twist.
- Incorporate 1 teaspoon of peppermint extract for a festive chocolate mint flavor.
Chef’s tip: For an extra layer of flavor, fold in ½ cup of chocolate chips into the cheesecake filling before baking.
| Ingredient | Substitution |
|---|---|
| All-Purpose Flour | Gluten-Free Flour Blend |
| Cocoa Powder | Powdered Peanut Butter |
| Vanilla Extract | Espresso or Peppermint Extract |
With these variations and substitutions, you can make your chocolate cheesecake bars not only delicious but also accommodating to different dietary preferences and flavor profiles. Enjoy experimenting!
Serving and Plating Suggestions
Serving chocolate cheesecake bars can elevate your dessert experience, making it not only delicious but visually appealing. Here are some thoughtful garnishing tips and complementary flavors to enhance your homemade bars.
- Garnish with Whipped Cream: A dollop of freshly whipped cream adds a light and airy texture that contrasts beautifully with the dense cheesecake. Use 1 cup of heavy cream whipped with 2 tablespoons of powdered sugar until soft peaks form. Spoon it onto each bar just before serving for a fresh touch.
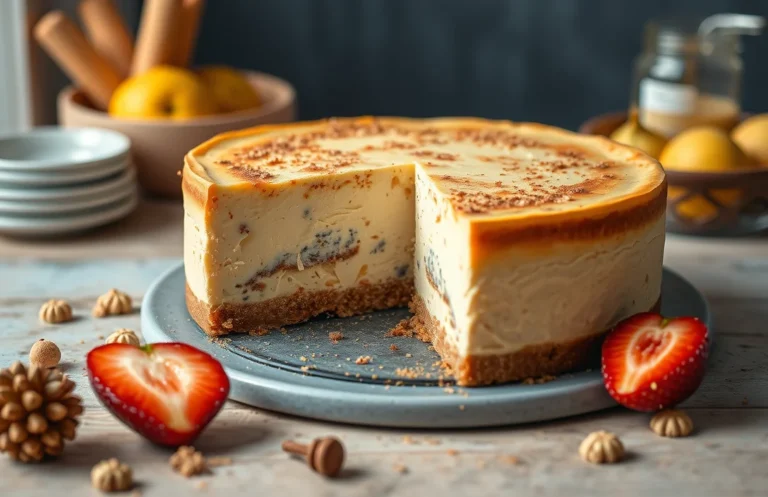
- Chocolate Drizzle: For an extra indulgent look, melt 2 ounces of dark chocolate and drizzle it over the bars using a fork or a piping bag. This not only enhances the chocolate flavor but also adds a gourmet feel to your presentation.
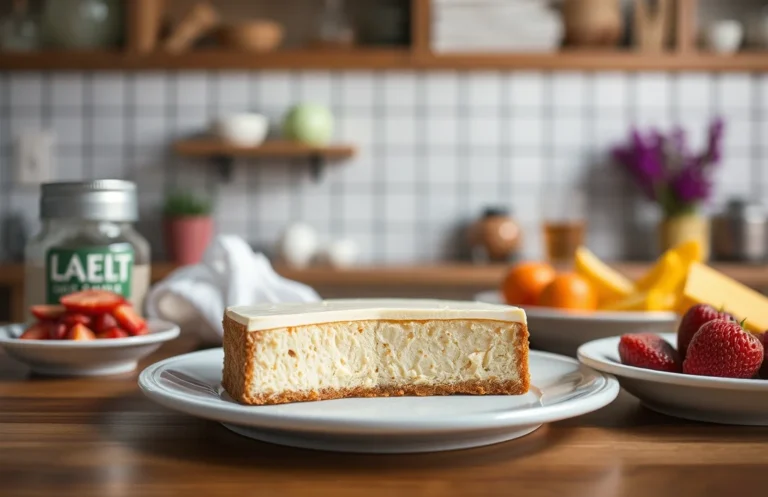
- Fresh Berries: Serve your cheesecake bars with a handful of fresh raspberries or strawberries. Their tartness complements the rich chocolate, creating a balanced flavor profile. Arrange them artistically on the plate for a pop of color.
- Mint Leaves: Adding a few mint leaves as a garnish can introduce a refreshing element to each bite. Place 1-2 leaves on top of the whipped cream or alongside the bars for a vibrant touch.
- Pair with Coffee or Espresso: Chocolate and coffee are a classic combination. Serve your cheesecake bars alongside a shot of espresso or a cup of dark roast coffee to enhance the chocolate flavors. The bitterness of the coffee will beautifully contrast the sweetness of the bars.
Experiment with these garnishing ideas and complementary flavors to make your chocolate cheesecake bars not only a treat for the taste buds but also a feast for the eyes!
Quick Summary
| Prep Time | 20 minutes |
|---|---|
| Cook Time | 30 minutes |
| Total Time | 50 minutes |
| Servings | 16 bars |
- Preheat oven to 325°F (163°C) before mixing ingredients.
- Crust preparation requires 1 cup crushed graham crackers and 1/2 cup melted butter.
- Cheese mixture blends 16 oz cream cheese with 1 cup sugar until smooth.
- Bake for 30 minutes, or until the center is set but slightly jiggly.
- Cool completely before refrigerating for at least 2 hours for best texture.
- Tip: Use room temperature cream cheese to avoid lumps.
- Tip: Let bars chill overnight for deeper flavor development.
Frequently Asked Questions
Can I make this ahead of time? How to store and reheat?
You can definitely make these chocolate cheesecake bars ahead of time! Store them in an airtight container in the refrigerator for up to 5 days and enjoy them chilled or bring them to room temperature before serving.
What can I substitute for cream cheese?
If you need a substitute, you can use mascarpone cheese for a similar texture and flavor, or try a blended mixture of ricotta and sour cream for a lighter option.
How do I know when it’s done?
The cheesecake bars are done when the edges are set but the center still has a slight jiggle; it should appear slightly puffed and not wet or runny. Allow them to cool completely before cutting for the best texture.
Can I freeze this? How long does it last?
Yes, you can freeze chocolate cheesecake bars! Wrap them tightly in plastic wrap and aluminum foil, and they’ll last up to 3 months in the freezer; just thaw in the fridge before serving.
Why did my chocolate cheesecake bars turn out cracked?
Cracks usually occur due to overbaking or rapid temperature changes, so make sure to bake at a low temperature and let them cool gradually in the oven with the door ajar. Always check for doneness before the recommended time to avoid this issue!

- Make Cheesecake Up to 3 Days Ahead: Tips for Best Flavor & Texture - March 4, 2026
- Easy No-Bake Cool Doen Cheesecake: Quick Recipe & Tips - March 4, 2026
- Decadent Dulce de Leche Cheesecake: Easy Step-by-Step Recipe - March 4, 2026