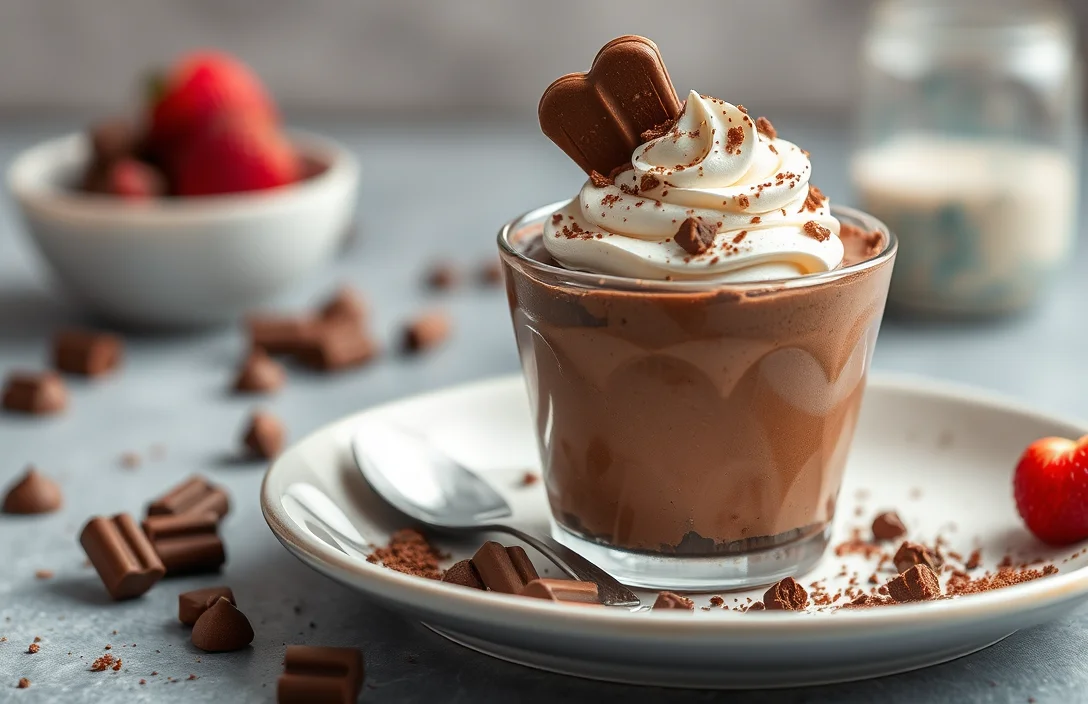
Decadent Chocolate Mousse: Easy Recipe with Tips for Perfection
Chocolate mousse is the ultimate indulgence, turning any ordinary day into a special occasion. With its rich, creamy texture and deep chocolate flavor, it’s a dessert that pleases everyone, from family dinners to dinner parties. Each spoonful melts in your mouth, leaving you wanting more.
This recipe features easy-to-follow steps, takes about 30 minutes to prepare, and serves 4-6 people. It’s perfect for both novice and experienced cooks, ensuring that your mousse turns out velvety every time.
| Prep Time | Cook Time | Total Time | Servings | Difficulty |
|---|---|---|---|---|
| 15 minutes | 15 minutes | 30 minutes | 4-6 | Easy |
History of Chocolate Mousse
Chocolate mousse has a rich and delightful history that reflects its status as a beloved dessert around the world. This section explores its origins, significance, and the ideal occasions for serving this indulgent treat.
- Origin of Chocolate Mousse: The origins of chocolate mousse can be traced back to the 18th century in France. Initially, this dessert was made using simple ingredients like chocolate, eggs, and sugar, combined to create a light and airy texture that was revolutionary for its time.
- Why It’s Special: Chocolate mousse is celebrated for its luxurious texture and deep chocolate flavor. The combination of whipped eggs and cream creates a unique blend of richness and lightness, making it a favorite among chocolate lovers. The versatility of this dessert allows it to be served as a comforting treat or an elegant finale to a fine meal.
- Ideal Occasions for Serving: This dessert is perfect for various occasions, from intimate dinners to grand celebrations. Whether served at a romantic dinner or during a festive holiday gathering, chocolate mousse adds a touch of sophistication and indulgence to any event.
Ingredients for Chocolate Mousse
In this section, you’ll find everything you need to create a rich and velvety chocolate mousse. Each ingredient plays a crucial role in achieving the perfect texture and flavor, so precise measurements and quality choices are essential.
| Item | Amount/Specification | Notes |
|---|---|---|
| Dark chocolate (70% cocoa minimum) | 6 ounces (170g) | Use high-quality chocolate for the best flavor. |
| Unsweetened cocoa powder | 2 tablespoons (15g) | Optional, for extra chocolate richness. |
| Eggs | 3 large | Separate yolks and whites. |
| Granulated sugar | ¼ cup (50g) | Adjust to taste; consider using less for a darker mousse. |
| Heavy cream | 1 cup (240ml) | Chilled, for whipping. |
| Vanilla extract | 1 teaspoon | For added flavor. |
- Chocolate Types: You can substitute semi-sweet chocolate if you prefer a sweeter mousse.
- Eggs and Cream: For a vegan version, consider using aquafaba (chickpea brine) in place of egg whites and coconut cream instead of heavy cream.
- Optional Ingredients: A pinch of sea salt enhances flavor; consider adding espresso powder for depth.
Required Kitchen Equipment
To make a rich and airy chocolate mousse, you’ll need some essential equipment that ensures each step of the process goes smoothly. Having the right tools can make a significant difference in achieving that perfect texture and flavor balance.
- Mixing Bowls: You’ll need at least two mixing bowls. One should be a medium-sized bowl for the chocolate mixture, ideally heatproof, as you’ll be melting chocolate in it. The second bowl should be large enough to accommodate the whipped cream. Glass or stainless steel bowls work best for this purpose, as they conduct heat evenly and are easy to clean.
- Whisk and Spatula: A whisk is crucial for beating the egg whites until they form stiff peaks, which adds airiness to your mousse. A rubber spatula is equally important for gently folding the whipped cream into the chocolate mixture. This folding technique helps to maintain the volume of the whipped cream, preventing your mousse from becoming dense.
- Melting Equipment: For melting the chocolate, you can use either a microwave or a double boiler. If using a microwave, heat the chocolate in 30-second intervals at 50% power, stirring in between until fully melted and smooth. If opting for a double boiler, fill a pot with water and bring it to a simmer, then place a heatproof bowl over it with the chocolate inside. Stir until melted, ensuring the bottom of the bowl doesn’t touch the water to avoid burning.
Step-by-Step Cooking Instructions
In this section, we’ll cover the essential steps for making a rich and creamy chocolate mousse, focusing on melting the chocolate, whipping the cream, and folding the ingredients together. Each step is crucial to ensure that your mousse achieves the perfect texture and flavor.
- Melting Chocolate: Begin by breaking 6 ounces (170g) of high-quality dark chocolate (70% cocoa) into small pieces. Place the chocolate in a heatproof bowl over a saucepan of simmering water (double boiler method). Stir gently until melted and smooth, which should take about 5-7 minutes. Be careful not to let any water touch the chocolate, as it can cause it to seize.
- Whipping Cream: In a separate bowl, pour 1 cup (240ml) of heavy cream. Using an electric mixer, whip the cream on medium speed until soft peaks form, about 3-4 minutes. The cream should be thickened but still pourable; it should look fluffy and have a shiny sheen. Keep an eye on it, as over-whipping can lead to butter formation.
- Folding Ingredients: Once the chocolate has cooled slightly (but still melted), gently fold one-third of the whipped cream into the chocolate using a spatula. This lightens the chocolate mixture. Carefully fold in the remaining whipped cream in two additions, ensuring you maintain the airiness. The mousse should appear smooth and glossy without any lumps of cream.
Chef’s tip: Use a gentle folding motion to preserve the airiness of the whipped cream, which is key for a light texture.
Pro Tips for Perfect Mousse
Creating a silky and airy chocolate mousse requires attention to detail and a few expert tips. By mastering temperature control, whipping techniques, and proper storage, you can elevate your mousse from good to extraordinary.
- Temperature Control: Ensure your chocolate is melted at a low temperature, around 120°F (49°C). This prevents the chocolate from seizing and allows for a smooth incorporation with the other ingredients. When mixing in the egg yolks, let the chocolate cool slightly to avoid cooking the yolks.
- Whipping Techniques: For the egg whites, use a clean, dry bowl and beaters to achieve maximum volume. Whip until soft peaks form, which should take about 3-5 minutes at medium-high speed. If the peaks are too stiff, your mousse will become grainy. Aim for glossy, smooth peaks that gently fold into the chocolate mixture.
- Storage Tips: Chill your mousse in the refrigerator for at least 2 hours before serving, allowing it to set properly. Store any leftovers in an airtight container for up to 3 days. To prevent the mousse from forming a skin, cover it with plastic wrap directly on the surface.
Chocolate Mousse Variations
Chocolate mousse is wonderfully versatile, allowing you to cater to different tastes and dietary needs. Below are some delicious variations and substitutions that maintain the creamy richness of traditional mousse while accommodating various preferences.
Dark Chocolate Mousse
If you prefer a bolder flavor, dark chocolate mousse is the way to go. Using high-quality dark chocolate (at least 70% cocoa) will give you a rich and intense dessert.
- 8 ounces (225g) dark chocolate, chopped
- 3 tablespoons (45g) unsalted butter
- 4 large eggs, separated
- ¼ cup (50g) granulated sugar
- 1 cup (240ml) heavy cream, whipped to soft peaks
- Melt the dark chocolate and butter together in a heatproof bowl over simmering water, stirring until smooth. Allow to cool slightly.
- In another bowl, whisk the egg yolks and sugar until pale and fluffy, then fold into the cooled chocolate mixture.
- Gently fold in the whipped cream until no white streaks remain, then spoon into serving dishes and chill for at least 2 hours.
Dairy-Free Options
For a dairy-free chocolate mousse, you can substitute ingredients to keep the creaminess without dairy.
- 8 ounces (225g) dairy-free dark chocolate, chopped
- 3 tablespoons (45ml) coconut oil
- 1 cup (240ml) coconut cream
- 4 tablespoons (60g) maple syrup or agave nectar (to taste)
- Melt the dairy-free chocolate and coconut oil together, stirring until smooth.
- In a separate bowl, whip the coconut cream until fluffy, then gradually add the maple syrup.
- Fold the melted chocolate mixture into the whipped coconut cream until well combined, then refrigerate for 2 hours before serving.
Flavor Additions
Enhance your mousse with different flavors to give it a unique twist.
- Espresso: Add 1 tablespoon of instant espresso powder to the chocolate mixture for a mocha flavor.
- Orange Zest: Stir in the zest of one orange for a refreshing citrus note.
- Mint: Add a few drops of mint extract to the whipped cream for a cool finish.
Chef’s tip: Always taste your mousse before serving; adjust sweetness or flavorings as needed!
| Variation | Main Ingredients |
|---|---|
| Dark Chocolate | Dark chocolate, eggs, sugar, cream |
| Dairy-Free | Dairy-free chocolate, coconut oil, coconut cream |
Serving and Plating Ideas
Presenting chocolate mousse can elevate your dessert experience, making it feel special and indulgent. Here are some creative suggestions for serving and garnishing your mousse, along with pairing ideas to enhance its rich flavor.
Presentation Techniques
- Serve in elegant glassware: Use small dessert cups, mason jars, or even shot glasses to showcase the mousse’s velvety texture.
- Layer flavors: Create a parfait by layering chocolate mousse with whipped cream or fruit puree for added color and taste.
- Play with height: Pipe the mousse into tall glasses for a sophisticated look, finishing with a dollop of whipped cream on top.
Garnishes
- Fresh berries: Top with raspberries or strawberries for a pop of color and a tart contrast.
- Chocolate shavings: Use a vegetable peeler to create delicate chocolate curls for added elegance.
- Mint leaves: A sprig of fresh mint not only adds a vibrant touch but also a refreshing aroma.
Pairing Suggestions
Chef’s tip: Pair your chocolate mousse with a glass of red wine, such as a rich Cabernet Sauvignon or a fruity Merlot, to complement the chocolate.
- Serve with coffee or espresso for a delightful contrast to the sweetness.
- Accompany with a scoop of vanilla ice cream for a creamy texture contrast.
- Consider a crunchy element like biscotti or shortbread cookies on the side for added texture.
Quick Summary
| Prep Time | 20 minutes |
|---|---|
| Cook Time | 0 minutes |
| Total Time | 2 hours (chilling) |
| Servings | 4 |
- Use high-quality chocolate: Opt for 70% cocoa for rich flavor.
- Whip cream to soft peaks: This ensures a light, airy texture.
- Gently fold ingredients: Preserve airiness by folding, not mixing.
- Chill thoroughly: Allow at least 2 hours to set properly.
- Serve with garnishes: Fresh berries or whipped cream enhance presentation.
Frequently Asked Questions
Can I make this ahead of time? How to store and reheat?
You can definitely make chocolate mousse ahead of time; it keeps well in the refrigerator for up to 2-3 days. Simply cover it tightly with plastic wrap to prevent it from absorbing any odors.
What can I substitute for heavy cream?
If you don’t have heavy cream, you can substitute it with coconut cream for a dairy-free option, or use whipped topping for a lighter version. Keep in mind that the texture and flavor may vary slightly.
How do I know when it’s done?
Your chocolate mousse is done when it has a smooth, creamy texture and holds soft peaks when you lift the whisk out of the mixture. It should not be grainy or overly thick; a gentle fold will give you the right consistency.
Can I freeze this? How long does it last?
While you can freeze chocolate mousse, it’s best enjoyed fresh; if you must freeze it, it can last for about 1 month. Thaw it in the refrigerator overnight before serving, as freezing can change the texture.
Why did my mousse turn out grainy?
Your mousse may turn out grainy if the chocolate was not melted properly or if it was mixed too vigorously after adding the whipped cream. Ensure the chocolate is smooth and melted gently, and fold in the whipped cream with a light hand.

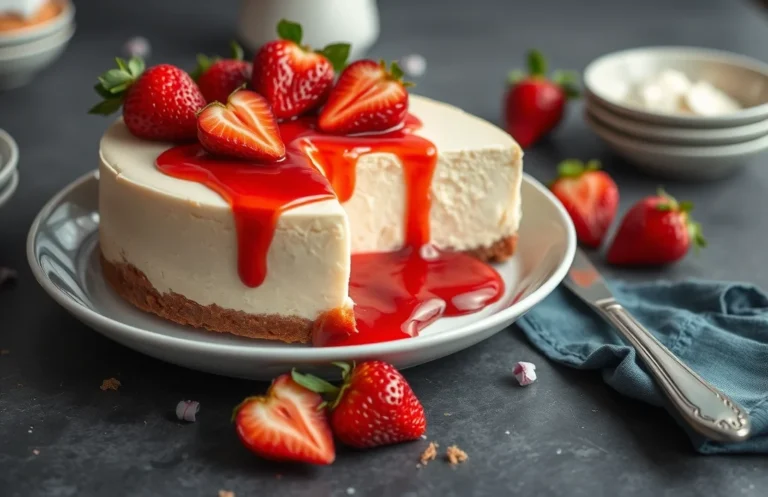
- Make Cheesecake Up to 3 Days Ahead: Tips for Best Flavor & Texture - March 4, 2026
- Easy No-Bake Cool Doen Cheesecake: Quick Recipe & Tips - March 4, 2026
- Decadent Dulce de Leche Cheesecake: Easy Step-by-Step Recipe - March 4, 2026