10 Stunning Cheesecake Decoration Ideas to Impress Your Guests
There’s nothing quite like a well-decorated cheesecake to elevate your dessert game and impress your guests. With its creamy texture and rich flavor, a cheesecake is already a crowd-pleaser. But add a thoughtful topping or an eye-catching garnish, and you’ve got a showstopper that not only tastes amazing but looks stunning too!
Total time: 1 hour 30 minutes | Difficulty: Easy | Servings: 10
| Prep Time | Cook Time | Total Time | Servings | Difficulty |
|---|---|---|---|---|
| 30 minutes | 1 hour | 1 hour 30 minutes | 10 | Easy |
Get ready for a delightful mix of decoration ideas that will make your cheesecake the star of any occasion!
History of Cheesecake
The decoration of cheesecake is not just about aesthetics; it reflects cultural traditions and culinary evolution. Understanding the origins of cheesecake decoration helps us appreciate the significance of various toppings and presentation styles that have emerged over time.
- Cultural Origins: Cheesecake has roots tracing back to ancient Greece, where it was served to athletes during the first Olympic Games. This early version was simple, often topped with honey and fruit, emphasizing natural flavors. As cheesecake recipes spread through Europe, particularly in Italy and France, decorative elements became more elaborate, highlighting local ingredients and culinary creativity.
- Modern Variations: Today, cheesecake decoration takes on many forms, influenced by global flavors and trends. From fresh berries and whipped cream to chocolate ganache and caramel drizzle, modern toppings reflect diverse tastes. The use of seasonal ingredients not only enhances flavor but also elevates the visual appeal, making every cheesecake a unique masterpiece.
Ingredients for Decoration
Decorating your cheesecake not only enhances its visual appeal but also adds layers of flavor and texture that can elevate your dessert to a whole new level. In this section, we’ll explore a variety of ingredients you can use for topping your cheesecake, ensuring that you have all the essentials at your fingertips for a stunning presentation.
| Item | Amount/Specification | Notes |
|---|---|---|
| Fresh Berries | 1 cup mixed (strawberries, blueberries, raspberries) | Choose ripe and vibrant berries for best flavor and color. |
| Chopped Nuts | ½ cup (almonds, walnuts, or pecans) | Toast lightly for extra crunch and flavor. |
| Coconut Flakes | ¼ cup | Use unsweetened for a more natural taste. |
| Chocolate Sauce | ½ cup | Drizzle over the top or serve on the side for dipping. |
| Fruit Sauce | ½ cup (raspberry or strawberry) | Homemade or store-bought; use a fine sieve for smoothness. |
| Edible Flowers | As needed (like violets or nasturtiums) | Ensure they are pesticide-free for safe consumption. |
| Whipped Cream | 1 cup | Stabilize with gelatin if making ahead of time. |
- For a colorful touch, mix and match fresh fruits to create a vibrant topping.
- Consider using a combination of textures, such as crunchy nuts with creamy whipped cream.
- Be cautious with chocolate sauce; too much can overpower the cheesecake’s flavor.
- Keep your decorations simple and elegant – less is often more!
Essential Kitchen Tools
To decorate your cheesecake like a pro, having the right tools at your fingertips is essential. These tools not only make the process smoother but also elevate the presentation of your dessert. Here’s a list of must-have items to ensure your cheesecake looks as good as it tastes.
| Item | Amount/Specification | Notes |
|---|---|---|
| Piping Bags | 1-2 medium bags | For precise icing and decoration. Consider disposable for easy cleanup. |
| Piping Tips | 1-3 varied tips | Use star or round tips for different effects. Choose based on desired design. |
| Offset Spatula | 1 medium size | Perfect for spreading toppings evenly and smoothing edges. |
| Serving Plates | 1 large, decorative plate | Choose a plate that complements your cheesecake’s colors. |
| Decorative Toothpicks | 10-15 | For holding up decorations or adding height to garnishes. |
- Tip: If you don’t have piping bags, a zip-top plastic bag with the corner snipped off works in a pinch.
- Make sure your offset spatula is clean and dry to avoid smearing the decorations.
- Before starting, plan your design to avoid unnecessary mistakes during the decorating process.
Step-by-Step Decoration Techniques
Decorating your cheesecake not only enhances its visual appeal but also elevates the overall dining experience. Here are some simple yet effective methods for layering fruits, drizzling sauces, and using whipped cream to create a stunning cheesecake presentation.
-
Layering Fruits
Begin by selecting fresh fruits such as strawberries, blueberries, or kiwi. Aim for about 1 cup of mixed fruits, diced or sliced as desired. Arrange the fruits evenly on top of the cheesecake, starting from the outer edge and working your way inward, creating a colorful and inviting pattern.
-
Drizzling Sauces
For a delicious finish, prepare a fruit sauce or chocolate ganache. To make a simple berry sauce, combine 1 cup of mixed berries, ¼ cup of sugar, and 2 tablespoons of lemon juice in a saucepan over medium heat. Cook for about 5-7 minutes until the mixture thickens, then cool slightly before drizzling it over the cheesecake in a spiral or zigzag pattern for added flair.
-
Using Whipped Cream
Whip 1 cup of heavy cream with 2 tablespoons of powdered sugar and 1 teaspoon of vanilla extract until soft peaks form. Use a piping bag fitted with a star tip to pipe decorative dollops around the edges of the cheesecake. This adds a touch of elegance and a creamy texture that complements the cheesecake beautifully.
Chef’s tip: Always chill your cheesecake for at least 4 hours before decorating to ensure it holds its shape when you cut into it.
Pro Tips for Perfect Decoration
Decorating your cheesecake isn’t just about aesthetics; it’s about creating a delightful experience for the senses. By avoiding common pitfalls and focusing on balance and color combinations, you can elevate your cheesecake to a stunning centerpiece.
Avoiding Sogginess
Sogginess can ruin the texture of your cheesecake. Here are key strategies to prevent it:
- Always chill the cheesecake completely before adding any toppings. Aim for at least 4 hours in the refrigerator.
- Use a thick layer of ganache or cream on top to create a barrier against moisture from fruits or sauces.
- If using fresh fruit, pat it dry with paper towels before placing it on the cheesecake.
Maintaining Balance
Balancing flavors and textures can enhance your cheesecake’s appeal. Consider the following tips:
- If your cheesecake is rich and creamy, opt for tart toppings like raspberries or a citrus glaze.
- For a lighter cheesecake, consider using a heavier topping like chocolate ganache, but balance it with a sprinkle of sea salt.
- Limit toppings to 2-3 complementary elements to avoid overwhelming the palate.
Color Combinations
Visual appeal is key in dessert decoration. Use these guidelines for striking color combinations:
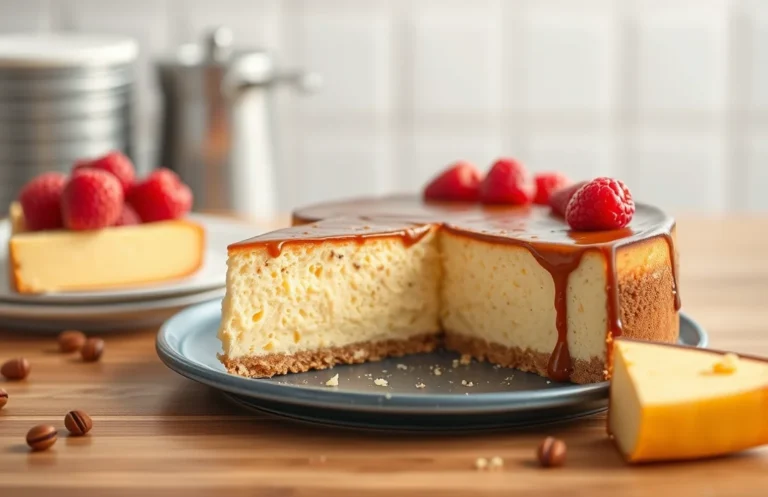
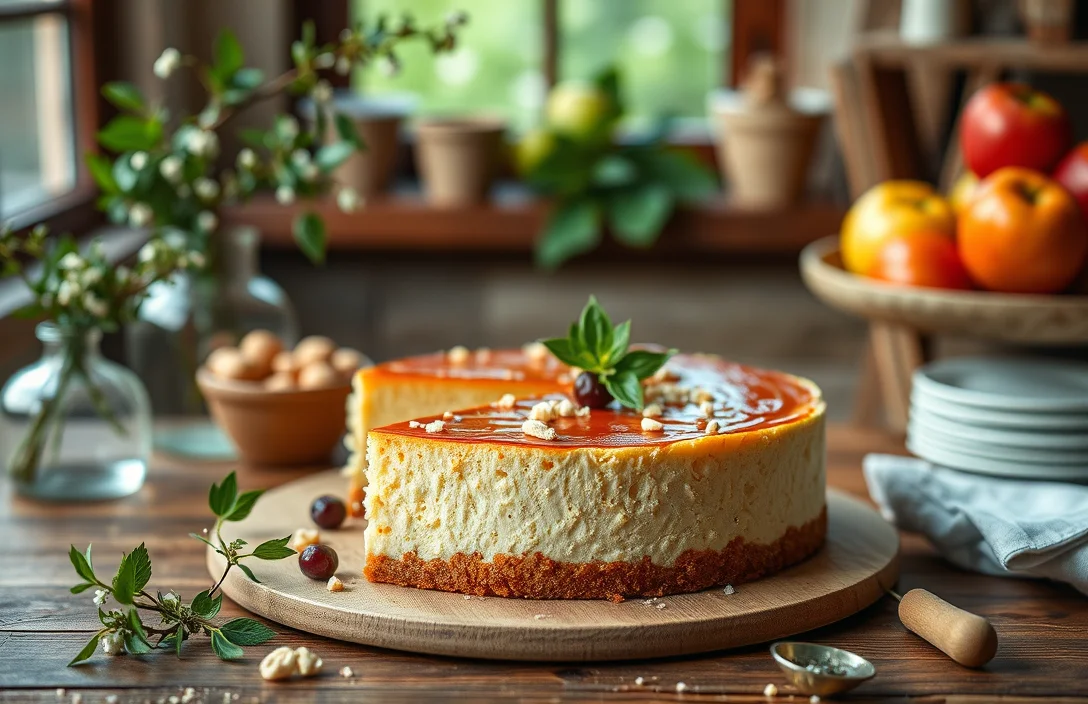
“Try pairing vibrant fruits like strawberries or kiwi against a white cheesecake for a classic contrast.”
Consider the following combinations for a visually stunning dessert:
| Cheesecake Flavor | Complementary Colors |
|---|---|
| Classic Vanilla | Red (strawberries), Green (kiwi) |
| Chocolate | Gold (caramel), White (whipped cream) |
| Lemon | Blue (blueberries), Purple (lavender) |
By following these pro tips, you can ensure that your cheesecake is not only delicious but also a feast for the eyes. Happy decorating!
Decoration Variations
Decorating your cheesecake can cater to various dietary needs and personal preferences, making it not only visually appealing but also inclusive. Here are some alternative toppings and modifications that can enhance your cheesecake while accommodating different diets.
Gluten-Free Options
- Use a gluten-free graham cracker crust made from 1 ½ cups gluten-free graham cracker crumbs (150g) mixed with ½ cup melted butter (115g).
- Top with fresh fruit like strawberries, blueberries, or raspberries which are naturally gluten-free.
- Drizzle with a homemade gluten-free chocolate sauce made from ½ cup coconut milk (120ml) and ½ cup dark chocolate chips (90g) melted together.
Vegan Alternatives
- Replace cream cheese with 2 cups soaked cashews blended with ½ cup coconut milk (120ml) and ½ cup maple syrup (120ml) for sweetness.
- For a crust, use 1 ½ cups almond flour (150g) combined with ¼ cup coconut oil (60ml) and 2 tablespoons maple syrup (30ml).
- Top with a coconut whipped cream made from 1 can of coconut cream whipped until fluffy.
Seasonal Themes
Chef’s tip: Use seasonal fruits to inspire your cheesecake toppings for a fresh twist. Think pumpkin in fall, berries in summer, and citrus in winter.
- Spring: Top with lemon curd and edible flowers for a bright look.
- Summer: Use a variety of fresh berries mixed with a sprinkle of mint leaves.
- Fall: Decorate with spiced apple compote and a sprinkle of cinnamon.
- Winter: Add a layer of peppermint ganache and crushed candy canes for a festive touch.
| Dietary Variation | Ingredient Suggestions |
|---|---|
| Gluten-Free | Gluten-free crusts, fresh fruits, gluten-free sauces |
| Vegan | Cashew cream, almond flour crust, coconut whipped cream |
Plating and Serving Ideas
Presenting your decorated cheesecake beautifully can elevate its appeal and make it even more inviting. Here are some essential tips on pairing, serving temperature, and garnishing that will help you create a stunning dessert every time.
- Pairing Suggestions: Consider serving your cheesecake with a complementary sauce, like a homemade raspberry coulis or salted caramel. A simple recipe for raspberry coulis includes 1 cup of fresh or frozen raspberries, ½ cup of sugar, and the juice of half a lemon. Simmer these ingredients in a saucepan over medium heat until thickened, about 10 minutes. Allow it to cool before drizzling over the cheesecake.
- Serving Temperature: For the best texture and flavor, serve your cheesecake chilled. Remove it from the refrigerator about 15-20 minutes before serving to allow it to come to room temperature. This will enhance its creaminess and make each slice easier to cut.
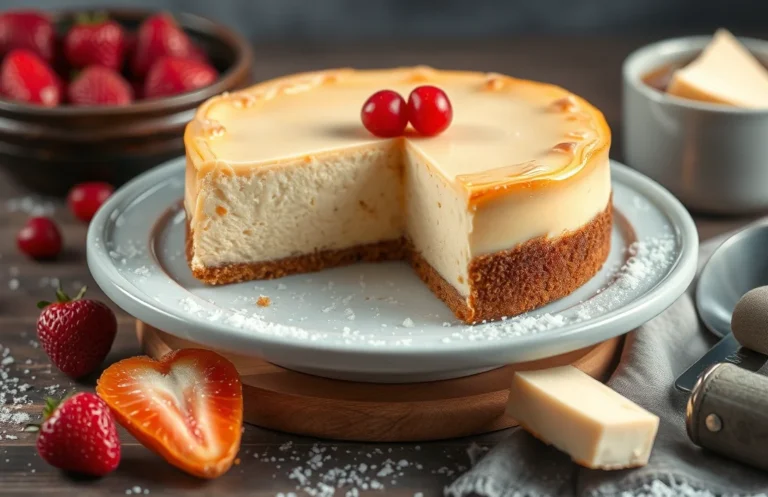
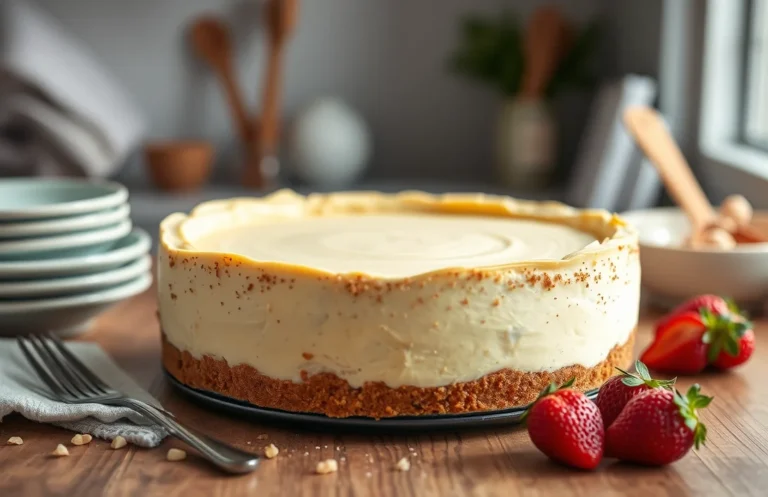
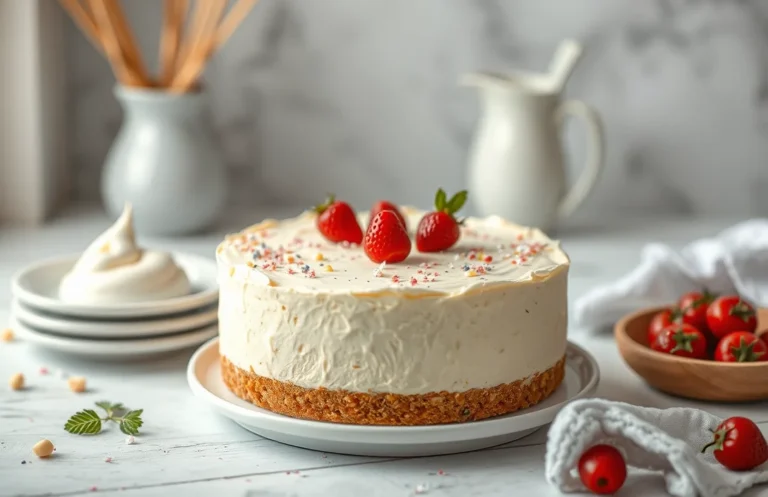
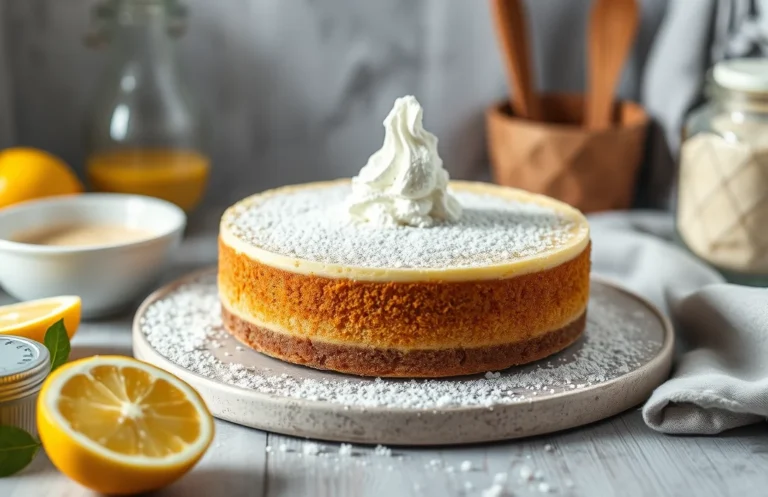
- Garnishing Tips: Use fresh fruits like berries or kiwi slices for a vibrant touch. Arrange them artfully on top or around the sides of the cheesecake. A sprinkle of powdered sugar adds a finishing touch, making it look extra special. For a richer flavor, consider shaving dark chocolate over the top—use about 1 ounce for a decadent effect.
- Common Mistakes to Avoid: Avoid overloading your cheesecake with toppings, which can overwhelm the palate. Stick to a few key ingredients that complement each other. Also, be cautious when slicing; use a hot knife (run it under hot water and dry it off) to ensure clean cuts.
Quick Summary
| Prep Time | 15 minutes |
|---|---|
| Cook Time | 0 minutes |
| Total Time | 15 minutes |
| Servings | 8 |
- Choose your base: Use crushed graham crackers or digestive biscuits for the crust.
- Layer toppings: Fresh fruits, chocolate sauce, or caramel provide flavor and color.
- Use a piping bag: For precise decoration with whipped cream or cheesecake mousse.
- Chill before serving: Let the cheesecake sit for at least 4 hours to set.
- Garnish just before serving: Add toppings right before to maintain freshness.
- Tip: Use seasonal fruits for a vibrant presentation.
- Tip: Dust with powdered sugar for a professional finish.
Frequently Asked Questions
Can I make this ahead of time? How to store and reheat?
You can absolutely make your cheesecake ahead of time! Store it in the refrigerator, covered tightly with plastic wrap for up to 5 days without losing its flavor or texture; just decorate it right before serving.
What can I substitute for cream cheese?
If you need a substitute for cream cheese, you can use mascarpone cheese or a mixture of Greek yogurt and sour cream for a similar creamy texture, though it may alter the flavor slightly.
How do I know when it’s done?
Your cheesecake is done when the edges are set and the center still has a slight jiggle; it should look slightly puffed and not wet on top, which usually takes about 50-60 minutes in the oven.
Can I freeze this? How long does it last?
Yes, you can freeze your cheesecake for up to 3 months; wrap it well in plastic wrap and aluminum foil to prevent freezer burn, and thaw it in the fridge overnight before decorating.
Why did my cheesecake turn out cracked?
Your cheesecake may crack due to overbeating the batter or baking it at too high a temperature; ensure you mix just until smooth and use a water bath for even baking to prevent this issue.

- 10 Best Cheese Knife With Holes For Smooth Slice 2026 - March 9, 2026
- Make Cheesecake Up to 3 Days Ahead: Tips for Best Flavor & Texture - March 4, 2026
- Easy No-Bake Cool Doen Cheesecake: Quick Recipe & Tips - March 4, 2026