Chic Cupcake Recipe: Step-by-Step for Preppy Kitchen Style
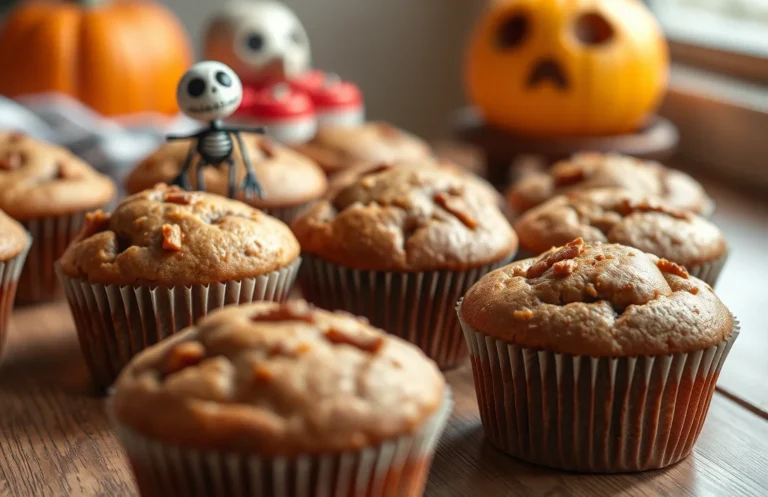
If you’re looking for a sweet treat that brings joy to any occasion, these cupcakes are just what you need! With their light and fluffy texture, they’re the perfect balance of sweet and airy, making them a delightful addition to birthdays, brunches, or even just a cozy night in. Trust me, one bite and you’ll be hooked!
This recipe takes just 30 minutes total, is easy to follow, and yields 12 delicious cupcakes. You’ll be amazed at how simple it is to create something so beautiful and tasty right at home.
| Prep Time | Cook Time | Total Time | Servings | Difficulty |
|---|---|---|---|---|
| 15 minutes | 15 minutes | 30 minutes | 12 | Easy |
Cupcake History and Significance
Cupcakes have a delightful history that traces back to the early 19th century. Their evolution from simple cake baked in individual molds to the vibrant, decorative treats we enjoy today reflects cultural shifts and culinary creativity. Understanding this background enriches our appreciation for cupcakes, especially within the stylish and polished context of a preppy kitchen aesthetic.
Origin of Cupcakes
The cupcake originated in the United States, with the first known recipe appearing in a cookbook published in 1828. These early cupcakes were often referred to as “number cakes” because they were baked using a cup measurement for each ingredient. Over the years, they became a favorite in bakeries and homes alike for their convenience and portion control. Their compact size made them ideal for gatherings, parties, and celebrations.
- 1828: First known cupcake recipe documented.
- 19th Century: Rise in popularity as individual servings.
- 20th Century: Flourished in bakeries with creative decorations.
Preppy Kitchen Style
The preppy kitchen aesthetic embodies elegance and charm, characterized by clean lines, pastel colors, and a focus on simplicity. Cupcakes fit perfectly into this style, as they can be beautifully decorated with pastel-colored frosting and stylish toppings. They bring a sense of nostalgia while also allowing for modern interpretations, making them a staple for gatherings.
“A well-decorated cupcake can elevate any gathering, making it feel special and polished.”
In a preppy kitchen, cupcakes are not just desserts; they are a canvas for creativity and style, reflecting the host’s personality and attention to detail. Their significance goes beyond taste, symbolizing celebration and the joy of sharing.
Ingredients for Preppy Cupcakes
In this section, we will outline all the essential ingredients you’ll need to whip up delightful preppy cupcakes. Having precise measurements and specifications is crucial for achieving that perfect balance of flavor and texture that defines these stylish treats.
| Item | Amount/Specification | Notes |
|---|---|---|
| All-purpose flour | 1 ½ cups (190g) | For a light and fluffy texture |
| Baking powder | 1 ½ teaspoons | Leavening agent for rise |
| Salt | ½ teaspoon | Enhances flavor |
| Granulated sugar | 1 cup (200g) | Sweetness balance |
| Unsalted butter | ½ cup (115g), softened | Adds richness |
| Eggs | 2 large | Room temperature for best incorporation |
| Whole milk | ½ cup (120ml) | Provides moisture |
| Vanilla extract | 2 teaspoons | For flavor depth |
- For a gluten-free option, substitute all-purpose flour with a 1:1 gluten-free blend.
- If you have dairy allergies, use coconut oil and almond milk as substitutes.
- Ensure all ingredients are at room temperature for optimal mixing.
Essential Kitchen Tools
Having the right kitchen tools is crucial for baking delicious preppy cupcakes that not only taste great but also look fabulous. This section outlines the essential baking and decorating tools you’ll need to create perfectly styled cupcakes that embody the preppy kitchen aesthetic.
Baking Tools
| Item | Amount/Specification | Notes |
|---|---|---|
| Mixing Bowls | 2-3 bowls (various sizes) | Glass or stainless steel works best for easy mixing and visibility. |
| Cupcake Pan | 12-cup standard size | Use a non-stick or silicone pan for easy removal. |
| Paper Liners | 12 standard cupcake liners | Choose colorful or patterned liners for a preppy touch. |
| Electric Mixer | 1 | A stand mixer or hand mixer for easy batter preparation. |
| Spatula | 1 silicone spatula | For scraping down the sides of the mixing bowl. |
Decoration Tools
| Item | Amount/Specification | Notes |
|---|---|---|
| Piping Bags | 1-2 reusable or disposable | For elegant frosting designs. |
| Piping Tips | 2-3 various sizes | Choose star or round tips for different frosting styles. |
| Offset Spatula | 1 | Helps in frosting cupcakes smoothly. |
| Decorative Sprinkles | 1-2 types | Opt for colorful or themed sprinkles to enhance the presentation. |
- Tip: Ensure all your tools are clean and dry before starting.
- Use a whisk to combine dry ingredients for better aeration.
- Don’t forget to preheat your oven to 350°F (175°C) before mixing your batter.
Step-by-Step Baking Instructions
This section provides clear, timed instructions for baking your cupcakes to perfection. Following these steps will ensure that you achieve a light and fluffy texture, while also showcasing the stylish presentation typical of a preppy kitchen.
- Preheat your oven: Set your oven to 350°F (175°C) and let it preheat for at least 10-15 minutes. This is crucial as a properly preheated oven ensures even baking and helps your cupcakes rise beautifully.
- Prepare your cupcake liners: While the oven is preheating, line a standard 12-cup muffin tin with your favorite cupcake liners. Choose colors or patterns that reflect the preppy aesthetic, such as pastel shades or classic stripes.
- Mix the batter: In a large mixing bowl, combine 1 ½ cups (180g) all-purpose flour, 1 cup (200g) granulated sugar, ½ teaspoon baking powder, ½ teaspoon baking soda, and ¼ teaspoon salt. Whisk these dry ingredients together until well blended. Then, add ½ cup (120ml) whole milk, ½ cup (120ml) vegetable oil, 2 large eggs, and 1 teaspoon pure vanilla extract. Beat the mixture on medium speed for about 2 minutes until smooth and creamy, and you see small bubbles forming on the surface.
- Fill the cupcake liners: Carefully pour the batter into each lined cupcake cup, filling them about ⅔ full to allow room for rising. You can use an ice cream scoop for even portions. The batter should look glossy and thick but flow easily from the scoop.
- Bake the cupcakes: Place the muffin tin in the preheated oven and bake for 18-20 minutes. The cupcakes are done when they are golden brown, and a toothpick inserted into the center comes out clean. Avoid opening the oven door for the first 15 minutes to prevent them from sinking.
- Cool before decorating: Once baked, remove the cupcakes from the oven and let them cool in the tin for 5 minutes. Then, transfer them to a wire rack to cool completely. This step is essential as warm cupcakes can melt your frosting.
Expert Tips and Common Pitfalls
Understanding the nuances of cupcake baking can elevate your results from good to exceptional. Here are some essential tips to ensure the perfect texture and flavor for your preppy kitchen cupcakes, along with common pitfalls to avoid.
Texture Tips
- Measure your flour correctly: Use the spoon-and-level method for measuring flour. Scooping directly from the bag can pack it down and result in dense cupcakes.
- Avoid overmixing: Mix the batter just until the ingredients are combined. Overmixing can create tough, rubbery cupcakes instead of light and fluffy ones.
- Use room temperature ingredients: Ingredients like eggs and butter should be at room temperature to ensure even mixing and a smooth batter. This helps with the rise and texture.
Flavor Issues
- Fresh ingredients matter: Always use fresh baking powder and vanilla extract. Stale ingredients can compromise the flavor and rise of your cupcakes.
- Don’t skip the salt: A small amount of salt enhances the sweetness and overall flavor profile. Aim for about ¼ teaspoon for your cupcake batter.
- Be careful with substitutions: If you’re replacing sugar with a sugar substitute, ensure it’s a 1:1 ratio. Some substitutes may affect the texture or taste negatively.
Flavor Variations and Modifications
Exploring different flavor profiles and dietary modifications for your cupcake recipe allows you to customize your treats to fit any occasion or preference. Whether you’re looking to accommodate dietary needs or simply want to add a twist to the classic recipe, these suggestions will help you create delightful and stylish cupcakes.
Flavor Variations
- Chocolate Cupcakes: Substitute ½ cup of all-purpose flour (60g) with ½ cup of unsweetened cocoa powder (50g) for a rich, chocolatey flavor.
- Vanilla Almond: Add 1 teaspoon of almond extract along with the vanilla for a nutty twist.
- Lemon Zest: Incorporate the zest of 1 lemon into the batter for a fresh, citrusy flavor.
- Red Velvet: Replace 1 cup (120g) of all-purpose flour with 1 cup (120g) of cake flour and add 1 tablespoon of red food coloring for that classic red velvet look.
Dietary Modifications
If you’re accommodating specific dietary restrictions, here are some effective substitutions:
| Dietary Need | Substitution |
|---|---|
| Gluten-Free | Use 1:1 gluten-free all-purpose flour blend instead of regular flour. |
| Dairy-Free | Substitute ½ cup of buttermilk with ½ cup of almond milk and add 1 tablespoon of vinegar. |
| Egg-Free | Replace each egg with ¼ cup of unsweetened applesauce or 1 tablespoon of ground flaxseed mixed with 3 tablespoons of water. |
Pro tip: Always taste your batter before baking. This allows you to adjust flavors as needed!
Serving and Plating Ideas
Presenting your cupcakes in a stylish manner can elevate their appeal, making them perfect for gatherings or special occasions. Here are some creative decoration tips and pairing suggestions that align beautifully with the preppy kitchen aesthetic.
Decoration Tips
- Use classic white or pastel-colored cupcake liners to maintain a sophisticated look.
- Top each cupcake with a generous swirl of buttercream frosting, using a star tip for a polished finish.
- For an additional touch, sprinkle edible glitter or colored sugar on top of the frosting.
- Add fresh fruit, such as a slice of strawberry or a few blueberries, for a pop of color and freshness.
- Consider using decorative flags or toothpicks with stylish designs to add an extra layer of charm.
Pairing Suggestions
Enhancing your cupcakes with complementary flavors can create a delightful experience. Here are some pairing ideas:
- Serve your cupcakes with a side of freshly brewed coffee or a light herbal tea.
- Pair with a fruity sorbet for a refreshing contrast to the sweetness of the cupcakes.
- Offer a selection of flavored whipped creams, such as vanilla or lavender, to add a unique twist.
Chef’s tip: For a cohesive look, match your serving platters and napkins to the colors of your cupcakes. This attention to detail makes a big difference!
Quick Recipe Summary
This section provides a concise overview of the essential ingredients and steps needed to create beautifully preppy kitchen-style cupcakes. This summary will help you quickly reference what you need and how to achieve that perfect cupcake presentation.
Quick Ingredients List
- 1 ½ cups all-purpose flour (190g)
- 1 cup granulated sugar (200g)
- ½ cup unsalted butter, softened (113g)
- 2 large eggs
- 1 teaspoon vanilla extract
- ½ cup milk (120ml)
- 1 ½ teaspoons baking powder
- ¼ teaspoon salt
Baking Overview
- Preheat your oven to 350°F (175°C) and line a cupcake pan with paper liners. This ensures even baking and easy removal once the cupcakes are done.
- In a mixing bowl, cream together the softened butter and sugar until light and fluffy, about 3-4 minutes. You’ll notice a pale color and a light texture, which is key for a soft cupcake.
- Add the eggs one at a time, mixing well after each addition. The mixture should look smooth and slightly thickened; this signals proper emulsification.
- Whisk the dry ingredients (flour, baking powder, and salt) in a separate bowl. This helps to evenly distribute the leavening agents.
- Gradually fold the dry mixture into the wet mixture, alternating with the milk until just combined. Avoid overmixing; the batter should look somewhat lumpy but well incorporated.
- Pour the batter into the cupcake liners, filling them about two-thirds full. This allows space for rising without overflowing.
- Bake for 18-20 minutes or until a toothpick inserted into the center comes out clean. The tops should be lightly golden and spring back when gently pressed.
- Cool completely in the pan for 5 minutes, then transfer to a wire rack. This step is crucial for preventing sogginess.
Chef’s tip: For an elegant finish, use a piping bag to add a swirl of frosting on top of cooled cupcakes.
Quick Summary
| Prep Time | 20 minutes |
|---|---|
| Cook Time | 18-20 minutes |
| Total Time | 40 minutes |
| Servings | 12 cupcakes |
- Preheat your oven to 350°F (175°C) for even baking.
- Cream butter and sugar until light and fluffy, about 3-5 minutes.
- Add eggs one at a time to maintain a smooth batter consistency.
- Alternate adding dry and wet ingredients to avoid lumps.
- Don’t overmix after the last addition to keep cupcakes fluffy.
- Cool completely before frosting to prevent melting.
- Tip: Use room temperature ingredients for better incorporation.
- Tip: Always measure flour accurately to avoid dense cupcakes.
- Tip: Bake in a preheated oven for optimal rise and texture.
Frequently Asked Questions
Can I make this ahead of time? How to store and reheat?
You can make the cupcakes up to 2 days in advance and store them in an airtight container at room temperature. If you want to reheat them, pop them in a 350°F (175°C) oven for about 5 minutes to warm up.
What can I substitute for eggs in this recipe?
If you need an egg substitute, you can use 1/4 cup unsweetened applesauce or a flax egg (1 tablespoon ground flaxseed mixed with 2.5 tablespoons water) for each egg. These alternatives will keep your cupcakes moist and delicious!
How do I know when it’s done?
Your cupcakes are done when they are golden brown and a toothpick inserted into the center comes out clean or with a few crumbs attached. This usually takes about 18-20 minutes at 350°F (175°C).
Can I freeze this? How long does it last?
You can freeze the cupcakes for up to 3 months when wrapped tightly in plastic wrap and placed in an airtight container. Just thaw them in the fridge overnight before serving!
What if I don’t have a cupcake pan?
If you don’t have a cupcake pan, you can use a muffin tin or even a lined baking sheet to make mini cupcakes, adjusting the baking time to about 15-18 minutes. Just keep an eye on them to make sure they don’t overbake!

- Make Cheesecake Up to 3 Days Ahead: Tips for Best Flavor & Texture - March 4, 2026
- Easy No-Bake Cool Doen Cheesecake: Quick Recipe & Tips - March 4, 2026
- Decadent Dulce de Leche Cheesecake: Easy Step-by-Step Recipe - March 4, 2026