Decadent Cannoli Cheesecake Recipe: Easy Step-by-Step Instructions
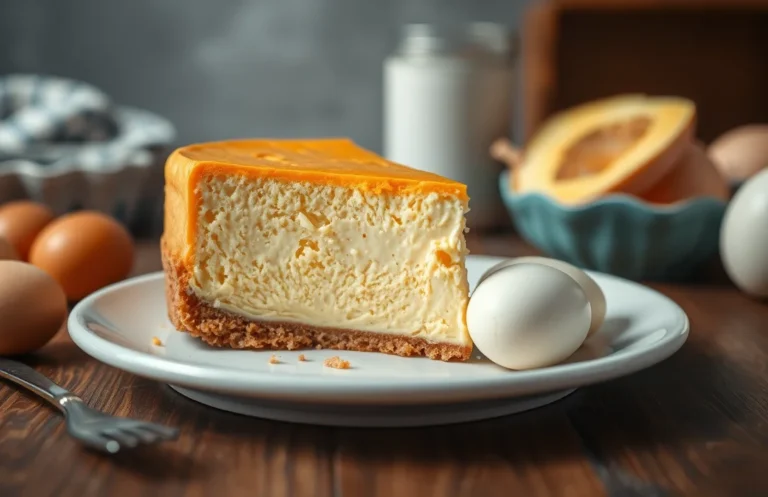
Imagine the creamy richness of cheesecake combined with the delightful crunch of cannoli shells—this Cannoli Cheesecake is not just a dessert, it’s a celebration on a plate. Perfect for impressing guests or treating yourself, every bite is a sweet escape that will leave you craving more.
Ready in 1 hour 30 minutes, this recipe is moderate in difficulty, and serves 8 people. You’ll find clear instructions and tips to navigate any hiccups along the way, ensuring your cheesecake turns out perfectly every time.
| Prep Time | Cook Time | Total Time | Servings | Difficulty |
|---|---|---|---|---|
| 30 minutes | 60 minutes | 1 hour 30 minutes | 8 | Moderate |
Origin of Cannoli Cheesecake
The cannoli cheesecake is a delightful fusion of two beloved desserts, each with its own rich history. Understanding the origins of both cannoli and cheesecake not only adds depth to this recipe but also celebrates the culinary traditions that inspire it.
- History of Cannoli: Cannoli originated in Sicily, Italy, during the Arab occupation in the 9th century. This pastry was traditionally made for special occasions like Carnival and has become a symbol of Italian-American cuisine. The crispy shell filled with sweet ricotta cheese is a testament to the blend of cultures that define Italian desserts.
- What Makes It Special: Cannoli are unique due to their contrasting textures—the crunchy shell versus the creamy filling. This dessert is often enhanced with chocolate chips, candied fruit, or pistachios, offering a burst of flavor. Cannoli cheesecake takes this classic filling and incorporates it into a rich, velvety cheesecake, creating a harmonious balance of flavors.
- When to Serve: This decadent dessert is perfect for celebrations such as birthdays, holidays, or family gatherings. Its striking appearance and delightful taste make it a showstopper at any event, ensuring that it’s enjoyed by all ages.
Ingredients List
To create the perfect cannoli cheesecake, you’ll need a variety of ingredients that not only contribute to the flavor but also ensure a delightful texture. Below, I’ve organized everything you’ll need for the cheesecake base, filling, and toppings into a clear list. Gathering these ingredients ahead of time will streamline your baking process and help you avoid any last-minute trips to the store!
| Item | Amount/Specification | Notes |
|---|---|---|
| Graham cracker crumbs | 1 ½ cups (150g) | Use finely crushed for a smooth base |
| Unsalted butter | ½ cup (113g) | Melted |
| Granulated sugar | 1 cup (200g) | For sweetening the filling |
| Cream cheese | 16 oz (450g) | Softened to room temperature |
| Sour cream | 1 cup (240ml) | For creaminess |
| Ricotta cheese | 15 oz (425g) | Drained well for best texture |
| Eggs | 3 large | Room temperature |
| Vanilla extract | 1 teaspoon | For flavor |
| Mini chocolate chips | ½ cup (90g) | Optional for added flavor |
| Pistachios | ¼ cup (30g) | Chopped, for topping |
- Substitution for allergies: Use dairy-free cream cheese and sour cream for a dairy-free version.
- Make sure your cream cheese is soft—this helps avoid lumps in your filling.
- Keep an eye on the cheesecake as it bakes; it should be set around the edges but slightly jiggly in the center.
Kitchen Equipment Needed
To create a delicious cannoli cheesecake, having the right kitchen equipment is essential for a smooth cooking process. Below is a list of tools you’ll need, along with some preparation instructions to get you ready for baking.
- 9-inch Springform Pan: This pan allows easy removal of the cheesecake once it’s set. Ensure it’s tightly sealed to prevent any water from seeping in during the water bath method.
- Mixing Bowls: Use a large mixing bowl for the cheesecake filling and a medium bowl for the crust. Having separate bowls helps keep the ingredients organized and makes mixing easier.
- Electric Mixer: A stand mixer or hand mixer will save you time and effort when combining the cheesecake filling. Mix until the batter is smooth and creamy, about 2-3 minutes.
- Measuring Cups and Spoons: Precise measurements are crucial for the perfect texture and flavor. Use dry measuring cups for the crust and liquid ones for the filling ingredients.
- Rubber Spatula: This tool is great for folding in the ricotta and mascarpone to ensure a smooth consistency. Use it to scrape down the sides of the bowl as you mix.
- Aluminum Foil: Wrap the outside of the springform pan with aluminum foil to prevent water from leaking in during the baking process. Use two layers for extra protection.
- Oven Thermometer: If your oven tends to run hot or cold, an oven thermometer ensures your cheesecake bakes at the correct temperature of 325°F (163°C).
Prep Instructions
- Gather all your ingredients and equipment before starting. This will streamline the process and reduce the chances of forgetting an important step.
- Preheat your oven to 325°F (163°C) and allow it to fully heat while you prepare the cheesecake. This ensures even baking and helps prevent cracks.
- Prepare the springform pan by greasing it lightly with butter or non-stick spray. Then, line the bottom with parchment paper for easier removal.
Step-by-Step Instructions
In this section, we’ll walk through the detailed steps to create your cannoli cheesecake, focusing on making the crust, preparing the filling, and the baking process. Each step is crucial to achieving that perfect blend of flavors and textures, so let’s get started!
-
Making the Crust
Preheat your oven to 350°F (175°C). In a large mixing bowl, combine 1 ½ cups (180g) of crushed graham crackers, ½ cup (100g) of granulated sugar, and ½ cup (115g) of melted unsalted butter. Mix until the crumbs are well coated and resemble wet sand.
- Firmly press the mixture into the bottom of a 9-inch (23 cm) springform pan, creating an even layer. Bake the crust for 10 minutes until it’s slightly golden and fragrant. Remove it from the oven and let it cool while you prepare the filling.
-
Preparing the Filling
In a large mixing bowl, beat 16 ounces (450g) of cream cheese at room temperature until smooth and creamy, about 2-3 minutes. Gradually add ¾ cup (150g) of granulated sugar, mixing until fully incorporated and fluffy.
- Add 1 cup (240ml) of ricotta cheese, 2 teaspoons of vanilla extract, and 1 teaspoon of ground cinnamon. Mix until well combined. Finally, fold in ½ cup (75g) of mini chocolate chips until evenly distributed.
- Pour the filling over the cooled crust, smoothing the top with a spatula. Bake for 55-60 minutes, or until the edges are set but the center still has a slight jiggle. The cheesecake should be lightly browned on top and smell heavenly.
- Once baked, turn off the oven and crack the oven door, allowing the cheesecake to cool slowly for 1 hour. This helps prevent cracks. Afterward, refrigerate it for at least 4 hours or overnight for the best texture.
Pro Chef Tips
Perfecting your cannoli cheesecake requires attention to detail and a few insider tips. These suggestions will help you achieve a delightful texture and flavor while avoiding common pitfalls that can occur during the baking process.
Achieving Perfect Texture
- Use room temperature ingredients: Make sure your cream cheese, ricotta, and eggs are at room temperature before mixing. This will ensure a smooth and creamy filling without lumps.
- Avoid overmixing: When incorporating the ingredients, mix just until combined. Overmixing can introduce too much air, resulting in cracks during baking.
- Check for doneness: The cheesecake should be set around the edges but slightly jiggly in the center. It will firm up as it cools. If you see cracks forming during baking, it’s likely overcooked.
Flavor Adjustments
- Customize your spices: If you want to add a twist, consider incorporating a pinch of cinnamon or nutmeg into the filling for added warmth and depth.
- Adjust sweetness: Taste your cheesecake mixture before baking. If you prefer a sweeter dessert, you can add an extra tablespoon of sugar or adjust the powdered sugar in the ricotta.
- Enhance with extracts: A splash of vanilla or almond extract can elevate the flavor. Start with ½ teaspoon and adjust to your liking.
Cooling Tips
- Cool gradually: After baking, turn off the oven and crack the door open, allowing the cheesecake to cool gradually. This helps prevent cracks from sudden temperature changes.
- Chill adequately: Allow the cheesecake to chill in the refrigerator for at least 4 hours, preferably overnight. This will enhance the flavors and firm up the texture.
Variations and Substitutions
This section provides options for dietary modifications and ingredient swaps for your cannoli cheesecake, ensuring everyone can enjoy this delightful dessert. Whether you’re accommodating dietary restrictions or simply looking to change up the flavors, these variations will help you create a cheesecake that suits your needs.
Gluten-Free Options
| Item | Amount/Specification | Notes |
|---|---|---|
| Gluten-free graham cracker crumbs | 1 ½ cups (150g) | Use a certified gluten-free brand for the crust. |
| All-purpose gluten-free flour | ½ cup (60g) | For the filling, replace regular flour with gluten-free blend. |
Vegan Adaptations
| Item | Amount/Specification | Notes |
|---|---|---|
| Vegan cream cheese | 16 oz (450g) | Look for brands like Tofutti or Kite Hill. |
| Maple syrup | ¾ cup (180ml) | Use instead of sugar for sweetness. |
| Silken tofu | 1 cup (240g) | Blend until smooth to mimic ricotta. |
Flavor Variations
- Chocolate Cannoli Cheesecake: Fold in ½ cup (90g) of mini chocolate chips into the filling for a rich twist.
- Citrus Zest: Add 1 tablespoon of lemon or orange zest to the filling for a bright flavor.
- Nutty Addition: Stir in ⅓ cup (50g) of finely chopped pistachios or walnuts into the crust for extra crunch.
Chef’s tip: Taste the filling before baking to adjust sweetness or flavors as desired!
Serving Suggestions
Presenting your cannoli cheesecake beautifully can elevate your dessert experience. Here are some creative plating tips, beverage pairings, and garnishing ideas that will impress your family and friends!
Plating Tips
- Use a round cake plate for a classic look; drizzle chocolate or caramel sauce around the edges for added flair.
- Slice the cheesecake into wedges and place each slice on a dessert plate, giving a bit of space between slices for an airy feel.
- Add a dollop of whipped cream on top and lightly dust with powdered sugar for an elegant touch.
Pairing with Beverages
Choosing the right beverage can complement your cheesecake perfectly. Here are some suggestions:
- Coffee: A rich espresso or cappuccino pairs wonderfully with the creamy texture of the cheesecake.
- Wine: A glass of dessert wine, like Moscato, balances the sweetness of the cannoli flavors.
- Tea: A soothing chai or vanilla herbal tea adds warmth and spice.
Garnishing Ideas
Garnishes can add both flavor and visual appeal. Consider these:
Chef’s tip: For a crunchy texture, sprinkle crushed cannoli shells or toasted pistachios on top before serving.
- Chopped candied orange peel for a zesty kick.
- Mini chocolate chips scattered on top for extra sweetness and texture.
- Fresh mint leaves to add a pop of color and freshness.
Quick Summary
| Prep Time | 30 minutes |
|---|---|
| Cook Time | 60 minutes |
| Total Time | 1 hour 30 minutes |
| Servings | 12 servings |
- Preheat the oven to 325°F (160°C) before starting the batter.
- Mix the crust with crushed cannoli shells and butter for a crunchy base.
- Beat the cream cheese until smooth to avoid lumps in the filling.
- Bake for 60 minutes and let cool in the oven to prevent cracking.
- Chill for at least 4 hours before serving for the best texture.
- Tip: Use ricotta cheese for authentic cannoli flavor.
- Tip: Sprinkle mini chocolate chips on top for added sweetness.
Frequently Asked Questions
Can I make this ahead of time? How to store and reheat?
You can make this cannoli cheesecake up to 2 days in advance. Store it in an airtight container in the refrigerator, and you can serve it cold directly from the fridge or let it sit at room temperature for 30 minutes before serving.
What can I substitute for ricotta cheese?
You can substitute ricotta cheese with mascarpone cheese for a creamier texture or use a blend of cottage cheese and cream cheese if you need a lighter option. Just make sure to blend it until smooth to mimic the texture of ricotta.
How do I know when it’s done?
Your cannoli cheesecake is done when the edges are set but the center still has a slight jiggle, which usually takes about 45-50 minutes in the oven at 325°F. It will continue to firm up as it cools, so don’t overbake!
Can I freeze this? How long does it last?
Yes, you can freeze the cannoli cheesecake for up to 2 months. Wrap it tightly in plastic wrap and aluminum foil to prevent freezer burn, and thaw it in the fridge overnight before serving.
What if I don’t have a springform pan?
If you don’t have a springform pan, you can use a regular 9-inch round cake pan, but be sure to line it with parchment paper for easy removal. Just take your time when slicing it out to keep the cheesecake intact!

- Decadent Peanut Butter No-Bake Cheesecake: Easy Recipe to Indulge - April 3, 2026
- Delicious Mango No-Bake Cheesecake: Step-by-Step Recipe - April 3, 2026
- Decadent Raspberry No-Bake Cheesecake: Easy Step-by-Step Recipe - April 3, 2026