Decadent White Chocolate No-Bake Cheesecake: Easy Recipe Inside
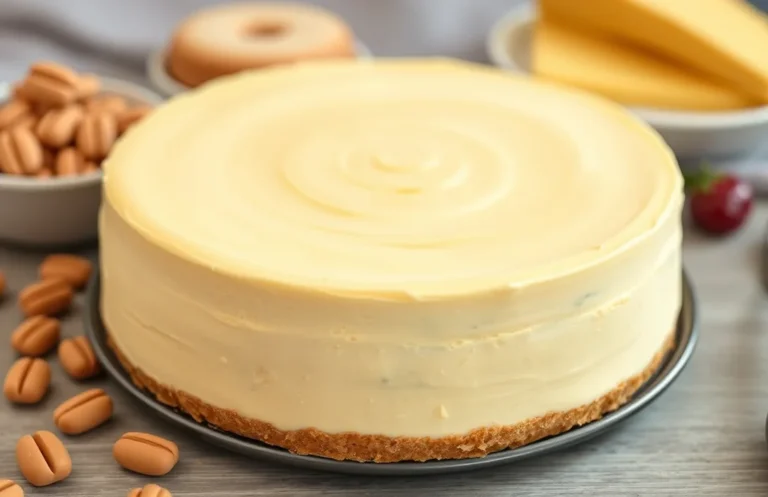
If you’re looking for a dessert that feels like a hug, this white chocolate no-bake cheesecake is just the ticket. Creamy, rich, and oh-so-decadent, it’s the perfect sweet treat for any occasion—whether you’re celebrating a special moment or indulging after a busy week. Your taste buds are in for a delightful surprise!
This recipe is straightforward and designed for home cooks who appreciate precise measurements and clear instructions. With a prep time of 20 minutes and chill time of 4 hours, it serves 8 people and is easy to make.
| Prep Time | 20 minutes |
|---|---|
| Chill Time | 4 hours |
| Total Time | 4 hours 20 minutes |
| Servings | 8 |
| Difficulty | Easy |
Origin of No-Bake Cheesecake
No-bake cheesecakes have a charming history, offering a delightful alternative to their baked counterparts. This method combines simplicity with the creamy richness of traditional cheesecake, making it a favored choice for many dessert lovers. The white chocolate variation adds a unique twist, elevating the dessert with its sweet, velvety flavor.
Historical Background
The origins of cheesecake can be traced back to ancient Greece, where it was served to athletes during the first Olympic Games. Over the centuries, variations evolved, particularly in Europe. The no-bake cheesecake emerged in the mid-20th century, gaining popularity for its ease and accessibility, making it a staple at gatherings and celebrations.
What Makes It Special
No-bake cheesecakes stand out for several reasons:
- Texture: They are exceptionally creamy and smooth, as they do not undergo the baking process that can alter the consistency of traditional cheesecakes.
- Ease of Preparation: With no baking required, they are quicker to prepare, often taking less than 30 minutes of active time.
- Flavor Variations: The use of ingredients like white chocolate, fresh fruit, or flavored extracts allows for endless customization.
Chef’s tip: For a richer flavor, use high-quality white chocolate and let the cheesecake chill overnight for the best texture.
| Ingredient | Amount |
|---|---|
| White chocolate | 8 oz (225g) |
| Cream cheese | 16 oz (450g) |
| Heavy cream | 1 cup (240ml) |
Ingredients List
Gathering the right ingredients is crucial for creating a delicious white chocolate no-bake cheesecake. Below is a comprehensive list of everything you’ll need, along with precise measurements and notes to help you achieve the best results.
| Item | Amount/Specification | Notes |
|---|---|---|
| Cream Cheese | 16 ounces (450g) | Softened to room temperature for easy mixing |
| White Chocolate | 8 ounces (225g) | Chopped or in chips; melt before adding to mixture |
| Granulated Sugar | ½ cup (100g) | Adjust to taste if desired |
| Heavy Whipping Cream | 1 cup (240ml) | Chilled for better whipping |
| Vanilla Extract | 1 teaspoon | For added flavor |
| Graham Cracker Crumbs | 1 ½ cups (150g) | For the crust base |
| Unsalted Butter | ½ cup (113g) | Melted for crust binding |
| Optional Toppings | Fresh berries, chocolate shavings | For serving, to enhance presentation |
- For a gluten-free option, use gluten-free graham cracker crumbs or crushed nuts for the crust.
- Ensure cream cheese is fully softened to avoid lumps in your cheesecake.
- If you’re dairy-free, look for cream cheese and white chocolate substitutes.
Kitchen Equipment Needed
Before diving into the white chocolate no-bake cheesecake recipe, it’s essential to gather the right tools and equipment. Having everything ready will streamline your preparation and ensure a smooth baking experience.
- Mixing Bowls: You will need at least two medium-sized mixing bowls. One for the crust and another for the cheesecake filling. Using glass or stainless steel bowls is preferred, as they hold temperature well and are easy to clean.
- Springform Pan: A 9-inch (23 cm) springform pan is ideal for this no-bake cheesecake. The removable sides make it easy to release the cheesecake without damaging its delicate structure. Make sure to line the bottom with parchment paper for easy removal.
- Electric Mixer: A handheld or stand mixer will save you time and effort when whipping the cream cheese and heavy cream. Ensure the mixer is set to medium speed to achieve a smooth and creamy texture without overmixing the ingredients.
- Spatula: A silicone or rubber spatula is essential for folding the whipped cream into the cream cheese mixture. It helps to maintain the airy texture of the filling while ensuring all ingredients are well combined.
Chef’s tip: Keep your mixing bowls and utensils chilled for a couple of hours before starting. This helps the heavy cream whip up better and hold its shape when folded into the cheesecake mixture.
Step-by-Step Instructions
This section provides detailed steps to create a delicious white chocolate no-bake cheesecake, ensuring each part of the process is clear and manageable. By following these instructions, you’ll achieve a creamy and rich cheesecake with a perfect crust.
- Prepare the Crust: In a medium bowl, combine 1 ½ cups (150g) of crushed graham crackers with ½ cup (100g) of granulated sugar and ½ cup (115g) of melted unsalted butter. Stir until the mixture resembles wet sand and holds together when pressed. Press this mixture firmly into the bottom of a 9-inch (23cm) springform pan to create an even layer. Refrigerate for at least 30 minutes to set.
- Melt the White Chocolate: Using a double boiler, melt 8 ounces (225g) of white chocolate, stirring frequently until smooth and glossy. Alternatively, you can microwave it in 30-second bursts, stirring between each, until fully melted. Be cautious not to overheat, as burnt chocolate can become grainy. Let it cool slightly while you prepare the filling.
- Mix the Filling: In a large mixing bowl, beat 16 ounces (450g) of cream cheese at room temperature with a handheld mixer until smooth and creamy. Gradually add ½ cup (60g) of powdered sugar and 1 teaspoon of vanilla extract, mixing until combined. Gently fold in the melted white chocolate until fully incorporated, ensuring a silky texture without lumps.
- Set the Cheesecake: Pour the filling over the chilled crust, spreading it evenly with a spatula. Tap the pan gently on the counter to remove air bubbles. Cover the cheesecake with plastic wrap and refrigerate for at least 4 hours, or overnight if possible, until it is firm and set. The cheesecake should feel solid to the touch when done.
Pro Chef Tips
Creating a flawless white chocolate no-bake cheesecake involves attention to detail and avoiding common pitfalls. Here are some practical tips to ensure your cheesecake has the perfect texture, remains crack-free, and cools properly for the best flavor and presentation.
Achieving Perfect Texture
- Use Room Temperature Ingredients: Allow your cream cheese and white chocolate to come to room temperature before mixing. This prevents lumps and ensures a smooth, creamy filling.
- Whip the Cream to Stiff Peaks: When whipping your heavy cream, stop when it forms stiff peaks. This adds lightness to your cheesecake while keeping it stable.
Avoiding Cracks
- Don’t Overmix: Once you add the whipped cream, gently fold it into the mixture until just combined. Overmixing can introduce air into the filling, which may lead to cracks as it sets.
- Chill Slowly: After assembling the cheesecake, refrigerate it uncovered for the first hour. This helps it set without forming condensation, which can cause cracking.
Cooling Tips
- Use a Water Bath: If you have the time, place your cheesecake in a pan of cold water in the fridge. This helps maintain an even temperature around the dessert, reducing the risk of cracks.
- Allow for Adequate Chill Time: Let your cheesecake chill for at least 4 hours, preferably overnight. This allows the flavors to meld and the texture to set perfectly, making it easier to cut into clean slices.
Variations and Substitutions
This section highlights some fantastic modifications for your white chocolate no-bake cheesecake, catering to different dietary preferences and ingredient availability. Whether you’re looking for gluten-free options, vegan substitutes, or simply want to add a unique flavor twist, these suggestions will help you customize the recipe to fit your needs.
Gluten-Free Options
| Item | Amount/Specification | Notes |
|---|---|---|
| Graham cracker crumbs | 1½ cups (150g) | Use gluten-free graham crackers or almond flour for the crust. |
| Butter | ½ cup (115g) | Ensure it’s gluten-free (most are, but check labels). |
Vegan Substitutes
| Item | Amount/Specification | Notes |
|---|---|---|
| White chocolate chips | 8 oz (225g) | Use dairy-free white chocolate chips. |
| Cream cheese | 8 oz (225g) | Opt for vegan cream cheese. |
| Heavy cream | 1 cup (240ml) | Substitute with coconut cream or a vegan whipping cream. |
Flavor Additions
- Add 1 teaspoon of vanilla extract for extra depth of flavor.
- Incorporate ¼ cup of lemon juice for a zesty contrast.
- Mix in ½ cup of crushed berries or fruit puree for a fruity twist.
Chef’s tip: When using fruit, make sure to adjust the sweetness of the cheesecake base to balance the flavors.
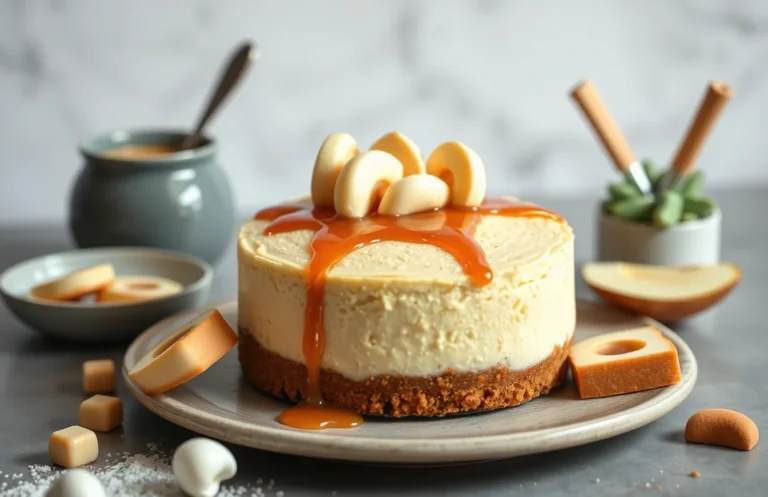
Serving Suggestions
Presenting your white chocolate no-bake cheesecake in an appealing way can elevate the dessert experience for you and your guests. From garnishes to serving sizes, thoughtful presentation can enhance the flavors and enjoyment of this creamy delight.
Garnishing Tips
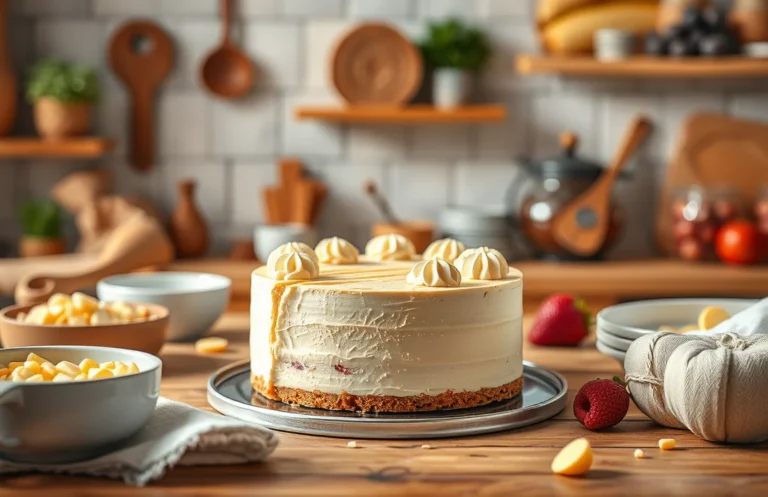
- Top each slice with a dollop of freshly whipped cream for added richness.
- Sprinkle white chocolate shavings or curls on top for a touch of elegance.
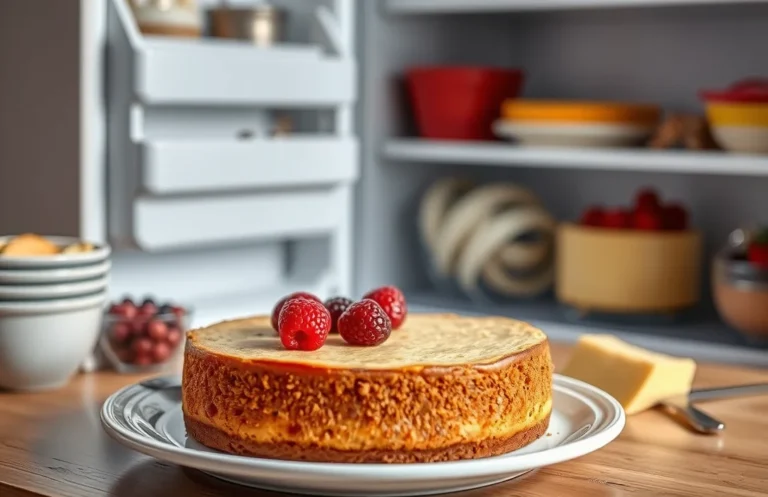
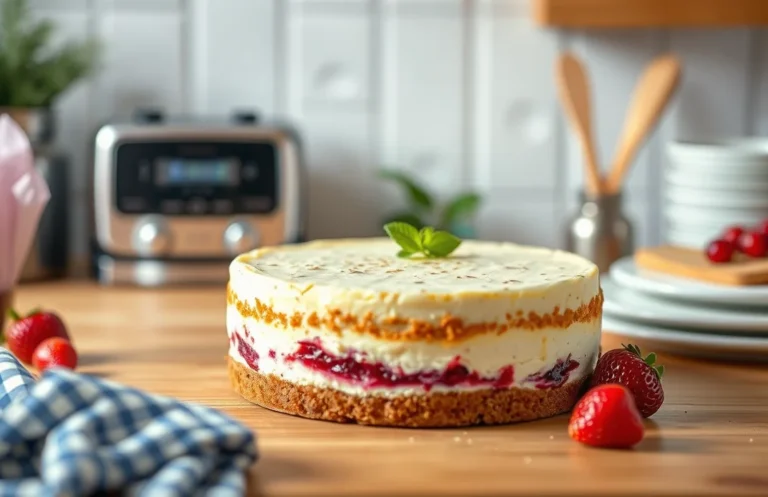
- Add fresh berries such as raspberries or strawberries for a pop of color and tartness.
- Drizzle with a fruit coulis (like raspberry or mango) to introduce a refreshing contrast to the sweetness.
Best Pairings
Pair your cheesecake with complementary flavors to enhance the overall dessert experience. Consider these options:
- A crisp glass of Prosecco or a light dessert wine to balance sweetness.
- Rich coffee, such as espresso or cappuccino, to contrast the creamy texture.
- Herbal teas like chamomile or mint for a soothing finish.
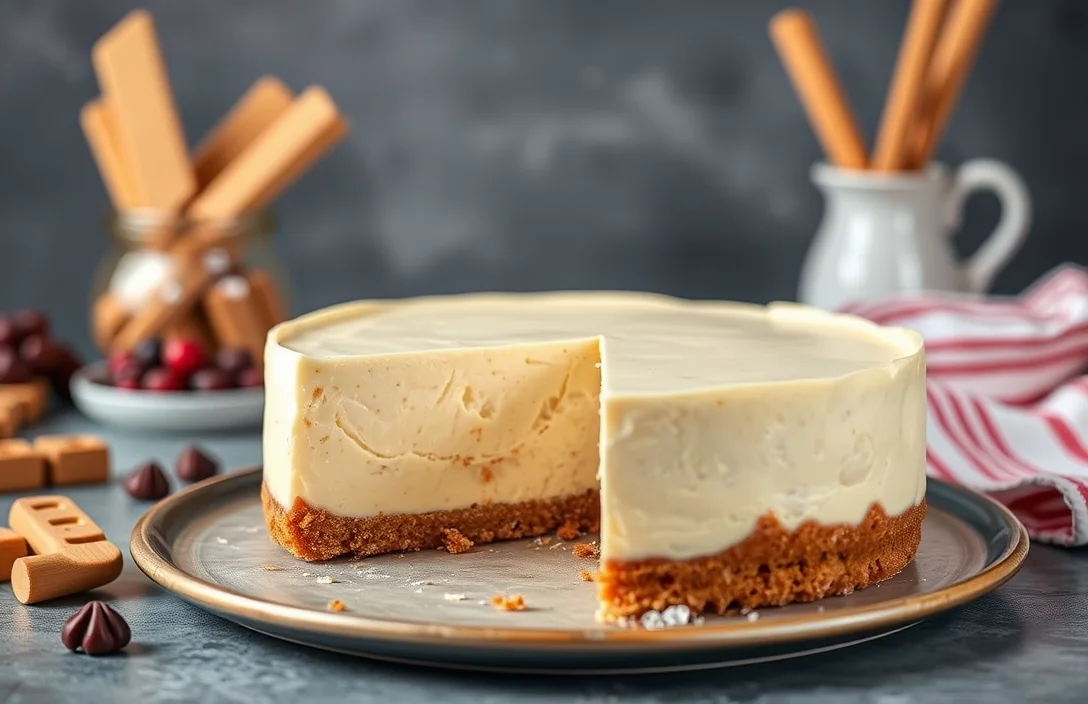
Serving Sizes
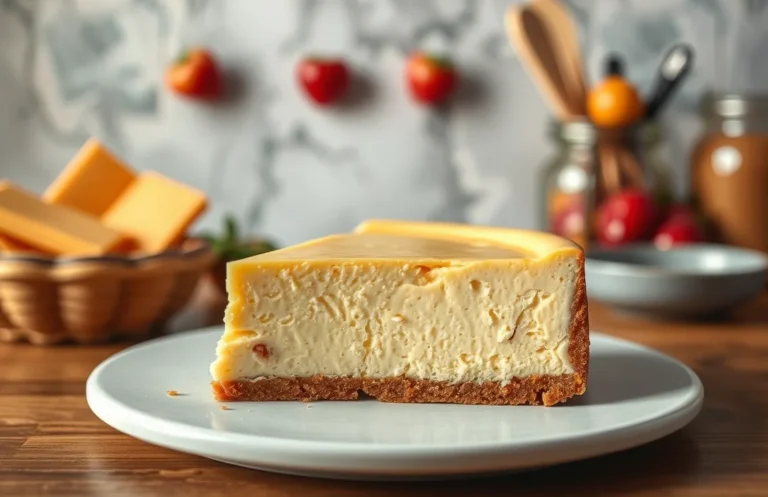
This no-bake cheesecake recipe typically serves 8-10 people, depending on portion sizes. Each slice should be about 1-1.5 inches wide. If you’re hosting a larger gathering, consider cutting smaller slices to allow guests to enjoy multiple desserts.
Pro Tip: If the cheesecake is too soft after chilling, it may need additional time in the fridge. Aim for at least 4 hours, but overnight chilling is ideal for perfect firmness.
Quick Summary
| Prep Time | Cook Time | Total Time | Servings |
|---|---|---|---|
| 20 minutes | 0 minutes | 4 hours | 8 servings |
- Prepare crust: Combine 1 ½ cups crushed graham crackers with ½ cup melted butter and press into a springform pan.
- Melt chocolate: Gently melt 8 oz of white chocolate over a double boiler.
- Mix filling: Beat 16 oz cream cheese with ½ cup sugar and 1 tsp vanilla until smooth.
- Combine: Fold melted chocolate into the cream cheese mixture.
- Chill: Pour the filling into the crust and refrigerate for at least 4 hours.
- Serve: Top with whipped cream and fresh berries before serving.
- Tip: Ensure the cream cheese is at room temperature for easy mixing.
- Tip: Use high-quality white chocolate for the best flavor.
- Tip: Let the cheesecake set overnight for optimal texture.
Frequently Asked Questions
Can I make this ahead of time? How to store and reheat?
You can make this cheesecake up to 2 days in advance. Store it in the refrigerator, covered tightly with plastic wrap or foil, and there’s no need to reheat.
What can I substitute for cream cheese?
You can substitute cream cheese with mascarpone cheese for a creamier texture. Just keep in mind that the flavor will be slightly different but still delicious!
How do I know when it’s done?
Your cheesecake is done when the edges are set but the center still has a slight jiggle, which should take about 4-6 hours in the fridge. It will firm up as it chills, so don’t worry if it looks a bit wobbly!
Can I freeze this? How long does it last?
Yes, you can freeze this cheesecake for up to 2 months. Wrap it tightly in plastic wrap, then aluminum foil to prevent freezer burn, and thaw it in the refrigerator before serving.
Why did my cheesecake turn out too soft?
If your cheesecake turned out too soft, it may need more time to chill, as it should be set in the fridge for at least 4 hours. Another reason could be that your cream cheese wasn’t fully blended, so make sure it’s smooth before mixing in the other ingredients.

- Decadent Peanut Butter No-Bake Cheesecake: Easy Recipe to Indulge - April 3, 2026
- Delicious Mango No-Bake Cheesecake: Step-by-Step Recipe - April 3, 2026
- Decadent Raspberry No-Bake Cheesecake: Easy Step-by-Step Recipe - April 3, 2026