Diabetic-Friendly Cheesecake: Low-Sugar Recipes & Tips for Portions
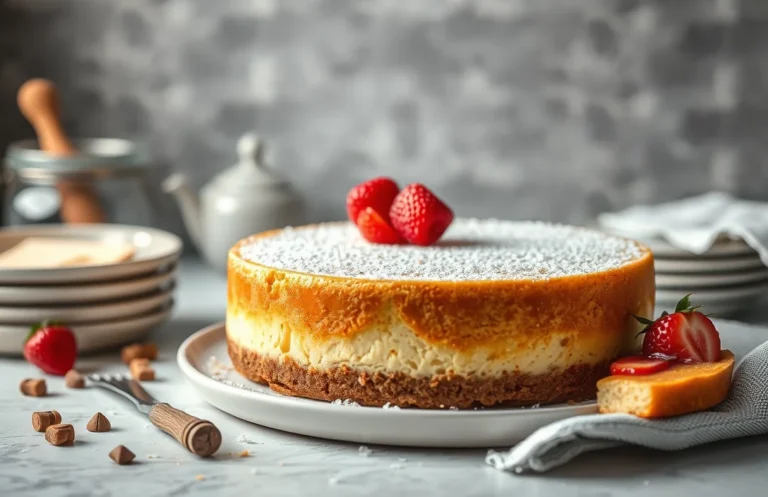
Cheesecake is that rich, creamy dessert that feels like a hug on a plate. With its velvety texture and a hint of sweet tang, it’s perfect for any occasion, whether it’s a cozy weeknight treat or the star of a festive gathering. Imagine biting into a slice that melts in your mouth, making you crave just one more bite!
Wondering if you can enjoy cheesecake as a diabetic? You absolutely can! This article provides three delicious recipes tailored for diabetics, complete with exact measurements, cooking times, and portion control tips.
| Prep Time | Cook Time | Total Time | Servings | Difficulty |
|---|---|---|---|---|
| 15 minutes | 60 minutes | 1 hour 15 minutes | 8 servings | Easy |
Cheesecake Origins and Significance
Cheesecake has a rich history that spans centuries and cultures, making it a beloved dessert worldwide. Understanding its origins and cultural significance helps us appreciate its place in culinary traditions and informs how we can adapt it for various dietary needs, including for diabetics.
History of Cheesecake
Cheesecake is believed to have originated in ancient Greece, where it was made with simple ingredients like cheese, flour, and honey. It was served to athletes during the first Olympic Games in 776 B.C. As the recipe traveled through Europe, it evolved into various forms, with the Romans adding eggs and the British introducing cream. By the time it reached America, cream cheese became the star ingredient, leading to the popular New York-style cheesecake we know today.
Cultural Significance
- Celebrations: Cheesecake is often featured at special occasions, including birthdays and holidays, symbolizing indulgence and joy.
- Regional Variations: Every culture has its twist on cheesecake, such as the Japanese fluffy cheesecake or the Italian ricotta cheesecake, showcasing local flavors and ingredients.
- Comfort Food: For many, cheesecake is a nostalgic dessert that evokes memories of family gatherings and shared meals.
When to Serve Cheesecake
Cheesecake is versatile and can be served at various occasions:
- Festive Occasions: Ideal for holiday feasts or special celebrations.
- Casual Gatherings: A great addition to potlucks or dinner parties.
- Everyday Treat: Perfect for a sweet finish to a weeknight dinner.
Chef’s tip: When serving cheesecake, consider portion sizes and dietary restrictions, especially for those with diabetes. Small slices can satisfy cravings without excessive sugar intake.
Ingredients for Diabetic-Friendly Cheesecake
This section outlines the essential ingredients needed to create a delicious diabetic-friendly cheesecake. Understanding these ingredients is crucial for making a dessert that fits within a diabetic diet while still satisfying your sweet tooth.
| Item | Amount/Specification | Notes |
|---|---|---|
| Cream Cheese | 16 ounces (450g), softened | Use low-fat cream cheese for fewer calories. |
| Sour Cream | 1 cup (240ml) | Opt for low-fat or fat-free varieties. |
| Granulated Sweetener | ¾ cup (150g) | Choose erythritol or stevia for a low-carb option. |
| Eggs | 3 large | Room temperature for better mixing. |
| Vanilla Extract | 1 teaspoon | Pure vanilla extract enhances flavor. |
| Almond Flour | 1 cup (100g) | For a low-carb crust alternative. |
| Butter | 4 tablespoons (60g), melted | Unsalted butter for a balanced flavor. |
- For a nut-free option, replace almond flour with crushed sugar-free graham crackers.
- Ensure all ingredients are at room temperature for smooth mixing.
- Use a food processor to blend the crust ingredients for a finer texture.
Essential Kitchen Tools and Prep
Before you start whipping up a diabetic-friendly cheesecake, it’s essential to have the right tools and prep work in place. This ensures a smooth baking experience and helps produce a delicious final product that stays true to dietary needs.
| Item | Amount/Specification | Notes |
|---|---|---|
| Mixing Bowls | 2 medium bowls | One for crust, one for filling |
| Springform Pan | 9-inch (23 cm) | Allows easy release of cheesecake |
| Electric Mixer | 1 | Handheld or stand mixer for smooth filling |
| Measuring Cups | Set | For accurate ingredient measurements |
| Measuring Spoons | Set | For precise smaller measurements |
| Spatula | 1 | For folding ingredients and scraping bowls |
| Oven Thermometer | 1 | To ensure accurate oven temperature |
- Tip: Preheat your oven to 325°F (163°C) before mixing your ingredients to save time.
- Tip: Line the bottom of the springform pan with parchment paper for easier removal.
- Tip: Make sure all ingredients, especially cream cheese, are at room temperature for a smoother mixture.
Step-by-Step Baking Instructions
Making a diabetic-friendly cheesecake is not only possible but can also be delicious! This section outlines the detailed steps to mix, bake, and cool your cheesecake, ensuring a creamy and satisfying treat while keeping sugar in check.
- Prepare the Crust: Preheat your oven to 325°F (160°C). In a bowl, combine 1 cup almond flour (100g) with 2 tablespoons melted coconut oil and 2 tablespoons erythritol. Mix until you achieve a crumbly texture, then press it evenly into the bottom of a 9-inch (23cm) springform pan. Bake for 10 minutes until lightly golden and fragrant.
- Mix the Filling: In a large mixing bowl, beat together 16 oz (450g) cream cheese (softened) and ½ cup (100g) erythritol until smooth. Add in 2 large eggs, one at a time, mixing thoroughly between each addition. The mixture should be creamy with no lumps and slightly fluffy.
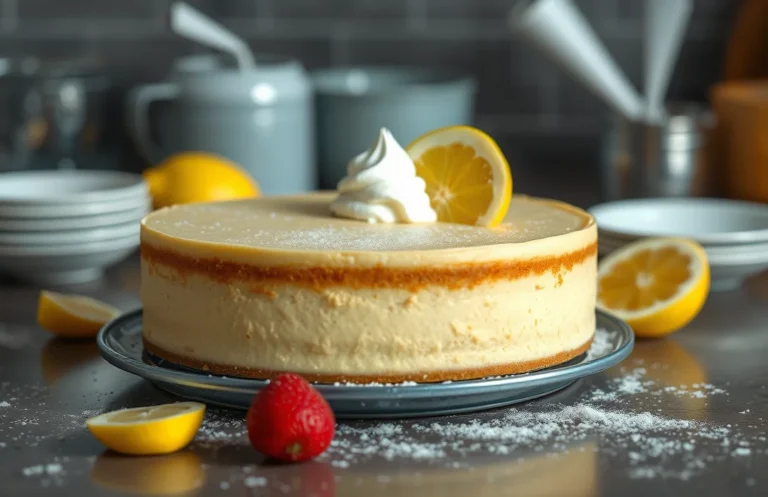
- Flavor the Cheesecake: Add 1 teaspoon vanilla extract and the juice of ½ lemon to the cream cheese mixture. Stir until well combined. The filling should have a smooth and glossy appearance. This adds flavor without increasing sugar content.
- Bake the Cheesecake: Pour the filling over the cooled crust. Bake in the preheated oven for 40-45 minutes or until the edges are set and the center is slightly jiggly. The cheesecake will puff up and may crack slightly on top, which is normal.
- Cool the Cheesecake: Once baked, turn off the oven and crack the oven door open. Allow the cheesecake to cool in the oven for 1 hour to prevent cracking. Afterward, transfer it to the fridge and chill for at least 4 hours or overnight for best results. The texture should be firm yet creamy when fully cooled.
Chef’s tip: For a smoother texture, blend the filling ingredients in a food processor until completely creamy.
Expert Tips and Common Mistakes
Making a delicious cheesecake that is suitable for diabetics requires attention to detail and some careful techniques. Here are some essential tips to help you achieve the best results while avoiding common pitfalls.
- Avoid Cracks: To prevent cracks in your cheesecake, make sure to mix the cream cheese until smooth before adding any other ingredients. Scrape down the sides of the bowl frequently to ensure even mixing. Additionally, bake your cheesecake in a water bath at 325°F (160°C) to maintain moisture and a gentle temperature.
- Check Doneness: Instead of relying solely on time, check for doneness by gently shaking the pan; the center should have a slight jiggle but not be liquid. A properly baked cheesecake should look set around the edges and only wobbly in the middle. This usually takes about 50-60 minutes in the oven.
- Cooling Tips: After baking, turn off the oven and crack the door open, allowing the cheesecake to cool gradually. This can help prevent cracking due to sudden temperature changes. Once at room temperature, refrigerate for at least 4 hours, or overnight for the best flavor and texture.
Chef’s tip: If your cheesecake does crack, don’t panic! You can cover it with a delicious fruit topping or a sugar-free glaze to mask any imperfections.
Variations and Substitutions
This section offers various alternatives and substitutions for making cheesecake suitable for diabetics, ensuring that dietary needs are met without sacrificing flavor. By using specific ingredients, you can create a healthier cheesecake that caters to gluten-free and vegan diets while also allowing for delightful flavor variations.
| Item | Amount/Specification | Notes |
|---|---|---|
| Almond flour | 1 ½ cups (150g) | Gluten-free crust option |
| Coconut oil | ½ cup (120ml) | Use in place of butter for vegan option |
| Stevia or Erythritol | ½ cup (100g) | Low-calorie sweetener for reduced sugar |
| Silken tofu | 1 cup (240g) | Vegan cream cheese substitute |
| Greek yogurt | 1 cup (240g) | Lower-fat option for cream cheese |
| Vanilla extract | 1 teaspoon (5ml) | Enhances flavor without added sugar |
- Portion Control: Serve in small slices (1-2 inches) to manage carbohydrate intake.
- Flavor Variations: Consider adding unsweetened cocoa powder for chocolate cheesecake or lemon zest for a citrus twist.
- Common Mistake: Avoid overbaking; the cheesecake should be slightly jiggly in the center when done.
- Chill Time: Allow the cheesecake to chill for at least 4 hours to set properly and enhance flavor.
Serving and Plating Suggestions
When serving cheesecake, especially for those managing diabetes, presentation and thoughtful garnishing can elevate the experience while keeping it healthy. Here are some practical tips on how to serve your cheesecake beautifully and what to pair it with for an enjoyable dessert.
- Garnishing Tips: Consider topping your cheesecake with fresh berries like strawberries, blueberries, or raspberries. These fruits are lower in sugar and add vibrant color. Use about ½ cup of mixed berries to create a visually appealing layer on top. A light dusting of powdered erythritol can mimic the look of powdered sugar without the added carbs.
- Pairing Suggestions: Serve your cheesecake with a side of unsweetened whipped cream made from 1 cup of heavy cream whisked until soft peaks form. This adds a creamy texture and balances the flavors without overwhelming sweetness. For additional flavor, incorporate a splash of vanilla extract or a sprinkle of cinnamon into the cream.
- Portion Control Advice: Slice the cheesecake into smaller servings, each about 2 inches wide, to keep portions manageable. This not only helps control sugar intake but also allows guests to sample without overindulging. Consider serving each slice on a small dessert plate to encourage mindful eating.
Chef’s tip: Always serve your cheesecake chilled for the best texture and flavor. Let it sit at room temperature for about 10 minutes before serving to soften slightly, enhancing its creaminess.
Quick Summary
| Prep Time | Cook Time | Total Time | Servings |
|---|---|---|---|
| 20 minutes | 50 minutes | 1 hour 10 minutes | 8 servings |
- Use low-carb sweeteners: Opt for erythritol or stevia to keep sugar levels down.
- Control crust ingredients: Use almond flour instead of graham crackers for a diabetic-friendly base.
- Monitor baking temperature: Bake at 325°F (163°C) to prevent cracking.
- Cool gradually: Let the cheesecake cool in the oven to avoid sudden temperature changes.
- Chill before serving: Refrigerate for at least 4 hours for best texture and flavor.
Frequently Asked Questions
Can I make this ahead of time? How to store and reheat?
You can absolutely make this cheesecake ahead of time! Store it in an airtight container in the refrigerator for up to 5 days and serve it cold, as reheating can alter the texture.
What can I substitute for sugar in this cheesecake?
You can use erythritol or stevia as substitutes for sugar, which are both diabetic-friendly options that won’t spike blood sugar levels.
How do I know when it’s done?
The cheesecake is done when the edges are set but the center still has a slight jiggle; it will firm up as it cools. You can also gently shake the pan, and if it wobbles evenly, it’s ready!
Can I freeze this? How long does it last?
Yes, you can freeze the cheesecake for up to 3 months; just wrap it tightly in plastic wrap and foil to prevent freezer burn. Thaw it overnight in the refrigerator before serving.
Why did my cheesecake turn out too dry?
Your cheesecake might be too dry if it was overbaked or baked at too high of a temperature. Make sure to bake at 325°F (163°C) and check for doneness early to avoid this issue.

- Make Cheesecake Up to 3 Days Ahead: Tips for Best Flavor & Texture - March 4, 2026
- Easy No-Bake Cool Doen Cheesecake: Quick Recipe & Tips - March 4, 2026
- Decadent Dulce de Leche Cheesecake: Easy Step-by-Step Recipe - March 4, 2026