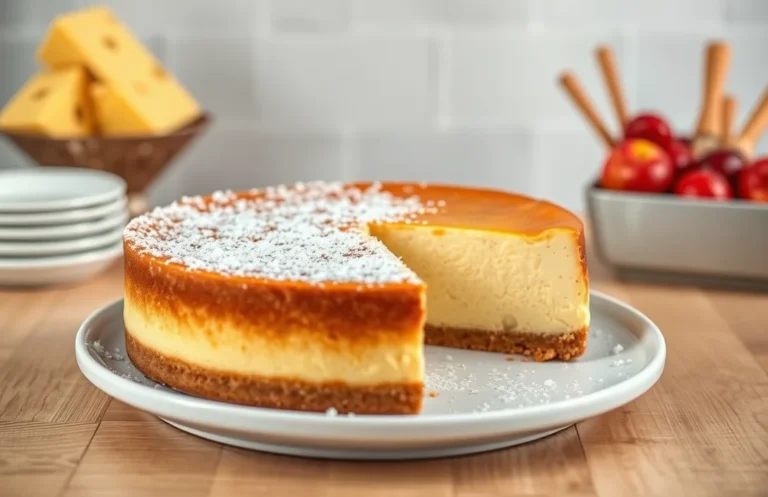
Easy No Bake Cheesecake Filling: Simple Recipe for Delicious Desserts
If you’re craving something creamy, decadent, and oh-so-satisfying, this DIY no bake cheesecake filling is your answer. Perfect for layering in desserts or spooning directly from the bowl, it’s both light and rich, making it an instant crowd-pleaser. Imagine the smooth, velvety texture melting in your mouth – it’s truly comfort food at its best.
Key details: This recipe takes just 15 minutes to prepare, is rated easy, and serves 8 people. It’s the perfect base for any cheesecake lover’s dessert dreams!
| Prep Time | Cook Time | Total Time | Servings | Difficulty |
|---|---|---|---|---|
| 15 minutes | 0 minutes | 15 minutes | 8 | Easy |
Origin of No Bake Cheesecake
No bake cheesecake filling has a rich and delightful history that reflects its popularity across various cultures. This dessert not only showcases the versatility of cream cheese but also highlights the ease of preparation that appeals to both novice and experienced bakers alike.
- Cultural Background: The no bake cheesecake is thought to have originated from the classic cheesecake recipes of the early 20th century, particularly in the United States. This variation emerged as a solution for those who wanted to enjoy cheesecake without the hassle of baking, making it accessible for casual home cooks and summer gatherings.
- Why It’s Popular: One of the main reasons for the widespread love of no bake cheesecake filling is its simplicity. With minimal ingredients and no oven required, it allows for quick preparation. The creamy texture and rich flavors can be easily customized with different toppings or mix-ins, appealing to a wide range of tastes.
- Seasonal Appeal: No bake cheesecakes shine particularly in warmer months, as they provide a refreshing dessert option that doesn’t heat up the kitchen. This makes them a favorite for summer parties, picnics, and holiday celebrations.
Ingredients List
This section provides a detailed list of the ingredients needed to create a delicious no bake cheesecake filling. Each ingredient plays a crucial role in achieving that creamy, rich texture and delightful flavor that makes this dessert so irresistible.
| Item | Amount/Specification | Notes |
|---|---|---|
| Cream Cheese | 16 oz (450g) | Softened to room temperature for easy mixing |
| Sour Cream | ½ cup (120g) | Adds tanginess; can substitute with Greek yogurt |
| Granulated Sugar | ¾ cup (150g) | Adjust according to sweetness preference |
| Vanilla Extract | 1 teaspoon (5ml) | Pure vanilla for best flavor |
| Heavy Whipping Cream | 1 cup (240ml) | Chilled; for whipping to soft peaks |
- For a lighter version: Use low-fat cream cheese and sour cream.
- For a dairy-free option: Substitute with vegan cream cheese and coconut cream.
- Common mistake: Ensure cream cheese is fully softened to avoid lumps in your filling.
Required Kitchen Equipment
To create a delightful no bake cheesecake filling, having the right tools on hand is essential. The following equipment will help ensure that your filling is smooth, creamy, and perfectly mixed. Let’s go over what you’ll need for this simple yet delicious treat.
| Item | Amount/Specification | Notes |
|---|---|---|
| Mixing Bowls | 2 medium-sized | One for the cream cheese mixture, one for whipped cream. |
| Electric Mixer | 1 | A handheld or stand mixer works best for achieving a smooth texture. |
| Spatula | 1 | A silicone or rubber spatula is great for folding ingredients without deflating the whipped cream. |
- Choose mixing bowls that are large enough to prevent splattering while mixing.
- Make sure your electric mixer is set to low speed initially to avoid making a mess.
- For best results, chill your mixing bowls and beaters in the freezer for about 10 minutes before whipping the cream.
Step-by-Step Instructions
This section will guide you through the precise steps to create a smooth and creamy no-bake cheesecake filling. Following these instructions will ensure your filling achieves the perfect texture and flavor, ready for any crust or topping you desire.
- Prepare the Cream Cheese: Start with 8 ounces (226g) of full-fat cream cheese, ensuring it’s at room temperature. This will help it blend smoothly. Use a hand mixer or stand mixer on medium speed for about 2-3 minutes until it becomes creamy and lump-free. You should see a glossy texture with no visible lumps.
- Add the Sweeteners: Gradually mix in ½ cup (60g) of powdered sugar and 1 teaspoon of vanilla extract. Beat on low speed initially to prevent a sugar cloud, then increase to medium for 1-2 minutes. The mixture should become light and fluffy, with a sweet aroma filling your kitchen.
- Incorporate Whipped Cream: In a separate bowl, whip 1 cup (240ml) of heavy cream until stiff peaks form, which usually takes about 3-5 minutes. Gently fold the whipped cream into the cream cheese mixture using a rubber spatula. The filling should look light and airy, with no streaks remaining.
- Chill the Filling: Transfer the cheesecake filling into your prepared crust or a container. Cover it tightly with plastic wrap and refrigerate for at least 4 hours or overnight for the best results. When you take it out, it should be set but still creamy, with a smooth surface.
- Final Texture Check: After chilling, check the filling’s texture. It should be firm enough to hold its shape but still creamy. If it’s too soft, you may need to chill it longer. If it’s too firm, gently fold in a little more whipped cream to restore the desired consistency.
Pro Chef Tips
Creating a luscious no-bake cheesecake filling requires attention to detail for the perfect texture and taste. Here are some expert tips to ensure your cheesecake is creamy with no cracks, along with proper mixing techniques to elevate your dessert.
- Achieving Creaminess: To get that ultra-smooth texture, always start with room temperature cream cheese. If it’s cold, it won’t mix well and can lead to lumps. So, let your cream cheese sit out for about 30 minutes before you begin mixing.
- Preventing Cracks: Cracks can occur if your filling is overmixed or if the mixture is too airy. Mix your ingredients just until combined, and avoid whipping too vigorously. The filling should be thick yet spreadable, resembling a creamy frosting.
- Proper Mixing Technique: Use a stand mixer with a paddle attachment or a handheld mixer on low speed for the best results. Start by mixing the cream cheese until smooth, then gradually add in other ingredients, such as sugar and vanilla extract. This ensures even distribution without incorporating too much air, which can cause cracks.
Chef’s tip: If you notice any lumps after mixing, use a rubber spatula to press the mixture through a fine-mesh sieve for a perfectly silky texture.
Flavor Variations
Creating a no-bake cheesecake filling opens up a world of flavor possibilities. By adjusting the ingredients slightly, you can craft a delightful variety of cheesecakes to suit any taste preference. Here are some delicious flavor variations to consider.
Chocolate Cheesecake
For a rich chocolate cheesecake, simply fold in melted chocolate into the filling. Use high-quality chocolate for the best flavor. Here’s how to do it:
- 8 ounces (227g) cream cheese, softened
- ½ cup (60g) powdered sugar
- ½ cup (120ml) heavy cream
- 4 ounces (113g) dark chocolate, melted and slightly cooled
Whisk the cream cheese and powdered sugar until smooth. Gradually fold in the melted chocolate, ensuring it’s fully incorporated before adding the whipped cream. The final mixture should be creamy and rich.
Fruit-Flavored Options
For a refreshing fruit twist, you can incorporate fruit purees or extracts. Here are a couple of options:
- For Strawberry Cheesecake: Add ½ cup (120ml) strawberry puree and 1 teaspoon of vanilla extract.
- For Lemon Cheesecake: Use the zest and juice of 1 lemon, along with ½ cup (100g) granulated sugar.
In both cases, mix the fruit puree or juice with the cream cheese and sugar until smooth. The filling should have a vibrant color and a fresh aroma.
Vegan Alternatives
If you’re looking for a vegan option, replace cream cheese with soaked cashews. Here’s a quick recipe:
- 1 cup (150g) soaked cashews
- ½ cup (120ml) coconut cream
- ⅓ cup (40g) maple syrup
- 1 tablespoon lemon juice
Blend the soaked cashews with coconut cream, maple syrup, and lemon juice until completely smooth. The mixture should be thick and creamy, resembling traditional cheesecake filling.
Chef’s tip: Make sure to soak the cashews for at least 4 hours or overnight for the best texture.
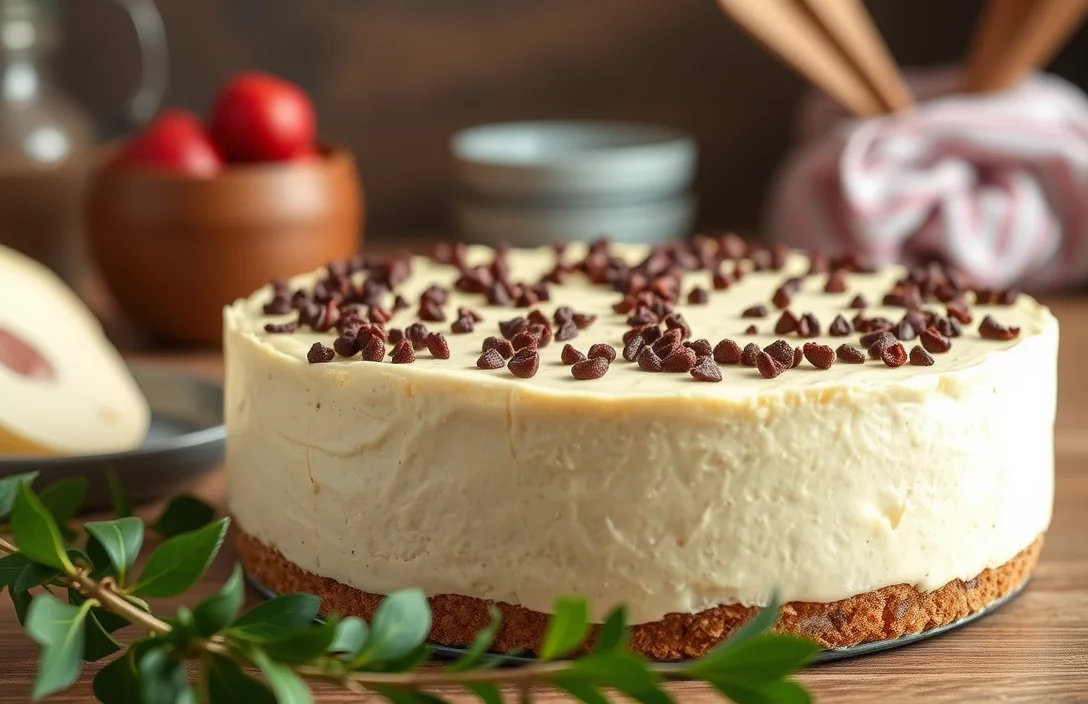
Serving Ideas
Serving your homemade no bake cheesecake filling can elevate your dessert experience. Whether you choose to pair it with a crust, add delightful toppings, or layer it into an impressive dessert, these ideas will help you present your cheesecake beautifully and deliciously.
- Pairing with Crusts: For a classic cheesecake experience, consider using a graham cracker crust. To make one, combine 1 ½ cups crushed graham crackers, ½ cup granulated sugar, and ½ cup melted butter. Press this mixture firmly into the bottom of a 9-inch pie pan and refrigerate for at least 30 minutes to set. Alternatively, for a gluten-free option, use crushed almond flour cookies.
- Toppings Suggestions: Top your cheesecake filling with fresh fruits like strawberries, blueberries, or raspberries for a refreshing contrast. If you prefer something sweeter, drizzle with chocolate ganache made from 1 cup of heavy cream and 8 ounces of bittersweet chocolate, melted together. Allow the ganache to cool slightly before pouring it over the cheesecake.
- Dessert Layering: Create individual dessert cups by layering the cheesecake filling with crushed cookies and fruit. Start with a layer of filling, followed by a layer of crushed cookies (try Oreos or speculoos), and then add a layer of fruit. Repeat until your cup is full, finishing with a dollop of whipped cream and a sprinkle of cookie crumbs on top for a visually stunning treat.
Quick Summary
| Prep Time | Cook Time | Total Time | Servings |
|---|---|---|---|
| 15 minutes | 0 minutes | 15 minutes | 8 servings |
- Combine ingredients: In a bowl, mix 16 oz cream cheese, 1 cup powdered sugar, and 1 tsp vanilla extract until smooth.
- Add whipped cream: Gently fold in 2 cups of whipped cream to maintain fluffiness.
- Chill the filling: Refrigerate for at least 2 hours for best texture.
- Adjust sweetness: Taste and add more sugar if needed before chilling.
- Use a pre-made crust: Spread the filling into a graham cracker crust for an easy dessert.
- Key Tip: Use room temperature cream cheese for a smoother mixture.
- Key Tip: Whip the cream until stiff peaks form for a light texture.
Frequently Asked Questions
Can I make this ahead of time? How to store and reheat?
You can definitely make this no-bake cheesecake filling ahead of time and store it in an airtight container in the refrigerator for up to 3 days. Just give it a quick stir before using, and there’s no need to reheat!
What can I substitute for cream cheese?
If you don’t have cream cheese, you can substitute it with mascarpone cheese for a slightly different flavor and texture. Greek yogurt can also work, but it will make the filling tangier.
How do I know when it’s done?
Your no-bake cheesecake filling is done when it’s smooth, creamy, and holds its shape when piped or spread. It should not be runny; if it is, give it a few more minutes of mixing until it thickens up.
Can I freeze this? How long does it last?
You can freeze the no-bake cheesecake filling for up to 2 months in an airtight container. Just thaw it in the refrigerator overnight before using it again!
What if I don’t have a hand mixer?
If you lack a hand mixer, you can use a whisk and mix vigorously by hand; just be prepared to put in some elbow grease! A food processor is another great alternative for achieving a smooth texture.

- Decadent Peanut Butter No-Bake Cheesecake: Easy Recipe to Indulge - April 3, 2026
- Delicious Mango No-Bake Cheesecake: Step-by-Step Recipe - April 3, 2026
- Decadent Raspberry No-Bake Cheesecake: Easy Step-by-Step Recipe - April 3, 2026