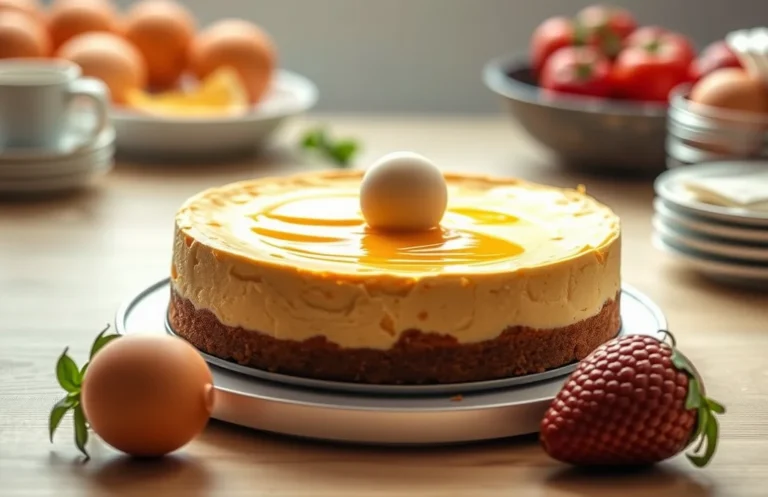
Does Baked Cheesecake Rise? Tips for Perfect Texture & Consistency
If you’ve ever dreamed of a dessert that’s creamy, rich, and utterly indulgent, then baked cheesecake should be at the top of your list. With its velvety texture and delightful flavor, it’s the kind of dessert that can turn an ordinary evening into a special occasion, leaving everyone at the table wanting more.
This recipe will answer your burning question: Does baked cheesecake rise? You’ll also find tips for achieving that perfect consistency, plus a reliable recipe that takes just 15 minutes prep, 50 minutes cook time, and serves 8 people with a moderate difficulty level.
| Prep Time | Cook Time | Total Time | Servings | Difficulty |
|---|---|---|---|---|
| 15 minutes | 50 minutes | 1 hour 5 minutes | 8 | Moderate |
Cheesecake History and Significance
Understanding the history and cultural significance of cheesecake not only enriches your appreciation of this dessert but also informs its preparation. The way cheesecake behaves in the oven—whether it rises, sets, or cracks—can often be linked back to its origins and the methods used in various cultures.
Origin of Cheesecake
Cheesecake has roots that trace back to ancient Greece, where it was served to athletes during the first Olympic Games in 776 B.C. The Romans later adopted the recipe, making it popular across their empire. Each culture has since adapted the basic concept, leading to diverse styles of cheesecake.
- Greek Style: Often made with fresh cheese, honey, and eggs, resulting in a dense texture.
- Italian Style: Uses ricotta cheese, creating a lighter, fluffier cheesecake.
- New York Style: Characterized by a cream cheese base, rich and creamy, often baked to achieve a slight rise.
Cultural Significance
Cheesecake holds a place in many celebrations, symbolizing indulgence and festivity. In the U.S., it’s commonly featured at birthdays and holidays, while in European countries, it’s often enjoyed with coffee or tea. Its variations reflect local ingredients and traditions, making it a beloved dessert worldwide.
When to Serve Cheesecake
Cheesecake can be served year-round, but it is especially popular during:
- Holidays like Christmas and Thanksgiving
- Celebrations such as weddings and anniversaries
- Summer gatherings with fresh fruit toppings
Chef’s tip: Let your cheesecake cool slowly in the oven after baking to minimize cracking and ensure a smooth texture.
Ingredients for Classic Cheesecake
This section outlines the essential ingredients needed for a classic cheesecake, crucial for understanding whether your cheesecake will rise properly during baking. The right measurements and quality of ingredients can significantly impact the texture and consistency of your finished dessert.
| Item | Amount/Specification | Notes |
|---|---|---|
| Cream Cheese | 24 ounces (680g) | Softened to room temperature for easy mixing |
| Sugar | 1 cup (200g) | Granulated sugar; for sweetness and stabilization |
| Eggs | 3 large | Room temperature; helps with even mixing |
| Sour Cream | 1 cup (240g) | Adds creaminess and tang; can substitute with Greek yogurt |
| Vanilla Extract | 1 teaspoon | For flavor; pure vanilla is best |
| Butter | ½ cup (113g) | Melted; for crust binding |
| Graham Cracker Crumbs | 1½ cups (150g) | For the crust; can substitute with crushed cookies |
- Ensure that the cream cheese is fully softened for a smooth batter; it should feel like a thick paste.
- When baking, preheat your oven to 325°F (160°C) for even cooking.
- Use room temperature eggs to avoid curdling the batter and ensure a smooth texture.
- If your cheesecake cracks, it may be due to overmixing or baking at too high a temperature.
Essential Kitchen Equipment
To achieve the perfect baked cheesecake, having the right tools on hand is essential. This section outlines the necessary equipment, ensuring your cheesecake bakes evenly and rises just right, creating that desirable creamy texture.
- Baking Pan Types: Use a 9-inch (23cm) round springform pan for classic cheesecakes as it allows easy removal. Alternatively, a 9-inch (23cm) cake pan works well too, but you’ll need to run a knife around the edge to release the cheesecake. Make sure to line the bottom with parchment paper to prevent sticking.
- Mixing Tools: A stand mixer or a hand mixer is ideal for achieving a smooth batter. Use a large mixing bowl, preferably glass or stainless steel, for mixing the cream cheese at room temperature. Don’t forget a spatula to scrape down the sides and ensure everything is well combined.
- Oven Preheating: Preheat your oven to 325°F (160°C) at least 20 minutes before baking. A properly preheated oven is crucial for a cheesecake to rise correctly and bake evenly. Use an oven thermometer to ensure the temperature is accurate; a fluctuating oven can lead to cracks in your cheesecake.
Chef’s tip: Always wrap the outside of your springform pan in aluminum foil before baking to prevent water from seeping in during a water bath.
Step-by-Step Baking Instructions
This section provides detailed instructions for preparing your baked cheesecake, including the crust and filling, as well as the baking process. Understanding each step is crucial for achieving a cheesecake that rises appropriately and develops the perfect texture.
- Preparing the Crust: Preheat your oven to 325°F (160°C). In a bowl, mix 1 ½ cups (150g) of graham cracker crumbs, ½ cup (100g) of granulated sugar, and ½ cup (115g) of melted unsalted butter until well combined. The mixture should feel like damp sand. Press this mixture firmly into the bottom of a 9-inch (23cm) springform pan and bake for 10 minutes. Let it cool while you prepare the filling.
- Making the Filling: In a large mixing bowl, beat together 4 (8-ounce) packages of cream cheese, softened to room temperature, with 1 ¼ cups (250g) of granulated sugar until smooth and creamy, about 3-4 minutes. Scrape down the sides of the bowl to ensure even mixing. Gradually add in 4 large eggs, one at a time, mixing until just combined. Finally, fold in 1 teaspoon of vanilla extract and 1 teaspoon of lemon juice for flavor.
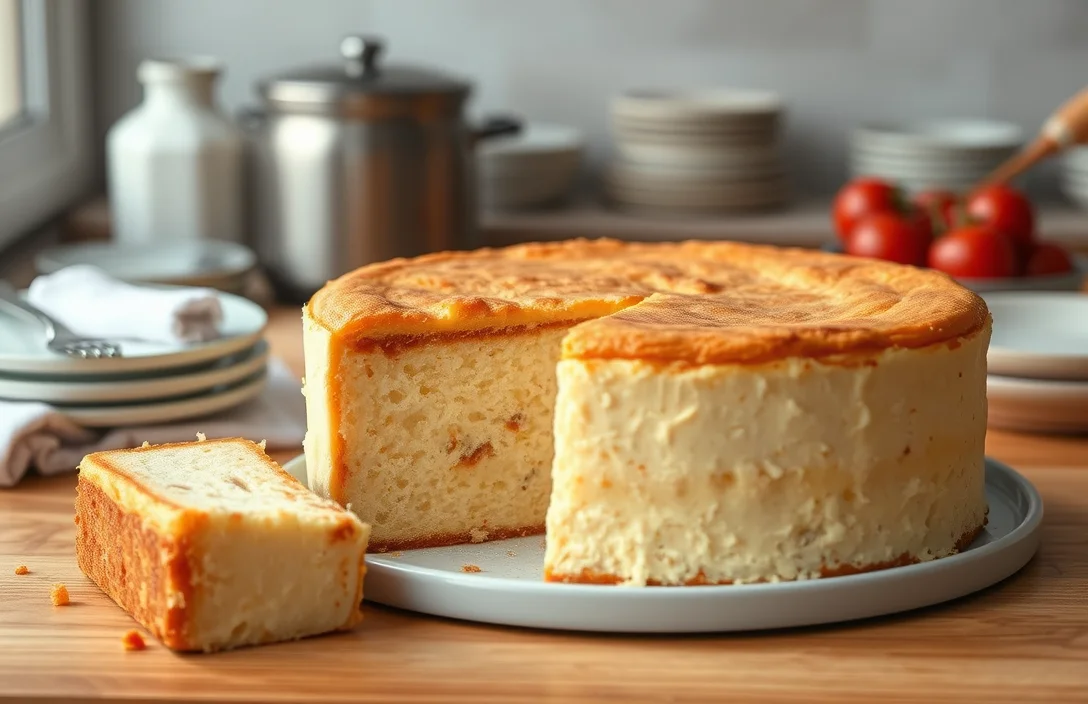
- Baking Process: Pour the cheesecake filling over the cooled crust. Bake in the preheated oven at 325°F (160°C) for 55-65 minutes. The edges should be set but the center will still have a slight jiggle. Do not open the oven door during the first 40 minutes to maintain the temperature. Once done, turn off the oven and crack the door, allowing the cheesecake to cool slowly in the oven for about 1 hour to prevent cracking.
Pro Tips for Perfect Texture
Achieving the perfect texture in your baked cheesecake is crucial to its overall success. To ensure your cheesecake rises properly and maintains a smooth consistency, follow these expert tips to avoid common pitfalls like cracks and sinking.
Preventing Cracks
- Use room temperature ingredients: Make sure your cream cheese, eggs, and sour cream are at room temperature (around 70°F or 21°C) before mixing. This helps create a smooth batter and prevents air bubbles that can lead to cracks.
- Mix gently: When combining ingredients, use a low speed and mix just until smooth. Overmixing incorporates too much air, increasing the risk of cracking as the cheesecake cools.
- Water bath method: Bake your cheesecake in a water bath to maintain moisture and even heat distribution. Wrap the cheesecake pan in aluminum foil and place it in a larger pan filled with about 1 inch of hot water. This will help prevent the top from drying out.
Avoiding Sinking
- Don’t overbake: Bake your cheesecake at 325°F (160°C) for about 50-60 minutes. The center should be slightly jiggly but not liquid. Overbaking causes it to sink once cooled.
- Cool gradually: After baking, turn off the oven and crack the door open. Allow the cheesecake to cool in the oven for an hour. This helps prevent sudden temperature changes that cause sinking.
Cooling Techniques
- Chill before slicing: After cooling in the oven, refrigerate your cheesecake for at least 4 hours, ideally overnight. This allows it to set properly and improves the texture.
- Run a knife around the edges: Before removing the cheesecake from the pan, gently run a knife along the edges to loosen it. This prevents the top from cracking when you remove the sides of the pan.
Cheesecake Variations and Substitutions
Cheesecake can be tailored to meet various dietary needs and flavor preferences, making it a versatile dessert choice. Understanding how these variations can affect the rise and texture of your baked cheesecake is essential for achieving the perfect dessert.
Gluten-Free Options
For those avoiding gluten, you can substitute traditional graham cracker crusts with gluten-free options. Here’s a quick reference:
- 1 ½ cups gluten-free cookies (about 150g), crushed
- ½ cup unsalted butter (113g), melted
- 2 tablespoons sugar (25g)
Mix these ingredients and press them into the bottom of your springform pan. Bake at 350°F (175°C) for 10 minutes until set. This crust will hold its shape during baking, allowing the cheesecake to rise slightly without collapsing.
Vegan Cheesecake
For a vegan alternative, use plant-based ingredients to maintain a creamy texture:
- 1 ½ cups soaked cashews (about 225g)
- ½ cup coconut cream (120ml)
- ½ cup maple syrup (120ml)
- 1 tablespoon lemon juice (15ml)
Blend these until smooth. Pour into your prepared crust and bake at 325°F (160°C) for 40-45 minutes. Vegan cheesecakes may not rise as much as traditional ones but will set nicely in the oven.
Flavor Variations
Experimenting with flavors can also influence the rise of your cheesecake. Here are some ideas:
- Add ¼ cup cocoa powder (30g) for chocolate cheesecake.
- Incorporate 1 teaspoon vanilla extract (5ml) for a classic flavor.
- Mix in ½ cup fruit puree (120ml) for fruity variations.
Tip: Always fold in flavors gently to avoid deflating your batter.
Keep an eye on the cheesecake as it bakes; it should be set around the edges and slightly jiggly in the center when done. This will ensure a rich, creamy texture. Remember, the type of crust and filling can affect how much your cheesecake rises, so adjust your expectations accordingly!
Serving and Plating Ideas
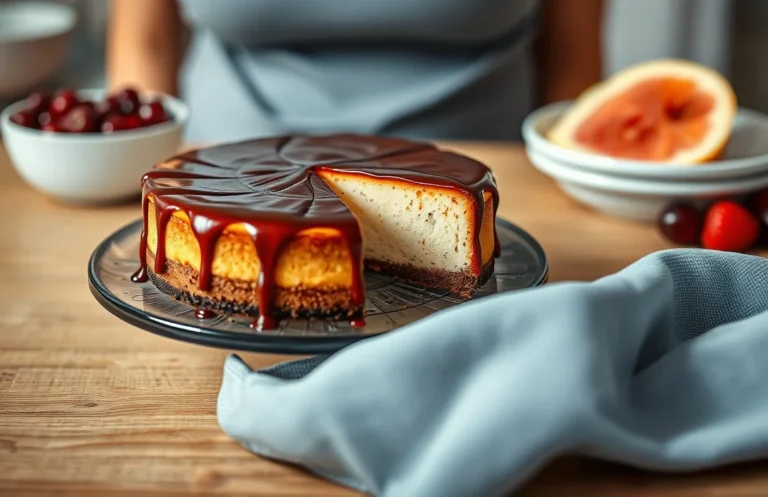
Presenting your baked cheesecake beautifully can elevate the entire dining experience. The right garnishes, toppings, and plate presentation not only enhance the look but also complement the flavors of the cheesecake. Here are some ideas to serve your cheesecake attractively.
- Garnishes and Toppings: Start with a classic topping like fresh berries. Use ½ cup of mixed berries, such as strawberries, blueberries, and raspberries, and arrange them on top of the cheesecake for a pop of color. Drizzle with 2 tablespoons of berry sauce or a light dusting of powdered sugar for an elegant finish.
- Pairing Suggestions: Serve your cheesecake with a scoop of ice cream or whipped cream on the side. For a complementary flavor, consider a dollop of lemon curd or chocolate ganache. These additions can add creaminess and enhance the overall taste.
- Plate Presentation: Use a clean, white plate to make the cheesecake stand out. Slice the cheesecake into even pieces, and gently place each slice on the plate. For added flair, create a swirl of sauce or coulis on the plate before placing the cheesecake. This not only looks appealing but also adds a burst of flavor with each bite.
- Final Touch: Just before serving, consider sprinkling a few mint leaves (about 3-4 leaves) next to the cheesecake for a fresh touch. This adds a vibrant color contrast and a hint of freshness that balances the richness of the cheesecake.
With these serving and plating ideas, you’ll not only impress your guests but also make the most of your delicious baked cheesecake.
Quick Summary
| Prep Time | 20 minutes |
|---|---|
| Cook Time | 60 minutes |
| Total Time | 1 hour 20 minutes |
| Servings | 8 |
- Prepare the crust: Mix crushed graham crackers with melted butter and press into the bottom of the pan.
- Beat the cream cheese: Mix with sugar and vanilla until smooth to prevent lumps.
- Add eggs gradually: Incorporate eggs one at a time to maintain a creamy texture.
- Bake in a water bath: Prevents cracking and helps the cheesecake rise evenly.
- Cool slowly: Turn off the oven and let the cheesecake sit inside for 1 hour.
- Tip 1: Use room temperature ingredients for a smoother batter.
- Tip 2: Don’t overmix after adding eggs to avoid too much air, which can cause rising.
- Tip 3: Chill overnight for the best flavor and texture.
Frequently Asked Questions
Can I make this ahead of time? How to store and reheat?
You can definitely make baked cheesecake ahead of time; just store it in the refrigerator for up to 5 days. To reheat, let it sit at room temperature for about 30 minutes before serving, or warm it gently in a low oven at 200°F for about 10 minutes.
What can I substitute for cream cheese?
If you don’t have cream cheese, you can use Greek yogurt or ricotta cheese as a substitute, though the texture may be slightly different. Aim for a similar 8-ounce measurement to maintain the recipe’s balance.
How do I know when it’s done?
50 to 60 minutes at 325°F. A toothpick inserted should come out clean but moist, not wet.
Can I freeze this? How long does it last?
You can freeze baked cheesecake for up to 2 months if wrapped well in plastic wrap and aluminum foil. To thaw, place it in the refrigerator overnight before serving.
Why did my cheesecake crack on top?
If your cheesecake cracked, it may have been baked at too high a temperature or overcooked; always bake at 325°F and check for doneness early. Another tip is to let it cool gradually in the oven with the door slightly ajar to prevent temperature shock.

- Make Cheesecake Up to 3 Days Ahead: Tips for Best Flavor & Texture - March 4, 2026
- Easy No-Bake Cool Doen Cheesecake: Quick Recipe & Tips - March 4, 2026
- Decadent Dulce de Leche Cheesecake: Easy Step-by-Step Recipe - March 4, 2026