How Long Does Cheesecake Take to Set in the Fridge? Tips Inside!
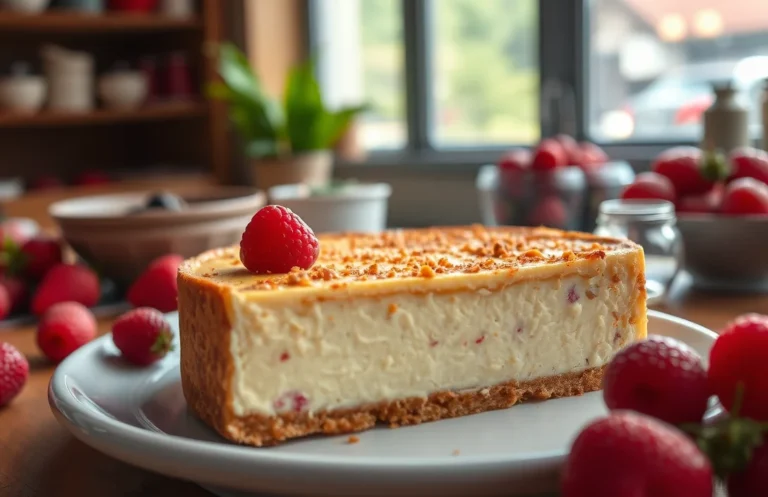
Cheesecake is that luscious dessert that turns any ordinary day into a celebration! The creamy, rich filling nestled in a buttery crust is hard to resist, whether it’s served at a family gathering or as a sweet treat after dinner. The anticipation of slicing into a perfectly set cheesecake makes my mouth water every time.
Cheesecake does harden in the fridge and typically takes about 4 to 6 hours to set, making it an easy and rewarding dessert to prepare. This recipe serves 8 to 10 people and is moderate in difficulty, perfect for home cooks ready to impress!
| Prep Time | Cook Time | Total Time | Servings | Difficulty |
|---|---|---|---|---|
| 15 minutes | 60 minutes | 4-6 hours (chill) | 8-10 | Moderate |
Cheesecake Origins and Specialties
Understanding the origins and specialties of cheesecake provides context for why its texture can vary, especially when chilled. Cheesecake has a rich history that spans from ancient Greece to modern-day variations around the world, influencing how we perceive its firmness and creaminess.
History of Cheesecake
The earliest known cheesecake dates back to ancient Greece, where it was made using simple ingredients like cheese, flour, and honey. This dessert was served to athletes during the first Olympic Games in 776 B.C. The Romans adapted the recipe, introducing it to various regions of Europe, leading to an array of cultural adaptations.
Regional Variations
- New York Style: Dense and creamy, this version often includes sour cream or heavy cream, contributing to its rich texture.
- Italian Ricotta Cheesecake: Lighter and fluffier, made with ricotta cheese, this variation is often less sweet and has a grainier texture.
- Japanese Cotton Cheesecake: Fluffy and airy, this cheesecake is baked using a water bath, creating a light, soufflé-like consistency.
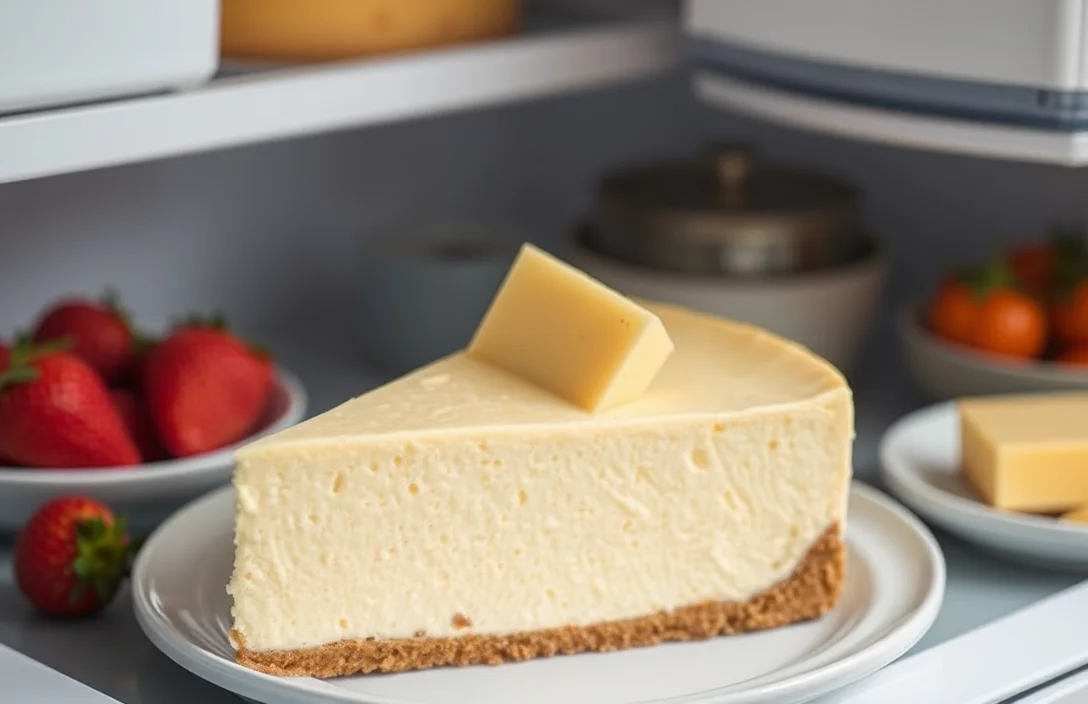
Pro tip: The setting process in the fridge is crucial for achieving the desired firmness. A well-chilled cheesecake should feel firm to the touch and have a smooth surface.
When you place your cheesecake in the refrigerator, it typically firms up over time due to the cooling of the fats and proteins. Aim for at least 4-6 hours of chilling for optimal results. If your cheesecake doesn’t harden properly, it may be due to insufficient baking time, incorrect ingredient ratios, or skipping the chilling stage altogether.
Ingredients for Perfect Cheesecake
Choosing the right ingredients is crucial for achieving a perfectly firm cheesecake that sets beautifully in the fridge. This section outlines the exact measurements of cream cheese, sugar, and flavorings you need to ensure your cheesecake has the right texture and flavor.
| Item | Amount/Specification | Notes |
|---|---|---|
| Cream Cheese | 24 ounces (680g) | Softened to room temperature for easy blending |
| Granulated Sugar | 1 cup (200g) | Adjust based on sweetness preference; avoid brown sugar for a smoother texture |
| Vanilla Extract | 1 teaspoon (5ml) | Use pure vanilla extract for the best flavor |
| Sour Cream | 1 cup (240ml) | Adds creaminess; can substitute with Greek yogurt |
| Eggs | 3 large | Room temperature for better incorporation |
- Ensure the cream cheese is fully softened; otherwise, you’ll get lumps in your batter.
- Mix the ingredients on low speed to avoid incorporating too much air, which can cause cracks as it sets.
- After baking, let the cheesecake cool at room temperature before refrigerating to prevent condensation.
- If your cheesecake doesn’t set properly, it may need more time in the fridge—allow at least 4-6 hours, but overnight is best.
Essential Equipment and Prep Steps
Having the right tools and ingredients ready is crucial for making a cheesecake that sets perfectly in the fridge. This section outlines the essential mixing tools and baking pan types you’ll need, along with preparation steps to ensure your cheesecake achieves the desired firmness.
- Mixing Tools: Gather your mixing tools, including a large mixing bowl (preferably stainless steel or glass) for combining your ingredients. A handheld or stand mixer is essential for achieving a smooth, creamy texture. Make sure your mixing tools are clean and dry to prevent any unwanted moisture from affecting the cheesecake’s consistency.
- Baking Pan Types: Use a 9-inch springform pan for the best results, as it allows for easy removal of the cheesecake after it has set. If you don’t have a springform pan, a standard 9-inch round cake pan will work, but be prepared to run a knife around the edges before removing it. Lining the bottom with parchment paper can also aid in easy removal.
- Preparation Steps: Before starting, preheat your oven to 325°F (163°C). This temperature is ideal for baking the cheesecake gently, helping it to firm up properly while preventing cracks. Prepare your crust by mixing 1 ½ cups of graham cracker crumbs with ½ cup of melted butter until the mixture resembles wet sand. Press this mixture firmly into the bottom of your pan.
- Ingredient Prep: Ensure that your cream cheese is at room temperature for at least an hour, making it easier to blend smoothly. This step is crucial as cold cream cheese can lead to lumps in your cheesecake batter. Similarly, have your eggs and sour cream at room temperature to promote even mixing and a creamy texture.
Setting Cheesecake in the Fridge
Understanding how to properly set your cheesecake in the fridge is crucial for achieving that perfect, creamy texture. This section will guide you through the mixing and baking process, followed by chilling times to ensure your cheesecake firms up as it should.
- Prepare the Cheesecake Mixture: Start by mixing 16 ounces (450g) of cream cheese at room temperature with ¾ cup (150g) of granulated sugar until smooth. This should take about 2-3 minutes on medium speed. Scrape down the sides of the bowl to ensure even mixing, and add 1 teaspoon of vanilla extract and 3 large eggs one at a time, mixing just until incorporated. The mixture should be silky and creamy without any lumps.
- Bake the Cheesecake: Preheat your oven to 325°F (160°C). Pour the cheesecake mixture into a prepared 9-inch (23cm) springform pan, and smooth the top with a spatula. Bake for 55-60 minutes or until the edges are set and the center has a slight jiggle. The top should look slightly puffed and may have a light golden color. Avoid overbaking, as this can lead to cracks.
- Cool Before Refrigerating: Once baked, turn off the oven and crack the oven door open, allowing the cheesecake to cool slowly for about 1 hour. This gradual cooling helps prevent cracks. After an hour, remove the cheesecake from the oven and let it cool to room temperature for an additional 30 minutes before transferring it to the fridge.
- Chill the Cheesecake: Cover the cheesecake with plastic wrap or aluminum foil, ensuring it doesn’t touch the surface, and refrigerate for at least 4 hours or overnight for best results. The cheesecake should feel firm to the touch and retain its shape when sliced. If it’s not firming up, it may need more chilling time or could be a sign of underbaking.
Chef’s tip: For a smoother texture, blend the cheesecake mixture in a food processor instead of a mixer. This reduces air bubbles.
Common Mistakes in Cheesecake Making
Making a cheesecake can be a delicate process, and small missteps can lead to a less-than-perfect texture. Understanding common mistakes like overmixing and temperature issues is crucial for ensuring your cheesecake hardens beautifully in the fridge.
- Overmixing the Batter: Mixing your cheesecake batter too much can introduce excess air, leading to a fluffy texture rather than the dense creaminess you want. Aim for a smooth consistency, mixing just until combined to avoid this pitfall.
- Undermixing: On the flip side, not mixing enough can leave lumps of cream cheese in your batter, which can prevent it from setting properly. Make sure to blend until there are no visible lumps for a uniform texture.
Temperature Issues
- Using Cold Ingredients: If your cream cheese or other dairy ingredients are too cold, they won’t blend smoothly, affecting the batter’s consistency. Allow your cream cheese to sit at room temperature for at least 30 minutes before mixing.
- Baking Temperature: Baking your cheesecake at too high a temperature can lead to cracking and uneven cooking, resulting in a dense, gummy texture. Stick to a low temperature of 325°F (163°C) and bake until the edges are set but the center is slightly jiggly.
- Cooling Too Quickly: Rapid cooling can cause your cheesecake to crack. After baking, turn off the oven, crack the door open, and let it cool in the oven for about an hour before transferring it to the fridge.
Cheesecake Variations and Modifications
This section highlights how you can adapt cheesecake recipes to accommodate dietary restrictions without compromising on taste or texture. Understanding these modifications can help ensure your cheesecake sets properly in the fridge, maintaining that perfect firmness.
Gluten-Free Options
If you’re looking to make a gluten-free cheesecake, the good news is that you can easily swap out traditional ingredients. Here are some alternatives:
- For the crust: Use 1½ cups of almond flour instead of graham cracker crumbs.
- For binding: Incorporate 2 tablespoons of coconut oil melted with the almond flour to help it stick together.
Chill your gluten-free cheesecake in the fridge for at least 4-6 hours. It should feel firm to the touch yet slightly jiggly in the center when you take it out.
Vegan Substitutes
Creating a vegan cheesecake is also possible while ensuring it hardens nicely in the fridge. Here’s what you can use:
- Replace cream cheese with 1½ cups of soaked cashews (soaked for 4-6 hours) blended with ¼ cup of coconut cream.
- For sweetness, add ⅓ cup of maple syrup and a splash of vanilla extract.
Chef’s tip: Let the vegan cheesecake cool completely at room temperature before transferring to the fridge, as this helps it firm up better.
Chill for 6-8 hours, and it should be firm enough to slice cleanly.
| Ingredient | Traditional | Gluten-Free/Vegan |
|---|---|---|
| Crust | 1½ cups graham cracker crumbs | 1½ cups almond flour |
| Cream Cheese | 16 oz cream cheese | 1½ cups soaked cashews |
| Sweetener | 1 cup granulated sugar | ⅓ cup maple syrup |
Serving and Plating Cheesecake
Serving and plating your cheesecake beautifully can elevate the dessert experience, making it even more enjoyable. Here are some garnishing ideas and beverage pairings that will complement your cheesecake and enhance its flavors.
Garnishing Ideas
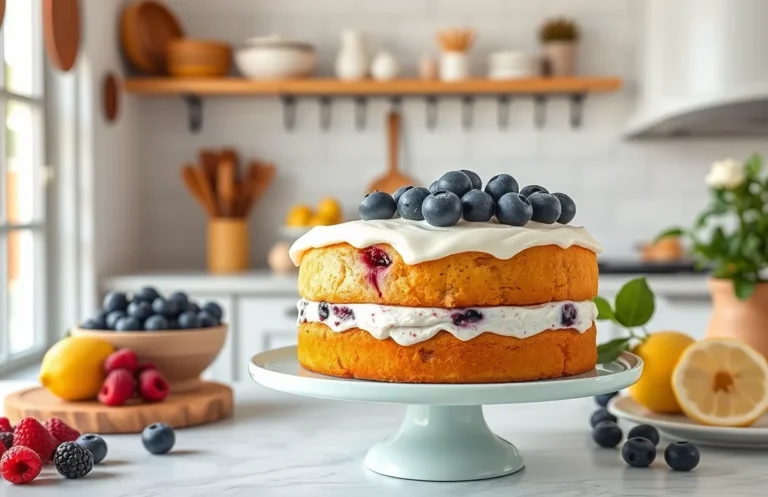
- Fresh Fruit: Top your cheesecake with berries such as strawberries, blueberries, or raspberries. These not only add color but also a refreshing tartness that balances the creaminess.
- Chocolate Drizzle: Melt ½ cup of dark chocolate and drizzle it over the cheesecake for a rich touch. Ensure the chocolate is slightly cooled before drizzling to avoid melting the cheesecake.
- Whipped Cream: Whip 1 cup of heavy cream with 2 tablespoons of powdered sugar until soft peaks form. Pipe onto each slice for a light and airy finish.
- Nuts: Toast ¼ cup of chopped pecans or walnuts and sprinkle them on top for added crunch and flavor.
Beverage Pairings
Choosing the right beverage can elevate your cheesecake experience further. Here are some great pairings:
- Coffee: A rich espresso or a creamy cappuccino complements the cheesecake’s flavors beautifully.
- Tea: A cup of Earl Grey or chamomile tea can provide a soothing contrast to the sweetness.
- Wine: Consider a glass of dessert wine, like Sauternes or a Moscato, which pairs nicely with the creamy texture.
Chef’s tip: Chill your cheesecake in the fridge for at least 4-6 hours, or overnight, for the best texture. If it’s too soft, you may need to adjust the gelatin or cream cheese ratio in your recipe.
Quick Summary
| Prep Time | Cook Time | Total Time | Servings |
|---|---|---|---|
| 20 minutes | 60 minutes | 4 hours (chilling) | 8 |
- Chill the cheesecake: Let it sit in the fridge for at least 4 hours to fully set.
- Use full-fat cream cheese: This ensures a rich and creamy texture that hardens properly.
- Cool before chilling: Allow the cheesecake to cool at room temperature for 1 hour before refrigerating.
- Check for firmness: Gently shake the pan; it should be slightly jiggly but not liquid.
- Cover tightly: Use plastic wrap to prevent moisture from affecting texture while chilling.
- Slice after chilling: Use a warm knife for clean cuts after the cheesecake has set.
Frequently Asked Questions
Can I make this cheesecake ahead of time? How do I store it?
You can absolutely make cheesecake ahead of time; in fact, it often tastes better after chilling! Store it covered in the fridge for up to 5 days before serving.
What can I substitute for cream cheese?
If you’re looking for a substitute, you can use mascarpone cheese for a rich texture or a combination of ricotta and sour cream for a lighter option.
How do I know when my cheesecake is done?
Your cheesecake is done when the edges are set and the center has a slight jiggle; it will continue to firm up as it cools. Check for doneness around 50-60 minutes at 325°F (163°C).
Can I freeze cheesecake? How long does it last?
Yes, you can freeze cheesecake for up to 3 months, but make sure it’s wrapped tightly to prevent freezer burn. Thaw it in the fridge overnight before serving for the best texture.
Why did my cheesecake turn out cracked?
Cream cheese can crack if it’s overbaked or if the oven temperature is too high; make sure to bake at 325°F (163°C) and use a water bath for even cooking. Allow it to cool gradually to room temperature before refrigerating to help prevent cracks.

- Make Cheesecake Up to 3 Days Ahead: Tips for Best Flavor & Texture - March 4, 2026
- Easy No-Bake Cool Doen Cheesecake: Quick Recipe & Tips - March 4, 2026
- Decadent Dulce de Leche Cheesecake: Easy Step-by-Step Recipe - March 4, 2026