Does Cheesecake Harden in the Fridge? Tips for Perfect Texture
Cheesecake is the ultimate indulgence—creamy, rich, and utterly satisfying. Imagine slicing into a perfectly chilled cheesecake, the smooth texture melting in your mouth, and the sweet, buttery crust crumbling just right. It’s not just dessert; it’s a celebration of flavor that brings people together, making every bite feel special.
Curious about how cheesecake hardens in the fridge? You’ll discover key details like total time of about 4 hours, difficulty level of easy, and servings for 8. This guide will help you achieve the perfect texture and troubleshoot any issues along the way.
| Prep Time | Cook Time | Total Time | Servings | Difficulty |
|---|---|---|---|---|
| 20 minutes | 60 minutes | 4 hours | 8 | Easy |
Cheesecake Origins and Texture
Understanding the origins and texture of cheesecake provides valuable insight into whether it will solidify in the refrigerator. Cheesecake has a rich history and its texture can vary greatly depending on ingredients and preparation methods, which directly affects how it sets in the fridge.
Historical Background
Cheesecake dates back to ancient Greece, where it was served to athletes during the first Olympic Games. The Romans later adapted the recipe, introducing it to various cultures over the centuries. Today, cheesecake has evolved into numerous styles, with the New York cheesecake being one of the most famous for its dense and creamy texture.
Texture Variations
The texture of cheesecake can vary widely based on ingredients and preparation techniques. Here are the main types:
- New York Style: Dense and rich, made with cream cheese, eggs, and sugar.
- Italian Style: Lighter and fluffier, often using ricotta cheese.
- No-Bake Cheesecake: Creamy and smooth, set with gelatin or whipped cream, requiring refrigeration to firm up.
When placed in the refrigerator, most cheesecakes will harden as the fats solidify and the filling cools. However, the time it takes to set can depend on:
- The type of cheese used (cream cheese vs. ricotta).
- The presence of other ingredients (like whipped cream or gelatin).
- The thickness of the cheesecake.
Chef’s tip: To achieve the perfect consistency, allow your cheesecake to chill for at least 4-6 hours, or overnight if possible.
If your cheesecake doesn’t harden as expected, it may be due to insufficient chilling time or an imbalance of ingredients. Always ensure proper measurements and follow the chilling instructions for optimal results.
Ingredients for Perfect Cheesecake
To achieve the ideal cheesecake texture that hardens beautifully in the fridge, you’ll need a precise combination of ingredients. Each component plays a crucial role in the final consistency and flavor, so be sure to measure carefully.
| Item | Amount/Specification | Notes |
|---|---|---|
| Cream Cheese | 16 ounces (450g) | Use full-fat for creaminess; room temperature for easy mixing |
| Sugar | 1 cup (200g) | Granulated sugar ensures sweetness without graininess |
| Eggs | 3 large | Room temperature; for better incorporation into the batter |
| Crust Ingredients | 1 ½ cups (150g) graham cracker crumbs | Combine with ½ cup (115g) melted butter and ¼ cup (50g) sugar |
- For best results, soften cream cheese by leaving it out for at least 30 minutes before using.
- Mix ingredients until just combined; overmixing can introduce air, causing cracks.
- To avoid a soggy crust, pre-bake the crust at 350°F (175°C) for 10 minutes before adding the filling.
- If using a springform pan, wrap the base with aluminum foil to prevent leaks.
- After baking, let the cheesecake cool in the oven with the door slightly ajar for about 1 hour to prevent cracking.
Essential Kitchen Tools
To achieve the perfect cheesecake that sets beautifully in the fridge, having the right tools is key. Each tool plays a vital role in both the preparation and the storage of your cheesecake, ensuring it hardens properly and maintains its delicious texture.
| Item | Amount/Specification | Notes |
|---|---|---|
| Mixing Bowls | 2-3 large | Glass or stainless steel preferred for easy mixing and cleanup. |
| Springform Pan | 9-inch (23cm) | Allows for easy release of the cheesecake; ensures even cooking. |
| Electric Mixer | 1 | Hand or stand mixer for achieving smooth cream cheese mixture. |
| Refrigerator | N/A | Essential for chilling; set to a temperature of 35°F to 40°F (1°C to 4°C). |
- Tip: Use glass mixing bowls to monitor the texture of your batter better as you mix.
- Pro Tip: A springform pan should be tightly sealed with aluminum foil if you’re baking a water bath cheesecake to prevent leaks.
- Always allow your cheesecake to cool at room temperature for at least 30 minutes before chilling it in the fridge.
Cheesecake Preparation Steps
Understanding how to properly prepare your cheesecake is crucial for achieving that perfect creamy texture that hardens beautifully in the fridge. This section will guide you through mixing the batter, preparing the crust, baking time, and the cooling process, ensuring your cheesecake sets just right.
- Mixing the Batter: Start by preheating your oven to 325°F (160°C). In a large mixing bowl, beat 16 ounces (450g) of cream cheese at room temperature until smooth and creamy, about 2-3 minutes. Gradually add in 1 cup (200g) of granulated sugar and continue mixing until fully incorporated and fluffy, which should take another 2 minutes.
- Adding Other Ingredients: To the cream cheese mixture, add 1 teaspoon of vanilla extract and 3 large eggs, one at a time. Mix on low speed until just combined; you want to avoid over-mixing, which can incorporate too much air and lead to cracking as it cools.
- Preparing the Crust: For the crust, combine 1 ½ cups (150g) of graham cracker crumbs with ¼ cup (50g) of granulated sugar and ½ cup (115g) of melted unsalted butter in a medium bowl. Press this mixture firmly into the bottom of a 9-inch (23cm) springform pan and bake in the preheated oven for 10 minutes, until set and slightly golden.
- Baking the Cheesecake: Pour the batter over the cooled crust and spread evenly. Bake the cheesecake for about 50-60 minutes, or until the edges are set but the center still has a slight jiggle. Remember, the cheesecake will continue to firm up as it cools, so don’t worry if it looks a bit undercooked.
- Cooling Process: After baking, turn off the oven and crack the door open, letting the cheesecake gradually cool for about 1 hour. This helps prevent cracks. Once it’s at room temperature, cover it and refrigerate for at least 4 hours, ideally overnight, to allow it to fully set and achieve that perfect texture.
Common Mistakes to Avoid
Creating the perfect cheesecake requires attention to detail, especially when it comes to achieving the right texture. In this section, I’ll share some common pitfalls that can affect how well your cheesecake hardens in the fridge, along with tips to help you avoid them.
- Overmixing the batter: Mixing too vigorously can incorporate excess air, leading to a cheesecake that cracks or doesn’t set properly. Aim to mix the ingredients until just combined, especially after adding the eggs. The batter should be smooth but not overly whipped.
- Underbaking: Cheesecake may appear slightly jiggly in the center when you take it out of the oven. This is normal, as it will continue to set while cooling. However, if it’s too underbaked, it may not harden in the fridge. Bake at 325°F (163°C) for about 50-60 minutes, and check for a slight wobble in the center.
- Skipping the cooling time: Patience is key! After baking, let your cheesecake cool at room temperature for at least 1 hour before refrigerating. This step allows it to firm up slightly before going into the fridge. Skipping this can result in a cheesecake that never fully sets.
Chef’s tip: Use a water bath while baking to promote even cooking and prevent cracking.
Texture Variations and Substitutions
This section provides insights on how to adapt cheesecake recipes to fit different dietary needs without compromising texture. Whether you’re gluten-free or vegan, there are plenty of delicious alternatives to achieve that creamy consistency.
Gluten-Free Crust Options
If you’re looking to avoid gluten, consider these crust alternatives that still provide that satisfying crunch:
- Almond Flour Crust: Combine 1 ½ cups almond flour with ¼ cup melted coconut oil and 2 tablespoons honey. Press into the bottom of your pan and bake at 350°F (175°C) for 10 minutes until golden.
- Oats and Nuts: Blend 1 cup gluten-free oats with ½ cup chopped walnuts, 2 tablespoons maple syrup, and 2 tablespoons coconut oil. Bake at 350°F (175°C) for 8-10 minutes.
These crusts have a nutty flavor and a great texture that complements your cheesecake perfectly.
Vegan Cheesecake Alternatives
For a dairy-free version, silken tofu or cashews can work wonders in achieving a creamy texture.
- Silken Tofu: Blend 1 block (12 oz) of drained silken tofu with ½ cup maple syrup, ¼ cup lemon juice, and 1 teaspoon vanilla extract until smooth.
- Cashew Cream: Soak 1 cup raw cashews in water for 4-6 hours, then drain and blend with ½ cup coconut milk, ⅓ cup agave syrup, and 1 teaspoon vanilla extract until velvety.
Chef’s tip: Always refrigerate your cheesecake for at least 4 hours to ensure it sets properly, regardless of the crust or filling you choose.
| Ingredient | Measurement | Notes |
|---|---|---|
| Almond Flour | 1 ½ cups | Gluten-free option |
| Silken Tofu | 1 block (12 oz) | Dairy-free option |
| Raw Cashews | 1 cup | Soaked for creaminess |
Experiment with these variations to find the right fit for your dietary preferences while ensuring your cheesecake hardens beautifully in the fridge!
Serving Suggestions and Pairings
After a successful cheesecake-making session, it’s time to think about how to serve your beautifully set dessert. Pairing your cheesecake with the right garnishes and beverages can elevate the experience, making it even more delightful for you and your guests.
Garnishing Ideas
- Fresh Berries: Top your cheesecake with a mix of fresh strawberries, blueberries, and raspberries. A handful (about ½ cup) of each will not only add vibrant color but also a refreshing tartness that complements the creamy cheesecake.
- Chocolate Drizzle: Melt ½ cup of semi-sweet chocolate chips in a microwave-safe bowl for 30 seconds, stirring until smooth. Drizzle over the cheesecake for a rich contrast in flavor and a professional touch.
- Whipped Cream: Whip 1 cup of heavy cream with 2 tablespoons of powdered sugar until soft peaks form. Add a dollop on each slice for an airy texture that balances the density of the cheesecake.
Beverage Pairings
- Coffee: A rich cup of coffee enhances the cheesecake’s flavors. Brew a medium roast and serve it hot, allowing the warmth to highlight the dessert’s creaminess.
- Wine: Pair your cheesecake with a sweet dessert wine, like a Riesling or Moscato. A chilled glass complements the cheesecake’s sweetness while cutting through its richness.
- Tea: For a lighter option, consider serving with a cup of Earl Grey or chai tea. The spices from the tea can beautifully offset the richness of the cheesecake.
Remember, the key to the perfect cheesecake experience is balancing flavors and textures, so feel free to mix and match these suggestions to create your own signature serving style!
Quick Summary
| Prep Time | Cook Time | Total Time | Servings |
|---|---|---|---|
| 20 minutes | 60 minutes | 4 hours (chill) | 8 |
- Chill Time is Key: Refrigerate cheesecake for at least 4 hours to set properly.
- Use Room Temperature Ingredients: Ensure cream cheese and eggs are at room temperature for a smooth batter.
- Check for Doneness: The center should slightly jiggle when done baking.
- Cooling Process: Let cheesecake cool in the oven with the door ajar for about an hour before refrigerating.
- Wrap Properly: Cover the cheesecake with plastic wrap to prevent drying out.
- Tip: For a firmer texture, leave in the fridge overnight.
- Tip: Avoid overmixing to prevent cracking.
Frequently Asked Questions
Can I make this ahead of time? How to store and reheat?
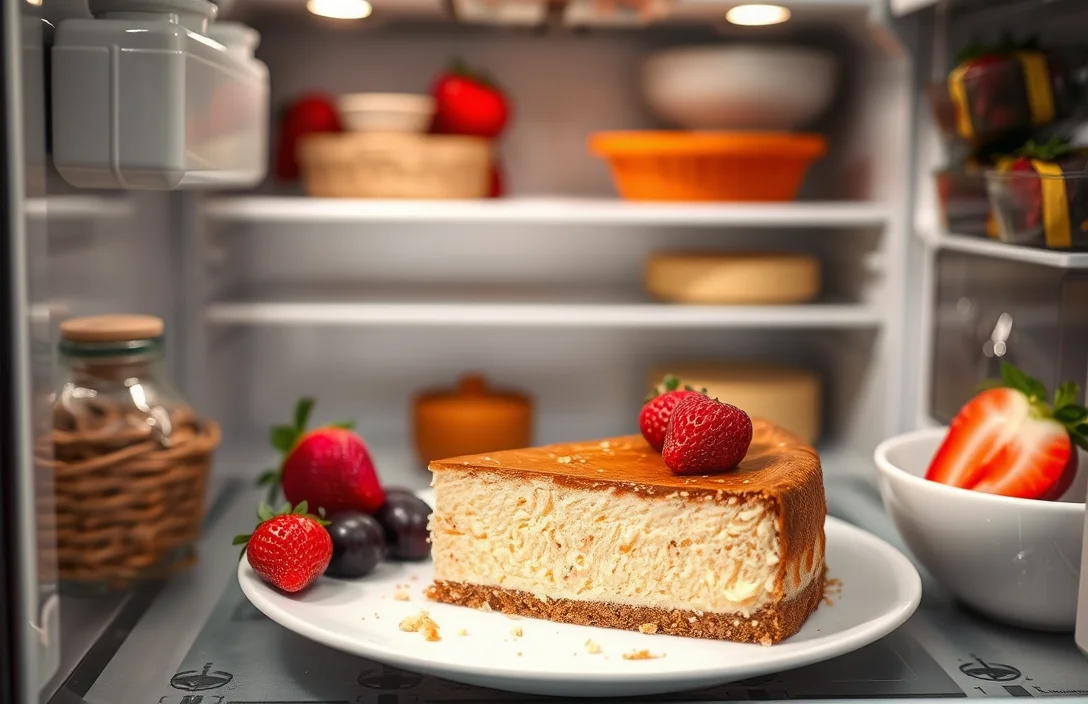
You can absolutely make cheesecake ahead of time! Just cover it tightly with plastic wrap and store it in the fridge for up to 5 days; there’s no need to reheat it—serve it chilled!
What can I substitute for cream cheese?
You can substitute Greek yogurt or mascarpone for cream cheese, but keep in mind that this may alter the texture and flavor slightly.
How do I know when it’s done?
Your cheesecake is done when the edges are set and the center still has a slight jiggle; it will continue to firm up as it cools. A toothpick inserted should come out mostly clean, with a few crumbs sticking to it.
Can I freeze this? How long does it last?
You can freeze cheesecake for up to 3 months; just wrap it tightly in plastic wrap and then in aluminum foil to prevent freezer burn. Thaw it in the fridge overnight before serving for the best texture.
Why did my cheesecake crack on top?
Your cheesecake may crack due to overmixing or baking at too high a temperature; always mix on low and bake at 325°F for the best results. If it does crack, you can cover it with a fruit topping or whipped cream for a beautiful presentation!

- Make Cheesecake Up to 3 Days Ahead: Tips for Best Flavor & Texture - March 4, 2026
- Easy No-Bake Cool Doen Cheesecake: Quick Recipe & Tips - March 4, 2026
- Decadent Dulce de Leche Cheesecake: Easy Step-by-Step Recipe - March 4, 2026