9 Easy No-Bake Cheesecake Bars Recipes for a 9×13 Pan
No-bake cheesecake bars are the perfect balance of creamy indulgence and easy preparation, making them a must-have for any occasion. Whether it’s a weeknight treat or a show-stopping dessert for a gathering, these bars are guaranteed to satisfy your sweet tooth and impress your friends and family.
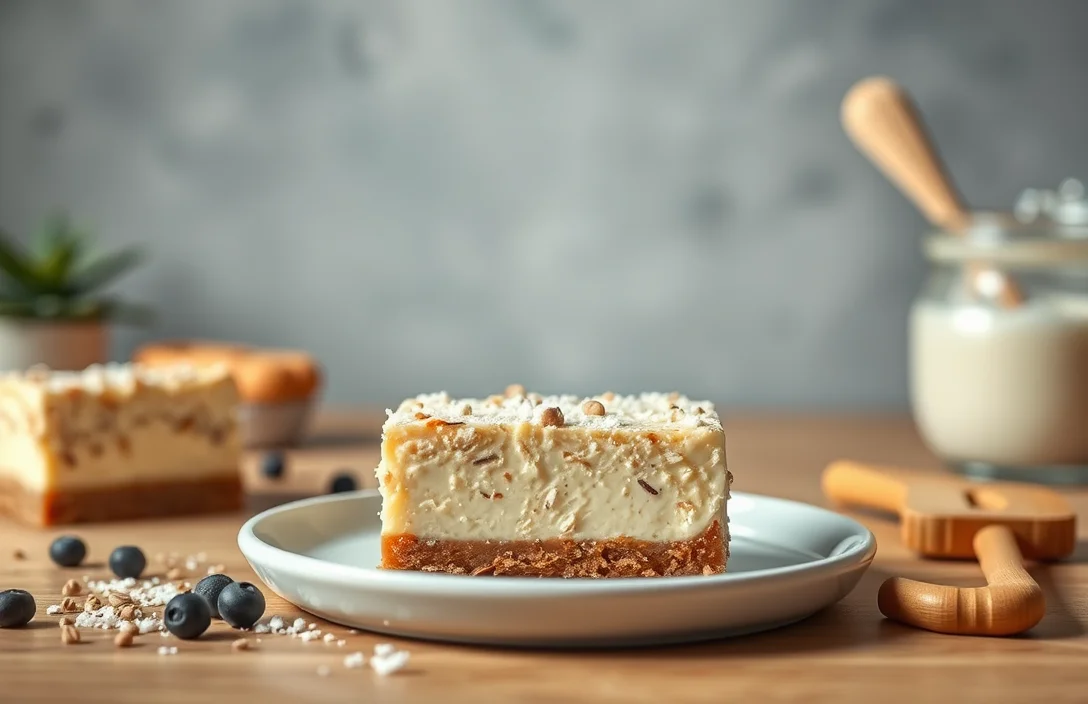
With just 15 minutes of prep time, a chill time of 4 hours, and serving 12 people, these recipes are easy and delicious. You’ll find exact measurements and step-by-step instructions that ensure your cheesecake bars turn out perfectly every time.
| Prep Time | Cook Time | Total Time | Servings | Difficulty |
|---|---|---|---|---|
| 15 minutes | 0 minutes | 4 hours | 12 | Easy |
Origin of Cheesecake Bars
No-bake cheesecake bars are a delightful treat that combines the creamy richness of traditional cheesecake with the convenience of an easy, no-bake method. Understanding the history of cheesecake bars adds a layer of appreciation to these delectable desserts, which have evolved over the years into a variety of flavors and styles.
- Historical roots: Cheesecake can trace its origins back to ancient Greece, where it was served to athletes during the first Olympic games. The original recipe featured simple ingredients like cheese, honey, and flour, which laid the groundwork for future variations.
- Evolution into no-bake: The no-bake cheesecake emerged in the mid-20th century, providing a simpler alternative to traditional cheesecakes that required baking. This version became popular due to its ease of preparation and the creamy texture that could be achieved without an oven.
- Cheesecake bars: The transition from a round cheesecake to bars made them more portable and easier to serve at gatherings and parties. The 9×13 inch pan became the go-to baking dish for these bars, allowing home cooks to create larger batches with minimal effort.
- Flavor variations: Today, no-bake cheesecake bars come in countless flavors, from classic vanilla to rich chocolate and fruity options. This versatility makes them a favorite for celebrations, potlucks, and casual family desserts.
Ingredients for No-Bake Bars
This section details the essential ingredients needed for creating delicious no-bake cheesecake bars in a 9×13 inch pan. Each ingredient is carefully measured to ensure your bars come out perfectly every time, so let’s get to the heart of the recipe!
| Item | Amount/Specification | Notes |
|---|---|---|
| Graham cracker crumbs | 2 cups (200g) | For the crust |
| Unsalted butter | ½ cup (115g) | Melted |
| Granulated sugar | ⅓ cup (67g) | For sweetness |
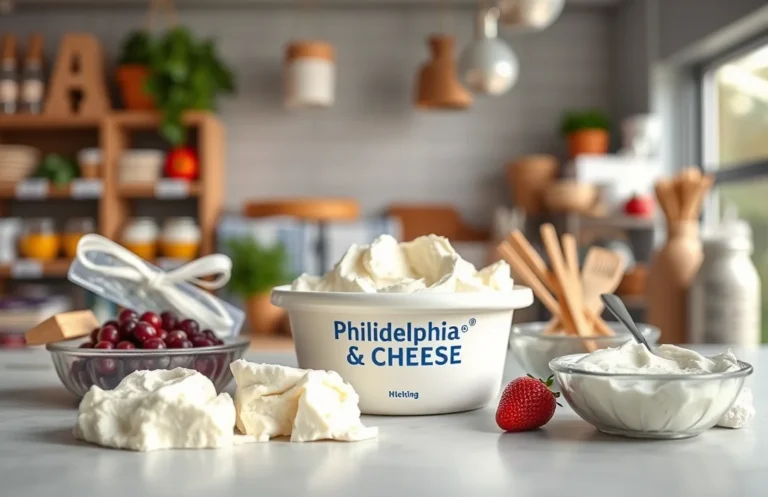
| Cream cheese | 16 oz (450g) | Softened to room temperature |
| Sour cream | 1 cup (240ml) | Provides creaminess |
| Powdered sugar | ¾ cup (90g) | For a smooth texture |
| Vanilla extract | 2 teaspoons | Adds flavor |
| Fresh fruit or fruit puree | 1 cup (150g) | Optional, for topping |
- For a gluten-free option, substitute graham cracker crumbs with gluten-free cookies or almond flour.
- If you have a dairy allergy, try using dairy-free cream cheese and sour cream alternatives.
- Ensure the cream cheese is fully softened for easy mixing; it should feel like a soft, spreadable consistency.
Essential Kitchen Equipment
Before you dive into making your easy no-bake cheesecake bars, it’s crucial to gather the right kitchen tools. Having the right equipment will streamline your process, ensuring a smooth and enjoyable baking experience. Here’s a list of what you’ll need to create delicious cheesecake bars in a 9×13 inch pan.
- 9×13 inch baking pan: This is essential for setting your cheesecake bars. Make sure it’s lined with parchment paper for easy removal once they’re set.
- Mixing bowls: You’ll need a large bowl for mixing the cream cheese filling and a medium bowl for the crust. A set of nesting bowls can save space in your kitchen.
- Electric mixer or whisk: An electric mixer is ideal for achieving a smooth, creamy filling, but a sturdy whisk will work if you prefer to mix by hand. Just be prepared for a bit of elbow grease!
- Spatula: A rubber spatula is perfect for scraping down the sides of your mixing bowl and folding in ingredients gently.
- Measuring cups and spoons: Accurate measurements are key for the right flavor and texture. Make sure you have both dry and liquid measuring cups on hand.
- Foil or plastic wrap: Cover your cheesecake bars tightly after they set in the refrigerator to prevent them from drying out.
- Refrigerator: Essential for chilling your cheesecake bars so they firm up properly. Aim to chill for at least 4 hours for the best results.
Chef’s tip: If you want to make individual servings, consider using silicone muffin cups instead of a 9×13 inch pan.
Step-by-Step Instructions
This section provides clear, step-by-step instructions for making easy no-bake cheesecake bars in a 9×13 inch pan. Following these instructions will help you achieve the perfect creamy texture and rich flavor, making your cheesecake bars a delightful treat.
- Prepare the crust: In a medium bowl, combine 1 ½ cups graham cracker crumbs, ½ cup granulated sugar, and ½ cup melted unsalted butter. Stir until the mixture is well combined and resembles wet sand. Press this mixture firmly into the bottom of the 9×13 inch pan using a flat measuring cup. Chill the crust in the refrigerator for 15 minutes until set.
- Make the cheesecake filling: In a large mixing bowl, beat 16 ounces of cream cheese (softened to room temperature) with a hand mixer on medium speed for about 2-3 minutes until smooth and creamy. Add in ½ cup granulated sugar, 1 teaspoon vanilla extract, and 1 cup heavy whipping cream. Continue to mix on medium speed until the mixture is well combined and starts to thicken, about 3-4 minutes.
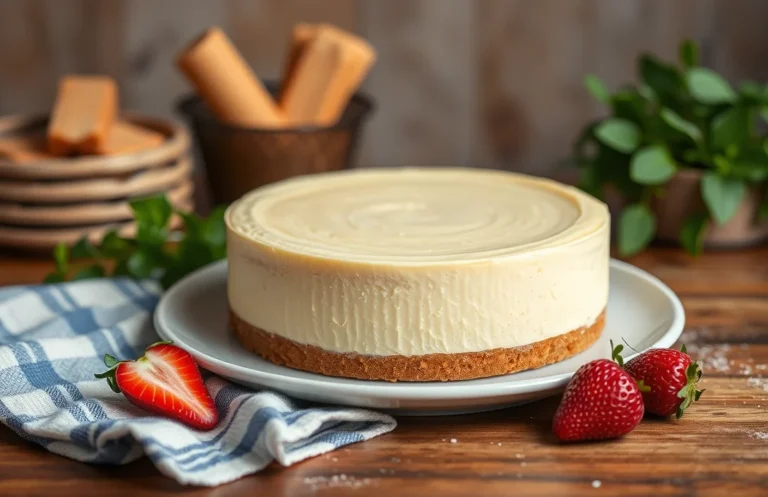
- Spread the filling: Once the filling is nice and thick, pour it over the chilled crust. Use a spatula to spread it evenly, making sure to reach all corners of the pan. Smooth the top so it’s level, which will help with presentation once cut. You should see a glossy surface at this stage.
- Chill the cheesecake bars: Cover the pan with plastic wrap and refrigerate for at least 4 hours, or overnight if possible. This allows the filling to firm up properly. It should feel firm to the touch and hold its shape when you gently press it.
- Slice and serve: Once set, lift the cheesecake out of the pan using the edges of the parchment paper (if used). Slice into bars using a sharp knife, cleaning the knife between cuts for neat edges. Serve chilled, and enjoy your delicious no-bake cheesecake bars!
Chef’s tip: If you’d like to add a fruity topping, consider using fresh berries or a fruit compote for extra flavor!
Expert Tips for Perfection
Creating the perfect no-bake cheesecake bars can be easier than you think, but there are a few essential tips to ensure you achieve that creamy, smooth texture and irresistible flavor. These expert insights will help you avoid common pitfalls and elevate your cheesecake game.
- Use room temperature ingredients: Make sure your cream cheese, sour cream, and any other dairy ingredients are at room temperature. This helps them blend more smoothly, preventing lumps and ensuring a creamy texture.
- Choose the right pan: A 9×13 inch pan is ideal for cheesecake bars, as it allows for even distribution of the filling. Consider using a glass or metal pan to best conduct heat when chilling.
- Don’t skip the chilling time: After assembling your cheesecake bars, chill them for at least 4-6 hours, or overnight if possible. This allows them to set properly and makes cutting easier while enhancing the flavors.
- Line your pan: Line the bottom of your pan with parchment paper, leaving an overhang on the sides. This makes it much easier to lift out the bars for clean, even slices.
- Watch the sweetness: Taste your filling before pouring it into the pan. Depending on the brand of cream cheese and other ingredients, you may need to adjust the sugar to your liking. Start with the recommended amount and add more if necessary.
- Be cautious with toppings: If adding fruit or other toppings, ensure they are well-drained to avoid excess moisture, which can make your bars soggy. Fresh berries or a fruit compote are great options that add flavor without too much liquid.
Variations and Modifications
This section highlights various ways to customize your easy no-bake cheesecake bars, allowing you to cater to dietary needs and flavor preferences. Making these bars your own can enhance their appeal and make them suitable for every occasion.
Flavor Variations
- Chocolate Cheesecake Bars: Add ½ cup of unsweetened cocoa powder to the cream cheese mixture for a rich chocolate flavor.
- Fruit-Infused Bars: Fold in 1 cup of pureed fruit, like strawberries or raspberries, into the filling. You can also top with fresh fruit for added texture.
- Nutty Flavor: Incorporate ½ cup of finely chopped nuts, such as pecans or almonds, into the crust for a crunchy twist.
- Spiced Variations: Add 1 teaspoon of cinnamon or pumpkin spice to the filling for a warm, seasonal flavor.
Dietary Modifications
For those with specific dietary restrictions, here are some helpful substitutions:
- Gluten-Free: Use gluten-free graham crackers or almond flour for the crust.
- Dairy-Free: Substitute cream cheese with a dairy-free alternative made from cashews or tofu. Use coconut cream instead of whipped cream.
- Low-Sugar: Replace granulated sugar with a sugar substitute like stevia or erythritol, adjusting to taste.
Chef’s tip: Always taste your filling before setting it in the fridge; you can adjust the sweetness or flavor at this stage!
| Ingredient | Standard | Gluten-Free | Dairy-Free |
|---|---|---|---|
| Graham Crackers | 2 cups (200g) | 2 cups gluten-free | N/A |
| Cream Cheese | 16 oz (450g) | N/A | 16 oz dairy-free |
Serving and Plating Ideas
Presenting your easy no-bake cheesecake bars beautifully can elevate the dessert experience and impress your guests. Here are some tips on how to serve and pair these delicious treats for maximum enjoyment.
- Choose Your Plating Dish: Opt for a clean white platter or individual dessert plates to highlight the creamy texture and colors of your cheesecake bars. A contrasting color can make them pop visually.
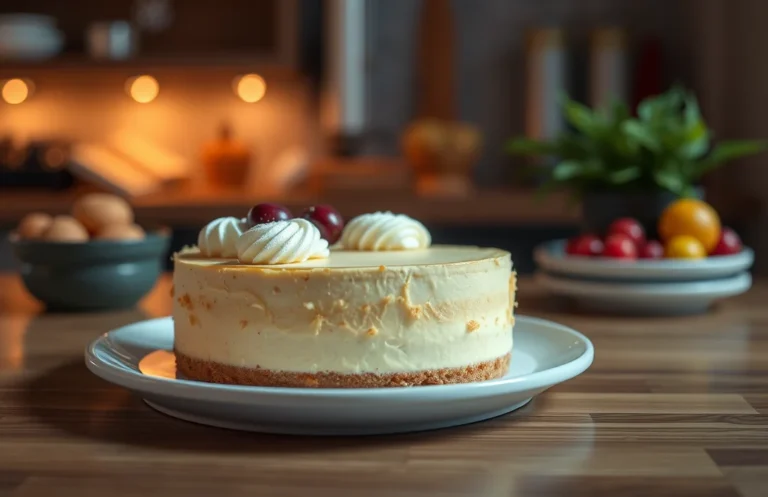
- Garnish for Appeal: Before serving, sprinkle fresh berries like blueberries or raspberries on top. You can also drizzle with a raspberry or chocolate sauce for extra flavor and a touch of elegance.
- Serve Chilled: Make sure your cheesecake bars are thoroughly chilled before slicing. They should feel firm to the touch and have a creamy look. Cut them into squares and use a sharp knife for clean edges.
- Pair with Complementary Flavors: Serve these bars alongside a small scoop of vanilla ice cream or whipped cream to enhance the rich cheesecake flavor. A strong coffee or herbal tea can also balance the sweetness.
- Offer Variety: If you’ve made different flavors of cheesecake bars, arrange them on the platter in a rainbow pattern. This not only looks appealing but also invites guests to try all varieties.
- Keep it Simple: Sometimes, less is more. A simple dusting of powdered sugar and a mint leaf can be all you need to elevate the presentation without overwhelming the bars.
Quick Summary
| Prep Time | 20 minutes |
|---|---|
| Cook Time | 0 minutes |
| Total Time | 4 hours (includes chilling) |
| Servings | 9 bars |
- Crust preparation: Combine 1.5 cups of crushed graham crackers with ½ cup melted butter.
- Cheese mixture: Beat 16 oz cream cheese with ½ cup sugar and 1 tsp vanilla until smooth.
- Add whipped cream: Fold in 2 cups of whipped cream gently for a light texture.
- Layering: Spread the cream cheese mixture over the crust evenly.
- Chill time: Refrigerate for at least 4 hours to set properly.
- Room temperature: Ensure cream cheese is at room temperature for easy mixing.
- Chill thoroughly: Don’t skip chilling time; it’s crucial for the right texture.
- Garnish wisely: Top with fresh fruit or chocolate for added flavor and presentation.
Frequently Asked Questions
Can I make this ahead of time? How to store and reheat?
You can absolutely make these cheesecake bars up to 2 days in advance. Store them in an airtight container in the refrigerator, and there’s no need to reheat—enjoy them chilled!
What can I substitute for cream cheese?
If you want a lighter option, you can substitute mascarpone cheese for cream cheese, which will give a similar creamy texture. Greek yogurt can also work if you prefer a tangy flavor, but it may yield a softer consistency.
How do I know when it’s done?
Your cheesecake bars are done when they are set around the edges but still slightly jiggly in the center—this should take about 4-6 hours in the fridge. They will firm up as they chill, so don’t worry if they look a bit soft initially!
Can I freeze this? How long does it last?
Yes, you can freeze these cheesecake bars for up to 3 months. Just wrap them tightly in plastic wrap and aluminum foil to prevent freezer burn, and thaw them in the fridge before serving.
Why did my cheesecake bars turn out too soft?
If your cheesecake bars are too soft, it might be due to not chilling them long enough—make sure to give them at least 4 hours in the fridge to set properly. Another reason could be using too much liquid in the filling; stick to the exact measurements for best results!

- Make Cheesecake Up to 3 Days Ahead: Tips for Best Flavor & Texture - March 4, 2026
- Easy No-Bake Cool Doen Cheesecake: Quick Recipe & Tips - March 4, 2026
- Decadent Dulce de Leche Cheesecake: Easy Step-by-Step Recipe - March 4, 2026