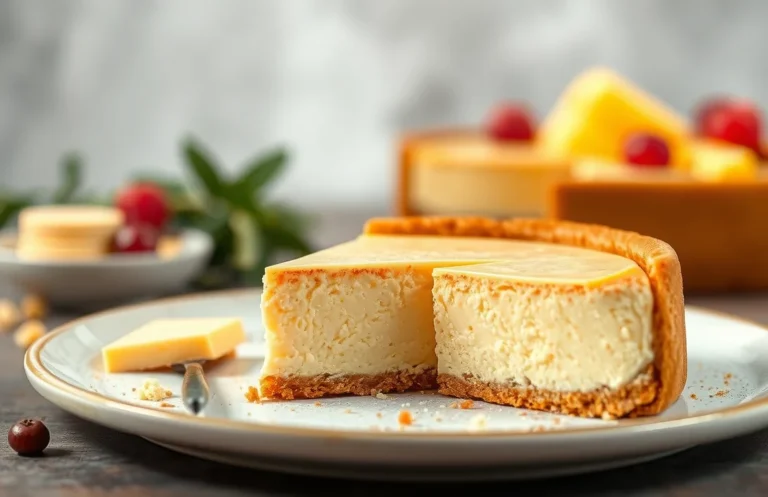
Easy Preppy Kitchen Cheese Pie Recipe: Bake in 45 Minutes!
There’s something undeniably comforting about a slice of cheese pie, with its creamy filling and buttery crust. Perfect for any occasion, this dish is a hit at family gatherings or cozy weeknight dinners. Each bite is rich and satisfying, making it a favorite for both kids and adults alike!
Total time: 1 hour 15 minutes, Difficulty level: Easy, Servings: 8.
| Prep Time | Cook Time | Total Time | Servings | Difficulty |
|---|---|---|---|---|
| 20 minutes | 55 minutes | 1 hour 15 minutes | 8 | Easy |
Story of Cheese Pie
The cheese pie is a delightful dish that blends rich flavors with a comforting, creamy texture. Its origins can be traced back to various cultures, each adding their unique twist, making it a beloved staple across the globe. This section highlights the significance and characteristics of cheese pie, perfect for those special occasions or a cozy family dinner.
- Historical roots: Cheese pie has its roots in ancient Greece and Rome, where cheese was a primary ingredient in many dishes. Over the centuries, it evolved, incorporating local ingredients and flavors, which led to the diverse variations we see today.
- Versatile serving options: This dish is ideal for a variety of occasions, from festive gatherings to casual weeknight dinners. Its versatility allows it to be served as an appetizer, main dish, or even dessert, depending on the style you choose.
- Unique characteristics: A well-made cheese pie features a flaky crust that cradles a luscious filling of creamy cheese, eggs, and spices. Its golden-brown top, achieved through careful baking, signals a perfectly cooked pie, ready to impress your guests with both taste and presentation.
- Perfect for sharing: Cheese pie is a crowd-pleaser, making it an excellent choice for potlucks or family gatherings. The comforting flavors and appealing appearance invite everyone to dig in and share a moment of joy together.
Ingredients List
This section provides a detailed list of ingredients you’ll need to create a delicious cheese pie, inspired by the Preppy Kitchen style. Each ingredient is crucial for achieving that perfect balance of flavors and textures, so let’s ensure you have everything ready before you start cooking!
| Item | Amount/Specification | Notes |
|---|---|---|
| All-purpose flour | 1 ½ cups (190g) | Plus extra for dusting |
| Unsalted butter | ½ cup (113g) | Cubed and chilled |
| Granulated sugar | 2 tablespoons (25g) | For the crust |
| Cold water | 4-5 tablespoons | To bind the dough |
| Ricotta cheese | 2 cups (450g) | Drained |
| Shredded mozzarella cheese | 1 cup (100g) | For a gooey texture |
| Eggs | 3 large | Room temperature |
| Salt | ½ teaspoon | Enhances flavor |
| Black pepper | ¼ teaspoon | Freshly ground |
| Fresh herbs (optional) | 1 tablespoon | Such as parsley or chives, finely chopped |
- For a gluten-free option: Substitute all-purpose flour with a gluten-free flour blend.
- Make it vegetarian: Ensure the cheeses are rennet-free.
- Common mistake: Do not skip chilling the butter; it helps keep the crust flaky.
Kitchen Equipment Needed
To create the perfect cheese pie, having the right kitchen tools on hand is essential. This section outlines everything you’ll need for preparation and baking, ensuring a smooth cooking experience.
- 9-inch Pie Dish: A standard pie dish is essential for shaping and baking your cheese pie. Make sure it’s deep enough to hold the filling without overflowing. Ceramic or glass dishes work best as they provide even heating.
- Mixing Bowls: You will need at least two mixing bowls: one for combining your pie crust ingredients and another for mixing the cheese filling. Choose bowls that are large enough to easily whisk and fold ingredients without splattering.
- Whisk: A sturdy whisk is crucial for ensuring your filling is smooth and well-combined. Use it to blend the cheese and eggs thoroughly until no lumps remain.
- Rolling Pin: If you’re making a homemade pie crust, a rolling pin is necessary to roll out the dough evenly. Dust it lightly with flour to prevent sticking as you roll.
- Measuring Cups and Spoons: Accurate measurements are vital for the success of your cheese pie. Use dry measuring cups for flour and sugar, and liquid measuring cups for any liquid ingredients.
- Spatula: A rubber spatula will help you fold in ingredients gently and scrape the sides of your mixing bowls. This is especially important for achieving a smooth filling.
- Oven Thermometer: To ensure your oven is at the correct temperature (typically 350°F or 175°C), an oven thermometer is a great tool. This helps prevent overbaking or underbaking your pie.
- Cooling Rack: After baking, place your pie on a cooling rack to allow it to cool evenly. This will help maintain the texture and prevent sogginess in the crust.
Step-by-Step Instructions
This section provides precise, timed instructions for preparing your cheese pie, ensuring every layer is perfect. Follow these steps closely for a delightful baking experience that yields a creamy, flavorful pie with a golden crust.
- Preheat your oven: Set the temperature to 350°F (175°C). This allows the oven to reach the right temperature for baking while you prepare the crust and filling.
- Prepare the crust: In a mixing bowl, combine 1 ½ cups (190g) of all-purpose flour, ½ teaspoon of salt, and ½ cup (113g) of chilled unsalted butter, cut into cubes. Using a pastry cutter or your fingers, mix until the mixture resembles coarse crumbs, about 5 minutes.
- Add the liquid: Pour in 3-4 tablespoons of ice-cold water, one tablespoon at a time, mixing gently until the dough comes together. Be careful not to overwork the dough; it should feel slightly tacky but not sticky.
- Chill the dough: Wrap the dough in plastic wrap and refrigerate for at least 30 minutes. This helps the butter solidify, resulting in a flakier crust.
- Roll out the dough: Once chilled, place the dough on a floured surface. Using a rolling pin, roll it out to about ⅛ inch thick, then transfer it to a 9-inch pie pan, pressing it gently into the corners. Trim any excess dough hanging over the edges.
- Pre-bake the crust: Use a fork to prick the bottom of the crust and bake for 10-12 minutes until lightly golden. Keep an eye on it; it should smell buttery and slightly nutty but not browned.
- Prepare the filling: In a bowl, whisk together 2 cups (480ml) of ricotta cheese, 1 cup (240ml) of heavy cream, 3 large eggs, ½ cup (100g) of granulated sugar, and 1 teaspoon of vanilla extract until smooth. The mixture should be creamy and well-blended, with no lumps.
- Fill the crust: Pour the cheese filling into the pre-baked crust, smoothing the top with a spatula. It should be evenly distributed and look glossy.
- Bake the pie: Place the pie in the oven and bake for 40-45 minutes. The edges should be set, while the center remains slightly wobbly. You’ll know it’s done when it’s puffed and golden, and the aroma fills your kitchen.
- Cool and serve: Remove the pie from the oven and let it cool completely at room temperature, about 1 hour. For the best texture, chill it in the refrigerator for at least 2 hours before serving. It should feel firm yet creamy when you slice into it.
Pro Chef Tips
Creating a perfect cheese pie requires attention to detail and a few insider tips that can elevate your dish. Here, I share some essential advice to help you avoid common pitfalls and achieve a delicious, creamy pie that embodies the Preppy Kitchen style.
- Choose the right cheese: A blend of cream cheese (8 oz/227 g) and ricotta (1 cup/250 g) creates a rich, smooth texture. Avoid using overly sharp cheeses as they can overpower the delicate flavor.
- Whip the cream cheese: Before incorporating it into the mixture, beat the cream cheese until creamy (about 2-3 minutes). This ensures a lump-free filling that bakes evenly.
- Don’t skip the chill: Once your filling is prepared, chill it in the fridge for at least 30 minutes. This helps the flavors meld together and makes it easier to spread into the crust.
- Watch your baking time: Bake at 350°F (175°C) for 25-30 minutes. The edges should be set, but the center should still have a slight jiggle. Overbaking will lead to a dry texture.
- Allow to cool gradually: After baking, let your cheese pie cool at room temperature for 1 hour before refrigerating. This prevents cracks from forming on the surface as it cools.
- Store properly: Cover your pie tightly with plastic wrap to keep it fresh. It can be stored in the refrigerator for up to 5 days. Freezing is also an option, but for best results, consume it fresh.
Variations and Substitutions
This section highlights various ways to modify the cheese pie recipe to accommodate different dietary needs and personal preferences. Whether you’re looking for a gluten-free option, a vegan twist, or simply want to switch up the flavor profile, these suggestions will help you create a cheese pie that’s just right for you.
Gluten-Free Crust
- Replace the regular pie crust with a gluten-free option made from almond flour or gluten-free all-purpose flour. Use 1 ½ cups (150g) of almond flour mixed with 3 tablespoons of melted butter for the crust.
Vegan Cheese Pie
- To make a vegan cheese pie, substitute traditional cheeses with plant-based alternatives. Use 1 cup (240g) of cashew cream and 1 cup (240g) of nutritional yeast as the base.
- Replace eggs with a flaxseed mixture: Combine 1 tablespoon of ground flaxseed with 3 tablespoons of water, let it sit for 5 minutes until it thickens.
Flavor Variations
Chef’s tip: Experiment with different cheese combinations, such as feta for a tangy kick or goat cheese for creaminess.
- Add herbs like fresh basil or dill into the filling for extra flavor.
- Mix in cooked spinach or sautéed mushrooms for added texture and taste.
Ingredient Quick Reference Table
| Ingredient | Traditional | Gluten-Free | Vegan |
|---|---|---|---|
| Cheese | 2 cups (240g) shredded cheese | 2 cups (240g) shredded gluten-free cheese | 1 cup (240g) cashew cream + 1 cup (240g) nutritional yeast |
| Crust | 1 pie crust | 1 ½ cups (150g) almond flour crust | 1 pie crust made from oats or nuts |
Remember, substitutions can affect the texture and flavor of your cheese pie, so be sure to adjust cooking times or add ingredients as needed. Enjoy experimenting!
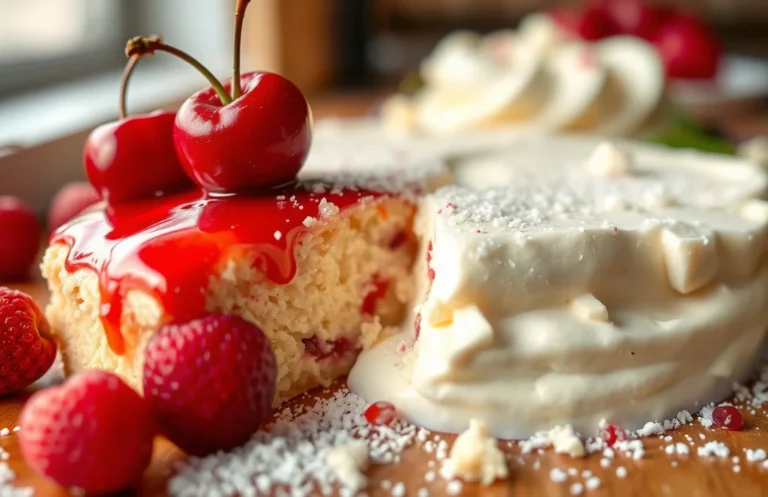
Serving Suggestions
Creating the perfect cheese pie is only half the fun; presenting it beautifully elevates the entire experience. Here are some delightful serving ideas and pairing suggestions that will impress your guests and complement the rich flavors of your cheese pie.
Plating Ideas
- Serve slices of cheese pie on elegant white plates to highlight the creamy filling.
- Garnish with fresh herbs like thyme or chives for a pop of color and freshness.
- Drizzle a bit of balsamic reduction or homemade pesto around the plate for added flavor and visual appeal.
Pairing Suggestions
The right accompaniments can elevate your cheese pie to new heights. Here are some fantastic food and drink pairings:
- Salads: A simple arugula salad with lemon vinaigrette complements the richness of cheese pie.
- Roasted Vegetables: Serve with roasted cherry tomatoes and bell peppers for a colorful side.
- Drinks: Pair with a crisp white wine like Sauvignon Blanc or a refreshing sparkling water with lemon.
Pro tip: To enhance the flavors, let your cheese pie sit for about 10 minutes after baking before slicing. This allows it to firm up slightly and makes for cleaner slices.
Presentation Tips
For a more festive look, consider the following:
- Use decorative pie servers or forks for a more elegant touch.
- Add seasonal fruits like figs or grapes on the side for a sweet contrast.
With these serving suggestions, your cheese pie will not only taste divine but also look stunning on the table!
Quick Summary
| Prep Time | 20 minutes |
|---|---|
| Cook Time | 45 minutes |
| Total Time | 1 hour 5 minutes |
| Servings | 8 servings |
- Preheat oven to 350°F (175°C) before mixing ingredients.
- Use room temperature ingredients for a smoother filling.
- Blend cheese mixture until completely smooth for best texture.
- Bake pie for 45 minutes, until the edges are set but the center is slightly jiggly.
- Cool completely before slicing for clean cuts.
- Chill in the refrigerator for at least 2 hours to enhance flavors.
- Tip: Use a mix of cream cheese and ricotta for optimal creaminess.
- Tip: Add a pinch of salt to balance the sweetness.
Frequently Asked Questions
Can I make this ahead of time? How to store and reheat?
You can make the cheese pie a day in advance and store it in the refrigerator, covered with plastic wrap. To reheat, bake it at 350°F (175°C) for about 15-20 minutes or until warmed through.
What can I substitute for cream cheese?
If you need a substitute for cream cheese, you can use ricotta cheese mixed with a bit of sour cream for a similar texture. Aim for a 1:1 ratio to maintain the consistency.
How do I know when it’s done?
Your cheese pie is done when the edges are golden brown and the center is set but slightly jiggly. It should look puffy and not wet on top, typically taking around 35-40 minutes at 325°F (160°C).
Can I freeze this? How long does it last?
Yes, you can freeze the cheese pie for up to 2-3 months if wrapped well in plastic wrap and aluminum foil. Thaw it in the refrigerator overnight before reheating.
Why did my cheese pie turn out watery?
Your cheese pie may be watery if you didn’t drain the ricotta properly or overbaked it, causing excess moisture. To fix this in the future, make sure to strain the ricotta and check for doneness early.

- 10 Best Cheese Knife With Holes For Smooth Slice 2026 - March 9, 2026
- Make Cheesecake Up to 3 Days Ahead: Tips for Best Flavor & Texture - March 4, 2026
- Easy No-Bake Cool Doen Cheesecake: Quick Recipe & Tips - March 4, 2026