Elegant Chocolate Mousse Recipe: Perfect for Preppy Gatherings
Chocolate mousse is the epitome of indulgence, transforming any occasion into a special celebration. With its rich, velvety texture and deep chocolate flavor, this dessert is sure to impress everyone from family to friends. There’s something incredibly satisfying about whipping up this elegant treat in just under an hour.
Get ready for a total time of 30 minutes, with 2 hours of chilling, and this recipe serves 4 to 6 people. It’s rated easy, making it perfect for any home cook wanting to impress.
| Prep Time | Cook Time | Total Time | Servings | Difficulty |
|---|---|---|---|---|
| 15 minutes | 15 minutes | 2 hours 30 minutes | 4-6 | Easy |
History of Chocolate Mousse
Chocolate mousse has a rich and delightful history that traces back to its French origins, bringing a sophisticated touch to dessert tables around the world. Understanding its cultural significance adds depth to the experience of making and serving this elegant treat.
- French Origins: The roots of chocolate mousse can be traced back to the 18th century in France. Originally, it was a savory dish made from fish or meat, but by the 19th century, it evolved into the sweet chocolate version we adore today. The classic recipe often incorporates whipped egg whites, giving it a light and airy texture that captures the essence of French culinary artistry.
- Cultural Significance: In French cuisine, chocolate mousse is not just a dessert; it’s a symbol of indulgence and sophistication. It has become a staple in fine dining restaurants and is often served at celebrations and special occasions. The dessert embodies the French philosophy of savoring life’s pleasures, making it a cherished treat that represents both tradition and luxury.
Ingredients List
This section provides a complete list of ingredients needed for your chocolate mousse recipe, emphasizing the quality and proportions necessary for an exquisite result. Choosing the right ingredients is crucial for achieving that rich, velvety texture and sophisticated flavor that embodies a ‘preppy’ aesthetic.
| Item | Amount/Specification | Notes |
|---|---|---|
| Dark chocolate (70% cocoa or higher) | 6 ounces (170g) | Finely chopped for easier melting |
| Unsalted butter | 2 tablespoons (28g) | Room temperature for easy incorporation |
| Large eggs | 4 | Separated into yolks and whites |
| Granulated sugar | 1/4 cup (50g) | Divided; 2 tablespoons for yolks, 2 tablespoons for whites |
| Heavy cream | 1 cup (240ml) | Chilled for whipping |
| Vanilla extract | 1 teaspoon | Pure extract preferred for flavor |
- For a sweeter mousse, opt for semi-sweet chocolate (about 60% cocoa).
- If you’re looking for a dairy-free version, substitute butter with coconut oil and use dairy-free chocolate.
- Ensure your mixing bowls and utensils are grease-free when whipping egg whites to achieve maximum volume.
Necessary Kitchen Equipment
To create a delightful chocolate mousse that embodies a preppy aesthetic, having the right tools on hand is essential. This section outlines the kitchen equipment you’ll need to ensure a smooth preparation and an elegant presentation.
| Item | Amount/Specification | Notes |
|---|---|---|
| Mixing Bowls | 2 medium-sized | Glass or stainless steel are preferred for ease of cleaning and durability. |
| Electric Mixer | 1 | A hand mixer or stand mixer will work; ensure it has a whisk attachment for aerating the cream. |
| Serving Glasses | 4-6 | Opt for clear, elegant glassware to showcase the layers of mousse. |
- Tip: Use a glass mixing bowl when melting chocolate to see the melting process clearly and avoid overheating.
- Tip: Chill your mixing bowls and beaters in the refrigerator for 15-20 minutes before whipping the cream; this helps achieve a better volume and texture.
- Tip: If using a stand mixer, be cautious not to over-whip the cream; you want soft peaks that will hold their shape, not stiff peaks.
Step-by-Step Instructions
This section provides clear, detailed steps to create a rich and elegant chocolate mousse. Each step is crucial to ensure that your mousse achieves the perfect texture and flavor, making it a delightful addition to any preppy gathering.
- Melting the Chocolate: Begin by chopping 6 ounces (170g) of high-quality dark chocolate into small pieces for even melting. Place the chocolate in a heatproof bowl over a saucepan of simmering water, ensuring the bowl doesn’t touch the water. Stir gently until the chocolate is completely melted and glossy, which should take about 3-5 minutes. Remove from heat and let it cool slightly.
- Whipping the Cream: In a clean mixing bowl, pour 1 ½ cups (360ml) of heavy cream and begin whipping it with an electric mixer on medium speed. After about 2 minutes, add 2 tablespoons of powdered sugar and a pinch of salt. Continue whipping until soft peaks form, about 3-4 minutes. The cream should look fluffy and hold its shape but not be over-whipped to the point of becoming butter.
- Combining Ingredients: Once the melted chocolate has cooled but is still pourable, gently fold in ½ teaspoon of vanilla extract. Take one-third of the whipped cream and stir it into the chocolate mixture to lighten it up. Then, carefully fold in the remaining whipped cream using a spatula, ensuring not to deflate the mixture. The mousse should become light and airy, with a smooth chocolate color.
Pro Tips and Common Mistakes
Creating the perfect chocolate mousse requires attention to detail, especially when it comes to choosing your chocolate and ensuring a smooth texture. Here are some expert tips and common pitfalls to avoid that will elevate your mousse to a refined, preppy delight.
Choosing Chocolate
- Select high-quality chocolate: Use chocolate with at least 70% cocoa content for a rich flavor. Brands like Valrhona or Callebaut are excellent choices. Avoid chocolate chips, as they have stabilizers that may affect the texture.
- Consider flavor profiles: Dark chocolate provides depth, while milk chocolate offers creaminess. If you prefer a more sophisticated taste, opt for a blend of dark and milk chocolate to balance bitterness and sweetness.
Avoiding Graininess
- Ensure chocolate is melted smoothly: Use a double boiler or microwave in 30-second increments. If using the microwave, stir between each increment to prevent overheating, which can cause the chocolate to seize.
- Fold gently but thoroughly: When incorporating whipped cream or egg whites, fold gently to maintain airiness. If overmixed, the mousse can become dense and lose its light texture.
- Check for curdling: If using eggs, ensure they are at room temperature before whipping. Cold eggs can result in a grainy texture. If curdling occurs, gently blend the mixture with an immersion blender to smooth it out.
Variations and Substitutions
Chocolate mousse can be easily adapted to cater to various dietary preferences while maintaining its rich, velvety texture and decadent flavor. Here are some thoughtful variations and substitutions that can elevate your mousse experience without compromising on taste or elegance.
Vegan Options
- Replace the eggs: Use 1 cup of aquafaba (the liquid from canned chickpeas) whipped until soft peaks form as a substitute for eggs. This will give the mousse the necessary lightness.
- Choose a dairy-free chocolate: Opt for 8 ounces of high-quality dark chocolate (70% cocoa or higher) that is dairy-free to ensure it’s fully vegan.
- Use coconut cream: Instead of heavy cream, use 1 cup of chilled coconut cream (the solid part from a can) for a luscious texture and a hint of tropical flavor.
Flavored Mousse Ideas
Elevate your chocolate mousse with these sophisticated flavors:
- Mint Chocolate Mousse: Add 1 teaspoon of peppermint extract to the melted chocolate for a refreshing twist.
- Espresso Chocolate Mousse: Mix in 2 tablespoons of finely ground espresso beans or instant coffee to the chocolate for a deep, rich flavor.
- Orange Chocolate Mousse: Incorporate the zest of 1 orange and 1 tablespoon of orange liqueur for a bright, citrusy note.
Chef’s tip: Always taste your mousse mixture before setting it to ensure the flavors balance perfectly.
| Ingredient | Substitution |
|---|---|
| Eggs | Aquafaba (1 cup) |
| Heavy cream | Coconut cream (1 cup) |
| Dairy chocolate | Dairy-free dark chocolate (8 ounces) |
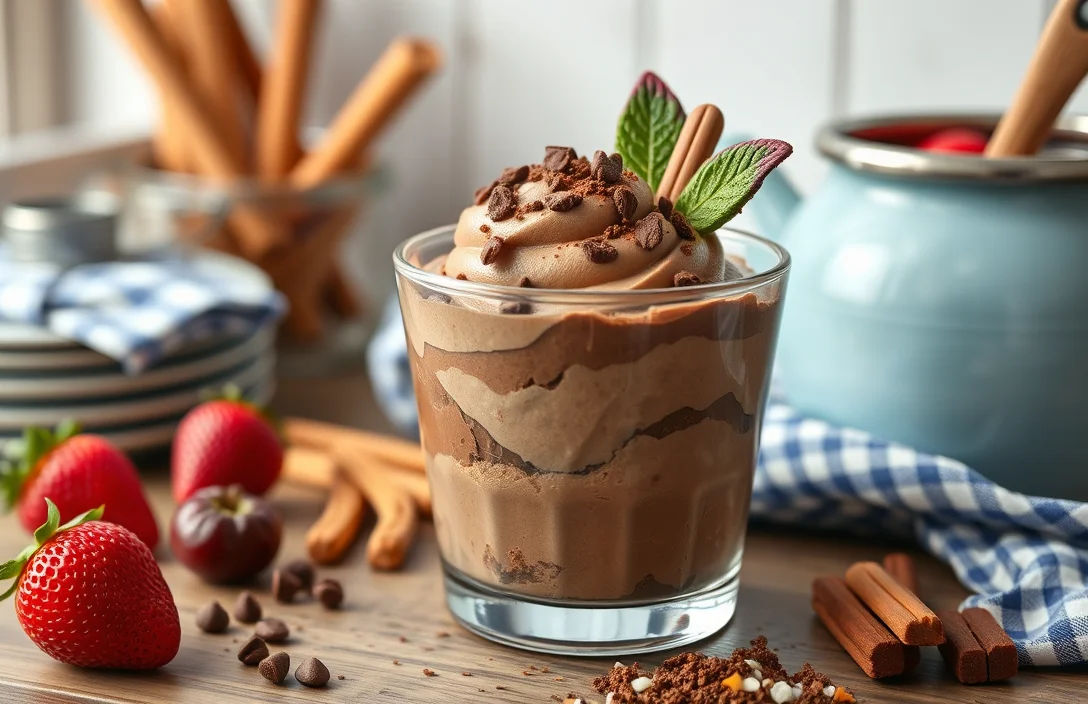
Plating and Serving Suggestions
Presenting your chocolate mousse in an elegant manner not only enhances its appeal but also aligns perfectly with a preppy aesthetic. Using refined glassware and thoughtful garnishes can elevate your dessert from simple to sophisticated, making it a stunning centerpiece for any occasion.
- Choose Elegant Glassware: Opt for classic glass dessert cups or stemmed glasses to showcase the rich layers of your chocolate mousse. Clear glass allows the beautiful, velvety texture to shine through. Aim for glasses that hold about ½ cup (120ml) to allow for a generous portion without overwhelming the senses.
- Layer Your Mousse: For a preppy touch, consider layering your chocolate mousse with whipped cream or a fruit puree. Start with a layer of mousse, followed by a dollop of whipped cream, and repeat. This creates a visually appealing contrast and adds an extra dimension of flavor.
- Garnish with Fresh Berries: Top each serving with a few fresh raspberries or strawberries. The tartness of the berries complements the richness of the mousse beautifully. Arrange them artfully on top, and consider adding a mint leaf for a pop of color and freshness.
- Add a Dusting of Cocoa or Powdered Sugar: Just before serving, lightly dust the top of each mousse with unsweetened cocoa powder or powdered sugar. This not only adds a touch of sweetness but also enhances the visual appeal. Use a fine mesh sieve for even distribution.
- Serve with a Side of Biscotti or Shortbread: Pair your mousse with a small biscotti or piece of shortbread for added texture. Place it elegantly beside the mousse on the plate to create a balanced presentation that invites guests to indulge.
Quick Summary
| Prep Time | 20 minutes |
|---|---|
| Cook Time | 5 minutes |
| Total Time | 2 hours (chill time included) |
| Servings | 4 |
- Use quality chocolate: Aim for at least 70% cocoa for rich flavor.
- Whip egg whites properly: Beat until stiff peaks form for a light mousse.
- Gentle folding: Carefully fold chocolate into whipped cream to maintain airiness.
- Chill adequately: Let the mousse set in the fridge for at least 2 hours.
- Garnish creatively: Add fresh berries or mint for an elegant finish.
Frequently Asked Questions
Can I make this ahead of time? How to store and reheat?
You can absolutely make chocolate mousse ahead of time! Store it in an airtight container in the refrigerator for up to 3 days without losing its texture.
What can I substitute for eggs in this mousse recipe?
If you’re looking for an egg substitute, try using silken tofu blended until smooth, or a store-bought egg replacer to maintain creaminess.
How do I know when it’s done?
Your chocolate mousse is done when it has a fluffy, airy texture and holds stiff peaks after folding in the whipped cream, typically around 2-3 minutes of whipping.
Can I freeze this? How long does it last?
You can freeze chocolate mousse, but it’s best enjoyed fresh; if you do freeze it, it will last up to 1 month, though the texture may change upon thawing.
What if I don’t have a double boiler?
If you don’t have a double boiler, you can create one by placing a heatproof bowl over a pot of simmering water, ensuring the bowl doesn’t touch the water for gentle melting.

- Make Cheesecake Up to 3 Days Ahead: Tips for Best Flavor & Texture - March 4, 2026
- Easy No-Bake Cool Doen Cheesecake: Quick Recipe & Tips - March 4, 2026
- Decadent Dulce de Leche Cheesecake: Easy Step-by-Step Recipe - March 4, 2026