10 Fun Baking Recipes for a Preppy Kitchen Makeover
There’s something utterly delightful about baking in a preppy kitchen. Picture fluffy lemon scones with a hint of zest, perfect for brunch or an afternoon tea. Their buttery texture and bright flavors make them a crowd-pleaser, and I guarantee they’ll disappear faster than you can say “second batch!”
Total time: 30 minutes | Difficulty level: Easy | Servings: 8 scones
| Prep Time | Cook Time | Total Time | Servings | Difficulty |
|---|---|---|---|---|
| 15 minutes | 15 minutes | 30 minutes | 8 scones | Easy |
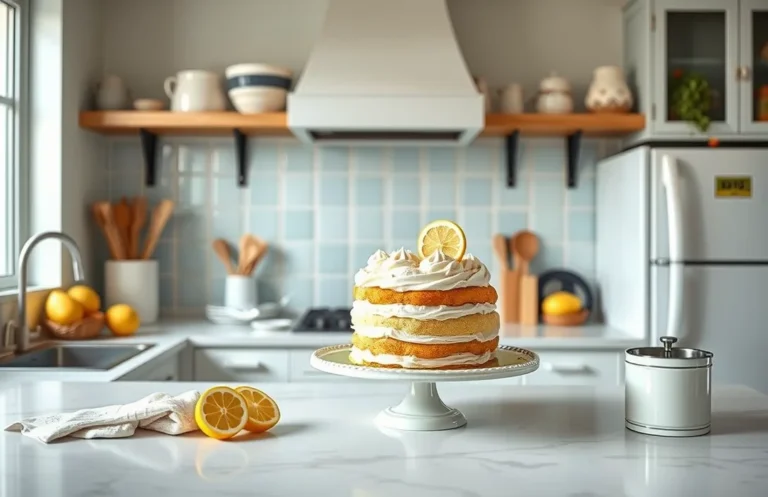
Charming Cupcake Tower
Cupcakes have a charming history that makes them a beloved treat at gatherings. These delightful mini cakes originated in the United States in the 19th century, offering a simpler alternative to traditional layer cakes. Their individual size and variety make them perfect for parties, allowing guests to indulge in multiple flavors without the commitment of a full slice.
Origin of Cupcakes
The term “cupcake” is derived from the way they were originally baked in individual cups, or “cups.” This method not only made them easier to serve but also showcased their potential for creativity in flavor and decoration. Over time, cupcakes have evolved from simple vanilla and chocolate to extravagant confections adorned with colorful frostings, toppings, and even themed decorations.
Perfect for Parties
One of the best things about cupcakes is their versatility, making them ideal for any occasion. Whether you’re hosting a birthday party, a bridal shower, or a casual get-together, these treats can be tailored to match your theme. Here are a few reasons why cupcakes are perfect for gatherings:
- Variety: Offer different flavors to cater to diverse tastes—think red velvet, lemon, or even funfetti!
- Presentation: Arrange them on a tiered stand for an eye-catching centerpiece that guests will admire.
- Portion Control: No cutting required! Each guest can enjoy their own cupcake without any fuss.
Chef’s tip: Use seasonal ingredients for your frosting and toppings to elevate your cupcake game and match the theme of your gathering.
As you prepare for your next celebration, consider the charm and appeal of a cupcake tower, sure to bring smiles and sweetness to your table!
Cupcake Ingredients
Getting the right ingredients is essential for creating delicious cupcakes that not only taste great but also look fabulous. This section outlines the specific measurements and types of ingredients you’ll need for your preppy kitchen cupcakes, ensuring consistent results every time you bake.
| Item | Amount/Specification | Notes |
|---|---|---|
| All-purpose flour | 1 ½ cups (190g) | Sifted for a lighter texture |
| Granulated sugar | 1 cup (200g) | Helps achieve sweetness and moisture |
| Baking powder | 1 ½ teaspoons | Leavening agent for fluffiness |
| Salt | ¼ teaspoon | Enhances flavor |
| Unsalted butter | ½ cup (113g) | Softened to room temperature |
| Eggs | 2 large | At room temperature for better mixing |
| Vanilla extract | 2 teaspoons | For flavor depth |
| Milk | ½ cup (120ml) | Whole milk for richness |
- For a gluten-free option, substitute all-purpose flour with a 1:1 gluten-free baking blend.
- Consider using flavored extracts like almond or lemon to add a unique twist.
- Ensure butter is softened by leaving it out for about 30 minutes before use; it should feel slightly firm but easily indented.
Essential Baking Tools
Having the right tools in your kitchen can make baking not only easier but also more enjoyable. For creating fun, preppy treats, specific tools can help you achieve that polished look and perfect taste you’re aiming for. Here’s a breakdown of the essential equipment you’ll need, along with some tips for prepping your kitchen before you start baking.
- Muffin Tin: A standard 12-cup muffin tin is essential for baking cupcakes and muffins. Look for a non-stick version to ensure easy release. If you want to get creative, consider using colorful silicone muffin cups, which add a fun pop of color and are reusable!
- Mixers: A stand mixer is a game-changer for baking, especially for whipping up buttercream frosting or mixing cake batter. If you don’t have one, a handheld mixer works well too. Make sure to use the appropriate speed for the task; start slow to avoid splatters, then increase as needed.
- Measuring Cups and Spoons: Accurate measurements are crucial for baking success. Invest in a set of dry measuring cups for solids and liquid measuring cups for wet ingredients. Don’t forget a set of measuring spoons for precise amounts of baking powder and spices!
- Oven Thermometer: Ovens can often be off by a few degrees. An oven thermometer ensures that your oven heats to the correct temperature. Place it in the center of the oven for the most accurate reading.
- Cooling Rack: After baking, allow your cupcakes and cakes to cool on a wire rack. This prevents them from becoming soggy due to trapped steam. A good cooling rack can also double as a presentation piece for your baked goods.
- Preheating the Oven: Always preheat your oven to the specified temperature (usually 350°F or 175°C) before placing your baked goods inside. This ensures even cooking. Wait for the oven to signal it’s ready, and avoid opening the door too soon, which can cause your treats to sink.
Step-by-Step Cupcake Instructions
Making cupcakes is a delightful way to add a preppy touch to your baking repertoire. In this section, we will cover the essential steps for mixing the batter and baking the cupcakes to perfection, ensuring they come out fluffy and flavorful.
Mixing Batter
- Preheat your oven to 350°F (175°C) and line a cupcake pan with paper liners. This temperature is crucial for achieving the perfect rise and texture. Your kitchen should start to smell warm and inviting as the oven heats up.
- In a large mixing bowl, whisk together 1½ cups (190g) all-purpose flour, 1 cup (200g) granulated sugar, ½ teaspoon baking powder, and ½ teaspoon baking soda. Whisking ensures that all dry ingredients are evenly distributed, preventing any clumps.
- In a separate bowl, combine ½ cup (120ml) whole milk, ½ cup (120ml) vegetable oil, 2 large eggs, and 1 teaspoon vanilla extract. Whisk until smooth. The mixture should have a glossy finish and a light yellow color.
- Gradually fold the wet ingredients into the dry ingredients using a spatula. Mix gently until just combined; small lumps are okay. Overmixing can lead to dense cupcakes, so be cautious!
Baking Time
- Divide the batter evenly among the cupcake liners, filling each about ⅔ full. This allows enough room for the cupcakes to rise without overflowing. You can use an ice cream scoop for consistent sizing.
- Bake in the preheated oven for 18-20 minutes. The cupcakes are done when they spring back lightly when touched and a toothpick inserted in the center comes out clean. Your kitchen will be filled with a sweet aroma as they bake.
- Once baked, remove the pan from the oven and let the cupcakes cool in the pan for 5 minutes before transferring them to a wire rack. This prevents them from becoming soggy by allowing air circulation around them.
Chef’s tip: If you want to make allergen-friendly cupcakes, substitute the eggs with ¼ cup unsweetened applesauce per egg and the milk with a non-dairy alternative.
Pro Tips for Perfect Cupcakes
Mastering the art of cupcake baking involves more than just following a recipe; it’s about understanding the nuances that can make or break your delightful treats. By avoiding common pitfalls and knowing when your cupcakes are perfectly baked, you’ll achieve that preppy aesthetic that makes your creations look as good as they taste.
- Don’t Overmix: Overmixing your batter can lead to dense, tough cupcakes. Mix just until the ingredients are combined; you should see a few lumps. Aim for a silky batter that’s smooth but not overworked. This will help your cupcakes rise beautifully and maintain a light texture.
- Check for Doneness: Relying solely on time can be misleading. Start checking your cupcakes after 18 minutes of baking at 350°F (175°C). Insert a toothpick into the center of a cupcake; it should come out clean or with a few moist crumbs—no wet batter. If it comes out sticky, they need a few more minutes. This ensures they are perfectly baked and not overdone.
Chef’s tip: If you see that the tops are browning too quickly, rotate the pan and cover lightly with aluminum foil for the last few minutes of baking.
Cupcake Variations and Modifications
When it comes to baking fun cupcakes that suit everyone’s taste, it’s essential to offer variations that cater to dietary restrictions and flavor preferences. Whether you’re looking for gluten-free options or vegan ingredients, these modifications ensure that everyone can enjoy a delightful treat.
Gluten-Free Options
Creating gluten-free cupcakes can be as simple as swapping out regular flour for a gluten-free blend. Here’s how to make your cupcakes gluten-free:
- 1 ½ cups gluten-free all-purpose flour blend (180g)
- 1 teaspoon baking powder
- ½ teaspoon baking soda
- ½ teaspoon salt
Mix these dry ingredients together and proceed with your favorite cupcake recipe, following the same steps. Bake at 350°F (175°C) for 18-20 minutes, or until a toothpick inserted into the center comes out clean. The cupcakes should be light and fluffy, with a slightly golden top.
Vegan Ingredients
To make your cupcakes vegan, substitute traditional ingredients with plant-based alternatives:
- ½ cup unsweetened applesauce (120g) instead of eggs
- ½ cup almond milk (120ml) instead of dairy milk
- ⅓ cup vegetable oil (80ml) instead of melted butter
Combine these ingredients as you would in a standard cupcake recipe. Bake at 350°F (175°C) for about 20-22 minutes. The cupcakes will rise beautifully, and they should have a moist texture and sweet aroma.
Chef’s tip: Always check your gluten-free flour blend for xanthan gum; if it’s not included, add ½ teaspoon to help with texture.
Presentation and Serving Ideas
Creating visually appealing desserts is just as important as their taste, especially in a preppy kitchen setting. Here, we’ll discuss some delightful decorating styles and beverage pairings that will elevate your cupcakes and make them even more inviting.
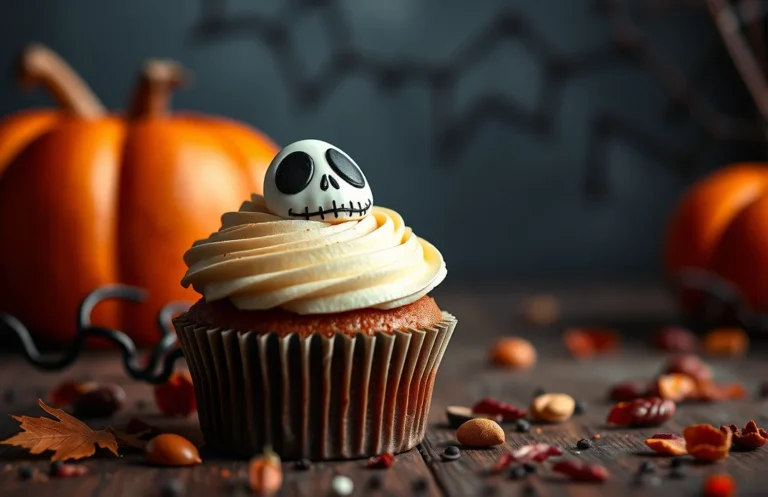
Preppy Decorating Styles
- Pastel Colors: Use soft pinks, blues, and greens for frosting to convey a light, cheerful vibe. Consider using food coloring to achieve the desired shades, and layer your colors for a beautiful ombre effect.
- Classic Patterns: Incorporate elements like polka dots or stripes in your decorations. Use a piping bag to create these patterns with icing or edible glitter to add a touch of glam.
- Fresh Flowers: Top your cupcakes with edible flowers such as pansies or violets for a charming, garden-like feel. Make sure the flowers are pesticide-free and safe for consumption.
- Charming Toppers: Use cute cupcake toppers like bows, anchors, or seasonal shapes. These can be made from fondant or purchased to complement the preppy theme.
Pairing with Beverages
- Tea: Serve your cupcakes alongside a refreshing iced tea or herbal tea. The delicate flavors of tea enhance the sweetness of the cupcakes.
- Lemonade: A classic pairing with cupcakes, especially those with fruity flavors. The tartness of lemonade balances the sweetness perfectly.
- Sparkling Water: For a sophisticated touch, serve flavored sparkling water. The effervescence cleanses the palate and complements the cupcake flavors.
Quick Summary
| Prep Time | Cook Time | Total Time | Servings |
|---|---|---|---|
| 15 minutes | 25 minutes | 40 minutes | 12 servings |
- Preheat oven to 350°F for even baking.
- Measure ingredients accurately to ensure perfect texture.
- Mix dry ingredients first to avoid clumps.
- Use room temperature eggs for better incorporation.
- Cool baked goods on a wire rack to prevent sogginess.
- Store in an airtight container to maintain freshness.
- Tip: Don’t overmix the batter to keep it light and fluffy.
- Tip: Use parchment paper for easy removal from pans.
Frequently Asked Questions
Can I make this ahead of time? How to store and reheat?
You can absolutely make many of these baked goods ahead of time! Store them in an airtight container at room temperature for up to 3 days or refrigerate for up to a week; reheat in the oven at 350°F for 5-10 minutes until warmed through.
What can I substitute for [key ingredient]?
If you’re out of a key ingredient like buttermilk, you can substitute it with a mix of 1 cup of milk and 1 tablespoon of lemon juice or vinegar, letting it sit for 5 minutes before using. This will give you the acidity needed for the recipe!
How do I know when it’s done?
Your baked goods are done when they are golden brown on top and a toothpick inserted in the center comes out clean or with a few moist crumbs. For cakes, check the internal temperature; it should reach 200°F to 210°F.
Can I freeze this? How long does it last?
Yes, most baked items freeze well; wrap them tightly in plastic wrap and then aluminum foil to prevent freezer burn. They can last in the freezer for up to 3 months; just thaw them in the fridge overnight before enjoying!
What if I don’t have [specific equipment]?
If you don’t have a stand mixer, you can use a hand mixer or even mix by hand with a whisk for most recipes, just be prepared for a bit more elbow grease! For baking sheets, you can use any flat, oven-safe pan lined with parchment paper.

- Make Cheesecake Up to 3 Days Ahead: Tips for Best Flavor & Texture - March 4, 2026
- Easy No-Bake Cool Doen Cheesecake: Quick Recipe & Tips - March 4, 2026
- Decadent Dulce de Leche Cheesecake: Easy Step-by-Step Recipe - March 4, 2026