10 Stunning Fruit Designs to Elevate Your Cheesecake Decoration
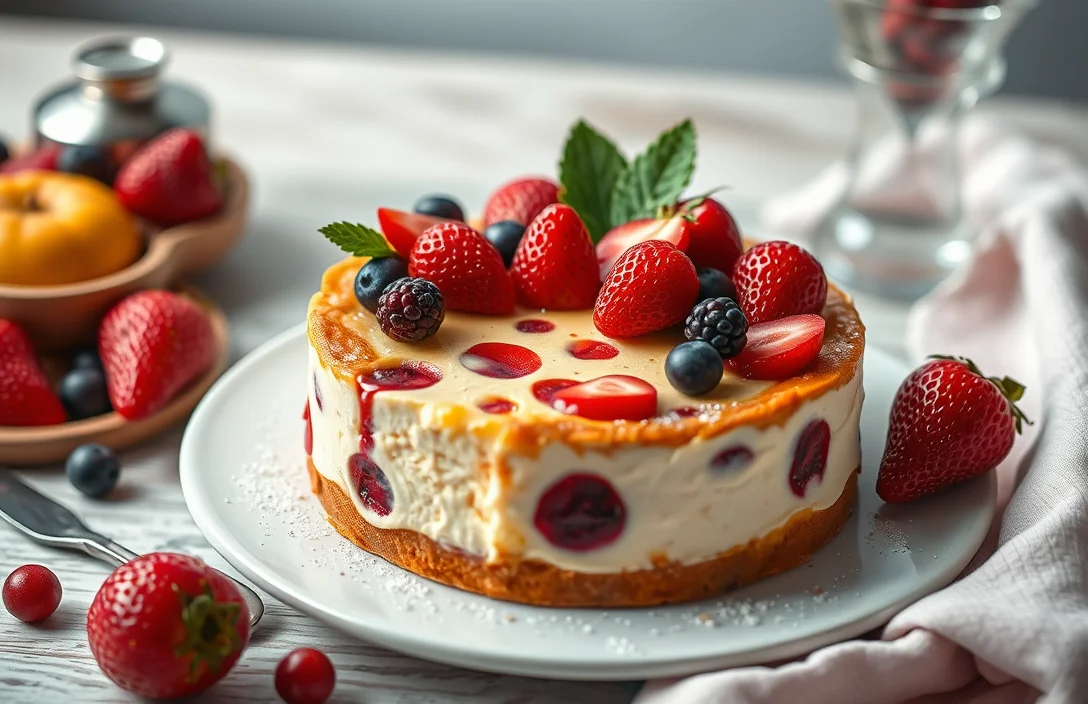
There’s something incredibly satisfying about a beautifully decorated cheesecake, especially when it’s topped with vibrant, fresh fruits. The creamy, rich texture of the cheesecake paired with the juicy, colorful fruits not only makes it look stunning but elevates the flavor, creating a dessert that’s sure to impress your family and friends.
Get ready to learn three creative decoration techniques for your cheesecake using seasonal fruits. With a prep time of 30 minutes, a cooking time of 1 hour, and 8 servings total, this project is rated medium difficulty.
| Prep Time | Cook Time | Total Time | Servings | Difficulty |
|---|---|---|---|---|
| 30 minutes | 1 hour | 1 hour 30 minutes | 8 | Medium |
History of Cheesecake Decoration
Understanding the history of cheesecake decoration, particularly with fruit, provides insight into its cultural significance and evolution over time. This section highlights how decorative trends have influenced the presentation of this beloved dessert.
- Ancient Roots: Cheesecake is believed to have originated in ancient Greece, where it was served to athletes at the first Olympic Games. Although decoration was minimal, the focus was on the fresh, creamy texture of the cheese itself.
- Renaissance Influence: During the Renaissance in Europe, the art of dessert decoration flourished. Fruits, particularly berries and citrus, became popular for garnishing cheesecakes, adding color and enhancing flavor while symbolizing abundance and prosperity.
- Regional Variations: Different cultures have adapted cheesecake decoration to reflect local tastes. For instance, in South America, tropical fruits like passion fruit and guava are frequently used, while in Asia, matcha and lychee can be seen accentuating the cheesecake’s appearance.
- Modern Trends: In contemporary baking, the trend has shifted towards artistic presentation. Layering fruits in patterns or using them to create intricate designs has become a hallmark of cheesecake decoration, showcasing the baker’s creativity and attention to detail.
Fruits for Cheesecake Decoration
Choosing the right fruits for decorating your cheesecake not only enhances its visual appeal but also elevates the flavor profile. Seasonal fruits can add a burst of color, freshness, and taste, making your dessert irresistible. Here’s a guide to the best fruits by season and how they pair with cheesecake.
Best Fruits by Season
- Spring: Strawberries, cherries, and kiwi
- Summer: Raspberries, blueberries, peaches, and blackberries
- Fall: Apples, figs, and pears
- Winter: Citrus fruits like oranges, grapefruits, and pomegranates
Flavor Pairings with Cheesecake
Different fruits can complement the creamy, rich texture of cheesecake in delightful ways. Here are some popular pairings:
| Fruit | Flavor Pairing |
|---|---|
| Strawberries | Vanilla or chocolate cheesecake |
| Raspberries | Lemon or white chocolate cheesecake |
| Blueberries | Classic New York cheesecake |
| Pears | Caramel or spiced cheesecake |
Chef’s tip: For a stunning presentation, slice fruits like strawberries or peaches thinly and fan them out on top of your cheesecake. This creates an elegant look that’s sure to impress!
Choosing the right fruits not only makes your cheesecake visually appealing but also enhances the overall flavor experience. Experiment with different combinations to find your perfect match!
Essential Tools for Decorating
To create a stunning fruit decoration on your cheesecake, having the right tools can make all the difference. These essential items will not only help you achieve precision but will also elevate the overall presentation of your dessert.
| Item | Amount/Specification | Notes |
|---|---|---|
| Chef’s Knife | 8-inch | For slicing fruits cleanly and with precision. |
| Paring Knife | 3-4 inch | Ideal for intricate work, such as trimming or peeling. |
| Melon Baller | 1-2 size | Perfect for creating uniform fruit balls for decoration. |
| Offset Spatula | 10-inch | Great for lifting and placing delicate fruit slices without damaging them. |
| Decorating Squeeze Bottles | 2-3 bottles | Useful for drizzling sauces or purees artfully on the plate. |
| Food Tweezers | 1 pair | For precise placement of small fruit pieces or edible flowers. |
- Keep your knives sharp: A sharp knife ensures clean cuts and reduces the risk of accidents.
- Use a cutting board: A stable surface prevents slipping and helps maintain safety while cutting.
- Wash fruits thoroughly: Always rinse your fruits under cold water to remove any pesticides or residues.
- Plan your design: Sketch out or visualize your arrangement before starting to ensure a balanced look.
Techniques for Fruit Arrangement
Creating a visually stunning cheesecake with fruits requires thoughtful arrangement techniques. Here are three popular methods that will elevate your dessert presentation, making it both appealing and delicious.
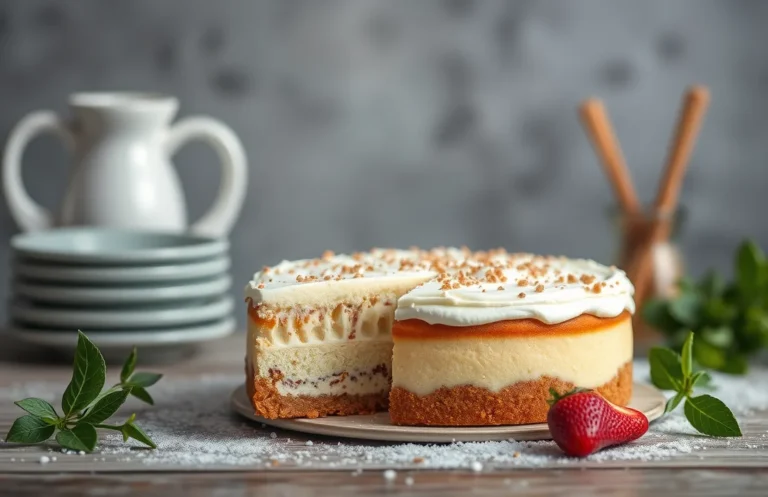
- Layered Arrangement: Start by slicing a variety of fruits, like strawberries, kiwis, and blueberries. Begin by placing a layer of sliced strawberries at the outer edge of the cheesecake, followed by a layer of kiwi slices slightly overlapping the strawberries. Finally, fill in the center with a sprinkle of blueberries, creating a vibrant, colorful look. This layered effect not only adds height but also creates a refreshing burst of flavor with each slice.
- Spiral Design: For a more dynamic look, thinly slice fruits such as oranges and apples. Starting from the center of the cheesecake, lay the fruit slices in a spiral pattern, working your way outward. Ensure that the edges of the slices slightly overlap, producing a beautiful spiral effect. This design draws the eye and invites your guests to dive in, while the fresh citrus scent enhances the dessert’s appeal.
- Fruit Fan Technique: Choose fruits like strawberries or peaches for this elegant presentation. Cut each fruit in half and thinly slice them without cutting all the way through, leaving them attached at one end. Gently fan out the slices and arrange them around the edge of the cheesecake, creating a beautiful floral effect. This technique not only looks sophisticated but also showcases the natural beauty of the fruit.
Expert Tips for Success
Decorating a cheesecake with fruit can elevate its appearance and flavor, but there are key considerations to keep in mind to achieve a stunning result. Avoiding soggy fruits and maintaining a balanced design will ensure your cheesecake looks as good as it tastes.
- Avoid soggy fruits: To prevent fruits from releasing too much moisture, choose firmer varieties such as strawberries, blueberries, or raspberries. If using sliced fruits like peaches or kiwis, consider lightly dusting them with granulated sugar and letting them sit for 15 minutes to draw out excess moisture before decorating.
- Maintain balance in design: Aim for a harmonious blend of colors and shapes. Use a mix of larger fruits and smaller berries to create visual interest. For example, arrange larger slices of kiwi around the outer edge, then fill in with clusters of blueberries in the center. This layered approach provides depth and draws the eye.
- Consider the cheesecake flavor: When choosing fruits, think about the flavor profile of your cheesecake. For a lemon cheesecake, fresh berries or a citrus medley would complement nicely. On the other hand, a rich chocolate cheesecake pairs well with tart cherries or raspberries to cut through the sweetness.
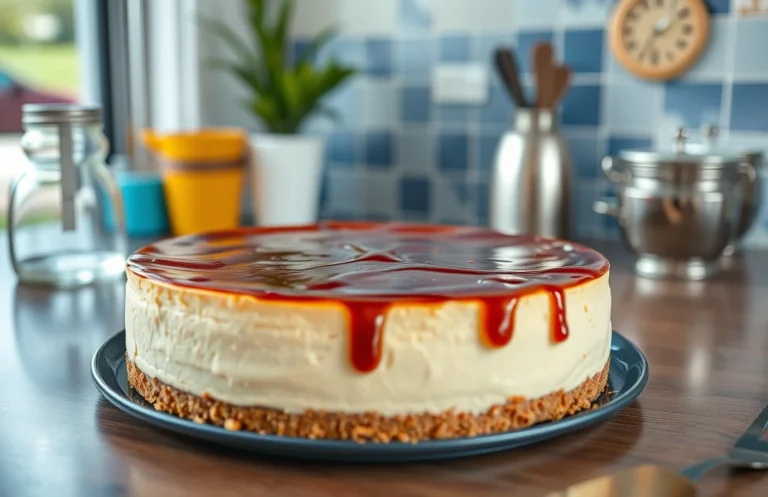
- Finish with a glaze: To give your fruit a glossy finish and provide extra protection against moisture, brush a thin layer of warm apricot or berry jam over the top. Heat about 2 tablespoons of jam in a small saucepan over low heat until liquefied, then brush it on with a pastry brush.
Creative Variations and Modifications
Exploring creative variations and dietary modifications for decorating your cheesecake with fruits not only elevates its visual appeal but also makes it accessible to a broader audience. Whether you’re accommodating vegan diets or gluten-free preferences, there are tasty options to ensure everyone can enjoy a beautifully adorned cheesecake.
Vegan Options
To create a vegan cheesecake, you can substitute traditional cream cheese with a mixture of blended cashews and coconut cream. Here’s how to decorate:
- Use fresh fruits like strawberries, blueberries, and kiwi to add vibrant colors.
- For a glossy finish, brush your fruits with a light syrup made from 1 tablespoon of maple syrup mixed with 1 teaspoon of water.
- Arrange fruits in geometric patterns, like concentric circles or radial designs, for a striking look.
Gluten-Free Alternatives
If you need a gluten-free cheesecake, use gluten-free graham crackers or almond flour for the crust. Here’s how to enhance your fruit decoration:
- Opt for fruits like raspberries, mangoes, and peaches for a colorful contrast against the cheesecake.
- Consider adding edible flowers like pansies or nasturtiums for an elegant touch.
- Drizzle a homemade fruit compote on top for added flavor and a beautiful presentation.
Chef’s tip: Always ensure that fruits are fresh and ripe for the best flavor and appearance.
| Fruit | Vegan Friendly | Gluten-Free Friendly |
|---|---|---|
| Strawberries | ✔️ | ✔️ |
| Blueberries | ✔️ | ✔️ |
| Kiwi | ✔️ | ✔️ |
| Mango | ✔️ | ✔️ |
| Raspberries | ✔️ | ✔️ |
By incorporating these variations, you can create a stunning cheesecake that caters to different dietary needs without compromising on flavor or aesthetics.
Serving and Plating Ideas
When it comes to serving and plating your beautifully decorated cheesecake, the presentation can elevate the entire experience. Thoughtful garnishes and complementary beverages can enhance the flavors and visual appeal of your dessert, making it even more inviting for your guests.
Garnishes and Sauces
To give your cheesecake that extra flair, consider the following garnishes and sauces:
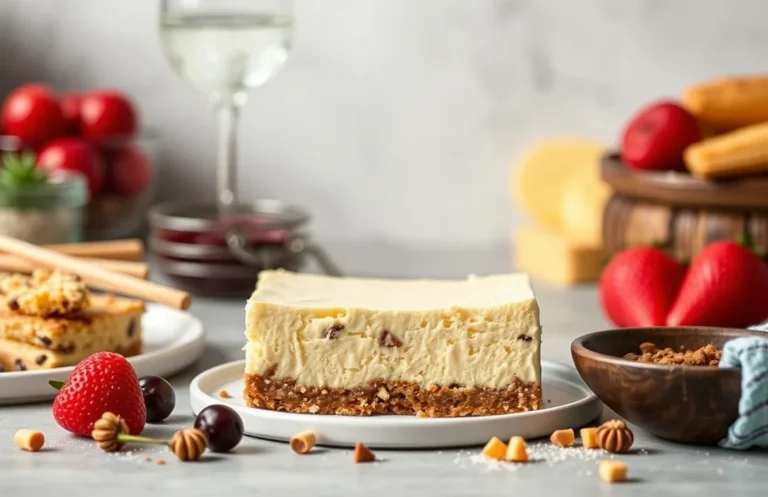
- Fresh fruits: Strawberries, blueberries, and kiwi add vibrant colors and freshness. Use about 1 cup of mixed fruit for a small cheesecake.
- Fruit coulis: Puree ½ cup of your favorite fruit with 2 tablespoons of sugar and a splash of lemon juice, then strain for a smooth sauce.
- Mint leaves: A few sprigs of fresh mint not only add color but also a refreshing aroma. Use 3-4 leaves per slice of cheesecake.
- Chocolate shavings: Use a vegetable peeler to shave a chocolate bar over the top of your cheesecake for a touch of decadence.
Pairing with Beverages
Choosing the right beverage can elevate the cheesecake experience. Here are some excellent pairings:
- Coffee: A rich espresso or a creamy latte complements the sweetness of the cheesecake.
- Sweet dessert wines: Pair with a Moscato or a late harvest Riesling for a delightful contrast.
- Herbal tea: A calming chamomile or refreshing mint tea works beautifully, especially if you’ve used mint as a garnish.
Chef’s tip: Serve the cheesecake chilled for the best texture and flavor. Allow it to sit at room temperature for about 15 minutes before slicing to make cutting easier.
Quick Recipe Summary
This section highlights key elements for beautifully decorating your cheesecake with fruit, ensuring both visual appeal and delicious flavor. A well-decorated cheesecake not only enhances the dessert’s presentation but also elevates the overall dining experience.
Ingredients at a Glance
- 1 cheesecake (prepared and cooled)
- 1 cup mixed fresh fruits (e.g., strawberries, blueberries, kiwi, raspberries)
- 2 tablespoons honey or fruit glaze for shine
- Fresh mint leaves for garnish (optional)
Key Steps Recap
- Prepare the Cheesecake: Ensure your cheesecake is fully cooled and set, preferably chilled in the refrigerator for at least 4 hours. It should be firm to the touch and not jiggle when gently shaken.
- Select Your Fruits: Choose a vibrant mix of fruits that contrast in color and texture. Aim for at least three different types for visual interest. Wash and dry the fruits thoroughly.
- Arrange the Fruits: Start by placing larger fruits like sliced strawberries or kiwi around the perimeter of the cheesecake. Fill in with smaller fruits like blueberries and raspberries in the center. Use an artistic hand to create a balanced look.
- Finish with Shine: Drizzle honey or a fruit glaze over the arranged fruits to add a glossy finish. This not only enhances the look but also adds a touch of sweetness.
- Garnish: Add fresh mint leaves for a pop of green and extra freshness. This gives the cheesecake a professional finish.
Chef’s tip: Use a mix of fruits with varying heights to create depth in your design.
Quick Summary
| Prep Time | Cook Time | Total Time | Servings |
|---|---|---|---|
| 30 minutes | 60 minutes | 90 minutes | 8 |
- Choose the right fruit: Opt for complementary flavors like berries or citrus.
- Layer strategically: Start with a base of fruit, then add cheesecake for depth.
- Use fresh ingredients: Fresh fruit enhances flavor and presentation.
- Glaze for shine: Brush with a light syrup to add sheen and preserve freshness.
- Garnish thoughtfully: Use herbs like mint to elevate visual appeal.
- Tip 1: Chill the cheesecake before decorating for easier handling.
- Tip 2: Arrange fruit in patterns for a polished look.
Frequently Asked Questions
Can I make this ahead of time? How to store and reheat?
You can definitely make your cheesecake a day in advance; just store it in the refrigerator, covered with plastic wrap. If you need to reheat, gently warm individual slices in the microwave for about 10-15 seconds.
What can I substitute for cream cheese?
If you’re looking for a substitute, you can use ricotta cheese blended with a little sour cream for a lighter texture. Alternatively, mascarpone cheese can also be a delicious replacement with a similar creaminess.
How do I know when it’s done?
Your cheesecake is done when the edges are set and the center has a slight jiggle; it will firm up as it cools. You can also check with a toothpick inserted in the center; it should come out mostly clean with a few moist crumbs.
Can I freeze this? How long does it last?
Yes, you can freeze your cheesecake, and it will last up to 3 months when wrapped tightly in plastic wrap and aluminum foil. Thaw it overnight in the fridge before serving to maintain its texture.
What if I don’t have a springform pan?
If you don’t have a springform pan, you can use a regular cake pan lined with parchment paper, allowing for easy removal after cooling. Just make sure to let the cheesecake cool completely before attempting to take it out to avoid any breakage.

- Decadent Peanut Butter No-Bake Cheesecake: Easy Recipe to Indulge - April 3, 2026
- Delicious Mango No-Bake Cheesecake: Step-by-Step Recipe - April 3, 2026
- Decadent Raspberry No-Bake Cheesecake: Easy Step-by-Step Recipe - April 3, 2026