10 Delicious Ham Recipes: From Glazed to Smoked in 1 Hour
Ham is more than just a dish; it’s a centerpiece that can elevate any gathering, from festive holidays to cozy weeknight dinners. The savory aroma fills the kitchen, and the tender slices are perfect for sandwiches, or served alongside your favorite sides. Trust me, everyone will be asking for seconds!
This guide offers 10 tested ham recipes with exact measurements, clear step-by-step instructions, and nutritional information. Total time ranges from 1 to 4 hours, with a difficulty level from easy to moderate, and each recipe serves 6-10 people.
| Prep Time | Cook Time | Total Time | Servings | Difficulty |
|---|---|---|---|---|
| 15 minutes | 2-4 hours | 2-4 hours 15 minutes | 6-10 | Easy to Moderate |
History of Ham
The history of ham is rich and varied, reflecting the agricultural practices and culinary traditions of different cultures around the world. Understanding its origins and cultural significance enhances our appreciation for this beloved meat, especially as it graces our tables during festive occasions.
- Origins of Ham: The word “ham” originates from the Old English term “ham,” which referred to the back of the leg. The process of curing pork dates back to ancient civilizations, with evidence found in Roman texts that describe salting and drying methods used to preserve meat for longer shelf life.
- Ancient Techniques: In ancient times, ham was a valuable source of protein, especially in regions where refrigeration was not available. Techniques such as salting, smoking, and drying were developed to prevent spoilage and enhance flavor, making ham a staple in many diets.
- Cultural Variations: Different cultures have their unique take on ham. For example, Italian prosciutto is known for its delicate sweetness and is often eaten raw, while Spanish jamón ibérico is celebrated for its rich flavor derived from acorn-fed pigs. Each variant reflects local traditions and ingredients.
- Festive Symbolism: In many cultures, ham is traditionally associated with celebrations and feasts. In the U.S., glazed ham is a centerpiece for holidays like Easter and Thanksgiving, symbolizing abundance and hospitality.
Types of Ham
Understanding the different types of ham is essential for selecting the right one for your dish. Each type has its own unique characteristics, flavors, and preparation methods, making it important to match the ham to your recipe and cooking style.
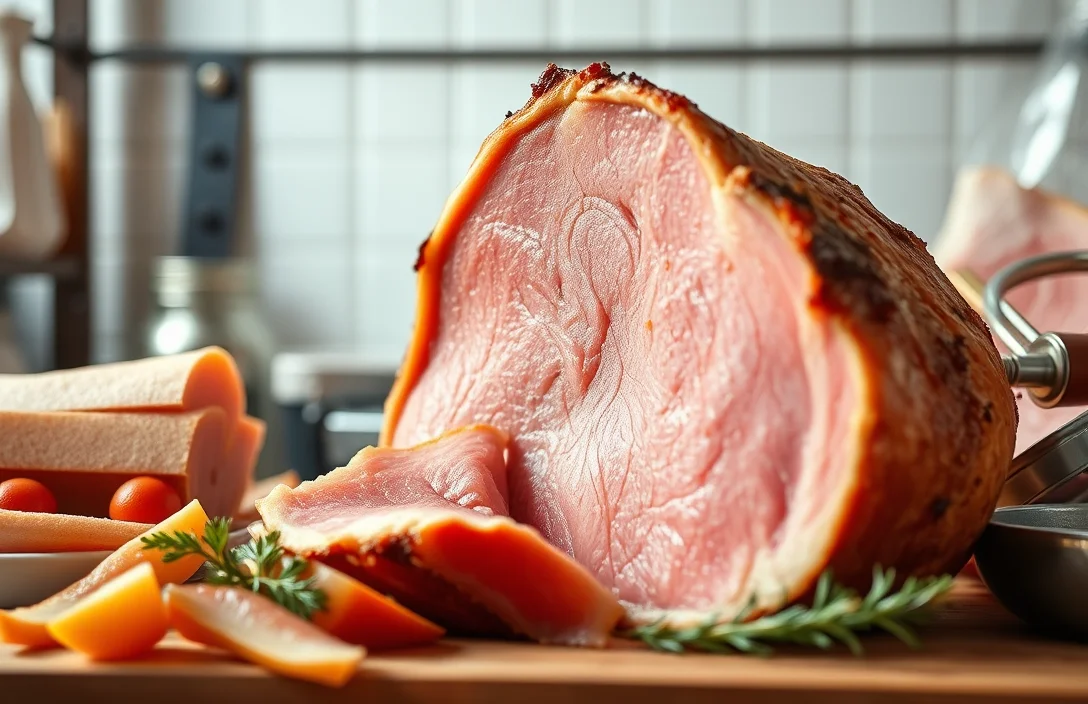
Smoked Ham
Smoked ham is known for its rich, smoky flavor, which comes from being cured and then smoked over wood chips. This type is often fully cooked and can be enjoyed cold or heated. Look for a deep, mahogany color on the outside with a tender, juicy texture inside.
Cured Ham
Cured ham is preserved using salt and other curing agents. It can be wet-cured (brined) or dry-cured. Wet-cured ham is often sweeter, while dry-cured ham has a denser texture. Both types are typically ready to slice and serve, and they have a lovely pink hue. Examples include prosciutto and country ham.
Fresh Ham
Fresh ham is simply uncured and unprocessed pork leg. It has a mild flavor and must be cooked thoroughly before consumption. When prepared, it takes on a golden-brown appearance on the outside and remains juicy inside. Fresh ham is versatile and can be roasted, braised, or cooked in a slow cooker.
| Type of Ham | Flavor Profile | Cooking Method |
|---|---|---|
| Smoked Ham | Rich, smoky | Fully cooked, can be served cold or heated |
| Cured Ham | Salty, sweet (varies) | Ready to slice and serve |
| Fresh Ham | Mild | Must be cooked thoroughly |
Selecting the Right Ham
Choosing the right ham is crucial for achieving the best flavor and texture in your dishes. A high-quality ham can elevate your meal, while a poor choice can lead to disappointment. Here are some tips to ensure you select a ham that meets your expectations.
What to Look For
- Color: Look for a ham that has a rich, deep pink or rosy hue. This indicates freshness and good quality. Avoid hams that appear pale or have grayish tones.
- Marbling: Check for even marbling of fat throughout the meat. Good marbling contributes to the flavor and moisture of the ham during cooking. A ham with uneven or sparse marbling might yield dry meat.
- Texture: Gently press the ham; it should feel firm but slightly springy. A mushy texture could indicate spoilage or poor quality.
Label Reading Tips
- Type of Ham: Pay attention to the labeling. Hams labeled as ‘city ham’ are typically wet-cured and have a sweeter flavor, while ‘country ham’ is dry-cured and has a saltier, more robust taste.
- Preservation Method: Look for hams that are labeled as ‘natural’ or ‘no preservatives added.’ These options are often healthier and taste better without artificial additives.
- Cooking Instructions: Check for cooking recommendations on the packaging. Some hams are pre-cooked, while others require thorough cooking to reach a safe internal temperature of 145°F (63°C).
Preparation Techniques
When it comes to preparing ham, the right marinades and rubs can elevate the flavor to new heights, while preheating techniques ensure even cooking. This section covers how to effectively prepare your ham for the best results.
Marinades and Rubs
Using a marinade or rub can enhance the natural flavors of ham. Here are a few ideas:
- Sweet Glaze: Mix ½ cup brown sugar, ¼ cup honey, and 2 tablespoons Dijon mustard. Brush this mixture on the ham before cooking.
- Spicy Rub: Combine 2 tablespoons paprika, 1 tablespoon garlic powder, 1 tablespoon onion powder, and 1 teaspoon cayenne pepper. Rub evenly over the surface of the ham.
- Citrus Marinade: Whisk together 1 cup orange juice, 2 tablespoons soy sauce, and 1 tablespoon minced garlic. Let the ham marinate for at least 2 hours, or overnight for more flavor.
Make sure the ham is well-coated, and let it sit at room temperature for about 30 minutes before cooking to allow the flavors to penetrate.
Preheating Techniques
Proper preheating is crucial for evenly cooked ham. Here are some methods:
- Preheat your oven to 325°F (163°C). This temperature allows the ham to heat through without drying out. Use a meat thermometer to check for doneness; it should read 140°F (60°C) for pre-cooked ham.
- If using a slow cooker, set it to low and allow it to preheat for about 30 minutes before adding the ham. This ensures it starts cooking evenly.
Chef’s tip: Always preheat your cooking appliance to avoid uneven cooking; a cold oven can lead to dry spots in the ham.
Cooking Instructions
This section provides detailed cooking instructions for preparing ham using three popular methods: oven-baked, glazed, and slow-cooked. Each method offers a unique flavor profile and texture, ensuring a delicious meal no matter your preference.
Oven-Baked Ham
- Preheat your oven to 325°F (163°C). This temperature ensures even cooking without drying out the ham.
- Place the ham in a roasting pan, cut-side down. For a 10-pound ham, roast it uncovered for approximately 15 minutes per pound, which will take about 2.5 hours. The ham should reach an internal temperature of 140°F (60°C).
- For the last 30 minutes, brush with your favorite glaze (see Glazed Ham section below) and continue to roast until caramelized. The outside should be golden brown and slightly crispy.
Glazed Ham Recipe
- 1 10-pound fully cooked ham
- 1 cup brown sugar
- ½ cup honey
- ¼ cup Dijon mustard
- 1 teaspoon ground cloves
- Follow the oven-baked ham instructions above. Mix the glaze ingredients in a bowl until smooth.
- Increase the oven temperature to 400°F (204°C) for the final 30 minutes. Brush the glaze generously over the ham every 10 minutes.
- Once done, let the ham rest for 15-20 minutes before slicing. The glaze should be sticky and aromatic.
Slow-Cooked Ham
- Place a 6-8 pound ham in your slow cooker. Add 1 cup of apple juice or broth to keep it moist.
- Set the slow cooker to low and cook for 6-8 hours. The ham should feel tender and pull apart easily with a fork.
- For the last hour, glaze as per the Glazed Ham Recipe above, allowing the flavors to meld beautifully.
Chef’s tip: If your ham is pre-sliced, use toothpicks to hold the slices together while glazing for even coverage.
Common Mistakes
Cooking ham can be straightforward, but there are common pitfalls that can lead to overcooked or bland results. Avoiding these mistakes will ensure your dish is flavorful, juicy, and a hit at any gathering.
Overcooking Issues
- Ignoring the internal temperature: Always use a meat thermometer to check the internal temperature of your ham. For a fully cooked ham, aim for 140°F (60°C) and for raw or fresh ham, cook it to at least 145°F (63°C). Overcooking can lead to a dry texture that is far from enjoyable.
- Cooking at too high a temperature: Roasting ham at a temperature higher than 325°F (163°C) can cause it to dry out quickly. A lower and slower cooking method allows the flavors to develop while keeping the meat moist.
Flavor Balance Problems
- Not balancing the glaze: A glaze can elevate the flavor of your ham, but it should have a balance of sweetness and acidity. For example, if your glaze is too sweet, adding a splash of vinegar or mustard can help cut through the richness and enhance the overall taste.
- Skipping the seasoning: Don’t forget to season your ham properly before cooking. A simple rub of salt, pepper, and herbs can make a significant difference. If you find your ham lacking flavor after cooking, consider adding a flavorful broth or sauce to enhance it.
Recipe Variations
This section presents alternatives for those with specific dietary preferences, ensuring everyone can enjoy a delicious meal. Whether you’re gluten-free or following a vegan diet, there are great options to consider that maintain the spirit of traditional ham dishes.
Gluten-Free Options
- Choose gluten-free ham products, ensuring they are labeled as such.
- For glaze, use ¼ cup maple syrup mixed with 2 tablespoons Dijon mustard and 1 tablespoon apple cider vinegar for a sweet and tangy alternative.
- Serve with gluten-free sides like roasted vegetables or quinoa salad for a complete meal.
Vegan Ham Alternatives
If you’re looking for a vegan substitute for ham, consider these options that still bring a savory, satisfying flavor to your table:
- Smoked Tofurky: This plant-based option mimics the taste and texture of ham. Bake at 350°F (175°C) for 30 minutes, basting with a mix of 2 tablespoons soy sauce and 1 tablespoon maple syrup.
- Seitan: Use 1 pound of seitan, marinated in a blend of liquid smoke, maple syrup, and spices. Grill or pan-fry until browned, about 5-7 minutes per side.
- Chickpea “Ham” Salad: Mash 1 can of drained chickpeas and mix with ¼ cup vegan mayo, 2 tablespoons mustard, 1 teaspoon smoked paprika, and diced pickles for a hearty sandwich filling.
Chef’s tip: Always taste your vegan alternatives as you prepare them; you might want to adjust the seasoning to fit your palate!
Serving and Pairing
Pairing your ham with the right sides can enhance its flavors and create a well-rounded meal. Choosing complementary dishes not only elevates the dining experience but also balances the richness of the ham. Here are some excellent side dishes and plating tips to consider.
Best Side Dishes
- Roasted Vegetables: A mix of seasonal vegetables like carrots, Brussels sprouts, and sweet potatoes (about 2 cups each) roasted at 425°F (220°C) for 25-30 minutes brings a caramelized sweetness that pairs perfectly with ham.
- Scalloped Potatoes: Creamy scalloped potatoes made with 4 large potatoes, 1 onion, 2 cups heavy cream, and 1 cup shredded cheese, baked at 350°F (175°C) for 1 hour create a comforting side that complements the saltiness of the ham.
- Honey-Glazed Carrots: Sauté 1 pound of sliced carrots in 2 tablespoons of butter and 2 tablespoons of honey for 10-15 minutes until tender and glossy. The sweetness of the carrots enhances the savory notes of the ham.
- Green Bean Almondine: Blanch 1 pound of green beans for 3-4 minutes, then sauté with 2 tablespoons of olive oil and ½ cup sliced almonds until lightly toasted. This dish adds a crunchy texture and fresh flavor.
Plating Ideas
Presentation can elevate your meal. For a stunning plate, consider the following:
- Layering: Place slices of ham on a large platter, overlapping them slightly, and fan out roasted vegetables around the edges for a colorful display.
- Garnishing: Add fresh herbs like rosemary or thyme on top of the ham for a pop of color and fragrance.
- Serving Sauces: Offer a small bowl of mustard or a fruit chutney on the side for guests to drizzle over the ham, enhancing the flavors with a tangy contrast.
Quick Summary
| Prep Time | Cook Time | Total Time | Servings |
|---|---|---|---|
| 15 mins | 2 hours | 2 hours 15 mins | 8 |
- Score the ham: Make shallow cuts in a diamond pattern for even cooking and glaze absorption.
- Preheat oven: Set to 325°F (163°C) to ensure proper cooking temperature.
- Baste regularly: Use the pan juices every 30 minutes for a moist finish.
- Glaze at the end: Apply glaze during the last 30 minutes to prevent burning.
- Rest before slicing: Let the ham sit for 15-20 minutes to keep juices intact.
- Tip: Use a meat thermometer; aim for an internal temperature of 140°F (60°C).
- Tip: Choose a bone-in ham for richer flavor and moisture.
Frequently Asked Questions
Can I make this ahead of time? How to store and reheat?
Yes, you can prepare your ham up to 3 days in advance. Store it in an airtight container in the refrigerator and reheat at 325°F (163°C) until warmed through, about 15-20 minutes.
What can I substitute for brown sugar?
You can substitute brown sugar with an equal amount of honey or maple syrup for a natural sweetness. Just remember to reduce the liquid in your recipe slightly if using these substitutes.
How do I know when it’s done?
Your ham is done when it reaches an internal temperature of 145°F (63°C) using a meat thermometer. The juices should run clear, and the surface should have a nice caramelized glaze.
Can I freeze this? How long does it last?
Yes, you can freeze cooked ham for up to 2 months. Wrap it tightly in plastic wrap and then in aluminum foil to prevent freezer burn.
What if I don’t have a roasting pan?
If you don’t have a roasting pan, you can use a large, oven-safe skillet or a baking dish lined with aluminum foil. Just make sure it’s deep enough to catch any juices that may drip during cooking.

- 10 Best Cheese Knife With Holes For Smooth Slice 2026 - March 9, 2026
- Make Cheesecake Up to 3 Days Ahead: Tips for Best Flavor & Texture - March 4, 2026
- Easy No-Bake Cool Doen Cheesecake: Quick Recipe & Tips - March 4, 2026