Make Ahead Cheesecakes: How Long Can You Store Them Fresh?
Individual cheesecakes are the kind of dessert that can turn any occasion into a celebration. Rich, creamy, and perfectly portioned, they’re a crowd-pleaser that satisfies the sweet tooth while impressing guests. Picture a luscious cheesecake topped with fresh berries, just waiting to be devoured — it’s hard to resist that temptation!
Here, you’ll learn how far in advance you can make individual cheesecakes without losing their delightful texture and flavor. Prep Time: 20 minutes, Cook Time: 25 minutes, Total Time: 4 hours (including chilling), Difficulty: Easy, Servings: 6.
| Prep Time | Cook Time | Total Time | Servings | Difficulty |
|---|---|---|---|---|
| 20 minutes | 25 minutes | 4 hours | 6 | Easy |
Cheesecake Origins and Appeal
Cheesecake is not just a dessert; it’s a delightful blend of history and flavor that has captivated taste buds for centuries. Understanding its origins and unique qualities can enhance your appreciation for this beloved treat, especially when planning to serve individual cheesecakes for special occasions.
History of Cheesecake
The roots of cheesecake trace back to ancient Greece, where it was served to athletes during the first Olympic Games in 776 B.C. The Romans later adopted and adapted the recipe, incorporating various ingredients and techniques. Over the centuries, cheesecake has evolved, with different cultures adding their unique spins, from the rich and creamy New York-style to the lighter, fluffier versions found in Japan.
What Makes Cheesecake Special
Cheesecake stands out for its rich, creamy texture and versatile flavor profile. Here’s what sets it apart:
- Texture: The combination of cream cheese, eggs, and sugar creates a velvety mouthfeel that melts in your mouth.
- Flavor: Cheesecakes can be flavored in countless ways, from classic vanilla to chocolate, fruit, or even savory options.
- Serving Versatility: Individual cheesecakes are perfect for parties, weddings, or a cozy family dinner, allowing for easy portion control.
When to Serve Cheesecake
Cheesecake is an excellent choice for various occasions:
- Celebrations: Birthdays, anniversaries, or holidays can be made sweeter with this dessert.
- Casual Gatherings: Serve it at brunch or a dinner party to impress your guests.
- Make-Ahead Treats: Individual cheesecakes can be prepped in advance, making them ideal for busy hosts.
Chef’s tip: Individual cheesecakes can be made up to 3 days in advance and stored in the refrigerator for optimal freshness.
Ingredients for Individual Cheesecakes
To create delectable individual cheesecakes, having the right ingredients on hand is crucial. The quality and freshness of your ingredients can significantly impact the taste and texture of your cheesecakes, especially if you plan to prepare them in advance. Below is a detailed list to ensure your cheesecakes are a hit, whether made today or stored for later enjoyment.
| Item | Amount/Specification | Notes |
|---|---|---|
| Cream Cheese | 16 ounces (450g) | Softened to room temperature for smooth mixing |
| Sugar | ½ cup (100g) | Granulated sugar; can substitute with a sweetener of choice |
| Sour Cream | ½ cup (120ml) | Adds creaminess; can use Greek yogurt for a lighter version |
| Vanilla Extract | 1 teaspoon (5ml) | Use pure vanilla extract for best flavor |
| Graham Cracker Crumbs | 1 cup (100g) | Can use crushed cookies or gluten-free alternatives |
| Butter | 4 tablespoons (56g) | Melted; helps bind crust ingredients |
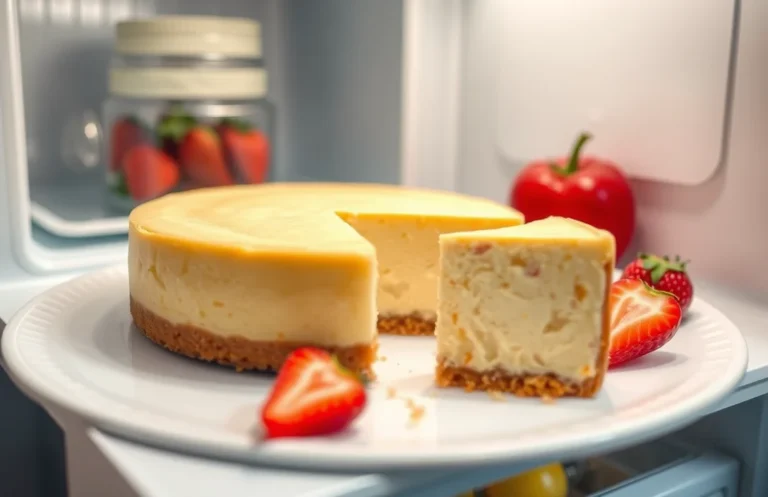
- For maintaining freshness, store your cheesecakes in an airtight container in the refrigerator if making ahead. They can last up to 5 days.
- If you plan to freeze them, wrap individual servings tightly in plastic wrap and aluminum foil; they can last up to 2 months in the freezer.
- When ready to serve, thaw in the refrigerator overnight for the best texture and taste.
Essential Kitchen Equipment
To create delicious individual cheesecakes, having the right kitchen tools is crucial. These tools ensure that your preparation is efficient and that your cheesecakes turn out perfectly every time, whether you’re making them ahead of time or baking them fresh.
- Mixing Bowls: You’ll need a set of mixing bowls in various sizes, ideally one large bowl (at least 4 quarts) for the cream cheese mixture and smaller ones for the crust ingredients. Make sure they are sturdy and easy to handle, as you’ll be mixing and folding ingredients together. A glass or stainless steel bowl is preferable for easy cleaning and durability.
- Springform Pans: For individual cheesecakes, mini springform pans (4 inches) work best. They allow for easy release of the cheesecakes without damaging their delicate structure. Ensure they are well-greased with butter to prevent sticking, and consider lining the bottom with parchment paper for added security.
- Oven Preheating: Preheat your oven to 325°F (160°C) before you begin mixing your ingredients. This ensures that your cheesecakes bake evenly and thoroughly. Use an oven thermometer to check the accuracy of your oven’s temperature, as an incorrectly preheated oven can lead to undercooked or overcooked cheesecakes.
Step-by-Step Baking Instructions
This section provides detailed instructions for preparing and baking individual cheesecakes, ensuring they are ready ahead of time without compromising quality. Following these steps will help you achieve perfect results every time, whether you’re making them a day in advance or freezing them for future enjoyment.
Preparing the Crust
- Preheat your oven to 325°F (160°C). In a medium bowl, combine 1 cup (100g) of graham cracker crumbs, ¼ cup (50g) of granulated sugar, and ½ cup (115g) of melted unsalted butter. Stir until the mixture resembles wet sand.
- Evenly distribute the crust mixture into a 12-cup muffin tin lined with cupcake liners, pressing it down firmly with the back of a measuring cup. Bake for 8-10 minutes until lightly golden and fragrant. Allow it to cool completely before adding the filling.
Mixing the Filling
- In a large mixing bowl, beat 16 ounces (450g) of cream cheese at room temperature with an electric mixer on medium speed until creamy, about 2-3 minutes. Scrape down the sides of the bowl to ensure everything is well mixed.
- Add ½ cup (100g) of granulated sugar, 2 large eggs, 1 teaspoon of vanilla extract, and ½ cup (120ml) of sour cream. Mix on low speed until just combined, being careful not to overbeat. The mixture should be smooth and creamy without lumps.
Baking Time and Temperature
- Pour the cheesecake filling into each prepared crust, filling them about ¾ full. Bake in the preheated oven for 18-20 minutes, or until the edges are set but the centers still have a slight jiggle. This ensures a creamy texture.
- Turn off the oven and crack the door, allowing the cheesecakes to cool gradually for about 1 hour. This helps prevent cracks. Once cool, refrigerate for at least 4 hours or overnight before serving.
Chef’s tip: Individual cheesecakes can be made up to 2 days in advance and stored in the refrigerator. For longer storage, freeze them for up to 3 months — just ensure they are well-wrapped in plastic wrap and aluminum foil to prevent freezer burn.
Pro Tips and Common Mistakes
Knowing how far in advance you can make individual cheesecakes is crucial for planning your dessert preparations. This section offers expert tips to ensure your cheesecakes turn out perfectly, while also highlighting common pitfalls to avoid.
- Preventing Cracks: To minimize cracks in your cheesecake, ensure that your cream cheese is at room temperature before mixing. This helps to create a smooth batter. Additionally, bake your cheesecakes in a water bath (bain-marie) at 325°F (163°C) for even cooking, which prevents the top from drying out and cracking.
- Achieving Creaminess: For that velvety texture, mix your ingredients just until combined. Avoid overmixing, as this can incorporate too much air and lead to cracks. A properly baked cheesecake should have a slight jiggle in the center when you take it out of the oven, indicating it will firm up as it cools.
- Cooling Techniques: After baking, turn off the oven and crack the door open for about an hour before taking the cheesecake out. This gradual cooling step helps prevent sudden temperature changes that can cause cracks. Always cool your cheesecake on a wire rack before refrigerating; this keeps the bottom crust from becoming soggy.
- Storage Tips: Individual cheesecakes can be made up to 2-3 days in advance and stored in the refrigerator. Ensure they are covered tightly with plastic wrap to prevent drying out. For longer storage, freeze them for up to 2 months. When ready to serve, thaw in the refrigerator overnight for the best texture.
- Common Mistake: One common mistake is not letting your cheesecake cool completely before refrigerating. This can lead to condensation forming, which makes the crust soggy and affects the texture. Always allow sufficient cooling time.
Variations and Dietary Modifications
This section covers some delicious alternatives for making individual cheesecakes that cater to various dietary needs and flavor preferences. By exploring gluten-free, vegan options, and exciting flavor additions, you can easily customize your cheesecakes without compromising on taste or texture.
Gluten-Free Crusts
For a gluten-free cheesecake, you can substitute the traditional graham cracker crust with alternatives that still deliver great flavor and texture. Here’s a simple recipe for a gluten-free crust:
- 1 ½ cups gluten-free graham cracker crumbs (150g)
- ⅓ cup granulated sugar (67g)
- ½ cup unsalted butter, melted (113g)
- Preheat your oven to 350°F (175°C).
- In a mixing bowl, combine the gluten-free graham cracker crumbs, sugar, and melted butter until well mixed. The mixture should resemble wet sand.
- Press the mixture firmly into the bottom of your cupcake liners and bake for 10 minutes. Allow it to cool before adding the filling.
Vegan Cheesecake Options
If you’re looking for a vegan cheesecake, you can replace cream cheese with cashew cream. Here’s a quick way to prepare it:
- 2 cups raw cashews, soaked for 4 hours (300g)
- ½ cup coconut milk (120ml)
- ⅓ cup maple syrup (80ml)
- 2 tablespoons lemon juice (30ml)
- Drain and rinse the soaked cashews, then blend them with coconut milk, maple syrup, and lemon juice until smooth and creamy.
- Pour the mixture into the cooled crust and freeze for at least 4 hours before serving.
Flavor Additions
Feel free to experiment with flavors by adding ingredients like:
- 1 teaspoon vanilla extract for classic flavor
- ½ cup melted chocolate or cocoa powder for a chocolate version
- 1 cup fresh fruit purée (like raspberry or mango) for a fruity twist
Chef’s tip: When adding flavors, make sure to taste the batter before pouring it into the crust to adjust sweetness or acidity as desired.
| Variation | Storage Time | Texture Impact |
|---|---|---|
| Gluten-Free | Up to 5 days in the fridge | Maintains texture well |
| Vegan | Up to 1 week in the fridge | May soften slightly over time |
Serving and Plating Suggestions
Serving individual cheesecakes attractively can enhance the overall dining experience, especially if they’ve been made in advance. Here are some suggestions to elevate your cheesecakes through garnishing, pairing with sauces, and serving temperatures.
- Garnishing Ideas: Top each individual cheesecake with a dollop of freshly whipped cream made from 1 cup of heavy cream whipped until soft peaks form. For a touch of color, add fresh berries such as strawberries, blueberries, or raspberries. You can also sprinkle a pinch of finely grated lemon zest or chocolate shavings for added visual appeal.
- Pairing with Sauces: Drizzle a homemade fruit coulis over the top, using 1 cup of your chosen fruit (like strawberries or mangoes) blended until smooth and sweetened to taste. For a richer flavor, consider a chocolate ganache made from 4 ounces of dark chocolate and ½ cup of heavy cream, combined and warmed until smooth. Serve these sauces alongside the cheesecakes for guests to add as they wish.
- Serving Temperatures: For the best texture and flavor, serve cheesecakes chilled, ideally at around 40°F (4°C). If they have been stored in the refrigerator for more than 3 days, let them sit at room temperature for about 10-15 minutes before serving to soften slightly, enhancing their creamy consistency.
Quick Summary
| Prep Time | Cook Time | Total Time | Servings |
|---|---|---|---|
| 20 minutes | 25 minutes | 45 minutes | 6 servings |
- Chill Time: Refrigerate for at least 4 hours or overnight for best flavor.
- Storage: Individual cheesecakes can be made up to 2 days in advance.
- Cooling: Allow cheesecakes to cool completely before refrigerating.
- Crust Prep: Pre-bake crust for 10 minutes at 350°F for optimal texture.
- Ingredients: Use room temperature cream cheese for a smooth batter.
Frequently Asked Questions
Can I make this ahead of time? How to store and reheat?
You can make individual cheesecakes up to 2 days ahead of time. Store them in the refrigerator, covered tightly with plastic wrap, and serve them chilled; no reheating is necessary.
What can I substitute for cream cheese?
If you’re looking for a substitute for cream cheese, you can use mascarpone cheese for a similar texture and a slightly sweeter flavor. Alternatively, Greek yogurt can be used for a lighter option, but it may alter the taste slightly.
How do I know when it’s done?
Your cheesecake is done when the edges are set and the center has a slight jiggle; it will continue to firm up as it cools. Typically, this takes about 25-30 minutes in a preheated oven at 325°F (163°C).
Can I freeze this? How long does it last?
Yes, you can freeze individual cheesecakes for up to 3 months. Wrap them tightly in plastic wrap and then aluminum foil to prevent freezer burn.
What if I don’t have a springform pan?
If you don’t have a springform pan, you can use a regular cake pan lined with parchment paper, making sure to allow some overhang for easy removal. Just be careful when cutting to ensure you don’t damage the sides of the cheesecake.

- 10 Best Cheese Knife With Holes For Smooth Slice 2026 - March 9, 2026
- Make Cheesecake Up to 3 Days Ahead: Tips for Best Flavor & Texture - March 4, 2026
- Easy No-Bake Cool Doen Cheesecake: Quick Recipe & Tips - March 4, 2026