Make Cheesecake Up to 3 Days Ahead: Tips for Best Flavor & Texture
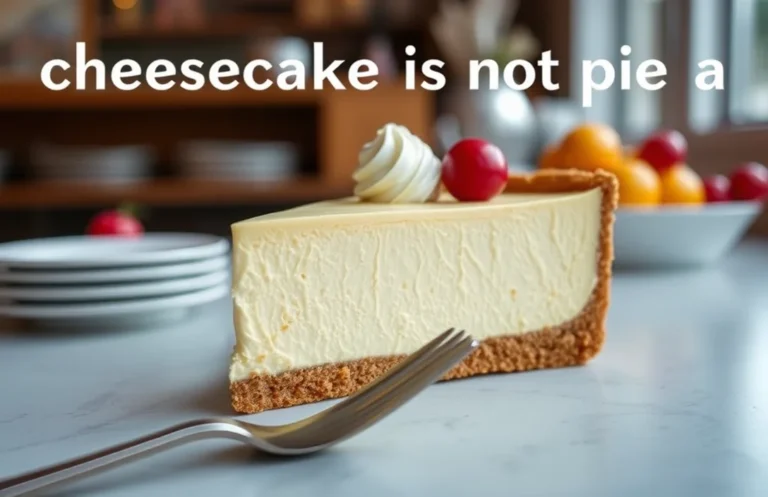
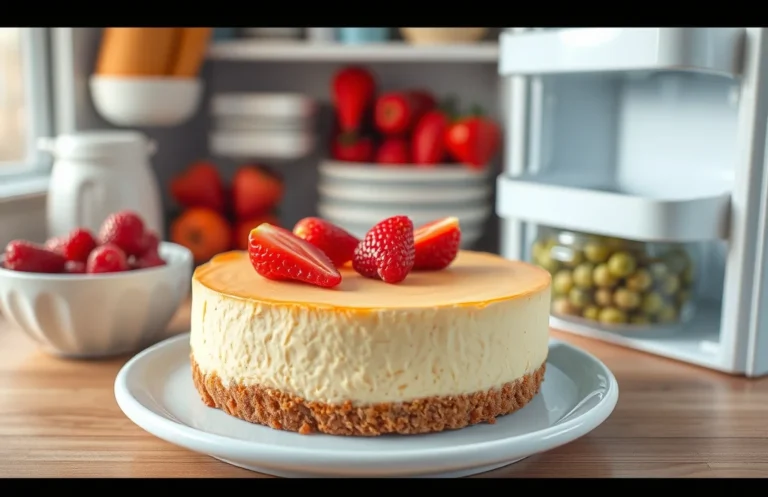
Cheesecake is that creamy, dreamy dessert that always feels like a celebration, whether it’s a special occasion or just a cozy weeknight treat. The buttery graham cracker crust paired with that rich, velvety filling is pure indulgence, and it’s hard to resist sneaking just one more slice. Trust me, once you make it, you’ll be dreaming about it!
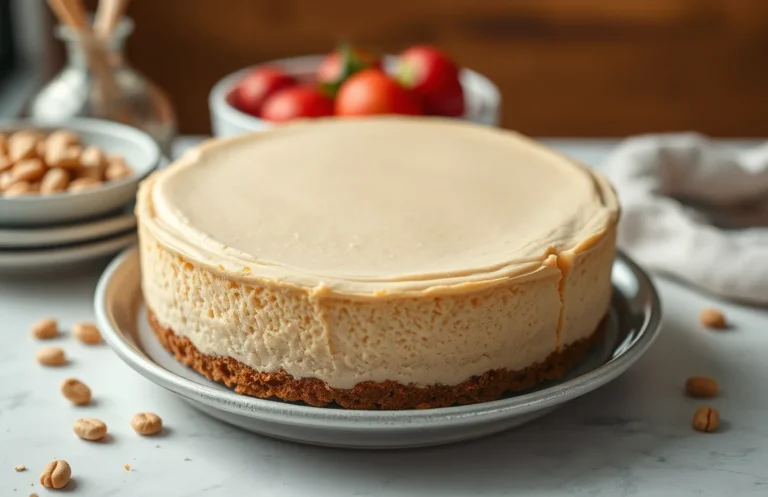
Cheesecakes can be made up to 3 days in advance for maximum flavor and freshness. This guide covers baked and no-bake versions, plus storage tips to keep your cheesecake at its best. Perfect for 8 servings and easy enough for any home cook!
| Prep Time | 20 minutes |
|---|---|
| Cook Time | 1 hour |
| Total Time | 1 hour 20 minutes |
| Servings | 8 |
| Difficulty | Moderate |
Cheesecake Origins and Significance
Cheesecake is a beloved dessert with a rich history that dates back to ancient Greece. Understanding its origins and significance not only enhances our appreciation for this creamy delight but also informs how we prepare it, especially regarding storage and advance preparation.
Historical Background
Cheesecake’s journey began in ancient Greece, where it was served to athletes during the first Olympic Games in 776 B.C. The Greeks used simple ingredients like cheese, honey, and flour. This dessert eventually made its way to Rome, where it evolved with the addition of eggs and further sweetening. Over centuries, cheesecake recipes have diversified globally, adapting to local tastes and ingredients.
Cultural Variations
- New York Style: Known for its dense and creamy texture, made primarily with cream cheese and a graham cracker crust.
- Italian Ricotta Cheesecake: Uses ricotta cheese for a lighter, fluffier texture, often flavored with citrus.
- Japanese Cotton Cheesecake: Features a soufflé-like lightness, incorporating whipped egg whites for airiness.
Chef’s tip: Different types of cheesecakes may have varying storage times and flavor profiles, so consider the style you’re preparing when planning ahead.
As you prepare to make your cheesecake, remember that the flavors often deepen and improve when made in advance. Most cheesecakes can be made 1-2 days ahead of serving, with some variations like baked cheesecakes holding their quality for up to a week when properly stored. Understanding these nuances allows you to enjoy your cheesecake at its best while minimizing last-minute stress.
Ingredients for Perfect Cheesecake
Understanding the ingredients that go into your cheesecake is crucial for planning ahead. The quality and type of each ingredient can affect how far in advance you can prepare your cheesecake without compromising its taste and texture. Below is a detailed list of all the ingredients you’ll need, along with specific measurements and tips for preparation.
| Item | Amount/Specification | Notes |
|---|---|---|
| Cream Cheese | 16 oz (450g) | Softened, full-fat for best results |
| Sour Cream | 1 cup (240g) | Adds creaminess; can substitute with Greek yogurt |
| Granulated Sugar | 1 cup (200g) | Adjust based on sweetness preference |
| Vanilla Extract | 1 teaspoon (5ml) | Use pure vanilla for enhanced flavor |
| Eggs | 3 large | Room temperature for better incorporation |
| Butter (for crust) | ½ cup (113g) | Melted, unsalted is preferred |
| Graham Cracker Crumbs | 1½ cups (150g) | Can substitute with crushed cookies |
| Brown Sugar (for crust) | ¼ cup (50g) | Adds a deeper flavor |
- For best flavor, allow the cheesecake to chill in the refrigerator for at least 4 hours before serving, but overnight is ideal.
- If storing, wrap the cheesecake tightly in plastic wrap to prevent drying out.
- Freezing is an option; wrap in foil and store in an airtight container for up to 2 months. Thaw in the fridge before serving.
Essential Kitchen Equipment
Having the right kitchen equipment is crucial for making a perfect cheesecake, whether you’re preparing it days in advance or on the same day. This section outlines the essential tools you’ll need to create your cheesecake with ease and efficiency.
- Mixing Tools: You’ll need a sturdy mixing bowl (preferably 4 quarts) and a hand mixer or stand mixer. A hand mixer allows for better control and is ideal for mixing the cream cheese until smooth and creamy, which should take about 2-3 minutes. Ensure there are no lumps for a velvety texture.
- Baking Pan: A 9-inch springform pan is ideal for cheesecakes. The removable bottom allows for easy release after baking. Line the bottom with parchment paper to prevent sticking, and ensure the sides are greased well with butter. Bake your cheesecake at 325°F (163°C) for about 55-60 minutes, or until the center is set but still slightly jiggly. This ensures a creamy consistency.
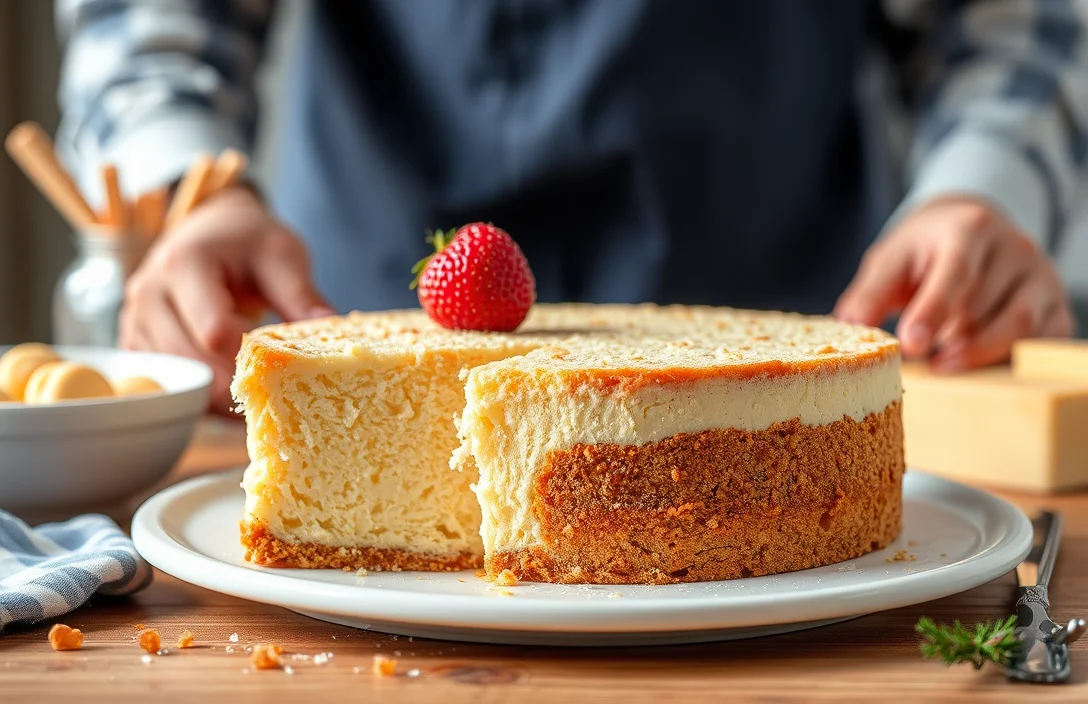
- Cooling Rack: Once out of the oven, place your cheesecake on a cooling rack. Cooling it at room temperature for at least 1 hour is essential before transferring it to the refrigerator. This helps prevent cracks by allowing the cheesecake to settle gradually.
Chef’s tip: If you’re making the cheesecake in advance, wrap it tightly in plastic wrap after it has completely cooled to maintain its flavor and texture.
Step-by-Step Cheesecake Preparation
Preparing cheesecake requires attention to detail and timing. Knowing how far in advance you can make your cheesecake helps ensure optimal taste and texture. Below are the specific steps to prepare the crust, make the filling, and bake the cheesecake for a perfect result.
- Prepare the Crust: Start by preheating your oven to 350°F (175°C). In a mixing bowl, combine 1 ½ cups (150g) of graham cracker crumbs, ½ cup (100g) of granulated sugar, and ½ cup (115g) of melted unsalted butter. Mix until the crumbs are evenly coated and resemble wet sand. Press this mixture firmly into the bottom of a 9-inch (23 cm) springform pan, ensuring an even layer. Bake for 10 minutes until set and lightly golden. Let it cool completely before adding the filling.
- Make the Filling: While the crust cools, beat 4 packages (8 oz or 226g each) of cream cheese at room temperature in a large mixing bowl until smooth, about 2-3 minutes. Gradually add 1 cup (200g) of granulated sugar and 1 teaspoon of vanilla extract, mixing until well incorporated. Add 4 large eggs, one at a time, mixing on low speed just until combined. Be careful not to overmix, as this can introduce excess air, leading to cracks during baking.
- Bake and Cool: Pour the cream cheese filling over the cooled crust, smoothing the top with a spatula. Bake in the preheated oven for 55-60 minutes until the edges are set but the center still slightly jiggles when you gently shake the pan. Once done, turn off the oven and crack the door open, allowing the cheesecake to cool gradually for 1 hour. This helps prevent cracking. After cooling, refrigerate for at least 4 hours, ideally overnight, to let the flavors meld and the texture firm up.
Pro Tips and Common Mistakes
This section highlights essential tips for preparing cheesecake in advance and common pitfalls to avoid, ensuring you achieve a perfect cheesecake every time. Understanding these nuances can significantly enhance the flavor and texture of your dessert, especially when making it ahead of time.
Avoiding Cracks
- Use room temperature ingredients: Bringing your cream cheese, eggs, and sour cream to room temperature (about 70°F or 21°C) prevents lumps and helps incorporate air evenly, reducing the chances of cracks.
- Don’t overmix: While it’s tempting to whisk vigorously, overmixing introduces too much air, which can lead to cracks as the cheesecake bakes and cools. Mix just until combined.
- Water bath method: Baking your cheesecake in a water bath helps regulate the temperature and provides moisture, minimizing the risk of cracks. Wrap the springform pan in aluminum foil to prevent water from seeping in.
Proper Cooling
- Cool gradually: After baking, turn off the oven and leave the cheesecake inside for 1 hour with the door ajar. This gradual cooling process prevents sudden temperature changes that can cause cracks.
- Chill before serving: Refrigerate your cheesecake for at least 4 hours or, ideally, overnight. This allows the flavors to meld and the texture to set properly, ensuring a creamy consistency.
- Wrap carefully: If you’re making your cheesecake in advance, wrap it tightly in plastic wrap after it has completely cooled to prevent it from absorbing other odors in the fridge.
Cheesecake Variations and Substitutions
Understanding cheesecake variations and substitutions can significantly impact how far in advance you can prepare your dessert. Different types of cheesecakes and dietary modifications have unique storage needs and shelf lives, so let’s explore these options to ensure your cheesecake is perfect for any occasion.
No-Bake Options
No-bake cheesecakes are a fantastic choice for those looking to prepare their dessert ahead of time. They can typically be made 2-3 days in advance without compromising taste or texture. Here’s what to keep in mind:
- Chill the cheesecake for at least 4 hours before serving to ensure it sets properly.
- Store in an airtight container in the fridge to prevent drying out.
Chef’s tip: If you’re making a no-bake cheesecake, avoid overmixing the filling to maintain a light, fluffy texture.
Gluten-Free Alternatives
If you need to accommodate gluten-free diets, using gluten-free graham crackers or almond flour for the crust can work well. These variations can be made 3-5 days in advance, but here are some key points:
- Check that your ingredients are certified gluten-free, especially the baking powder and any flavorings.
- Gluten-free crusts may become soggy faster, so serve within 3 days if possible.
| Type of Cheesecake | Advance Prep Time | Storage Method |
|---|---|---|
| No-Bake Cheesecake | 2-3 days | Refrigerator, airtight container |
| Gluten-Free Cheesecake | 3-5 days | Refrigerator, airtight container |
Serving and Pairing Suggestions
Serving your cheesecake beautifully can elevate the experience for your guests, while thoughtful beverage pairings can enhance its flavors. Here are some suggestions for garnishes and drinks that complement the rich, creamy texture of cheesecake.
Garnishes
- Fresh Berries: Top your cheesecake with a mix of strawberries, blueberries, and raspberries for a pop of color and a burst of tartness that balances the sweetness of the cake.
- Chocolate Drizzle: Melt ½ cup of semi-sweet chocolate chips and drizzle over the top before serving. This adds a rich, decadent touch that pairs beautifully with classic flavors.
- Whipped Cream: Serve with a dollop of freshly whipped cream, made by whisking 1 cup of heavy cream with 2 tablespoons of powdered sugar until soft peaks form. This adds a light and airy contrast to the dense cheesecake.
- Citrus Zest: Grate some lemon or orange zest over the cheesecake for a fresh, aromatic finish. This brightens the flavor and makes the dessert feel more vibrant.
Beverage Pairings
- Sweet Dessert Wine: A late harvest Riesling or a Moscato complements the sweetness of the cheesecake while its acidity balances the richness.
- Coffee: A robust cup of coffee or espresso can cut through the creaminess. Consider serving it with a splash of cream to echo the cheesecake’s texture.
- Herbal Tea: A light herbal tea, like chamomile or mint, can provide a refreshing contrast and cleanse the palate after each bite.
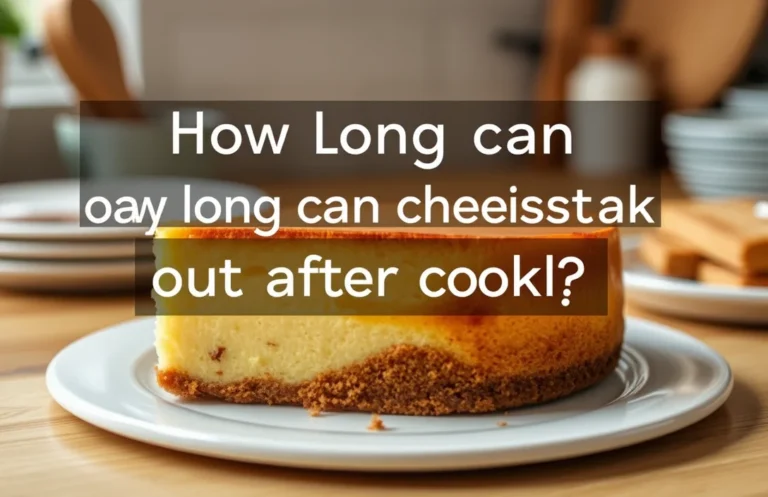
How Far in Advance to Make Cheesecake
Knowing how far in advance you can make cheesecake is essential for planning your dessert for any occasion. Whether you’re preparing a baked or no-bake cheesecake, having a timeline helps ensure your dessert is fresh and delicious when it’s time to serve.
Baked Cheesecakes
- Baked cheesecakes can be made up to 3 days in advance. Store them in the refrigerator, tightly covered with plastic wrap or aluminum foil, to maintain moisture and prevent any absorption of odors from other foods.
- When ready to serve, let the cheesecake sit at room temperature for about 30 minutes to 1 hour. This allows the texture to soften slightly, enhancing the creaminess. You want it to feel firm yet slightly yielding when you press gently.
- For best flavor, consider making your baked cheesecake at least 1 day in advance. This resting time allows the flavors to meld, giving you a richer and more delicious dessert.
No-Bake Cheesecakes
- No-bake cheesecakes can be made up to 5 days in advance. Make sure to cover them with plastic wrap or a lid to keep them fresh and prevent drying out.
- Before serving, remove the cheesecake from the refrigerator and let it rest for about 15-30 minutes at room temperature. This helps bring out the flavors and makes slicing easier; it should feel firm yet creamy.
- Keep in mind that while no-bake cheesecakes can last longer, they may lose some texture and flavor quality after the 5-day mark, so it’s best to enjoy them within that timeframe.
Cheesecake Storage Tips
Understanding how to properly store your cheesecake can significantly impact its taste and texture, especially when preparing in advance. Here are some essential guidelines to ensure your cheesecake remains fresh and delicious.
Refrigeration Guidelines
- Store in an airtight container: After your cheesecake has cooled completely, cover it with plastic wrap or place it in an airtight container. This prevents it from absorbing odors and drying out.
- Refrigerate for up to 5 days: Cheesecake can be stored in the refrigerator for about 3 to 5 days without compromising flavor. Set your refrigerator temperature to 40°F (4°C) or lower for optimal freshness.
- Check for signs of spoilage: If you notice any off smells, discoloration, or a change in texture, it’s best to discard the cheesecake to avoid foodborne illness.
Freezing Instructions
- Wrap tightly for freezing: To freeze your cheesecake, wrap it securely in plastic wrap followed by aluminum foil to prevent freezer burn. This method can keep it fresh for up to 2 months.
- Thaw in the refrigerator: When ready to eat, transfer the cheesecake to the refrigerator and let it thaw overnight. This gradual thawing helps maintain its creamy texture.
- Avoid refreezing: Once thawed, do not refreeze cheesecake as it can alter the texture and flavor. Consume it within 3 days after thawing for the best taste.
Quick Summary
| Prep Time | 20 minutes |
|---|---|
| Cook Time | 60 minutes |
| Total Time | 6 hours (including cooling) |
| Servings | 8 |
- Chilling time: Refrigerate cheesecake for at least 4 hours, preferably overnight.
- Freezing option: Cheesecake can be frozen for up to 3 months; wrap tightly.
- Room temperature: Allow cheesecake to sit at room temp for 30 minutes before serving.
- Ingredient temperature: Use room temperature cream cheese for a smoother batter.
- Prevent cracks: Bake in a water bath for even heat distribution.
Frequently Asked Questions
Can I make this ahead of time? How to store and reheat?
Yes, you can make cheesecake up to 2-3 days in advance. Store it tightly covered in the refrigerator, and there’s no need to reheat; serve it chilled for the best texture.
What can I substitute for cream cheese?
You can use mascarpone cheese or a vegan cream cheese alternative if you’re looking for a different flavor or texture. Keep in mind that this may alter the final taste of your cheesecake slightly.
How do I know when it’s done?
Your cheesecake is done when the edges are set and the center has a slight jiggle, which usually takes around 55-70 minutes at 325°F (160°C). It will firm up as it cools, so don’t overbake!
Can I freeze this? How long does it last?
Yes, you can freeze cheesecake for up to 2-3 months. Wrap it tightly in plastic wrap and place it in an airtight container to prevent freezer burn.
Why did my cheesecake turn out cracked?
Cracks often happen due to sudden temperature changes or overmixing the batter; to prevent this, bake at a lower temperature and avoid beating air into the mixture. A water bath can also help maintain even heat and moisture during baking.

- Make Cheesecake Up to 3 Days Ahead: Tips for Best Flavor & Texture - March 4, 2026
- Easy No-Bake Cool Doen Cheesecake: Quick Recipe & Tips - March 4, 2026
- Decadent Dulce de Leche Cheesecake: Easy Step-by-Step Recipe - March 4, 2026