Jello Cheesecake Filling: Easy Recipe for Creamy, Flavorful Dessert
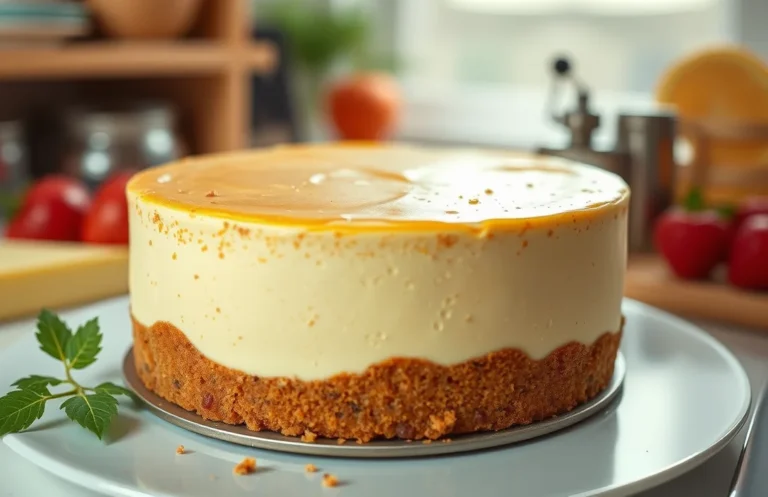
If you’re looking for a delightful twist on classic cheesecake, using Jello in the filling is a fantastic idea that adds both flavor and a touch of whimsy! This creamy dessert is perfect for celebrations or a cozy night in, and trust me, it will disappear in no time when served to friends and family.
Get ready for a delicious treat that takes just 20 minutes of prep time, requires 4 hours to chill, and serves 8 people with a medium difficulty level. You’ll love the smooth texture and vibrant colors that Jello brings to your cheesecake!
| Prep Time | Cook Time | Total Time | Servings | Difficulty |
|---|---|---|---|---|
| 20 minutes | 0 minutes | 4 hours | 8 | Medium |
Origin of Jello Cheesecake
The incorporation of Jello into cheesecake recipes reflects a unique blend of culinary creativity and accessibility. This section explores the cultural background of Jello cheesecake and the occasions it is commonly served, highlighting its significance in American dessert traditions.
- Cultural Background: Jello, invented in the late 19th century, quickly became a staple in American households. Its vibrant colors and ease of preparation made it popular for all types of desserts. The combination of Jello with cheesecake emerged as a way to create a lighter, more refreshing dessert that appealed to families looking for quick yet delightful treats. This fusion showcases how traditional recipes can evolve and adapt to contemporary tastes.
- When to Serve: Jello cheesecake is often served during celebrations and gatherings. Common occasions include summer picnics, birthday parties, and holiday festivities. Its colorful appearance and creamy texture make it a visually appealing dessert that delights both children and adults alike. The chilled nature of Jello cheesecake offers a refreshing option for warmer months, making it a versatile choice for any dessert table.
Ingredients for Jello Filling
In this section, you’ll find a precise list of ingredients required to create a delightful Jello cheesecake filling. The right combination of cream cheese and flavored Jello elevates the cheesecake, providing a unique taste and texture that sets it apart from traditional recipes.
| Item | Amount/Specification | Notes |
|---|---|---|
| Cream Cheese | 16 oz (450g) | Softened to room temperature for easy mixing |
| Sugar | ½ cup (100g) | Adjust to taste; can use powdered sugar for a smoother texture |
| Jello (flavor of choice) | 3 oz (85g) | Any flavor works, but strawberry and blueberry are popular |
| Boiling Water | 1 cup (240ml) | To dissolve the Jello completely |
| Cold Water | ½ cup (120ml) | Helps to cool the Jello mixture |
| Whipped Cream | 1 cup (240ml) | For folding into the mixture; can use store-bought or homemade |
- For a low-calorie version, consider using sugar-free Jello and reduced-fat cream cheese.
- Make sure the cream cheese is fully softened; otherwise, you’ll end up with lumps in your filling.
- If using a different flavor of Jello, adjust the sugar level accordingly—it may be sweeter or less sweet based on the flavor.
- Keep an eye on the texture of your mixture; it should be smooth and creamy before adding the whipped cream.
Essential Kitchen Equipment
Before you dive into making a cheesecake with Jello filling, it’s crucial to gather the right tools and prepare your workspace for success. Having the correct equipment on hand will streamline the process and ensure your cheesecake turns out perfectly every time.
| Item | Amount/Specification | Notes |
|---|---|---|
| Mixing Bowls | 2 medium-sized | One for the cream cheese mixture, one for the Jello |
| Springform Pan | 9-inch (23 cm) | Allows for easy removal of the cheesecake |
| Electric Mixer | N/A | For smooth cream cheese mixture. A hand mixer is sufficient |
| Spatula | 1 large | To fold in the whipped cream and Jello |
| Measuring Cups and Spoons | Standard set | For precise ingredient measurements |
- Ensure your mixing bowls are clean and dry to prevent any unwanted moisture from interfering with the Jello setting.
- Choose a sturdy springform pan to avoid leaks; a loose pan can lead to a messy cheesecake.
- For the best texture, make sure your cream cheese is at room temperature before mixing.
- If using a hand mixer, be cautious not to overmix the cream cheese mixture; it should be creamy, not fluffy.
Step-by-Step Cheesecake Instructions
This section will guide you through preparing the crust and making a delightful cheesecake filling with Jello, enhancing both flavor and texture. Following these instructions will ensure your cheesecake is creamy, flavorful, and has that signature Jello twist!
Preparing the Crust
- Preheat your oven to 350°F (175°C). This temperature is perfect for achieving a golden-brown crust. While the oven is heating, gather your crust ingredients.
- In a medium bowl, combine 1 ½ cups (150g) of graham cracker crumbs, ⅓ cup (70g) of granulated sugar, and ½ cup (115g) of melted unsalted butter. Mix until the crumbs are evenly coated and the mixture resembles wet sand.
- Press the crumb mixture firmly into the bottom of a 9-inch (23cm) springform pan. Use the flat bottom of a measuring cup to pack it tightly, creating an even layer. Bake for 8-10 minutes until lightly browned and fragrant.
Making the Filling
- In a large mixing bowl, beat 16 oz (450g) of cream cheese at room temperature until smooth and creamy, about 2-3 minutes. Be sure to scrape down the sides of the bowl to ensure even mixing.
- Gradually add in ½ cup (100g) of granulated sugar and 1 teaspoon of vanilla extract, beating until fully incorporated and fluffy. The mixture should be smooth without any lumps.
- In a separate bowl, dissolve 1 package (3 oz) of flavored Jello (your choice) in 1 cup (240ml) of boiling water. Stir until fully dissolved, then allow it to cool slightly for about 5 minutes.
- Slowly pour the cooled Jello mixture into the cream cheese mixture, mixing gently until combined. Be careful not to overmix; you want it well incorporated but still airy.
- Fold in 1 cup (240ml) of whipped heavy cream for added lightness. This will give your cheesecake a lovely texture. The filling should be smooth and slightly thickened.
Chef’s tip: To prevent cracks on your cheesecake, avoid overmixing and ensure all ingredients are at room temperature.
Pro Tips for Perfect Cheesecake
Making a Jello cheesecake can be a delightful twist on the traditional recipe, but it comes with its own set of challenges. To ensure your cheesecake turns out creamy and crack-free, follow these expert tips that will guide you through the process.
Avoiding Cracks
- Use room temperature ingredients: Cold ingredients can lead to an uneven mixture that may crack while baking. Let your cream cheese, eggs, and any other dairy sit out for about 30 minutes before mixing.
- Don’t overmix: Overmixing introduces too much air into the batter, which can cause cracks. Mix just until combined, and be gentle when folding in the Jello mixture.
- Water bath method: To prevent cracks, bake your cheesecake in a water bath. Wrap the springform pan in aluminum foil to prevent leaks, then place it in a larger pan filled with hot water. This helps maintain a consistent temperature.
Cooling Techniques
- Gradual cooling: After baking, turn off the oven and crack the door open, allowing the cheesecake to cool slowly inside. This prevents sudden temperature changes that can create cracks.
- Chill before slicing: Let the cheesecake chill in the refrigerator for at least 4 hours, preferably overnight. This helps the Jello set properly and enhances the flavors.
- Use a hot knife: When slicing, dip your knife in hot water and wipe it clean between cuts. This keeps the slices neat and prevents the filling from sticking to the knife.
Variations and Substitutions
Incorporating Jello into a cheesecake filling can open up a world of flavor and texture variations. This section will guide you through gluten-free options and vegan alternatives to ensure everyone can enjoy this delicious dessert.
Gluten-Free Options
| Item | Amount/Specification | Notes |
|---|---|---|
| Gluten-free graham cracker crumbs | 1 ½ cups (150g) | Look for certified gluten-free brands. |
| Butter or coconut oil | ½ cup (115g) | Use melted for binding the crust. |
Vegan Alternatives
| Item | Amount/Specification | Notes |
|---|---|---|
| Vegan cream cheese | 16 oz (450g) | Check label for a smooth texture. |
| Coconut cream | 1 cup (240ml) | Chill can overnight for easy separation. |
| Agar-agar | 1 tablespoon (7g) | Use as a gelling agent instead of Jello. |
- For a gluten-free cheesecake, ensure all ingredients are certified gluten-free to avoid cross-contamination.
- When using vegan alternatives, taste as you go; some brands of vegan cream cheese can be quite tangy.
- If the filling is too runny, consider adding a bit more agar-agar or chilling it longer to firm up.
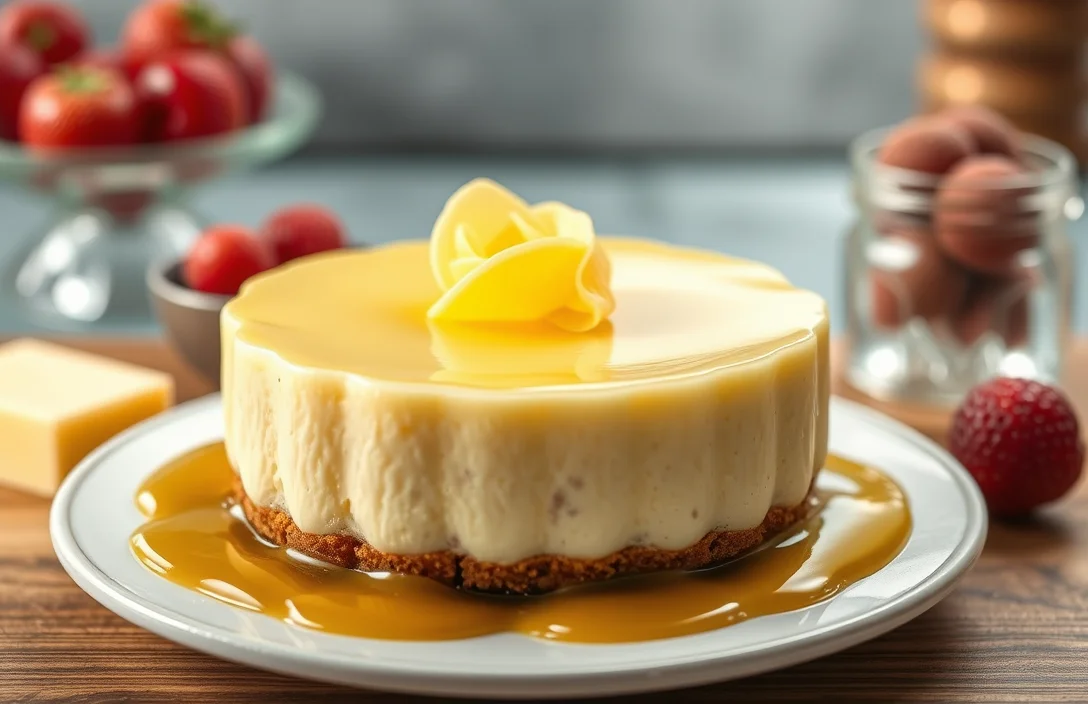
Serving and Plating Ideas
Presenting your Jello-infused cheesecake can elevate the overall experience and make it feel special. Here are some creative garnishes and pairing suggestions to make your dessert visually appealing and delicious.
Garnishes
- Top your cheesecake with a layer of fresh fruit such as sliced strawberries, blueberries, or kiwi. This adds vibrant color and a refreshing taste that complements the creamy filling.
- Drizzle a homemade fruit coulis or chocolate sauce over the top. To make a quick raspberry coulis, blend 1 cup fresh or frozen raspberries with 2 tablespoons of sugar until smooth, then strain to remove seeds.
- Sprinkle toasted coconut flakes or crushed nuts around the edges of the cheesecake to add texture and flavor. For a nutty twist, use ¼ cup of finely chopped pecans or almonds for a delightful crunch.
Pairing Suggestions
- Serve the cheesecake with a dollop of whipped cream on top, flavored with a splash of vanilla extract or a teaspoon of lemon zest for added brightness.
- Pair your cheesecake with a cup of strong coffee or a light dessert wine, such as Moscato, to balance the sweetness and enhance the dessert’s flavors.
- Offer a side of vanilla ice cream or sorbet for an extra treat. This creates a creamy contrast that many will love.
Chef’s tip: Always slice your cheesecake with a warm knife for clean cuts. Dip the knife in hot water, wipe it dry, and then slice!
Quick Summary
| Prep Time | 20 minutes |
|---|---|
| Cook Time | 0 minutes |
| Total Time | 3 hours (includes chilling) |
| Servings | 8 |
- Prepare the crust: Combine 1 ½ cups crushed graham crackers with ½ cup melted butter and press into a 9-inch pan.
- Make the filling: Beat 16 oz of cream cheese with ½ cup sugar until smooth, then mix in 1 cup of prepared Jello.
- Add flavors: Incorporate 1 tsp of vanilla extract for extra depth.
- Chill the cheesecake: Refrigerate for at least 3 hours for perfect set.
- Top with fruit: Garnish with fresh berries or whipped cream before serving.
- Tip: Use Jello that complements your fruit choice for best flavor.
- Tip: Ensure cream cheese is at room temperature for easy mixing.
- Tip: Do not skimp on chilling time; it ensures a firmer texture.
Frequently Asked Questions
Can I make this ahead of time? How to store and reheat?
You can definitely make this cheesecake filling ahead of time and store it in the refrigerator for up to 3 days. Just make sure to cover it tightly to prevent it from drying out.
What can I substitute for Jello in this recipe?
If you want to substitute Jello, try using gelatin powder mixed with sugar and fruit puree to achieve a similar texture and flavor. Just follow the package instructions for the correct ratios.
How do I know when it’s done?
The cheesecake is done when the edges are set but the center still has a slight jiggle, which usually takes about 55-60 minutes at 325°F (163°C). It will continue to firm up as it cools.
Can I freeze this? How long does it last?
You can freeze the cheesecake for up to 2 months, but it’s best to freeze it without the topping. Wrap it tightly in plastic wrap and foil to prevent freezer burn.
What if I don’t have a springform pan?
If you don’t have a springform pan, you can use a 9-inch round cake pan lined with parchment paper, but it will be a bit trickier to remove the cheesecake. Just let it cool completely before trying to remove it from the pan.

- Make Cheesecake Up to 3 Days Ahead: Tips for Best Flavor & Texture - March 4, 2026
- Easy No-Bake Cool Doen Cheesecake: Quick Recipe & Tips - March 4, 2026
- Decadent Dulce de Leche Cheesecake: Easy Step-by-Step Recipe - March 4, 2026