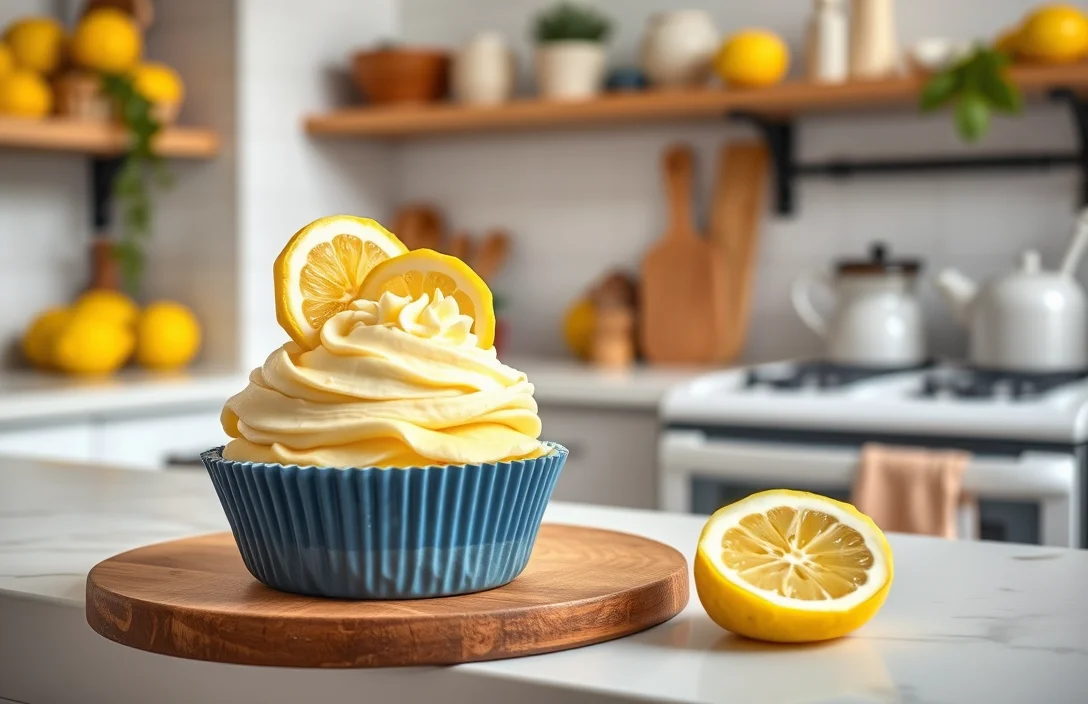
10 Stylish Lemon Desserts From Preppy Kitchen: Easy Recipes to Try
If you’re craving something bright and zesty, lemon desserts are where it’s at! These treats are not just delicious; they bring a burst of sunshine to any occasion. Whether it’s a cozy weeknight or a festive gathering, lemon bars, cakes, and tarts will have everyone asking for seconds. Get ready to satisfy your sweet tooth!
You’ll find 5-10 tested lemon dessert recipes that are easy to follow, complete with exact measurements, cooking times, and serving sizes. Each recipe is designed for home cooks of all skill levels, ensuring you’ll achieve impressive results.
| Prep Time | Cook Time | Total Time | Servings | Difficulty |
|---|---|---|---|---|
| 15 minutes | 30 minutes | 45 minutes | 8 servings | Easy |
Lemon Tart Origins
The lemon tart is a classic dessert that showcases the bright, tangy flavor of lemons, making it a delightful treat for any occasion. Its roots can be traced back to French pastry traditions, where desserts often highlight fresh, seasonal ingredients. This tart is cherished for its balance of sweetness and acidity, making it a standout choice for sunny brunches, elegant dinners, or simply a refreshing end to a meal.
- Flavor Profile: The tartness of the lemon filling is perfectly complemented by a buttery, flaky crust.
- Serving Suggestions: Enjoy it chilled, topped with a dusting of powdered sugar, or paired with whipped cream for added richness.
- Occasions: Ideal for spring and summer gatherings, picnics, or as a light dessert after heavy meals.
Chef’s tip: For a vibrant twist, consider adding a touch of lemon zest to your filling for extra flavor.
| Ingredient | Amount |
|---|---|
| Fresh lemons | 3 large |
| Sugar | 1 cup (200g) |
| Unsalted butter | ½ cup (115g) |
| Eggs | 3 large |
| All-purpose flour | 1 cup (120g) |
Common mistakes include overbaking the tart, which can lead to a tough texture, or not straining the filling, resulting in an unappealing grainy finish. Always ensure your tart is baked until the filling is just set and slightly jiggly in the center. This indicates that it will firm up as it cools!
Lemon Meringue Pie Ingredients
This section provides a detailed list of ingredients you’ll need to create a stunning Lemon Meringue Pie, a classic dessert that combines bright citrus flavors with sweet, fluffy meringue. Having precise measurements ensures that your pie will turn out perfectly every time, allowing you to impress family and friends with your culinary skills.
| Item | Amount/Specification | Notes |
|---|---|---|
| All-purpose flour | 1 ½ cups (180g) | For the pie crust |
| Granulated sugar | 1 cup (200g) | For the filling |
| Fresh lemon juice | ¾ cup (180ml) | About 4-5 lemons |
| Lemon zest | 2 tablespoons | Freshly grated |
| Egg yolks | 4 large | Keep the whites for the meringue |
| Unsalted butter | 6 tablespoons (85g) | Cut into pieces |
| Egg whites | 4 large | For the meringue |
| Cream of tartar | ½ teaspoon | Stabilizes the meringue |
| Salt | ¼ teaspoon | Enhances flavor |
- For a gluten-free option, substitute the all-purpose flour with a gluten-free flour blend.
- If you’re sensitive to dairy, try using a dairy-free butter alternative for the crust.
- Ensure the eggs are at room temperature for easier whipping of the egg whites.
- Always use fresh lemon juice for the best flavor; bottled lemon juice can be too acidic.
Essential Kitchen Tools
To create delicious lemon desserts that embody the vibrant style of the Preppy Kitchen, having the right tools at your disposal is essential. Each tool serves a purpose, ensuring that your cooking process is smooth and efficient, resulting in beautiful and tasty treats.
- Mixing Bowls: A set of mixing bowls in various sizes is crucial. You’ll need them for whisking together ingredients, mixing batters, and preparing fillings. Glass or stainless steel bowls are great as they’re easy to clean and won’t retain odors.
- Measuring Cups and Spoons: Accurate measurements are key to baking success. Invest in a set of dry measuring cups (for flour and sugar) and liquid measuring cups (for milk and juices). A set of measuring spoons will also help you measure smaller quantities precisely.
- Whisk: A good whisk is essential for combining ingredients smoothly, especially when preparing lemon curd or meringue. Choose a sturdy whisk that feels comfortable in your hand for the best results.
- Microplane Zester: For extracting the zest from lemons without the bitter pith, a microplane zester is invaluable. This tool adds intense lemon flavor to your desserts and elevates their presentation.
- Rubber Spatula: A rubber spatula is perfect for folding in ingredients gently without deflating your mixtures. It’s also great for scraping down the sides of bowls to ensure nothing is left behind.
- 9-inch Pie Dish or Baking Pan: Depending on the dessert, you may need a pie dish for tarts or a square baking pan for bars. A glass or ceramic dish will add charm and retain heat well during baking.
- Cooling Rack: Once your desserts are baked, transferring them to a cooling rack allows for even cooling, preventing sogginess. It’s particularly important for lemon bars and similar treats.
Step-by-Step Lemon Bars
These lemon bars are the perfect blend of tangy and sweet, making them a delightful addition to any dessert table. Follow these detailed steps to achieve that perfect balance with a flaky crust and creamy lemon filling.
Ingredients
- 1 cup (125g) all-purpose flour
- ½ cup (115g) unsalted butter, softened
- ¼ cup (50g) granulated sugar
- ¼ teaspoon salt
- 2 large eggs
- 1 cup (200g) granulated sugar (for filling)
- 2 tablespoons all-purpose flour (for filling)
- ⅓ cup (80ml) fresh lemon juice
- Zest of 1 lemon
- Powdered sugar, for dusting
- Preheat your oven to 350°F (175°C). Grease a 9×9-inch baking pan lightly with butter or line it with parchment paper for easy removal.
- Make the crust: In a medium bowl, cream together ½ cup softened butter and ¼ cup granulated sugar until light and fluffy, about 2-3 minutes. Add 1 cup flour and ¼ teaspoon salt; mix until crumbly. Press the mixture evenly into the bottom of the prepared pan.
- Bake the crust: Place the crust in the preheated oven and bake for 18-20 minutes until lightly golden and set. You want it to be firm to the touch but not overly browned.
- Prepare the filling: In a separate bowl, whisk together 2 large eggs, 1 cup granulated sugar, 2 tablespoons flour, lemon juice, and lemon zest. Mix until smooth and well combined with no lumps.
- Pour the filling: Once the crust is done baking, remove it from the oven and pour the filling mixture over the hot crust. Use a spatula to spread it evenly.
- Bake again: Return the pan to the oven and bake for an additional 20-25 minutes. The filling should be set and slightly jiggly in the center. It will firm up as it cools.
- Cooling: Allow the lemon bars to cool in the pan on a wire rack for at least 30 minutes. For cleaner cuts, refrigerate for an hour before slicing.
- Serve: Dust with powdered sugar before serving. Cut into squares or rectangles and enjoy the vibrant flavor!
Chef’s tip: For a gluten-free option, substitute the all-purpose flour with a 1:1 gluten-free flour blend.
Pro Tips for Lemon Cakes
Mastering lemon cakes takes practice, but with a few professional tips, you can elevate your baking game and avoid common pitfalls. These insights will help you achieve a perfectly moist and flavorful lemon cake that embodies the vibrant aesthetic of Preppy Kitchen desserts.
- Use fresh lemons: Always opt for fresh lemons over bottled lemon juice for the best flavor. The zest adds aromatic oils that enhance the cake’s overall profile.
- Measure precisely: Baking is a science, so measure your ingredients accurately. For a lemon cake, use 1 cup (200g) of granulated sugar and ½ cup (120ml) of lemon juice for the perfect balance of sweetness and tartness.
- Do not overmix: When combining wet and dry ingredients, mix just until incorporated. Overmixing can lead to a dense texture instead of the light, fluffy cake you desire.
- Check for doneness: Bake at 350°F (175°C) for 25-30 minutes, and check for doneness by inserting a toothpick into the center. It should come out clean or with a few moist crumbs.
- Cool properly: Allow your cake to cool in the pan for about 10 minutes before transferring it to a wire rack. This prevents sogginess and helps maintain the cake’s structure.
- Glaze while warm: If you’re adding a lemon glaze, do it while the cake is still warm. This allows the glaze to soak in, creating a deliciously moist finish.
Variations on Lemon Sorbet
Lemon sorbet is a refreshing and versatile dessert that can be easily customized to suit different tastes and dietary preferences. With a few simple modifications, you can create delightful variations that add flair to your dessert table while maintaining that signature lemony zing.
Flavor Variations
- Berry Lemon Sorbet: Add 1 cup of pureed strawberries, raspberries, or blueberries to the base mixture before freezing for a fruity twist.
- Lemon Basil Sorbet: Infuse the simple syrup with 1 cup of fresh basil leaves while heating. Strain before mixing with lemon juice for an aromatic flavor.
- Coconut Lemon Sorbet: Substitute ½ cup of water with ½ cup of coconut milk for a creamier texture and tropical flair.
Dietary Modifications
- Vegan: The classic lemon sorbet is already vegan, but ensure any added ingredients like coconut milk are also plant-based.
- Gluten-Free: This dessert is gluten-free as it contains no flour or gluten-containing ingredients.
Pro tip: To improve the texture of your sorbet, let it sit at room temperature for about 5-10 minutes before serving. This will make it easier to scoop.
| Ingredient | Amount |
|---|---|
| Lemon Juice | 1 cup (240ml) |
| Granulated Sugar | 1 cup (200g) |
| Water | 2 cups (480ml) |
Remember, the key to a smooth sorbet is to ensure your mixture is well-chilled before churning. If you notice ice crystals forming, simply blend the sorbet again after it has softened a bit.
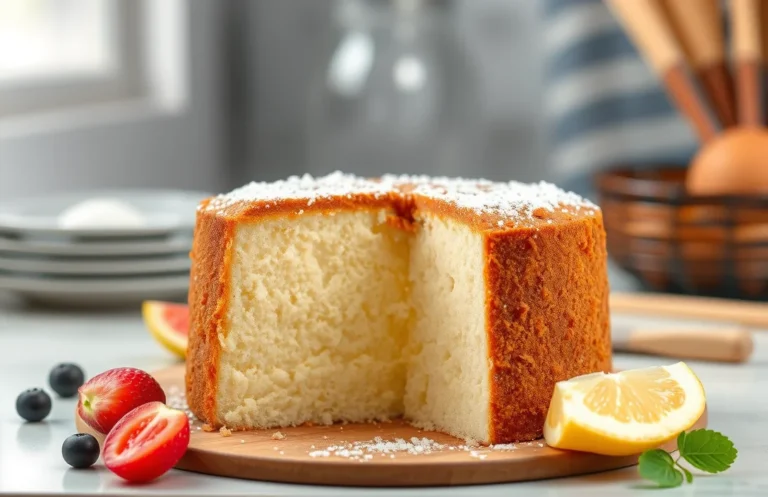
Serving Lemon Pound Cake
Serving lemon pound cake is not just about presentation; it’s about creating a delightful experience that highlights its vibrant flavors. With just a few simple tips, you can elevate this classic dessert to fit the stylish and cheerful aesthetic of the Preppy Kitchen.
- Choose the right plate: A classic white plate or a pastel-colored dish can beautifully showcase the golden hue of the lemon pound cake. Opt for a cake stand to add height and elegance to your presentation.
- Add a drizzle: Create a zesty lemon glaze by whisking together 1 cup powdered sugar with 2 tablespoons fresh lemon juice. Drizzle this over the cooled cake for a glossy finish that enhances both flavor and visual appeal.
- Garnish with fruit: Fresh berries such as raspberries or strawberries not only provide a pop of color but also complement the lemon flavor wonderfully. Scatter them around the slice on the plate for a vibrant touch.
- Serve with whipped cream: Lightly sweetened whipped cream adds a luscious texture. For extra flair, fold in a teaspoon of lemon zest to the cream for a refreshing twist. This contrast enhances the cake’s dense crumb.
- Pair with tea or coffee: A cup of Earl Grey tea or a rich coffee pairs nicely with the citrusy notes of the cake, creating a delightful balance that enhances the overall tasting experience.
Chef’s tip: Serve your lemon pound cake at room temperature to ensure the best flavor and texture. If you’ve made it ahead of time, store it in an airtight container to keep it moist.
Quick Recipe Summary
This section provides a concise overview of delightful lemon dessert recipes that embody the vibrant and stylish aesthetic of the Preppy Kitchen. With precise measurements, cooking times, and expert tips, you’ll find everything you need to whip up these zesty treats with confidence.
Lemon Dessert Recipes at a Glance
- Lemon Pound Cake – A buttery, dense cake with a bright lemon flavor that’s perfect for any occasion.
- Lemon Meringue Pie – A classic dessert featuring a tart lemon filling topped with fluffy meringue, baked to golden perfection.
- Lemon Bars – Tangy and sweet, these bars are made with a buttery shortbread crust and a smooth lemon filling.
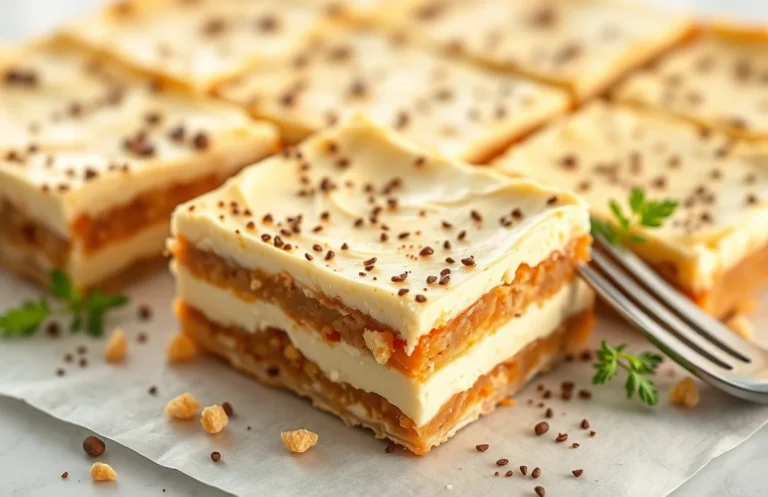
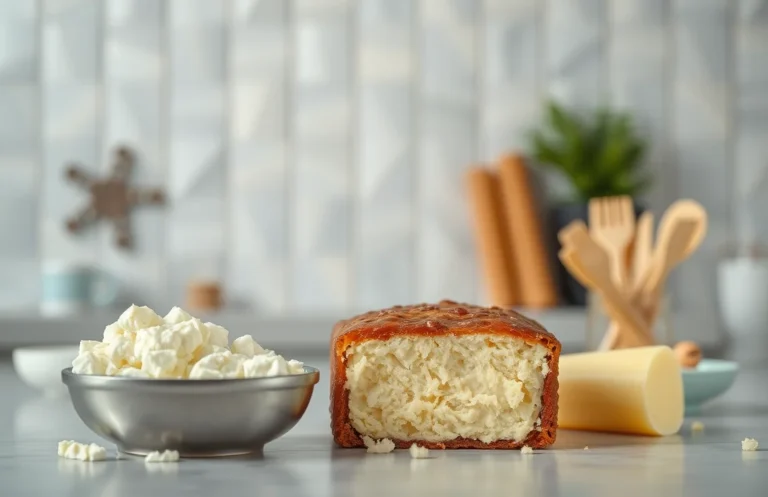
- Lemon Cheesecake – A creamy cheesecake infused with lemon zest and juice, on a crumbly graham cracker crust.
Quick Reference Ingredient Table
| Recipe | Key Ingredients |
|---|---|
| Lemon Pound Cake | 1 ½ cups all-purpose flour (180g), 1 cup sugar (200g), ½ cup unsalted butter (115g), 3 eggs, zest and juice of 1 lemon |
| Lemon Meringue Pie | 1 pie crust, 1 cup sugar (200g), 2 tablespoons cornstarch, 1 cup water (240ml), zest and juice of 2 lemons, 3 egg whites |
| Lemon Bars | 1 ¾ cups all-purpose flour (210g), 1 cup butter (226g), 1 ½ cups sugar (300g), 4 eggs, zest and juice of 2 lemons |
| Lemon Cheesecake | 1 ½ cups graham cracker crumbs (150g), 1 cup sugar (200g), 3 packages cream cheese (24 oz), 3 eggs, zest and juice of 1 lemon |
Chef’s tip: Always zest your lemons before juicing them for maximum flavor.
Cooking Tip: Ensure all your ingredients are at room temperature before you start baking for a smoother batter and better rise. Also, remember to preheat your oven to the correct temperature to avoid uneven baking. Happy baking!
Quick Summary
| Prep Time | Cook Time | Total Time | Servings |
|---|---|---|---|
| 20 minutes | 30 minutes | 50 minutes | 8 servings |
- Preheat oven to 350°F (175°C) for perfect baking.
- Use fresh lemons for the best flavor and zest.
- Whip egg whites until stiff peaks form for a light texture.
- Cool completely before serving to enhance flavors.
- Dust with powdered sugar right before serving for a beautiful finish.
- Tip: Use a microplane for zesting lemons to avoid bitter pith.
- Tip: Chill the dessert for at least 2 hours for optimal texture.
Frequently Asked Questions
Can I make this ahead of time? How to store and reheat?
You can prepare lemon desserts up to 2 days in advance. Store them in an airtight container in the refrigerator, and serve chilled or at room temperature without reheating.
What can I substitute for lemon juice?
If you don’t have lemon juice, you can use an equal amount of lime juice or white vinegar for a similar tartness. Just keep in mind that the flavor profile will change slightly.
How do I know when it’s done?
170°F (77°C). For cakes, a toothpick inserted in the center should come out clean after about 25-30 minutes at 350°F (175°C).
Can I freeze this? How long does it last?
You can freeze lemon desserts like cakes and curds for up to 3 months. Wrap them tightly in plastic wrap and aluminum foil to prevent freezer burn, and thaw in the refrigerator overnight before serving.
Why did my lemon meringue pie turn out runny?
Your lemon meringue pie may turn out runny if the lemon filling didn’t reach the proper temperature (should be about 170°F/77°C) or if it didn’t set long enough in the oven. Ensure you cook it until it’s thickened and bubbly for the best results.

- Make Cheesecake Up to 3 Days Ahead: Tips for Best Flavor & Texture - March 4, 2026
- Easy No-Bake Cool Doen Cheesecake: Quick Recipe & Tips - March 4, 2026
- Decadent Dulce de Leche Cheesecake: Easy Step-by-Step Recipe - March 4, 2026