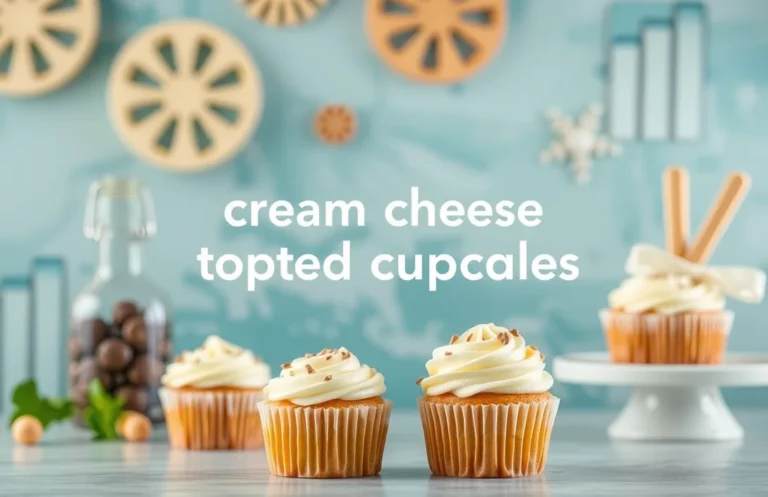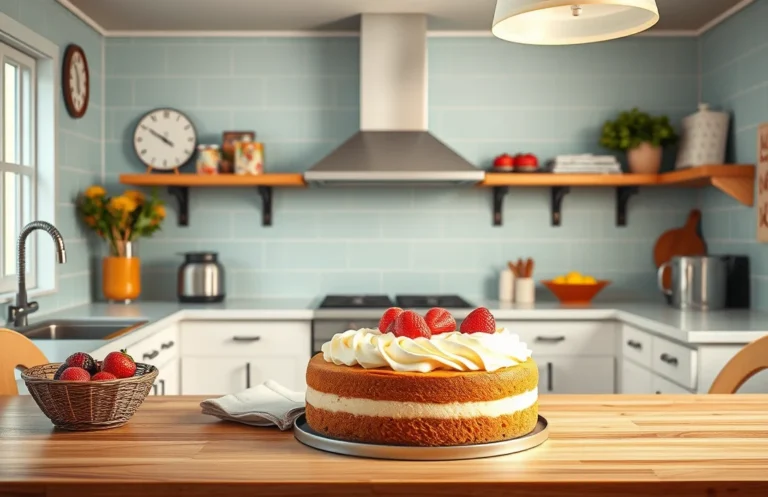
Light and Moist Coconut Cake Recipe: Step-by-Step Instructions
There’s something undeniably delightful about a coconut cake that combines fluffy texture with rich tropical flavor. Perfect for celebrations or just because you need a sweet treat, this cake will make your taste buds dance with joy. Picture a moist, airy slice topped with creamy coconut frosting—pure bliss!
Get ready to bake a scrumptious coconut cake in just 2 hours with a medium difficulty level, serving 8-10 generous slices. You’ll follow clear, step-by-step instructions to create a cake that looks as fabulous as it tastes!
| Prep Time | Cook Time | Total Time | Servings | Difficulty |
|---|---|---|---|---|
| 30 minutes | 30 minutes | 1 hour | 8-10 | Medium |
Coconut Cake Story
Coconut cake is a delightful treat that has roots deeply embedded in various cultures, often associated with celebrations and special occasions. Its light texture, rich coconut flavor, and often a beautiful presentation make it a favorite for birthdays, weddings, and holidays.
- Historical significance: Coconut cake is believed to have originated in the Caribbean, where coconuts are abundant. It represents the tropical charm and festivity, making it a popular choice for gatherings.
- Cultural variations: Different regions have their unique takes on coconut cake. For example, in the Southern United States, it’s often layered with fluffy frosting, while in some Asian cultures, it may be steamed and served with sweet toppings.
- Appeal for celebrations: The moist, sweet flavor of coconut cake resonates with many, making it a centerpiece dessert for celebratory events. Its versatility allows for creative decorations that can suit any theme.
- Personal connection: For many, coconut cake evokes memories of family gatherings and cherished moments, adding to its significance. Baking this cake can be an act of love, connecting generations through shared recipes and traditions.
Ingredients List
This section provides a comprehensive list of ingredients needed to create a delicious coconut cake inspired by the Preppy Kitchen style. Each ingredient plays a crucial role in achieving the cake’s moist texture and rich coconut flavor, so let’s make sure you have everything on hand before we start baking!
| Item | Amount/Specification | Notes |
|---|---|---|
| All-purpose flour | 2 ½ cups (315g) | Sifted for a lighter texture |
| Baking powder | 1 tablespoon (12g) | Ensure it’s fresh for proper rising |
| Salt | ½ teaspoon (3g) | Balances sweetness |
| Unsalted butter | 1 cup (226g) | Softened to room temperature |
| Sugar | 2 cups (400g) | Granulated for sweetness |
| Eggs | 4 large | At room temperature for best incorporation |
| Coconut milk | 1 cup (240ml) | Full-fat for richness |
| Shredded coconut | 1 cup (100g) | Sweetened or unsweetened, based on preference |
| Vanilla extract | 1 teaspoon (5ml) | Enhances flavor |
- For allergies: Substitute dairy with coconut yogurt or almond milk if needed.
- Tip: Make sure all ingredients are at room temperature for better mixing.
- Common mistake: Do not overmix the batter; stop as soon as the dry ingredients are incorporated.
Kitchen Equipment Needed
Before you dive into baking your coconut cake, it’s essential to gather the right kitchen tools. Having the appropriate equipment on hand not only streamlines the baking process but also ensures that your cake turns out perfectly every time. Here’s a list of what you’ll need for this delightful recipe.
- Mixing Bowls: Use at least two medium-sized mixing bowls. One will be for combining your dry ingredients, and the other for your wet ingredients. It’s crucial to keep these separate to ensure an even mix.
- Measuring Cups and Spoons: Accurate measurements are key in baking. You’ll need a set of dry measuring cups (1 cup, ½ cup, ⅓ cup, and ¼ cup) and liquid measuring cups, along with measuring spoons for precise ingredient amounts.
- Electric Mixer: A stand mixer or hand mixer will make creaming the butter and sugar a breeze. Aim for a fluffy texture, which should take about 3-5 minutes on medium speed. If you don’t have a mixer, a whisk can work, but it will require more effort.
- Rubber Spatula: A flexible spatula is perfect for folding your ingredients together gently. This tool will help maintain the airiness of the batter, ensuring a light and fluffy cake.
- Baking Pans: You will need two 9-inch round cake pans. Make sure to grease and flour them to prevent sticking. If you have parchment paper, placing it at the bottom of the pans is a great way to ensure easy release.
- Cooling Rack: After baking, transfer your cakes to a cooling rack to allow them to cool completely. This prevents sogginess and ensures a nice texture.
- Offset Spatula: This is a handy tool for frosting your cake smoothly. It allows you to spread icing easily without disturbing the cake layers.
Step-by-Step Instructions
This section will guide you through the precise steps to bake a delicious coconut cake inspired by Preppy Kitchen style. Each step includes exact measurements and timing to ensure success in your baking adventure.
- Prep the Oven and Cake Pans: Preheat your oven to 350°F (175°C). Grease and flour two 9-inch round cake pans, ensuring you tap out any excess flour. This step is crucial to prevent sticking, allowing for a smooth cake release.
- Mix the Dry Ingredients: In a medium bowl, whisk together 2 cups (240g) all-purpose flour, 1 ½ teaspoons baking powder, ½ teaspoon baking soda, and ½ teaspoon salt. The mixture should be light and airy, indicating proper aeration.
- Cream the Butter and Sugar: In a large mixing bowl, beat together 1 cup (226g) unsalted butter (softened) and 2 cups (400g) granulated sugar using a hand or stand mixer on medium speed for about 4-5 minutes until pale and fluffy. You should smell the buttery aroma, and the mixture should have a creamy consistency without any graininess.
- Add the Eggs: Gradually add in 4 large eggs (room temperature), one at a time, mixing well after each addition. The batter should be smooth and slightly glossy. If it appears curdled, continue mixing; it will come together.
- Incorporate Coconut and Milk: Stir in 1 teaspoon vanilla extract and 1 cup (240ml) coconut milk until combined. Fold in 1 ½ cups (120g) sweetened shredded coconut. The batter should be thick yet pourable and full of coconut flakes.
- Combine Wet and Dry Ingredients: Gradually fold the dry mixture into the wet mixture using a spatula. Mix until just combined, being careful not to overmix to ensure a tender cake texture. The batter should be thick and slightly lumpy but without any dry flour pockets.
- Bake the Cakes: Divide the batter evenly between the prepared pans. Bake in the preheated oven for 25-30 minutes. The cakes are done when a toothpick inserted in the center comes out clean and the edges are lightly golden. Allow them to cool in the pans for 10 minutes before transferring to a wire rack.
Pro Chef Tips
Making the perfect coconut cake requires attention to detail and an understanding of common pitfalls. Here are some expert tips to ensure your cake turns out moist, fluffy, and bursting with coconut flavor.
- Use fresh coconut for enhanced flavor: While shredded coconut works well, using freshly grated coconut adds a richer taste and texture. If using dried coconut, soak it in warm water for 10 minutes to rehydrate before incorporating it into the batter.
- Don’t overmix the batter: Overmixing can lead to a dense cake. Mix until the ingredients are just combined, and you see no dry flour. The batter should be slightly lumpy; this ensures a light and airy texture once baked.
- Measure accurately: Baking is a science, so use a kitchen scale for precise measurements. For instance, use 2 cups (240g) of all-purpose flour and 1 cup (200g) of granulated sugar. This attention to detail prevents inconsistencies in texture.
- Room temperature ingredients are key: Ensure your eggs and butter are at room temperature before mixing. This helps the batter to emulsify better, resulting in a smoother batter and a more even rise. Aim for 68°F (20°C) before you start.
- Check for doneness: Your cake is ready when a toothpick inserted into the center comes out clean or with a few moist crumbs. Avoid the temptation to open the oven door too early, as this can cause the cake to collapse.
- Cool properly: After baking, let the cake cool in the pan for 10-15 minutes before transferring it to a wire rack. This prevents it from becoming soggy and helps maintain its structure.
Variations and Substitutions
This section provides options for modifying the coconut cake recipe to accommodate different dietary needs or preferences. Whether you’re looking to make the cake gluten-free, dairy-free, or simply want to swap ingredients for a different flavor profile, these variations ensure everyone can enjoy a slice.
| Item | Amount/Specification | Notes |
|---|---|---|
| All-purpose flour | 2 cups (240g) | Substitute with 2 cups (240g) gluten-free flour blend for a gluten-free option. |
| Sugar | 1 ½ cups (300g) | Use coconut sugar for a more caramel-like flavor. |
| Unsalted butter | ½ cup (113g) | Substitute with ½ cup (120ml) coconut oil for a dairy-free option. |
| Milk | 1 cup (240ml) | Use almond milk or oat milk for a dairy-free cake. |
| Coconut milk | 1 cup (240ml) | Full-fat coconut milk adds moisture; light versions may result in a drier cake. |
| Eggs | 4 large | For vegan options, replace with 1 cup unsweetened applesauce or 4 flax eggs (1 tablespoon ground flaxseed mixed with 2.5 tablespoons water per egg). |
- For an added flavor kick, consider folding in ½ cup of toasted shredded coconut or ½ cup of chopped pineapple.
- If you want a lighter cake, separate the eggs and whip the egg whites to stiff peaks before folding them into the batter.
- To prevent the cake from sticking, ensure you grease your cake pans well and consider lining them with parchment paper.
- Be cautious with baking times if using different pan sizes; smaller pans may bake faster, while larger pans could take longer.
Serving Suggestions
Serving your coconut cake in delightful and creative ways can elevate the experience for your guests or family. Here are some tasty suggestions to complement the flavors of this coconut cake and ensure everyone enjoys each bite.
- Fresh Fruit Topping: Consider adding a medley of tropical fruits such as sliced mango, pineapple, or strawberries on top of the cake. These fruits not only add a pop of color but also a refreshing contrast to the sweetness of the cake. Arrange the fruit decoratively around the edges for an eye-catching presentation.
- Coconut Whipped Cream: Whip 1 cup of heavy cream until soft peaks form, then gently fold in ¼ cup of sweetened shredded coconut and a tablespoon of powdered sugar. This creamy topping will enhance the coconut flavor of the cake while providing a light and airy texture. Serve it on the side in a small bowl for guests to add as they wish.
- Chocolate Drizzle: Melt ½ cup of semi-sweet chocolate chips in the microwave in 30-second intervals, stirring until smooth. Drizzle the melted chocolate over the cake just before serving for a decadent touch. The rich chocolate pairs beautifully with the coconut’s sweetness and adds a luscious finish.
- Pair with Coffee or Tea: Coconut cake pairs wonderfully with a robust cup of coffee or a soothing herbal tea. The bitterness of coffee balances the sweetness of the cake, while a ginger or chamomile tea provides a relaxing complement. Set up a small beverage station for guests to choose their perfect pairing.
- Decorative Garnish: For a final touch, sprinkle some toasted coconut flakes on top of the cake before serving. This adds not just flavor but also a delightful crunch and visual appeal. Make sure to toast the flakes at 350°F (175°C) for 5-7 minutes until golden brown, stirring halfway through to prevent burning.
Quick Summary
| Prep Time | Cook Time | Total Time | Servings |
|---|---|---|---|
| 30 minutes | 25 minutes | 55 minutes | 8 servings |
- Preheat oven to 350°F: Ensure accurate temperature for even baking.
- Mix dry ingredients: Combine 2 cups of all-purpose flour, 1.5 tsp baking powder, and 1/2 tsp salt.
- Cream butter and sugar: Beat 1 cup unsalted butter with 2 cups sugar until fluffy.
- Add eggs gradually: Incorporate 4 large eggs one at a time for a smooth batter.
- Add coconut milk: Use 1 cup for moisture and flavor enhancement.
- Cool completely: Let cake cool in the pan for 10 minutes before transferring to a wire rack.
- Use fresh coconut: Freshly shredded coconut elevates flavor and texture.
- Don’t overmix: Mix just until combined to maintain a light cake.
- Let it rest: Allow the cake to set overnight for deeper flavor.
Frequently Asked Questions
Can I make this ahead of time? How to store and reheat?
You can make the coconut cake a day in advance and store it in an airtight container at room temperature. To reheat, simply warm individual slices in the microwave for about 10-15 seconds.
What can I substitute for coconut milk?
If you don’t have coconut milk, you can use an equal amount of whole milk mixed with a tablespoon of shredded coconut for flavor. Alternatively, almond milk or oat milk can work, but the taste will differ slightly.
How do I know when it’s done?
Your coconut cake is done when a toothpick inserted in the center comes out clean or with a few moist crumbs attached. The edges should be slightly golden, and the top should spring back when gently pressed.
Can I freeze this? How long does it last?
Yes, you can freeze the coconut cake for up to 3 months. Just wrap it tightly in plastic wrap and then in aluminum foil to prevent freezer burn.
Why did my coconut cake turn out dry?
Your coconut cake might have turned out dry if it was overbaked or if the batter was mixed too long. Make sure to check the baking time and use the toothpick test to avoid overbaking.

- 10 Best Cheese Knife With Holes For Smooth Slice 2026 - March 9, 2026
- Make Cheesecake Up to 3 Days Ahead: Tips for Best Flavor & Texture - March 4, 2026
- Easy No-Bake Cool Doen Cheesecake: Quick Recipe & Tips - March 4, 2026