Make-Ahead Cheesecake: Tips and Recipe for Perfect Storage
Cheesecake is that dreamy dessert that brings smiles to every gathering. With its creamy texture and rich flavor, it’s perfect for celebrations or simply indulging after dinner. The best part? You can make it ahead of time, allowing all the delicious flavors to meld together overnight!
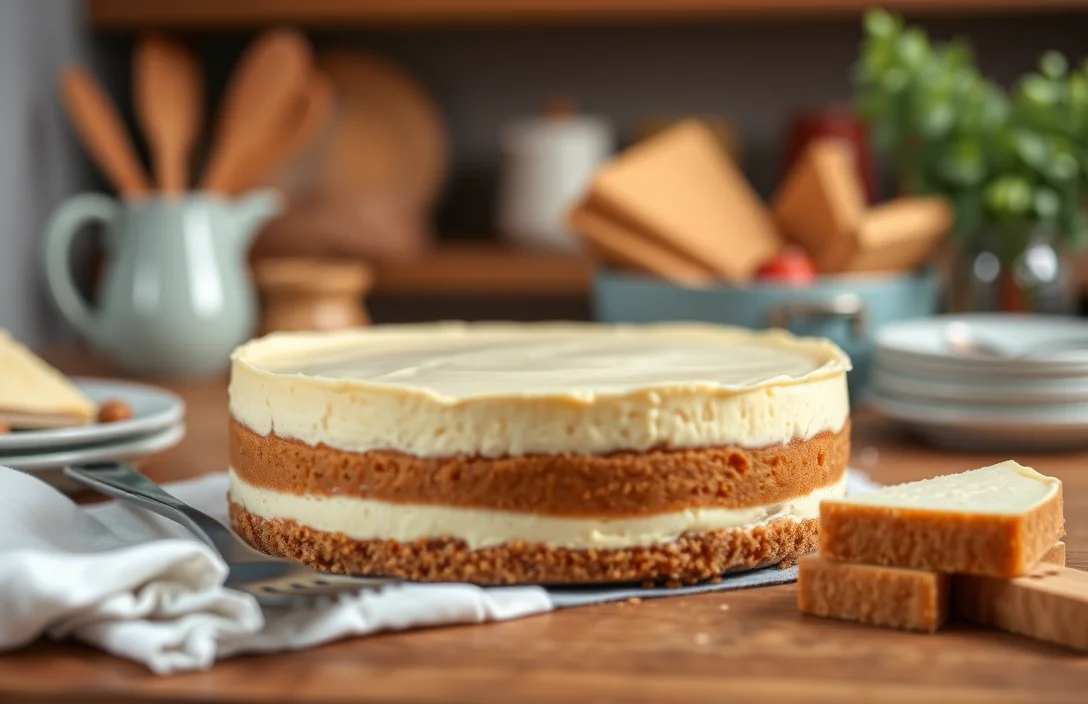
Get ready to impress with this simple, make-ahead cheesecake recipe that takes just 30 minutes of prep and 1 hour to bake. This recipe serves 8 people and is easy to follow, even for beginners.
| Prep Time | Cook Time | Total Time | Servings | Difficulty |
|---|---|---|---|---|
| 30 minutes | 1 hour | 1 hour 30 minutes | 8 | Easy |
Cheesecake Origins and Appeal
Cheesecake has a rich history that spans various cultures and traditions, making it a beloved dessert for countless occasions. Understanding its origins and cultural significance can enhance your appreciation for this creamy delight, especially when considering making it ahead of time.
Cultural Variations
- Ancient Roots: The earliest known cheesecake dates back to ancient Greece, where it was served to athletes during the first Olympic Games in 776 B.C. It was made with simple ingredients like cheese, flour, and honey.
- Regional Twists: Different cultures have their own takes on cheesecake. For example, the Italian ricotta cheesecake is lighter than its New York counterpart, which is dense and rich, often made with cream cheese.
- Modern Adaptations: In recent years, flavors like matcha, pumpkin spice, and chocolate have been incorporated, reflecting contemporary tastes while keeping the classic essence intact.
Occasions for Cheesecake
- Celebratory Events: Cheesecake is a popular choice for birthdays, weddings, and holidays, serving as a delectable centerpiece that pleases a crowd.
- Casual Gatherings: Whether it’s a family dinner or a get-together with friends, cheesecake can be made ahead of time, allowing for stress-free hosting.
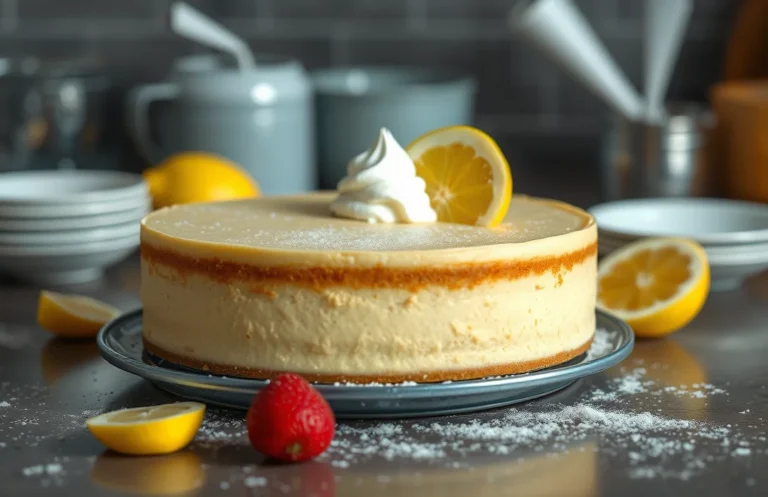
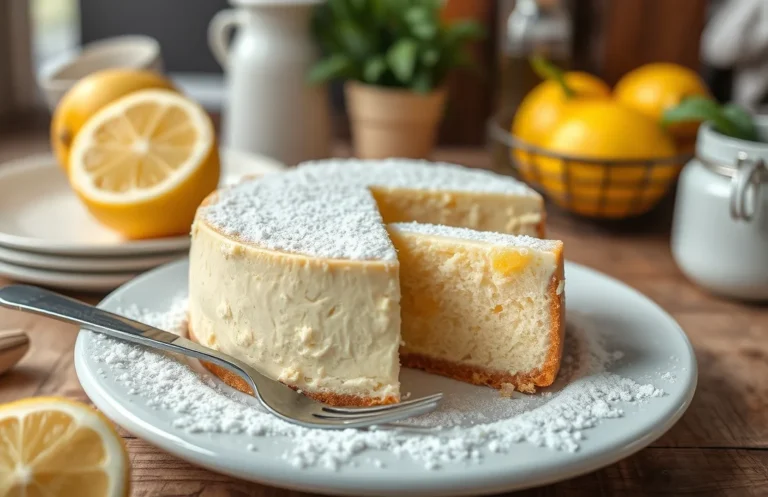
- Seasonal Celebrations: From festive pumpkin cheesecake in the fall to refreshing lemon varieties in summer, this dessert adapts beautifully to seasonal ingredients.
Cooking cheesecake the day before not only enhances its flavors but also allows for a smoother serving experience, making it a practical choice for any occasion. Stay tuned for the next section where we’ll dive into the ingredients for the perfect cheesecake!
Ingredients for Perfect Cheesecake
Making cheesecake the day before serving is a fantastic way to ensure it sets perfectly and develops rich flavors. Having the right ingredients on hand is crucial for achieving that creamy texture and delightful taste. Below, you’ll find a complete list of ingredients with precise measurements to help you create a cheesecake that’s ready to impress.
| Item | Amount/Specification | Notes |
|---|---|---|
| Cream Cheese | 24 ounces (680g) | Softened to room temperature for easier mixing |
| Sugar | 1 cup (200g) | Granulated white sugar |
| Sour Cream | 1 cup (240g) | Adds creaminess and a slight tang |
| Vanilla Extract | 2 teaspoons | Pure vanilla for best flavor |
| Eggs | 3 large | Room temperature for even mixing |
| Graham Cracker Crumbs | 1 ½ cups (150g) | For the crust |
| Unsalted Butter | ½ cup (113g) | Melted, for crust binding |
| Salt | ¼ teaspoon | Enhances flavor |
- Tip: For a gluten-free option, substitute graham cracker crumbs with almond flour.
- Tip: Ensure cream cheese is well softened; this prevents lumps.
- Tip: Chill the cheesecake overnight in the refrigerator to enhance its flavor.
- Tip: Use a water bath while baking to prevent cracks on the surface.
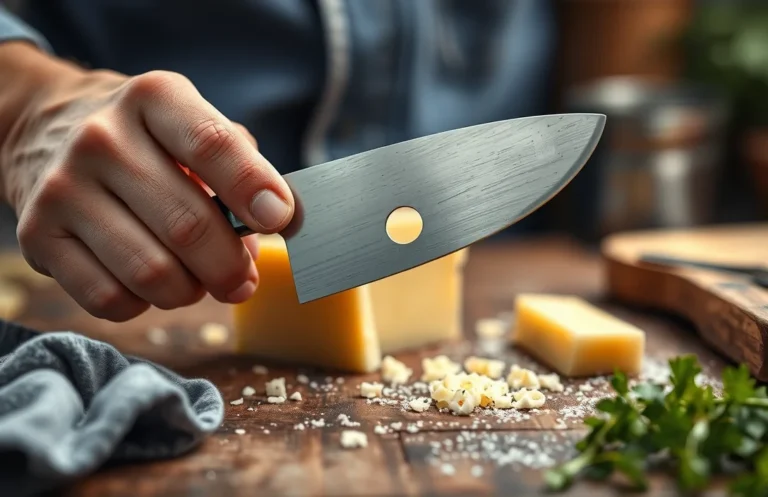
Essential Kitchen Equipment
Making cheesecake the day before serving is not only possible, but it’s often recommended for achieving the best flavor and texture. To ensure that your cheesecake comes out perfectly, it’s essential to have the right kitchen equipment on hand. Here’s a list of tools you’ll need to prepare your cheesecake with ease.
- Mixing Bowls: You will need at least two mixing bowls — one large (3-quart) for combining the cream cheese, sugar, and eggs, and a smaller one (1-quart) for mixing any additional ingredients like vanilla extract or lemon zest. Choose glass or stainless steel bowls for best results, as they are easy to clean and won’t retain odors.
- Springform Pan: A 9-inch springform pan is essential for making cheesecake. This type of pan allows you to easily remove the cheesecake without damaging its delicate structure. Ensure that the pan is well-greased with butter or lined with parchment paper on the bottom for easy release after baking.
- Oven Setup: Preheat your oven to 325°F (160°C) before you start mixing your ingredients. This temperature is perfect for baking cheesecake, allowing it to cook evenly without cracking. Place your oven rack in the center position to ensure even heat distribution.
Pro tip: If you’re using a water bath to prevent cracks, ensure your springform pan is wrapped tightly with aluminum foil to prevent water from seeping in.
Step-by-Step Cheesecake Instructions
Making cheesecake the day before serving is not only possible but often recommended for the best flavor and texture. This section will guide you through the entire process, from preparing the crust to baking the filling, ensuring your cheesecake is ready to impress when it’s time to serve.
- Prepare the Crust: Preheat your oven to 350°F (175°C). In a medium bowl, combine 1 ½ cups (150g) of graham cracker crumbs, ½ cup (100g) of granulated sugar, and ½ cup (115g) of melted unsalted butter. Mix until the crumbs are evenly moistened. Press the mixture firmly into the bottom of a 9-inch (23cm) springform pan, creating an even layer. Bake for 10 minutes, then let it cool completely before adding the filling.
- Make the Filling: In a large mixing bowl, beat 24 ounces (680g) of cream cheese at room temperature until smooth and creamy, about 2-3 minutes. Gradually add 1 cup (200g) of granulated sugar, 1 teaspoon of vanilla extract, and 3 large eggs, one at a time, mixing until just combined. Be careful not to overmix, as this can incorporate too much air. The mixture should be smooth and slightly thick.
- Baking Process: Pour the filling over the cooled crust, smoothing the top with a spatula. Bake at 325°F (160°C) for 60-70 minutes, or until the edges are set but the center still has a slight jiggle. Do not open the oven door during the first 20 minutes to prevent cracking. Allow the cheesecake to cool in the pan for 1 hour, then refrigerate for at least 4 hours, preferably overnight, to achieve the best texture.
Chef’s tip: If you notice cracks forming during baking, don’t worry! They can often be hidden with toppings.
Pro Tips for Cheesecake Success
Making cheesecake a day ahead is not only possible, but it can also enhance its flavor and texture. However, to ensure your cheesecake turns out perfectly, there are key techniques to avoid common pitfalls like cracking and to implement effective cooling methods.
Avoiding Cracks
- Use a water bath: Baking your cheesecake in a water bath (bain-marie) helps regulate the temperature and prevents cracking. Wrap the bottom of your springform pan tightly in aluminum foil and place it in a larger pan filled with about 1 inch of hot water before baking at 325°F (163°C). The steam keeps the cheesecake moist.
- Don’t overmix: Overmixing the batter incorporates too much air, which can lead to cracks. Mix the cream cheese until smooth, then gently fold in the other ingredients just until combined.
- Cool gradually: After baking, turn off the oven and crack the door open, allowing the cheesecake to cool slowly for about an hour. This reduces the temperature shock that can cause cracking. Once cool, refrigerate for at least 4 hours or overnight.
Cooling Techniques
- Chill in the right environment: After cooling at room temperature, place your cheesecake in the refrigerator. Cover it loosely with plastic wrap to avoid condensation, which can make the surface wet.
- Wait before serving: Cheesecake tastes best after a day in the fridge as the flavors meld and the texture firms up. To serve, let it sit at room temperature for about 30 minutes for easier slicing.
Cheesecake Variations and Substitutions
When planning to make cheesecake a day ahead, it’s essential to consider variations and substitutions that cater to dietary needs and flavor preferences. Adapting the crust or filling not only enhances the cheesecake experience but also ensures that everyone can enjoy it, regardless of dietary restrictions.
Gluten-Free Crust
For those avoiding gluten, a gluten-free crust is a simple swap that doesn’t compromise flavor or texture. Here’s how to create one:
- 1 ½ cups gluten-free graham cracker crumbs (150g)
- ½ cup unsalted butter, melted (113g)
- 2 tablespoons sugar (25g)
- Preheat your oven to 350°F (175°C).
- In a medium bowl, mix the gluten-free graham cracker crumbs, melted butter, and sugar until combined. The mixture should feel damp but crumbly.
- Press the mixture firmly into the bottom of a 9-inch springform pan. Bake for 8-10 minutes until lightly golden. Let it cool completely before adding the filling.
Vegan Alternatives
If you’re looking for a vegan cheesecake option, it’s entirely possible to create a delicious alternative using plant-based ingredients. Here’s a quick recipe:
- 1 ½ cups soaked cashews (150g)
- ½ cup coconut cream (120ml)
- ½ cup maple syrup (120ml)
- 1 tablespoon lemon juice (15ml)
- 1 teaspoon vanilla extract (5ml)
- In a blender, combine soaked cashews, coconut cream, maple syrup, lemon juice, and vanilla extract. Blend until smooth, scraping down the sides as needed. The mixture should be creamy and silky.
- Pour the mixture over the cooled crust and smooth the top with a spatula. Chill in the refrigerator for at least 4 hours or overnight.
Chef’s tip: Use fresh fruit or a fruit compote as a topping for a refreshing twist on your cheesecake.
| Ingredient | Amount |
|---|---|
| Gluten-Free Crust | 1 ½ cups graham cracker crumbs, ½ cup butter, 2 tbsp sugar |
| Vegan Cheesecake Filling | 1 ½ cups cashews, ½ cup coconut cream, ½ cup maple syrup, 1 tbsp lemon juice, 1 tsp vanilla |
Both variations can be made a day in advance, stored covered in the refrigerator, and will taste even better the next day as the flavors meld beautifully. Enjoy creating a cheesecake that everyone can love!
Serving and Plating Ideas
Serving your cheesecake with thoughtful garnishes and sauces can elevate the dessert from simple to spectacular. Since you’ve made your cheesecake the day before, it’s important to present it beautifully and enhance the flavors with delicious pairings. Here are some creative ideas to impress your guests!
Fruit Toppings
Fresh fruit is a classic complement to cheesecake. Here are a few delicious options:
- Strawberries: Slice 1 cup of fresh strawberries and toss them with 1 tablespoon of sugar. Let them sit for 15-20 minutes to release their juices before serving.
- Blueberries: Use 1 cup of fresh blueberries, either whole or slightly mashed with a fork for a more rustic look.
- Raspberries: A handful of raspberries sprinkled on top adds a bright pop of color and tartness.
- Peaches: Slice 1 ripe peach and arrange the slices artfully on top of the cheesecake for a summer twist.
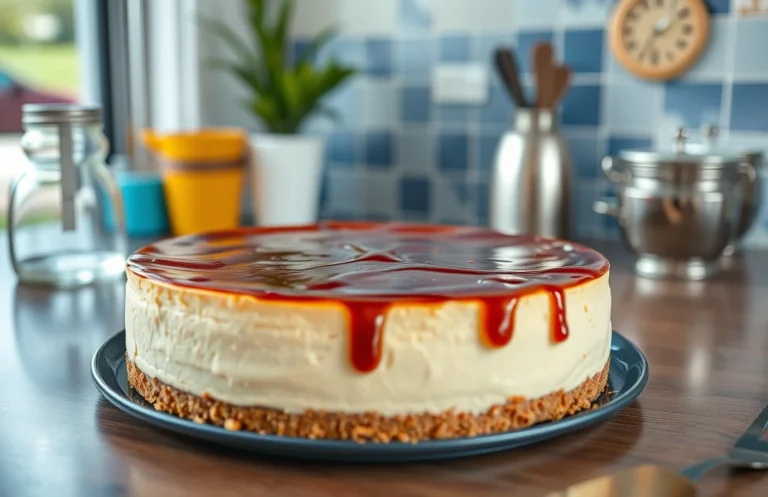
Serving with Sauces
Drizzling a sauce over your cheesecake can add richness and enhance the taste. Here are two easy sauces you can prepare:
Chef’s tip: Prepare your sauces while the cheesecake is chilling to save time.
- Chocolate Sauce: In a small saucepan, melt ½ cup of semi-sweet chocolate chips with 2 tablespoons of heavy cream over low heat, stirring until smooth. Drizzle over cheesecake just before serving.
- Caramel Sauce: Heat ½ cup of caramel sauce until warm, then drizzle it over the cheesecake for a sweet contrast.
For an elegant presentation, slice the cheesecake and place a piece on each plate. Top with a dollop of whipped cream and a sprinkle of your chosen fruit or sauce. Enjoy your beautifully plated, make-ahead cheesecake!
Quick Summary
| Prep Time | 30 minutes |
|---|---|
| Cook Time | 1 hour |
| Total Time | 8 hours (including chilling) |
| Servings | 8 |
- Chill overnight: Let the cheesecake sit in the fridge for at least 6-8 hours for best texture.
- Room temperature ingredients: Use room temperature cream cheese for a smooth batter.
- Bake in a water bath: Prevent cracks and ensure even baking by using a water bath.
- Cool gradually: Allow the cheesecake to cool in the oven with the door ajar to avoid sudden temperature changes.
- Wrap tightly: If making ahead, wrap the cooled cheesecake tightly in plastic wrap to prevent drying out.
Frequently Asked Questions
Can I make this ahead of time? How to store and reheat?
You can absolutely make cheesecake a day before serving. Store it in the refrigerator, covered with plastic wrap, and enjoy it cold—no reheating necessary!
What can I substitute for cream cheese?
You can use mascarpone cheese or ricotta cheese for a different flavor and texture. Just keep in mind that the consistency may vary slightly, so adjust with a bit of sour cream if needed.
How do I know when it’s done?
Your cheesecake is done when the edges are set but the center still has a slight jiggle, which usually takes about 50-60 minutes at 325°F (163°C). It will continue to firm up as it cools, so don’t overbake!
Can I freeze this? How long does it last?
Yes, you can freeze cheesecake for up to 2-3 months. Wrap it tightly in plastic wrap and then in aluminum foil to prevent freezer burn.
What if I don’t have a springform pan?
If you don’t have a springform pan, use a regular cake pan lined with parchment paper for easy removal. Just be sure to let it cool completely before attempting to take it out!

- Make Cheesecake Up to 3 Days Ahead: Tips for Best Flavor & Texture - March 4, 2026
- Easy No-Bake Cool Doen Cheesecake: Quick Recipe & Tips - March 4, 2026
- Decadent Dulce de Leche Cheesecake: Easy Step-by-Step Recipe - March 4, 2026