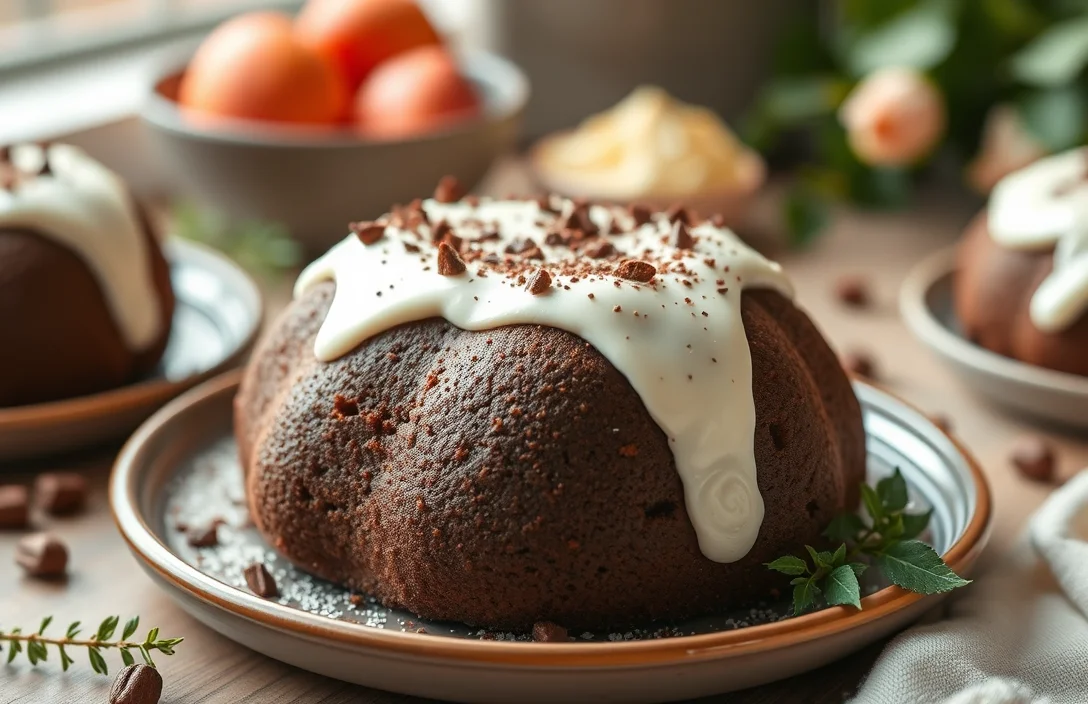
Mini Chocolate Bundt Cake with Cream Cheese Filling: Easy Recipe
There’s nothing quite like the rich, chocolatey aroma of a mini bundt cake baking in your oven, especially when it’s filled with creamy, tangy cream cheese. This dessert is perfect for any occasion, whether you’re celebrating a birthday or simply treating yourself on a weeknight. Each bite is a heavenly combination of moist chocolate cake and luscious filling that will have everyone asking for seconds!
Get ready to whip up this delightful treat in under 1 hour with a difficulty level of easy, serving 12 mini cakes. You’ll be surprised at how simple it is to create this delicious dessert using cake mix, oil, and sour cream.
| Prep Time | Cook Time | Total Time | Servings | Difficulty |
|---|---|---|---|---|
| 15 minutes | 25 minutes | 40 minutes | 12 | Easy |
Story Behind Mini Bundt Cake
Mini bundt cakes have become a beloved treat, combining the classic charm of traditional bundt cakes with the convenience and portion control of smaller sizes. This section delves into the origins of bundt cakes and the appeal of their mini counterparts, especially when it comes to a rich, chocolatey version filled with cream cheese.
Origin of Bundt Cakes
Bundt cakes originated from traditional European recipes, particularly those from Germany and Scandinavia, where the cake’s unique shape was designed to enhance baking and cooling. The word “bundt” itself is derived from the German word “bund,” meaning “a gathering.” These cakes were often made for celebrations, bringing people together over a delightful dessert.
- First introduced to America in the 1950s.
- Popularized by the Nordic Ware company, which created the iconic bundt pan.
- Versatile in flavor; can be made with various ingredients, including chocolate, vanilla, or spices.
Why Mini Versions?
Mini bundt cakes not only look adorable, but they also come with several advantages:
- Perfect for portion control, making them ideal for parties or gatherings.
- Faster baking time compared to larger cakes, reducing wait time.
- Easy to personalize, allowing for different fillings and toppings for each cake.
“Mini bundt cakes are perfect for sharing—everyone can have their own little slice of joy!”
When making a mini chocolate bundt cake with a cream cheese filling, using cake mix, oil, and sour cream makes this treat not only simple but also incredibly moist and flavorful. This approach allows home cooks to whip up a delicious dessert without the fuss, perfect for any occasion.
Ingredients for Chocolate Bundt
This section covers the essential ingredients you’ll need to create a delicious mini chocolate bundt cake with a creamy filling. Each ingredient plays a crucial role in achieving the right texture and flavor, so let’s ensure we’ve got everything lined up before we start baking!
| Item | Amount/Specification | Notes |
|---|---|---|
| Chocolate Cake Mix | 1 box (15.25 oz) | Use your favorite brand |
| Sour Cream | ½ cup (120g) | For added moisture and richness |
| Vegetable Oil | ⅓ cup (80ml) | Can substitute with melted coconut oil |
| Water | 1 cup (240ml) | Room temperature |
| Eggs | 3 large | At room temperature for better mixing |
| Cream Cheese | 8 oz (227g) | Softened for easy mixing |
| Powdered Sugar | ½ cup (60g) | For the cream cheese filling |
| Vanilla Extract | 1 teaspoon (5ml) | Adds flavor to the filling |
- For a gluten-free option, use a gluten-free chocolate cake mix.
- Ensure the cream cheese is at room temperature for a smooth filling.
- Measure the ingredients accurately for best results.
Necessary Kitchen Equipment
Before you dive into making your mini chocolate bundt cakes with cream cheese filling, it’s crucial to gather the right tools. Using the appropriate kitchen equipment not only makes the process smoother but also ensures that your cakes bake evenly and beautifully. Here’s what you’ll need for this recipe.
- Bundt Pan: A mini bundt pan is essential for shaping your cakes. Look for one with non-stick coating to prevent sticking. If you don’t have a mini bundt pan, you can use a standard-sized bundt pan but adjust the baking time accordingly.
- Mixing Bowls: You’ll need at least two mixing bowls: one for combining your cake mix, sour cream, and oil, and another for the cream cheese filling. Choose bowls that are large enough to allow for whisking and mixing without spillage.
- Measuring Tools: Precise measurements are key in baking. Use dry measuring cups for flour and sugar, and liquid measuring cups for oil and sour cream. A kitchen scale can also be helpful for accurate weight measurements if you prefer baking by weight.
- Whisk and Spatula: A whisk is essential for blending the cake batter until smooth, while a spatula will help you fold in the cream cheese filling gently without overmixing. Opt for a silicone spatula for easy scraping and mixing.
- Cooling Rack: Once baked, your mini bundt cakes will need a cooling rack to cool evenly. This prevents sogginess and allows the cakes to firm up properly.
Baking Instructions Step-by-Step
This section outlines the precise steps for preparing the batter, filling the bundt pan, and baking the mini chocolate bundt cakes. Following these instructions closely will ensure a delicious and perfectly baked cake with a creamy filling.
- Prepare the Batter: In a large mixing bowl, combine 1 box (15.25 oz) chocolate cake mix, ½ cup (120ml) vegetable oil, 1 cup (240ml) sour cream, and 3 large eggs. Using a hand mixer or stand mixer, beat the mixture on medium speed for 2-3 minutes until smooth and glossy. The batter should be thick and should not have any lumps.
- Make the Cream Cheese Filling: In a separate bowl, blend 8 oz (225g) cream cheese, ½ cup (60g) powdered sugar, and 1 teaspoon vanilla extract until creamy and smooth. This filling should have a thick, spreadable consistency with no lumps, ensuring it will create a delightful contrast in your bundt cakes.
- Fill the Bundt Pan: Preheat your oven to 350°F (175°C) while you prepare the pan. Grease a mini bundt pan with non-stick spray or softened butter. Fill each mini bundt cavity about halfway with the chocolate batter, then add a spoonful of the cream cheese filling in the center, and top with more chocolate batter until just full. Be careful not to overfill, as the cakes will rise as they bake.
- Baking Time: Place the bundt pan in the preheated oven and bake for 20-25 minutes. The cakes are done when they spring back to the touch and a toothpick inserted into the center comes out clean or with just a few moist crumbs. Avoid opening the oven door during the first 15 minutes to prevent collapsing.
Pro Tips for Perfect Bundt
Creating a mini chocolate bundt cake with cream cheese filling can be a delightful experience, but there are essential techniques to ensure your cake turns out perfectly. From proper mixing methods to cooling and preventing sticking, these tips will help you avoid common pitfalls and achieve a stunning dessert.
Mixing Techniques
- Do not overmix the batter: When combining the cake mix, oil, sour cream, and eggs, mix just until the ingredients are incorporated. Overmixing can lead to a dense texture, which is not ideal for a light and fluffy bundt cake.
- Fold in the cream cheese filling: When adding your cream cheese filling, gently fold it into the batter to keep the filling intact. This helps maintain the beautiful swirls without completely blending it into the cake batter.
Cooling Essentials
- Let the cake cool in the pan: After baking at 350°F (175°C) for about 25-30 minutes, allow the mini bundts to cool in the pan for 10-15 minutes. This helps the cake set and prevents it from breaking apart when you invert it.
- Use a wire rack for cooling: Once you’ve removed the cakes from the pan, place them on a wire rack to cool completely. This ensures proper air circulation and prevents sogginess on the bottom.
Avoiding Sticking
- Grease the pan thoroughly: Use a non-stick spray or butter and flour the bundt pan before adding the batter. This extra step is crucial for easy release, especially with intricate bundt designs.
- Tap the pan gently: After pouring the batter into the pan, tap it gently on the counter to eliminate any air bubbles. This helps the cake bake evenly and prevents sticking.
Variations and Substitutions
Customizing your mini chocolate bundt cake can make it more inclusive for various dietary needs and elevate its flavor profile. Here are some alternatives and variations you can consider to ensure everyone can enjoy this delicious treat.
Gluten-Free Options
If you need a gluten-free version, substitute the cake mix with a gluten-free chocolate cake mix. Make sure to check the label for any hidden gluten ingredients. Additionally, you can use:
- 1:1 gluten-free baking flour (such as Bob’s Red Mill) in place of regular cake mix.
Vegan Alternatives
To make this cake vegan-friendly, you can replace the eggs and dairy with plant-based options:
- Use 1/4 cup unsweetened applesauce instead of each egg.
- Replace the sour cream with 1/2 cup of unsweetened coconut yogurt or silken tofu blended until smooth.
- Opt for vegetable oil or melted coconut oil instead of regular oil.
Flavor Variations
Feel free to experiment with flavors to suit your palate:
- Add 1 teaspoon of espresso powder to enhance the chocolate flavor.
- Incorporate 1/2 teaspoon of peppermint extract for a minty twist.
- Mix in 1/2 cup of chocolate chips or chopped nuts for added texture.
Chef’s tip: For a richer filling, consider adding a splash of vanilla extract or a tablespoon of cocoa powder to the cream cheese mixture.
Serving and Plating Ideas
Presenting your mini chocolate bundt cakes attractively can elevate the dessert experience for your guests. By incorporating thoughtful toppings, garnishes, and pairing suggestions, you can enhance both flavor and visual appeal.
Toppings and Garnishes
- Dust with powdered sugar for a snowy finish that contrasts beautifully with the dark chocolate.
- Drizzle a simple chocolate ganache made from ½ cup heavy cream and 1 cup chocolate chips over the top for an indulgent touch.
- Top with fresh berries, like raspberries or strawberries, to add a pop of color and acidity.
- Serve with a dollop of whipped cream or a scoop of vanilla ice cream for a creamy texture contrast.
Pairing Suggestions
Pair your mini bundt cakes with complementary flavors for a delightful dessert experience:
- A rich coffee or espresso pairs well to balance the sweetness of the cake.
- A glass of dessert wine, like a Port or a sweet Riesling, enhances the chocolate flavors.
- For a non-alcoholic option, a milkshake or cold brew coffee can provide a refreshing contrast.
Serving Sizes
Each mini bundt cake serves approximately 1-2 people, making them perfect for sharing. Consider cutting each cake in half if you have several desserts to present, allowing guests to sample different flavors. This way, you can offer a variety of desserts without overwhelming portions.
Chef’s tip: For an extra special touch, serve the cakes on a tiered cake stand to create height and visual interest.
Quick Recipe Summary
This quick recipe summary gives you the essential ingredients and key steps for making a delightful mini chocolate bundt cake with cream cheese filling. Whether you’re a seasoned baker or a beginner, these highlights will provide an easy reference to ensure your baking experience is smooth and enjoyable.
Essential Ingredients
- 1 box chocolate cake mix (15.25 oz)
- ½ cup vegetable oil (120 ml)
- 1 cup sour cream (240 g)
- 3 large eggs
- 1 teaspoon vanilla extract
- 8 oz cream cheese, softened
- ½ cup powdered sugar (60 g)
Key Steps
- Preheat your oven to 350°F (175°C). Grease your mini bundt pan thoroughly to prevent sticking.
- In a large mixing bowl, combine the chocolate cake mix, vegetable oil, sour cream, eggs, and vanilla extract. Mix until smooth and well-blended, about 2 minutes.
- In a separate bowl, beat the softened cream cheese and powdered sugar until creamy and smooth.
- Fill each mini bundt mold halfway with the chocolate batter, then add a spoonful of the cream cheese mixture, followed by topping it with more chocolate batter until the molds are about ¾ full.
- Bake for 18-20 minutes, or until a toothpick inserted comes out clean. Allow the cakes to cool in the pan for 10 minutes before transferring to a wire rack.
Baking Time
Prep time: 15 minutes | Cook time: 18-20 minutes
Chef’s tip: Make sure not to overmix the batter; it should be smooth but slightly thick. This helps achieve a moist texture in the final cake.
Quick Summary
| Prep Time | 15 minutes |
|---|---|
| Cook Time | 25 minutes |
| Total Time | 40 minutes |
| Servings | 12 mini cakes |
- Mix ingredients: Combine cake mix, oil, sour cream, and eggs until smooth.
- Prepare filling: Beat cream cheese, sugar, and vanilla until creamy.
- Fill pans: Pour half the batter, add cream cheese filling, and top with remaining batter.
- Bake: Preheat oven to 350°F (175°C) and bake for 25 minutes.
- Cool: Let cakes cool in the pan for 10 minutes before transferring to a wire rack.
- Tip: Use room temperature ingredients for a smoother batter.
- Tip: Grease the bundt pan well to ensure easy removal.
- Tip: Don’t overmix the batter to keep the cakes light and fluffy.
Frequently Asked Questions
Can I make this ahead of time? How to store and reheat?
You can make the mini chocolate bundt cakes up to 2 days ahead of time. Store them in an airtight container at room temperature, and reheat in the microwave for about 10-15 seconds before serving.
What can I substitute for sour cream?
You can substitute sour cream with plain Greek yogurt for a similar tangy flavor and texture, using the same amount (1 cup). This will keep your cake moist and delicious!
How do I know when it’s done?
The mini bundt cakes are done when a toothpick inserted into the center comes out clean or with a few moist crumbs, usually after 22-25 minutes at 350°F (175°C). The tops should spring back when lightly touched.
Can I freeze this? How long does it last?
Yes, you can freeze the mini chocolate bundt cakes for up to 3 months. Wrap them tightly in plastic wrap and aluminum foil to prevent freezer burn.
What if I don’t have a mini bundt pan?
If you don’t have a mini bundt pan, you can use a standard muffin tin instead, adjusting the baking time to about 15-18 minutes. Just ensure you grease the tin well to avoid sticking!

- 10 Best Cheese Knife With Holes For Smooth Slice 2026 - March 9, 2026
- Make Cheesecake Up to 3 Days Ahead: Tips for Best Flavor & Texture - March 4, 2026
- Easy No-Bake Cool Doen Cheesecake: Quick Recipe & Tips - March 4, 2026