Chic Mini Desserts for Your Preppy Kitchen: Stylish & Easy Recipes
If you’re looking for delightful mini desserts that impress without the fuss, you’re in the right place! These charming treats are not just visually appealing; they pack a punch of flavor that will keep your guests coming back for more. Each bite-sized creation is perfect for any occasion, whether it’s a cozy dinner or a festive gathering.
Get ready to whip up delicious mini desserts in under 30 minutes! Each recipe comes with clear instructions, precise measurements, and tips to achieve that preppy kitchen flair. Perfect for 4-6 servings, and suitable for all skill levels.
| Prep Time | Cook Time | Total Time | Servings | Difficulty |
|---|---|---|---|---|
| 15 minutes | 15 minutes | 30 minutes | 4-6 | Easy |
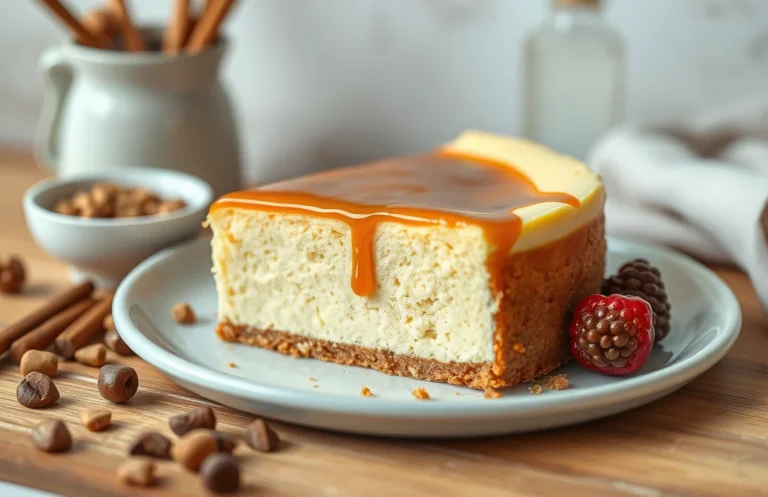
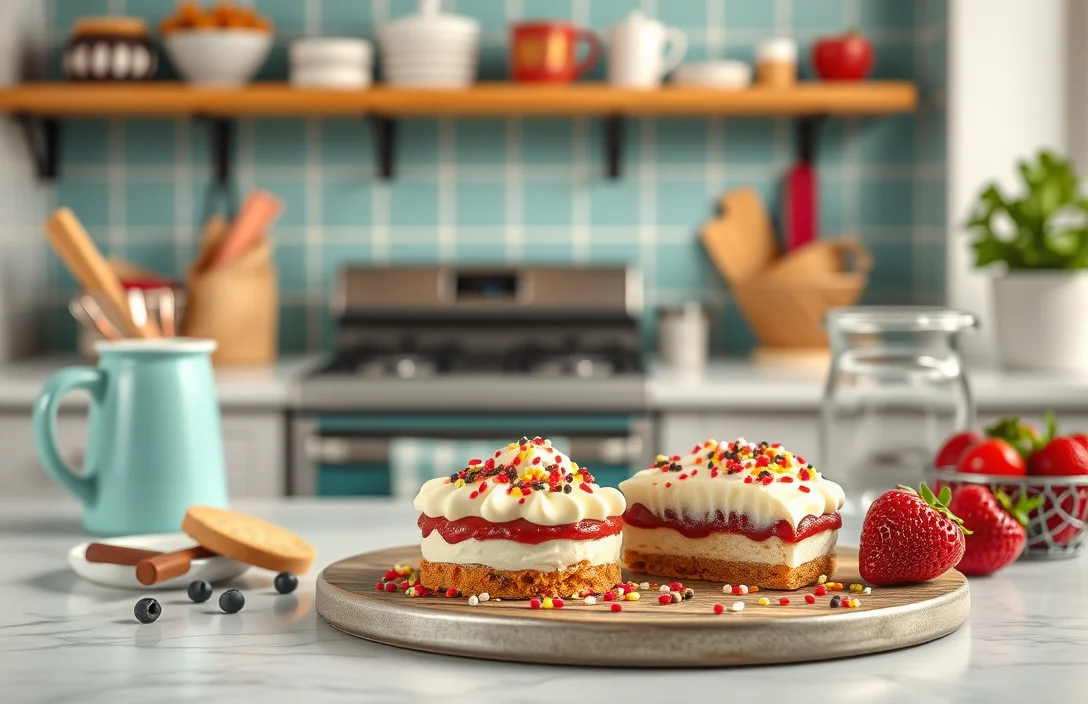
Charming Mini Cheesecakes
Mini cheesecakes are a delightful blend of rich flavor and elegant presentation, making them a perfect addition to any preppy kitchen. Their charming size not only makes them adorable but also allows for a variety of creative toppings and flavors that can elevate any gathering.
Origin of Cheesecake
Cheesecake has a rich history that dates back to ancient Greece, where it was made with simple ingredients like cheese, honey, and flour. Over the centuries, various cultures have added their twist, leading to the creamy, decadent versions we enjoy today. The classic New York-style cheesecake, with its dense and creamy texture, has become particularly popular and is the inspiration behind our mini version.
Why Mini Versions Shine
- Portion Control: Mini cheesecakes allow guests to indulge without overindulging, making them ideal for parties and gatherings.
- Versatility: You can experiment with flavors, from classic vanilla to fruity raspberry or chocolate, giving you endless options to match any occasion.
- Presentation: Their petite size makes them visually appealing, allowing for beautiful plating and garnishing, perfect for a stylish presentation.
Chef’s tip: Use seasonal fruits to top your mini cheesecakes for a fresh burst of flavor and vibrant color.
These mini treats are not only simple to make but also provide a touch of sophistication, making them a must-have in any preppy kitchen. Get ready to impress your friends and family with these charming bites of bliss!
Ingredients for Mini Cheesecakes
This section details the essential ingredients needed to create delightful mini cheesecakes that are not only stylish but also easy to prepare. Having the right ingredients in the proper amounts is crucial for achieving that smooth, creamy filling and the perfect graham cracker crust.
| Item | Amount/Specification | Notes |
|---|---|---|
| Cream Cheese | 16 ounces (450g) | Softened to room temperature for easy mixing |
| Sour Cream | ½ cup (120g) | Adds creaminess and tanginess |
| Granulated Sugar | ¾ cup (150g) | Adjust sweetness to taste |
| Vanilla Extract | 1 teaspoon (5ml) | Use pure vanilla for best flavor |
| Eggs | 2 large | Ensure they’re at room temperature |
| Graham Crackers | 1 ½ cups (150g) crushed | For the crust; finely crush for a smoother texture |
| Unsalted Butter | ½ cup (115g), melted | Bind the graham cracker crumbs together |
| Salt | ¼ teaspoon (1.5g) | Enhances flavor |
- For a gluten-free option: Substitute graham crackers with gluten-free cookies or almond flour.
- Common mistake: Ensure cream cheese is softened; otherwise, lumps will form in the batter.
- Presentation tip: For a preppy look, serve in clear mini dessert cups and top with fresh berries or a drizzle of chocolate.
Prep Work and Equipment
Having the right tools and preparing your workspace efficiently can make all the difference when creating stylish mini desserts. This section highlights essential baking equipment and preparation steps to ensure your mini desserts come out perfectly every time.
- Baking Pan: For mini desserts, a variety of baking pans can be used, but mini cheesecake or muffin pans are particularly effective. Look for a non-stick variety with 12 cups, each holding about 2-3 ounces of batter. This will help prevent sticking and ensure even baking.
- Preheating the Oven: Always preheat your oven to 350°F (175°C) at least 15 minutes before placing your mini desserts inside. This ensures that the desserts bake evenly and rise properly. A properly preheated oven will give your treats a beautiful golden color and a nice texture.
- Measuring Tools: Use precise measuring cups and spoons for accuracy. Baking is a science, and even slight deviations can affect the outcome. Invest in a kitchen scale for measuring dry ingredients, especially flour, to achieve consistent results.
- Mixing Bowls and Utensils: Have a few mixing bowls of varying sizes on hand, along with a whisk and spatula. A rubber spatula is perfect for folding in ingredients without deflating your batter. If your recipe includes cream or whipped toppings, keep an electric mixer nearby for ease.
- Cooling Racks: Once your mini desserts are baked, transferring them to a cooling rack is essential to prevent sogginess. Allow them to cool completely before serving for the best texture and flavor.
Chef’s tip: Line your baking pans with parchment paper for easy removal and a polished finish on your mini desserts.
Step-by-Step Baking Instructions
This section provides you with detailed instructions on mixing the batter and baking your mini desserts, ensuring they turn out perfectly every time. Follow these steps closely for a delightful and stylish treat that embodies the preppy kitchen aesthetic.
- Mixing the Batter: In a large mixing bowl, combine ½ cup (100g) granulated sugar and ½ cup (100g) unsalted butter, softened at room temperature. Use a hand mixer on medium speed to cream the mixture for about 2-3 minutes until it’s light and fluffy. You should see a pale yellow color and feel a light, airy texture.
- Add 2 large eggs, one at a time, mixing well after each addition. Scrape down the sides of the bowl with a spatula to ensure even incorporation. The batter should become smooth and glossy, with a slight increase in volume.
- In a separate bowl, whisk together 1 cup (125g) all-purpose flour, ½ teaspoon baking powder, and a pinch of salt. Gradually fold this dry mixture into the wet ingredients using a spatula, being careful not to overmix. Your batter should be thick but pourable, with no visible flour streaks remaining.
- Baking Time: Preheat your oven to 350°F (175°C). Line a mini muffin tin with paper liners or grease with cooking spray. Spoon the batter into each cup, filling them about ⅔ full. Bake for 12-15 minutes, or until the tops are lightly golden and a toothpick inserted in the center comes out clean.
- Once baked, remove from the oven and let the mini desserts cool in the pan for 5 minutes before transferring them to a wire rack. They should feel firm to the touch and have a lovely golden-brown top. Allow them to cool completely before decorating or serving.
Chef’s tip: If you notice that your mini desserts are browning too quickly, cover them loosely with aluminum foil during the last few minutes of baking.
Expert Tips for Success
Mastering mini desserts requires attention to detail, particularly in mixing and cooling techniques. These tips will help you achieve the perfect texture and presentation for your stylish treats.
- Avoid Overmixing: When combining your batter, mix just until the ingredients are incorporated. Overmixing can lead to tough, dense desserts instead of the light, airy texture you want in mini cakes or cookies. Aim for a smooth consistency without lumps, but don’t worry if a few small flour specks remain; they will blend in during baking.
- Cooling Tips: After baking, allow your mini desserts to cool in the pan for about 10-15 minutes before transferring them to a wire rack. This step helps them set properly and prevents them from crumbling. For even cooling, place the wire rack in a draft-free area; this will help maintain the shape and texture without drying them out.
- Be Mindful of Presentation: Mini desserts are all about aesthetics. Use colorful toppings like fresh berries, edible flowers, or a dusting of powdered sugar to elevate their appeal. Consider serving them on stylish platters or in clear cups to showcase their layers and textures, enhancing the overall preppy kitchen vibe.
Creative Variations and Substitutions
This section highlights delicious twists you can put on mini desserts to cater to dietary preferences or simply to switch things up. Whether you’re looking to make a vegan cheesecake or add vibrant fruit toppings, these variations ensure everyone can enjoy your mini desserts without compromising on flavor or presentation.
Vegan Cheesecake
Creating a vegan version of cheesecake is easier than you think! Here’s how to make a creamy, dreamy cheesecake without any dairy.
- 1 ½ cups raw cashews (soaked for at least 4 hours)
- ½ cup coconut cream
- ½ cup maple syrup
- ¼ cup coconut oil, melted
- 1 tablespoon lemon juice
- 1 teaspoon vanilla extract
To prepare, blend all ingredients in a high-speed blender until smooth and creamy. Pour the mixture into mini tart shells or silicone molds. Chill in the refrigerator for at least 4 hours until set. You want the texture to be firm yet creamy when you slice into it.
Fruit Toppings
Elevate your mini desserts with fresh fruit toppings that add color and flavor. Here are some delightful options:
- 1 cup mixed berries (strawberries, blueberries, raspberries)
- ½ cup mango, diced
- 1 banana, sliced
- 1 tablespoon honey or agave syrup (optional for extra sweetness)
For the perfect topping, toss your fruit with honey or agave syrup for extra gloss and sweetness. Let it sit for about 10 minutes to allow the flavors to meld.
Chef’s tip: Use seasonal fruits for the best flavor and presentation!
| Ingredient | Amount |
|---|---|
| Raw cashews | 1 ½ cups |
| Coconut cream | ½ cup |
| Maple syrup | ½ cup |
| Coconut oil | ¼ cup |
| Lemon juice | 1 tablespoon |
| Vanilla extract | 1 teaspoon |
Remember, if you’re using frozen fruit, make sure to thaw and drain it before adding it to your desserts to avoid excess moisture!
Plating and Serving Ideas
Presenting your mini desserts in a stylish way can elevate any gathering and add a touch of charm to your preppy kitchen aesthetic. Thoughtful garnishes and the right serving dishes can transform even the simplest desserts into eye-catching delights.
Garnishes
- Fresh Fruits: Use berries, citrus slices, or edible flowers to add color and freshness. A few blueberries or a delicate flower can make a cupcake pop.
- Chocolate Shavings: Grate dark or white chocolate over your desserts for a sophisticated touch. Aim for a fine texture that will melt in the mouth.
- Herbs: Mint leaves not only look beautiful but also bring a refreshing flavor. Place a single sprig atop a dessert to enhance its visual appeal.
- Powdered Sugar: Dusting a light layer of powdered sugar over desserts like mini cheesecakes or tarts can provide a classic, elegant finish.
Serving Dishes
The choice of serving dishes can greatly influence the presentation. Here are a few ideas:
| Dish Type | Best For |
|---|---|
| Mini Glass Jars | Layered desserts like parfaits or mousses |
| Elegant Plates | Individual tarts or cakes |
| Wooden Boards | Display a variety of mini desserts for a dessert bar |
Chef’s tip: Always ensure your dishes are clean and well-arranged; a cluttered presentation can detract from the beauty of your mini desserts.
Quick Summary
| Prep Time | Cook Time | Total Time | Servings |
|---|---|---|---|
| 30 minutes | 15 minutes | 45 minutes | 12 mini desserts |
- Choose the right molds: Use silicone molds for easy removal.
- Chill thoroughly: Allow desserts to set in the fridge for at least 2 hours.
- Preheat your oven: Ensure it’s at 350°F (175°C) before baking.
- Measure accurately: Use a kitchen scale for precise ingredient measurements.
- Decorate wisely: Use fresh fruits or edible flowers for a stunning finish.
Frequently Asked Questions
Can I make this ahead of time? How to store and reheat?
You can absolutely make mini desserts ahead of time! Store them in an airtight container in the refrigerator for up to 3 days, and enjoy them chilled or let them sit at room temperature for about 15-30 minutes before serving.
What can I substitute for [key ingredient]?
If you need to substitute for a key ingredient like cream cheese, you can use Greek yogurt for a lighter option or mascarpone cheese for a richer flavor in your mini desserts.
How do I know when it’s done?
Your mini desserts are done when they are set and have a slight jiggle in the center, which usually takes about 15-20 minutes in the oven, depending on the recipe. They should also have a lightly golden top if baked.
Can I freeze this? How long does it last?
You can freeze mini desserts for up to 2 months in a tightly sealed container. Just make sure to thaw them in the refrigerator overnight before serving for the best texture.
Why did my [dish] turn out [common problem]?
If your mini desserts turned out too dense, it might be because you overmixed the batter or used cold ingredients straight from the fridge. Always ensure your ingredients are at room temperature and mix until just combined for the best results.

- 10 Best Cheese Knife With Holes For Smooth Slice 2026 - March 9, 2026
- Make Cheesecake Up to 3 Days Ahead: Tips for Best Flavor & Texture - March 4, 2026
- Easy No-Bake Cool Doen Cheesecake: Quick Recipe & Tips - March 4, 2026