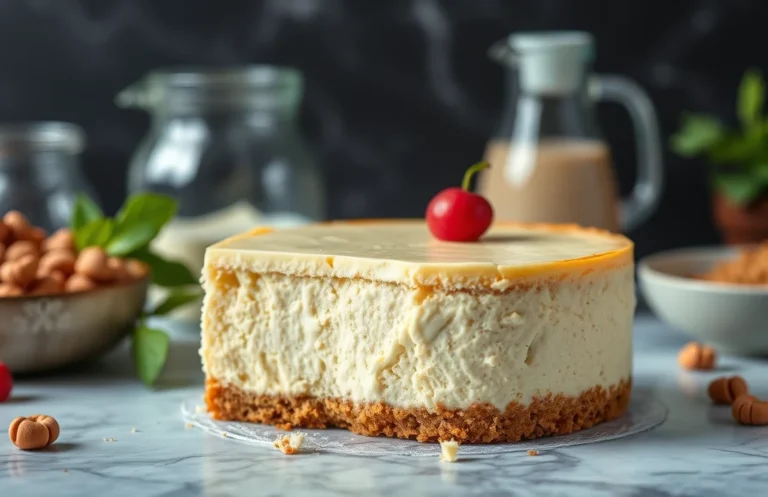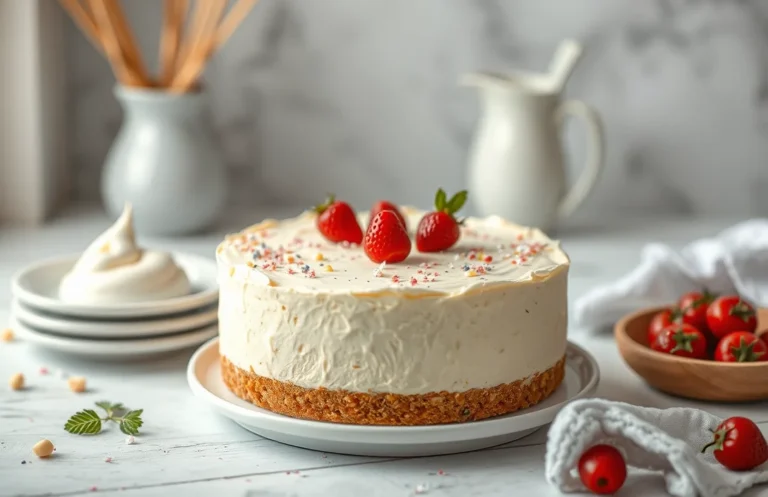
No Bake Peanut Butter Cheesecake: Easy Recipe in 30 Minutes
If you’re craving something rich and creamy without turning on the oven, this no bake peanut butter cheesecake is your answer. With a luscious peanut butter filling and a buttery graham cracker crust, it’s the kind of dessert that turns any weeknight or gathering into a special occasion. Trust me, you’ll want to savor every bite.
This recipe is easy to follow and perfect for all skill levels, taking just 20 minutes to prep, with a chill time of 4 hours. It serves 8 people and has a medium difficulty level.
| Prep Time | 20 minutes |
|---|---|
| Cook Time | 0 minutes |
| Total Time | 4 hours 20 minutes |
| Servings | 8 |
| Difficulty | Medium |
Origin and Special Features
No bake peanut butter cheesecake is a delightful dessert that combines the rich, creamy texture of cheesecake with the comforting flavor of peanut butter, all without needing to turn on the oven. This dessert is not only easy to prepare but also perfect for warm weather or when you want a quick treat without the hassle of baking.
Originating from the classic cheesecake recipes, the no bake version gained popularity for its simplicity and the ability to set in the refrigerator, making it a go-to for many home cooks. Here are some features that make this dessert unique:
- No Baking Required: Ideal for hot days when you don’t want to heat up the kitchen.
- Quick Prep Time: With about 15 minutes of preparation, you can whip this up in no time.
- Customizable: Feel free to add toppings like chocolate ganache, fresh fruit, or crushed cookies to elevate your cheesecake.
Chef’s tip: For a creamier texture, let the cheesecake set overnight in the fridge before serving.
Here’s a quick-reference table of what you can expect for preparation time:
| Task | Time |
|---|---|
| Preparation | 15 minutes |
| Chill Time | 4 hours (or overnight) |
This no bake peanut butter cheesecake is not only a crowd-pleaser but also a versatile dessert that you can make your own by experimenting with different flavors and toppings!
Ingredients List
This section provides a complete list of ingredients you’ll need to create a delicious no-bake peanut butter cheesecake. Having everything measured and ready will help streamline your cooking process and ensure the best results.
| Item | Amount/Specification | Notes |
|---|---|---|
| Graham cracker crumbs | 1 ½ cups (150g) | Can substitute with crushed cookies for a different flavor. |
| Unsalted butter | ½ cup (115g) | Melted, for the crust. |
| Cream cheese | 16 ounces (450g) | Softened to room temperature for ease of mixing. |
| Peanut butter | 1 cup (250g) | Use creamy or crunchy based on preference. |
| Powdered sugar | 1 cup (120g) | Sift to avoid lumps. |
| Heavy cream | 1 cup (240ml) | Whipped to soft peaks for lightness. |
| Vanilla extract | 1 teaspoon | For added flavor. |
- For a gluten-free version, use gluten-free graham crackers or almond flour.
- Ensure your cream cheese is fully softened to avoid lumps in the filling.
- Experiment with different nut butters if you want to vary the flavor.
Necessary Kitchen Equipment
To create your no bake peanut butter cheesecake, having the right kitchen equipment is essential for a smooth and enjoyable process. This section outlines the necessary tools and equipment you’ll need to prepare, mix, and assemble your cheesecake with ease.
| Item | Amount/Specification | Notes |
|---|---|---|
| 9-inch Springform Pan | 1 | For easy removal of the cheesecake after setting |
| Mixing Bowls | 2 (medium and large) | One for the crust, one for the filling |
| Electric Mixer | 1 | For achieving a smooth and creamy filling |
| Rubber Spatula | 1 | For folding ingredients and scraping bowls |
| Measuring Cups | 1 set | For accurate ingredient measurements |
| Measuring Spoons | 1 set | For precise amounts of smaller ingredients |
| Plastic Wrap | 1 roll | To cover the cheesecake while it chills in the fridge |
| Serving Utensil | 1 | For serving the cheesecake after it’s set |
- Ensure your mixing bowls are large enough to hold the filling without spilling.
- Using a springform pan is key; it allows you to release the cheesecake without damaging it.
- Have all your ingredients at room temperature for better mixing.
Preparation Instructions
This section will guide you through the essential pre-preparation steps for making a delightful no bake peanut butter cheesecake. Following these instructions carefully ensures the cheesecake has the perfect texture and flavor, so let’s get started!
- Begin by gathering all your ingredients and kitchen tools. You will need 1 ½ cups of graham cracker crumbs, ½ cup of unsalted butter (melted), 1 cup of creamy peanut butter, 1 cup of powdered sugar, 8 oz of cream cheese (softened), and 1 teaspoon of vanilla extract. It’s helpful to have everything measured out ahead of time.
- Preheat your refrigerator to a cool setting, around 34°F (1°C). This will help the cheesecake set quicker once you’ve finished mixing the filling. Ensure your mixing bowl is also clean and dry to avoid any contamination.
- In a medium bowl, combine the graham cracker crumbs and melted butter. Use a fork to mix them together until the crumbs are evenly coated and the mixture resembles wet sand. This should take about 1-2 minutes. The smell of the melted butter will be inviting!
- Transfer the crumb mixture into a 9-inch springform pan. Press it firmly into the bottom and slightly up the sides of the pan using the back of a measuring cup or your fingers. Make sure it’s compact; this will create a stable crust. Chill the crust in the refrigerator for about 10 minutes while you prepare the filling.
- In a large mixing bowl, beat the softened cream cheese with an electric mixer on medium speed until smooth and creamy, about 2-3 minutes. You should see no lumps, and the mixture should be fluffy and light in color. Then, add the peanut butter and continue mixing until fully combined.
- Gradually add the powdered sugar and vanilla extract to the peanut butter mixture while mixing on low speed. This will prevent a sugar cloud! Mix until everything is well incorporated and the filling is smooth and creamy. You may need to scrape down the sides of the bowl a couple of times.
Step-by-Step Recipe
This section provides detailed instructions for creating a no-bake peanut butter cheesecake, ensuring you achieve a creamy, flavorful dessert that impresses. Follow these steps closely for the best results, and don’t skip over the important tips I’ve included!
- Ingredients:
- 1 ½ cups graham cracker crumbs (150g)
- ½ cup unsalted butter, melted (115g)
- 1 cup creamy peanut butter (240g)
- 8 ounces cream cheese, softened (227g)
- 1 cup powdered sugar (120g)
- 1 teaspoon vanilla extract
- 1 cup heavy whipping cream (240ml)
- Prepare the crust: In a medium bowl, combine the graham cracker crumbs and melted butter. Mix until the crumbs are evenly coated and have a sandy texture. Press the mixture firmly into the bottom of a 9-inch springform pan using the back of a measuring cup. Chill in the refrigerator for at least 10 minutes to set.
- Make the filling: In a large mixing bowl, beat the softened cream cheese until smooth using an electric mixer on medium speed for about 2 minutes. The texture should be creamy with no lumps. Then, add the peanut butter, powdered sugar, and vanilla extract. Mix until well combined, about 1-2 minutes.
- Whip the cream: In a separate bowl, whip the heavy cream on high speed until stiff peaks form, which should take about 3-4 minutes. The cream should be fluffy and hold its shape. Gently fold the whipped cream into the peanut butter mixture using a spatula. Do this carefully to maintain the airy texture.
- Combine and chill: Pour the filling over the chilled crust, spreading it evenly with a spatula. Smooth the top to your liking. Cover the pan with plastic wrap or aluminum foil and refrigerate for at least 4 hours, or overnight for best results. The cheesecake should be firm to the touch when set.
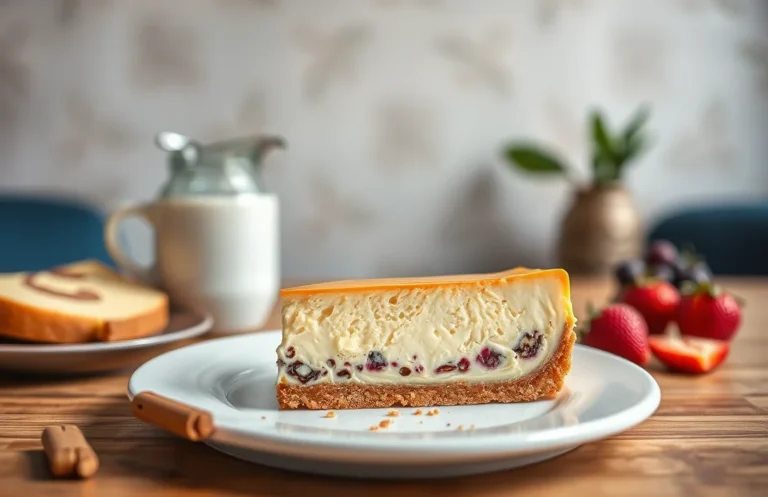
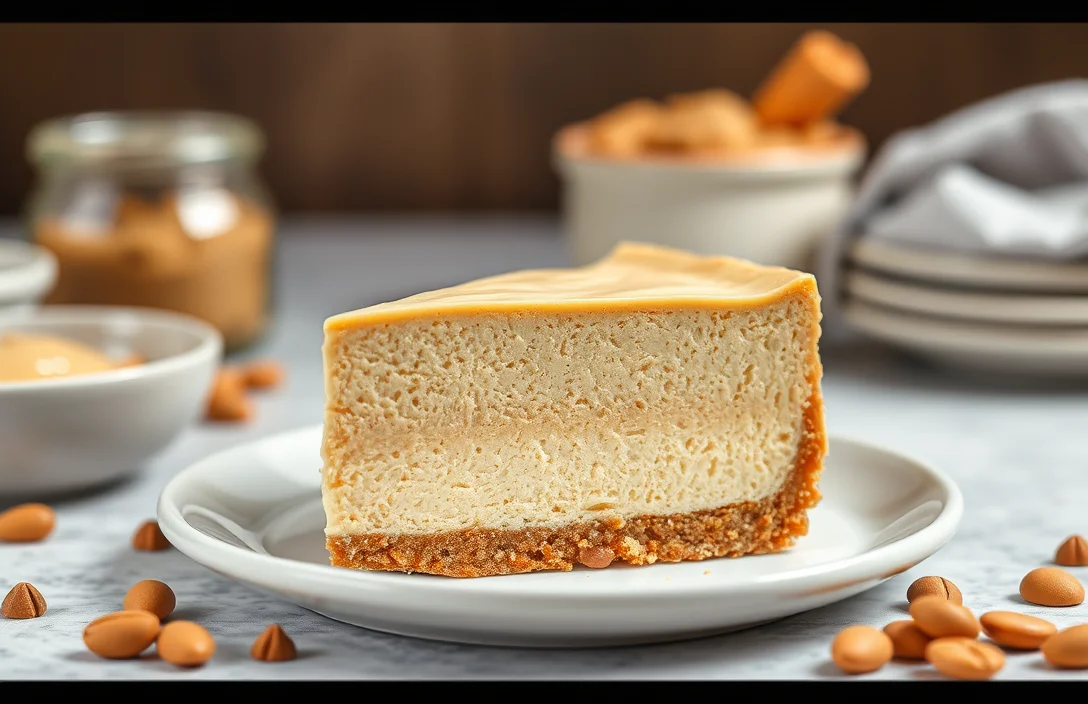
- Serve: Once set, remove the cheesecake from the springform pan. Optionally, you can garnish with chocolate sauce or crushed peanuts for an extra touch. Slice with a hot, dry knife for clean cuts. Enjoy your creamy, delicious no-bake peanut butter cheesecake!
Pro Tips and Common Mistakes
Creating a no bake peanut butter cheesecake can be a delightful experience, but a few expert tips can make all the difference in achieving that creamy, perfect texture. Understanding common pitfalls will help you avoid mishaps and ensure your cheesecake turns out beautifully every time.
- Use room temperature cream cheese: Let your cream cheese sit out for about 30 minutes before mixing. This makes it easier to blend smoothly with the other ingredients, preventing lumps in your cheesecake.
- Choose the right peanut butter: Opt for a creamy, natural peanut butter without added sugar or oils for the best flavor and texture. Crunchy peanut butter can add an interesting texture but may not blend as smoothly.
- Don’t skimp on chilling time: After assembling your cheesecake, let it chill in the refrigerator for at least 4 hours, or ideally overnight. This allows it to set properly and enhances the flavors.
- Maintain ingredient ratios: Stick to the recipe’s proportions closely. Too much cream cheese can make it heavy, while too little can result in a runny texture. Precision is key!
- Use a springform pan: This type of pan makes it easy to remove the cheesecake without damaging its shape. Ensure it’s tightly sealed to prevent leaks.
- Check for doneness: While this is a no bake recipe, the filling should be firm to the touch and not jiggle excessively when you gently shake the pan after chilling.
- Don’t rush the mixing: Take your time when mixing the filling. Whisk until fully combined to avoid any clumps, which can affect the texture.
Variations and Substitutions
This section highlights various variations and substitutions for the no-bake peanut butter cheesecake recipe, allowing you to customize it to suit your dietary needs and preferences. Whether you’re looking for a healthier option or need to accommodate allergies, these suggestions will help you create a delicious dessert that everyone can enjoy.
Ingredient Substitutions
- For a gluten-free option: Use gluten-free graham cracker crumbs or almond flour for the crust.
- Dairy-free alternative: Substitute cream cheese with vegan cream cheese and use coconut milk instead of heavy cream.
- Reduced sugar version: Swap out granulated sugar for a sugar substitute like erythritol or stevia, adjusting the amount to taste.
- Nut-free alternative: Replace peanut butter with sunflower seed butter for a nut-free cheesecake.
Flavor Variations
- Chocolate Peanut Butter Cheesecake: Fold in ½ cup of melted dark chocolate into the cream cheese mixture for a rich chocolate flavor.
- Maple Peanut Butter Cheesecake: Replace granulated sugar with ½ cup of maple syrup for a natural sweetener and unique flavor.
- Banana Peanut Butter Cheesecake: Mash 1 medium ripe banana and fold it into the cream cheese mixture for a fruity twist.
Chef’s tip: If you’re using substitutions for allergies, always double-check labels to ensure they meet your dietary needs.
| Ingredient | Standard Version | Substitution |
|---|---|---|
| Graham cracker crumbs | 1 ½ cups (150g) | Gluten-free graham cracker crumbs or almond flour |
| Cream cheese | 8 oz (227g) | Vegan cream cheese |
| Heavy cream | 1 cup (240ml) | Coconut milk |
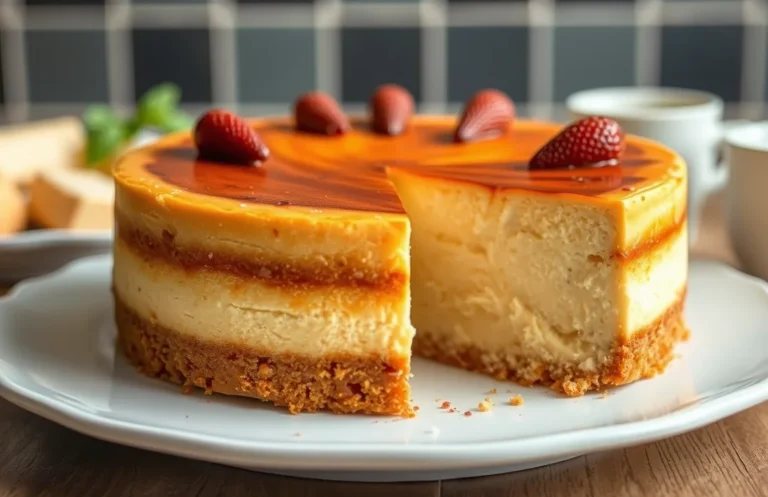
Serving Presentation Tips
Creating an eye-catching presentation for your no-bake peanut butter cheesecake can elevate your dessert from ordinary to extraordinary. With a few simple touches, you can impress your guests and make the dish look as delicious as it tastes.
- Garnish Wisely: Top the cheesecake with a drizzle of melted chocolate or a sprinkle of crushed peanuts for added texture and flavor. Fresh whipped cream also adds a lovely touch.
- Slice with Care: Use a sharp knife dipped in hot water to achieve clean slices. Wipe the knife after each cut to maintain neat edges on the cheesecake.
- Serve on Elegant Plates: Choose simple white plates or colorful ones to enhance the cheesecake’s presentation. A contrasting color will highlight the dessert beautifully.
Creative Serving Ideas
| Serving Idea | Description |
|---|---|
| Cup Portions | Serve individual portions in small dessert cups, layering the cheesecake with crushed graham crackers for a fun twist. |
| Chocolate Shell | Pour melted chocolate over the top before it sets for a shiny, decadent look. |
| Fruit Accompaniment | Serve with fresh berries on the side to add a pop of color and freshness. |
“Chef’s tip: Chill your cheesecake for at least 4 hours before serving to allow it to set properly and enhance the flavor!”
Lastly, remember to keep your presentation simple and elegant. A well-presented dish always tastes better, and your no-bake peanut butter cheesecake will surely be the star of the show!
Quick Summary
| Prep Time | 20 minutes |
|---|---|
| Chill Time | 4 hours |
| Total Time | 4 hours 20 minutes |
| Servings | 8 |
- Mix the crust: Combine 1 ½ cups of crushed graham crackers with ½ cup of melted butter and press into a springform pan.
- Prepare the filling: Beat 1 cup of creamy peanut butter, 8 oz of cream cheese, and 1 cup of powdered sugar until smooth.
- Add whipped cream: Fold in 1 cup of whipped cream gently to keep the filling light.
- Chill: Refrigerate for at least 4 hours for the cheesecake to set properly.
- Garnish: Top with chocolate syrup or crushed peanuts before serving.
- Tip 1: Use room temperature cream cheese for a smooth filling.
- Tip 2: Don’t skip the chilling time; it enhances the flavors and texture.
- Tip 3: For added richness, use natural peanut butter with no added sugar.
Frequently Asked Questions
Can I make this ahead of time? How to store and reheat?
You can definitely make this no-bake peanut butter cheesecake a day in advance. Store it in an airtight container in the refrigerator for up to 3 days; there’s no need to reheat!
What can I substitute for cream cheese?
You can substitute cream cheese with mascarpone cheese for a slightly different flavor, or use a dairy-free cream cheese if you’re looking for a vegan option.
How do I know when it’s done?
Your cheesecake is done when it has set and is firm to the touch; it should not jiggle in the center. After chilling for at least 4 hours, it should be ready to slice!
Can I freeze this? How long does it last?
Yes, you can freeze the cheesecake for up to 2 months in an airtight container. Just remember to thaw it in the refrigerator overnight before serving.
What if I don’t have a springform pan?
If you don’t have a springform pan, you can use a regular round cake pan lined with parchment paper for easy removal after chilling; just be gentle when taking it out.

- 10 Best Cheese Knife With Holes For Smooth Slice 2026 - March 9, 2026
- Make Cheesecake Up to 3 Days Ahead: Tips for Best Flavor & Texture - March 4, 2026
- Easy No-Bake Cool Doen Cheesecake: Quick Recipe & Tips - March 4, 2026