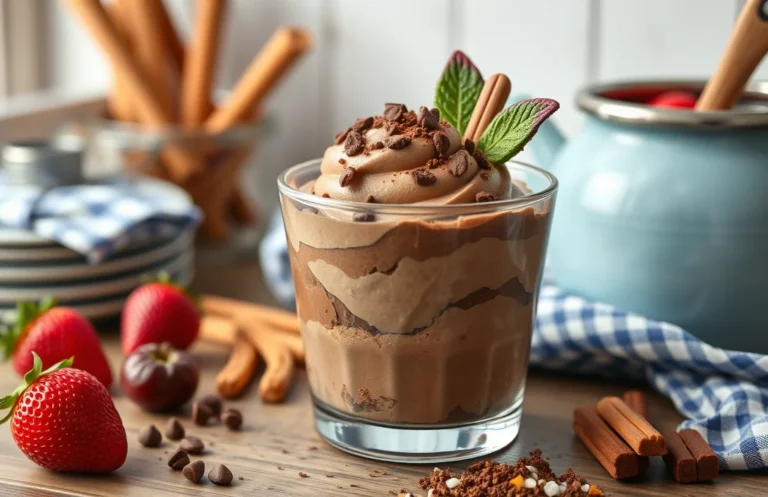
Delicious Oreo Cake Recipe: Step-by-Step from Preppy Kitchen
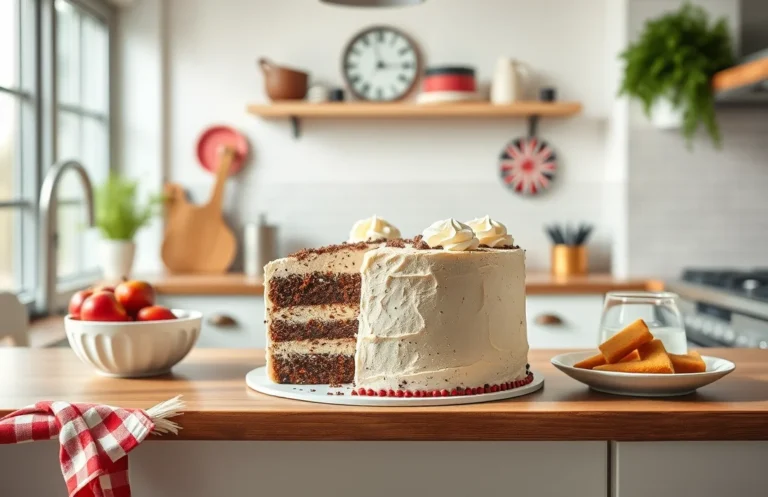
There’s something truly magical about an Oreo cake; it’s the perfect blend of rich chocolate and creamy filling that makes it an instant favorite. Whether you’re celebrating a birthday or just craving a sweet treat, this cake is sure to impress your family and friends with its delightful layers of flavor and texture.
You’ll find this recipe easy to follow, with total time of 1 hour, servings for 8, and a difficulty level of easy. Each bite will take you back to your childhood, making it a comforting classic for any occasion.
| Prep Time | Cook Time | Total Time | Servings | Difficulty |
|---|---|---|---|---|
| 20 minutes | 30 minutes | 1 hour | 8 | Easy |
Oreo Cake Story
The Oreo cake has become a beloved dessert, capturing the hearts of cookie lovers everywhere. With its rich, chocolatey layers and creamy filling, this cake is perfect for celebrations or simply indulging your sweet tooth.
Originating from the classic Oreo cookie, this cake brings together the nostalgia of childhood treats and the elegance of a homemade dessert. It’s a unique twist that combines the familiar flavors of Oreo with moist cake, making it a standout at parties and gatherings. Here are some highlights about this delightful cake:
- Best Served: At birthday parties, family gatherings, or as a special treat on a cozy evening.
- Texture: The cake should be fluffy and moist, with a creamy frosting that has a slight crunch from the crushed Oreos.
- Flavor Profile: A rich chocolate flavor complemented by the sweet and creamy vanilla filling, with bursts of crunch from the Oreo pieces.
Chef’s tip: For an extra layer of flavor, consider adding a hint of espresso powder to the cake batter!
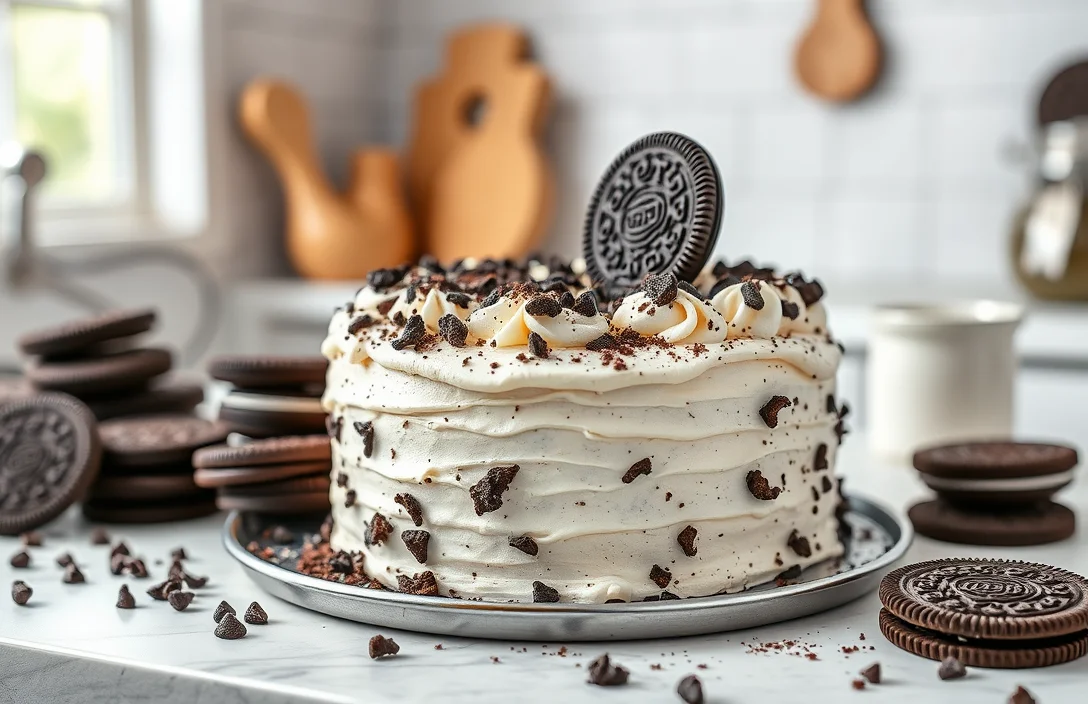
This Oreo cake is not just about taste; it’s also visually stunning, often decorated with whipped cream and more crushed Oreos on top. It’s a showstopper that will impress your guests and leave them asking for seconds.
Whether you’re celebrating a special occasion or just treating yourself, this Oreo cake recipe from Preppy Kitchen is sure to become a favorite in your home.
Ingredients List
This section outlines all the ingredients you’ll need to create a delicious Oreo cake following the Preppy Kitchen recipe. Having a detailed list ensures that you’re well-prepared and can achieve the best results in your baking adventure!
Cake Ingredients
| Item | Amount/Specification | Notes |
|---|---|---|
| All-purpose flour | 1 ¾ cups (220g) | Sifted for best results |
| Cocoa powder | ¾ cup (65g) | Unsweetened |
| Granulated sugar | 2 cups (400g) | Adjust based on taste preference |
| Baking powder | 1 ½ teaspoons | Ensure it’s fresh for proper rising |
| Baking soda | 1 teaspoon | Helps with leavening |
| Salt | ½ teaspoon | Balances sweetness |
| Eggs | 3 large | Room temperature for better mixing |
| Whole milk | 1 cup (240ml) | Can substitute with almond milk |
| Vegetable oil | ½ cup (120ml) | Adds moisture |
| Vanilla extract | 2 teaspoons | Pure vanilla is preferred |
Frosting Ingredients
| Item | Amount/Specification | Notes |
|---|---|---|
| Unsalted butter | 1 cup (226g) | Softened to room temperature |
| Powdered sugar | 4 cups (480g) | Sifted for smooth frosting |
| Cocoa powder | ½ cup (40g) | For chocolate flavor |
| Heavy cream | ¼ cup (60ml) | Adds creaminess |
| Vanilla extract | 1 teaspoon | Enhances flavor |
- For a gluten-free option, substitute all-purpose flour with a gluten-free blend.
- Egg substitutes can include flax eggs or applesauce for a vegan version.
- Ensure all ingredients are at
Kitchen Equipment
Having the right tools on hand can make all the difference when it comes to baking a delicious Oreo cake. Below is a comprehensive list of necessary equipment, along with prep steps to ensure everything flows smoothly as you create this delightful dessert.
- Baking pans: You’ll need two 9-inch round cake pans. Make sure to grease them with butter or non-stick spray and line the bottoms with parchment paper for easy removal.
- Mixing bowls: Use a large mixing bowl for combining your dry ingredients and a medium bowl for wet ingredients. This separation helps ensure even mixing and improves texture.
- Electric mixer: An electric mixer, either handheld or stand, is ideal for creaming the butter and sugar. This step should take about 3-5 minutes until the mixture is light and fluffy.
- Spatula: A rubber spatula will be essential for folding in the dry ingredients gently to avoid overmixing, which can lead to a dense cake.
- Measuring cups and spoons: Precision is key in baking, so have a set of measuring cups and spoons handy, including a kitchen scale if you prefer metric measurements.
- Cooling rack: Once your cakes are baked, transfer them to a cooling rack. This prevents condensation from forming and keeps the cake’s texture light and airy.
- Oreo cookie crumbles: A food processor or a resealable plastic bag with a rolling pin is great for crushing the Oreos into small pieces for both the cake and the frosting.
With these tools ready, you’re set to bake a beautifully layered Oreo cake that will impress everyone at your gathering!
Step-by-Step Instructions
This section provides detailed instructions for making the Oreo cake, preparing a delicious frosting, and assembling the cake. Following these steps will ensure you achieve the perfect Oreo cake that’s moist, flavorful, and beautifully presented.
- Making the Cake: Preheat your oven to 350°F (175°C). Grease and flour two 9-inch round cake pans, then set aside. In a large mixing bowl, whisk together 1 ¾ cups (220g) all-purpose flour, 1 ½ cups (300g) granulated sugar, ¾ cup (60g) unsweetened cocoa powder, 1 ½ teaspoons baking powder, 1 ½ teaspoons baking soda, and 1 teaspoon salt until well combined.
- Combine 2 large eggs, 1 cup (240ml) whole milk, ½ cup (120ml) vegetable oil, and 2 teaspoons of vanilla extract into the dry ingredients. Mix on medium speed for about 2 minutes. The batter should be smooth and slightly thick, with a rich chocolate aroma.
- Gently fold in 1 cup (120g) crushed Oreo cookies. Divide the batter evenly between the prepared pans. Bake in the preheated oven for 30-35 minutes or until a toothpick comes out clean when inserted. Let the cakes cool in the pans for 10 minutes before transferring them to a wire rack to cool completely.
- Preparing the Frosting: In a large bowl, beat 1 cup (230g) unsalted butter at room temperature until creamy. Gradually add 4 cups (480g) powdered sugar, ½ cup (60g) cocoa powder, and ¼ cup (60ml) heavy cream, mixing until smooth. The frosting should be light and fluffy, and it will have a rich chocolate smell.
- Assembling the Cake: Once the cakes have cooled completely, place one layer on a serving plate. Spread a generous layer of frosting on top, then sprinkle with ½ cup (60g) crushed Oreos. Place the second layer on top, and frost the top and sides of the cake. Decorate the top with additional Oreo pieces if desired.
Pro Chef Tips
Making an Oreo cake can be a delightful experience, but there are essential tips to keep in mind to ensure your cake turns out perfectly every time. These expert insights will help you avoid common pitfalls and elevate your baking skills.
Baking Tips
- Measure your ingredients accurately: Use a kitchen scale for dry ingredients like flour and sugar to ensure precision; even a slight variation can affect the cake’s texture.
- Preheat your oven: Always preheat to 350°F (175°C) before placing your cake inside. A properly heated oven ensures even baking and helps the cake rise effectively.
- Check for doneness: About 25-30 minutes into baking, use a toothpick to test the center. It should come out clean or with a few moist crumbs attached—this means your cake is ready!
- Let it cool properly: After removing the cake from the oven, allow it to cool in the pan for 10 minutes before transferring it to a wire rack. This prevents the cake from breaking apart.
Frosting Tips
- Use room temperature ingredients: Ensure your butter and cream cheese are at room temperature before mixing. This allows for a smoother, creamier frosting without lumps.
- Whip until fluffy: Beat your frosting on medium speed for at least 3-5 minutes until it’s light and airy. This will give your cake a beautiful texture and enhance the flavor.
- Crumb coat first: Apply a thin layer of frosting over the cooled cake before the final coat. This traps any loose crumbs and makes for a neater finish.
- Chill between layers: If your frosting is too soft, chill the cake for 15-20 minutes after the crumb coat. This helps the frosting firm up, making it easier to apply the final layer.
Variations and Substitutions
This section focuses on how you can easily adapt the Oreo cake recipe to meet various dietary needs or preferences without sacrificing flavor. Whether you’re looking for gluten-free or vegan alternatives, these substitutions will help you create a delicious cake that everyone can enjoy.
Gluten-Free Options
| Item | Amount/Specification | Notes |
|---|---|---|
| All-Purpose Gluten-Free Flour | 1 ¾ cups (210g) | Ensure it has a good binding agent like xanthan gum included. |
| Oreo Cookies (Gluten-Free) | 1 ½ cups (150g) | Check for certified gluten-free options available in stores. |
Vegan Alternatives
| Item | Amount/Specification | Notes |
|---|---|---|
| Unsweetened Applesauce | ½ cup (120ml) | Replaces eggs for moisture and binding. |
| Plant-Based Milk | 1 cup (240ml) | Any unsweetened variety such as almond or oat milk works well. |
| Vegan Butter | ½ cup (115g) | Use for a rich, buttery flavor without dairy. |
- Tip: Always double-check labels for hidden gluten or dairy.
- If using gluten-free flour, consider adding a bit more liquid, as it can absorb moisture differently.
- For a denser cake, reduce the baking powder by ¼ teaspoon.
- To enhance flavor, add a teaspoon of vanilla extract to your vegan batter.
Serving Suggestions
Presenting your Oreo cake beautifully can elevate its appeal and create a delightful experience for your guests. Here are some plating tips and beverage pairings that will complement your cake perfectly.
Plating Tips
- Use a clean, white plate to make the dark chocolate of the cake pop.
- Dust the top of the cake with powdered sugar or cocoa powder for a touch of elegance.
- Garnish with crushed Oreo cookies or chocolate shavings around the base of the cake.
- Add a dollop of whipped cream or a scoop of vanilla ice cream on the side.
Beverage Pairings
Choosing the right drink can enhance the rich flavors of your Oreo cake. Here are a few suggestions:
- Milk: A classic choice, ice-cold milk balances the sweetness of the cake.
- Coffee: Brew a strong cup of coffee; its bitterness contrasts nicely with the cake’s sweetness.
- Chocolate Milkshake: For a double chocolate treat, serve a chocolate milkshake alongside the cake.
- Red Wine: A light-bodied red wine, like Pinot Noir, offers a surprising pairing that complements the chocolate flavor.
Chef’s tip: Serve the cake slightly chilled for a firmer texture and enhanced flavor.
These serving suggestions will not only make your Oreo cake look fabulous but also ensure that every bite is a delight for the palate!
Quick Summary
| Prep Time | Cook Time | Total Time | Servings |
|---|---|---|---|
| 20 minutes | 30 minutes | 50 minutes | 8 servings |
- Preheat oven to 350°F (175°C) before mixing ingredients.
- Combine dry ingredients carefully to avoid lumps.
- Mix wet ingredients until fully incorporated for a smooth batter.
- Fold in crushed Oreos gently to maintain texture.
- Bake for 30 minutes, then check doneness with a toothpick.
- Cool completely before frosting to prevent melting.
- Tip: Use room temperature ingredients for better mixing.
- Tip: Chill the frosting for easier spreading.
- Tip: Reserve some crushed Oreos for garnishing the top.
Frequently Asked Questions
Can I make this Oreo cake ahead of time? How to store and reheat?
You can definitely make the cake up to 2 days in advance. Store it in an airtight container at room temperature, and if you need to reheat, pop it in the microwave for about 10-15 seconds.
What can I substitute for cream cheese in the frosting?
You can use mascarpone cheese as a delicious substitute for cream cheese in the frosting. It will give your frosting a slightly different texture and flavor, but it works wonderfully!
How do I know when the cake is done?
The cake is done when a toothpick inserted into the center comes out clean or with just a few moist crumbs. Also, the edges should start to pull away from the sides of the pan.
Can I freeze this Oreo cake? How long does it last?
Yes, you can freeze the Oreo cake for up to 3 months. Just wrap it tightly in plastic wrap and then in aluminum foil to prevent freezer burn.
What if I don’t have a springform pan?
If you don’t have a springform pan, you can use a regular round cake pan, but make sure to line it with parchment paper for easy removal. Just be careful when taking the cake out, as it may break more easily.

- Make Cheesecake Up to 3 Days Ahead: Tips for Best Flavor & Texture - March 4, 2026
- Easy No-Bake Cool Doen Cheesecake: Quick Recipe & Tips - March 4, 2026
- Decadent Dulce de Leche Cheesecake: Easy Step-by-Step Recipe - March 4, 2026