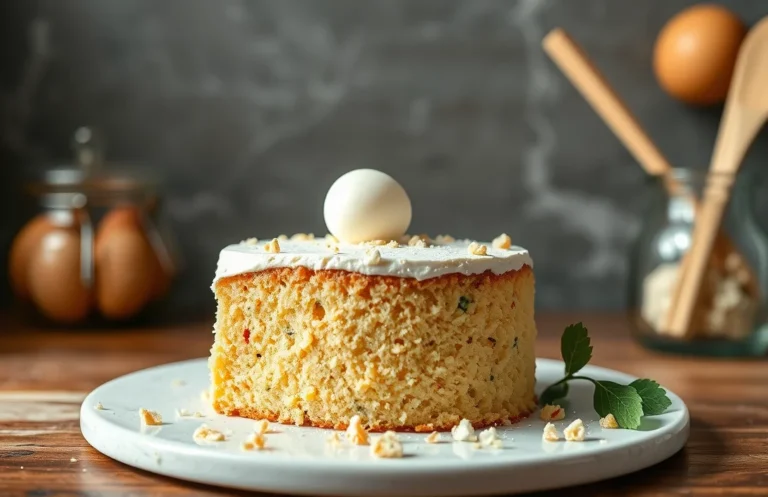
Perfect Cheesecake Crust: Easy Recipes for Graham, Oreo, & Nuts
There’s something incredibly satisfying about a perfectly crafted cheesecake crust. Whether you’re hosting a dinner party or simply indulging in a sweet treat after a long day, a solid crust sets the foundation for a creamy, decadent cheesecake that everyone will love. The crunch of the crust against the smooth filling is pure bliss!
Get ready for a reliable, tested cheesecake crust recipe with exact measurements and step-by-step instructions. Total time is around 30 minutes, with a difficulty level of easy, yielding 10 servings.
| Prep Time | Cook Time | Total Time | Servings | Difficulty |
|---|---|---|---|---|
| 10 minutes | 10 minutes | 30 minutes | 10 servings | Easy |
History of Cheesecake Crusts
The history of cheesecake crusts is rich and varied, reflecting the evolution of this beloved dessert over centuries. Understanding the origins and significance of different crusts can enhance your appreciation for this classic dish and inspire your own kitchen creations.
Traditional Origins
- Ancient Greece: The earliest versions of cheesecake can be traced back to ancient Greece, where they used simple ingredients like cheese, honey, and flour. The concept of a crust was not prominent, but it laid the groundwork for future adaptations.
- European Influence: As cheesecake recipes traveled through Europe, particularly during the Roman Empire, variations began to emerge. The crust became more defined, often utilizing crushed biscuits or bread to add texture and flavor.
Modern Variations
- Graham Cracker Crust: Introduced in the 19th century, the graham cracker crust became a staple in American cheesecakes. Its sweet, crumbly texture perfectly complements the creamy filling, becoming synonymous with classic cheesecake recipes.
- Oreo and Nut-Based Crusts: In recent decades, innovative home cooks have experimented with alternatives like Oreo cookies or crushed nuts, adding unique flavors and textures to the traditional cheesecake. These variations not only cater to different tastes but also accommodate dietary preferences.
Ingredients for Cheesecake Crusts
In this section, we’ll gather all the essential ingredients you’ll need for three delicious cheesecake crust options: the classic graham cracker crust, an indulgent Oreo crust, and a nut-based crust for a gluten-free alternative. Ensuring you have the right measurements and specifications is crucial for achieving the perfect texture and flavor.
| Item | Amount/Specification | Notes |
|---|---|---|
| Graham Cracker Crust | 1 ½ cups graham cracker crumbs (150g) | Finely crushed, for best texture |
| Granulated Sugar | ⅓ cup (67g) | Adjust to taste if desired |
| Unsalted Butter | ⅓ cup (75g), melted | Cool slightly before mixing |
| Oreo Crust | 1 ½ cups Oreo cookie crumbs (150g) | Remove the cream filling for a less sweet crust |
| Unsalted Butter | ⅓ cup (75g), melted | Same as above |
| Nut-Based Crust | 1 ½ cups nuts (e.g., almonds or walnuts) (150g) | Finely ground |
| Granulated Sugar | ¼ cup (50g) | Can be substituted with a sugar alternative |
| Unsalted Butter | ⅓ cup (75g), melted | Same as above |
- Tip: For a sweeter crust, you can increase the sugar by 1 tablespoon.
- To make a gluten-free crust, ensure your graham crackers or cookies are labeled gluten-free.
- If you prefer a firmer crust, refrigerate the crust for at least 30 minutes before filling.
Essential Kitchen Equipment
This section outlines the essential tools and equipment you’ll need to create the perfect cheesecake crust. Having the right equipment not only simplifies the process but also helps achieve a consistent and delicious result every time.
- Mixing Bowls: You’ll need at least two mixing bowls—one for combining dry ingredients like crumbs and sugar, and another for mixing in wet ingredients like melted butter. Choose bowls that are deep enough to prevent spillage during mixing.
- Measuring Cups and Spoons: Precision is key in baking. Use dry measuring cups for ingredients like graham cracker crumbs and sugar, and liquid measuring cups for melted butter or oil. Accurate measurements ensure that your crust has the right texture and flavor.
- Food Processor or Rolling Pin: A food processor is fantastic for quickly grinding cookies or nuts into fine crumbs. If you don’t have one, a rolling pin and a resealable plastic bag can work to crush cookies by hand. Just be sure to crush them until they resemble fine sand.
- Rubber Spatula: This tool is essential for scraping down the sides of your mixing bowls to incorporate all ingredients evenly. A good rubber spatula will help you fold in the melted butter with the crumbs without over-mixing.
- Baking Pan: A 9-inch springform pan is ideal for cheesecakes, as it allows for easy removal without damaging the crust. If you prefer, you can also use a standard pie dish, but the springform pan gives a more professional finish.
- Oven Thermometer: Ensure your oven is at the right temperature by using an oven thermometer. This guarantees even baking and prevents over-baking or under-baking your crust.
Step-by-Step Crust Preparation
Creating the perfect cheesecake crust is essential for a delightful dessert experience. In this section, I’ll guide you through three popular crust options: Graham cracker, Oreo, and nut-based crusts. Each has its own unique flavor and texture, and with these detailed steps, you’ll achieve a delicious base for your cheesecake.
Graham Cracker Crust
- 1 ½ cups graham cracker crumbs (150g)
- ⅓ cup granulated sugar (70g)
- ½ cup unsalted butter, melted (115g)
- Preheat your oven to 350°F (175°C). This ensures that your crust will bake evenly and become golden brown.
- In a mixing bowl, combine the graham cracker crumbs, sugar, and melted butter. Use a fork to mix until the mixture resembles wet sand. It should hold together when squeezed.
- Press the mixture firmly into the bottom and up the sides of a 9-inch (23cm) springform pan. Use the bottom of a glass to ensure it’s compact and even.
- Bake for 8-10 minutes until lightly golden. You’ll know it’s ready when it smells buttery and sweet.
Oreo Crust
- 1 ½ cups Oreo cookie crumbs (150g)
- ⅓ cup unsalted butter, melted (75g)
- Preheat your oven to 350°F (175°C). A properly heated oven is crucial for the crust to set correctly.
- In a bowl, combine the Oreo crumbs with melted butter. Mix until well combined; it should look like wet sand.
- Press the mixture into a 9-inch (23cm) springform pan, making sure it’s compact and evenly distributed.
- Bake for 8-10 minutes. The crust should feel firm to the touch and have a rich chocolate aroma.
Nut-Based Crust
- 1 ½ cups mixed nuts, finely chopped (150g)
- ⅓ cup pitted dates, chopped (50g)
- 2 tablespoons coconut oil, melted (30g)
- Preheat your oven to 350°F (175°C). This step is essential for toasting the nuts and enhancing their flavor.
- Combine the finely chopped nuts, chopped dates, and melted coconut oil in a bowl. Mix until everything is well incorporated and sticky.
- Press the mixture into the bottom of a 9-inch (23cm) springform pan, ensuring it’s packed tightly.
- Bake for 8-10 minutes. The crust should smell nutty and slightly toasted, and feel firm when cool.
Chef’s tip: If you have nut allergies, you can substitute the nuts in the nut-based crust with crushed gluten-free cookies or oats.
Pro Tips for Perfect Crusts
Creating the perfect cheesecake crust is all about achieving the right texture and avoiding common pitfalls like sogginess. Here are some expert tips to help you master your crust, ensuring it complements your cheesecake beautifully.
- Achieving Optimal Texture: For a crust that’s firm yet tender, make sure to finely crush your base ingredients, whether it’s graham crackers or nuts. A food processor works wonders here, aiming for a consistency similar to wet sand. When you pack the crust into your pan, use the bottom of a measuring cup to press it down firmly, ensuring it holds together during baking.
- Pre-Bake for Stability: Always pre-bake your crust at 350°F (175°C) for 8-10 minutes. This step helps to set the crust and prevents it from becoming too soft when you add the filling. You’ll know it’s ready when it’s slightly golden and fragrant, giving off a warm, toasty scent.
- Avoiding Sogginess: To keep your crust from becoming soggy, consider brushing it with a thin layer of melted chocolate or a mixture of egg white and water before adding the filling. This creates a moisture barrier, especially useful for creamier cheesecake recipes. Let it cool completely before filling.
- Use the Right Pan: Opt for a springform pan for cheesecakes, as it allows for easy removal without damaging your crust. Ensure the bottom is tightly sealed; you can wrap the outside with aluminum foil to prevent any leaks during baking.
- Cooling Time Matters: After baking, let your crust cool completely before adding the cheesecake filling. This helps maintain its texture and prevents the filling from melting the crust away.
Crust Variations and Substitutions
Finding the perfect cheesecake crust can cater to various dietary needs and preferences. Whether you’re avoiding gluten or looking for a vegan option, there are delicious alternatives that don’t compromise on taste or texture.
Gluten-Free Options
If gluten is a concern, you can easily create a gluten-free cheesecake crust using alternatives like almond flour or gluten-free cookies. Here’s a simple recipe:
- 1 ½ cups almond flour (150g)
- ¼ cup coconut oil, melted (60ml)
- 2 tablespoons maple syrup (30ml)
Combine the almond flour, melted coconut oil, and maple syrup in a bowl until the mixture resembles wet sand. Press it firmly into the bottom of your springform pan. Bake at 350°F (175°C) for 10-12 minutes, until lightly golden. Let it cool before filling.
Vegan Alternatives
For a vegan cheesecake crust, you can replace traditional ingredients with plant-based options. Here’s how:
- 1 ½ cups crushed vegan cookies (like Oreos or Digestives)
- ¼ cup coconut oil, melted (60ml)
- 2 tablespoons agave syrup (30ml)
Mix the crushed cookies, melted coconut oil, and agave syrup in a bowl until combined. Press this mixture into the bottom of your pan and bake at 350°F (175°C) for about 8-10 minutes. The crust should feel firm to the touch and slightly golden.
Chef’s tip: Always check labels for gluten-free or vegan certifications to ensure your ingredients meet your dietary requirements.
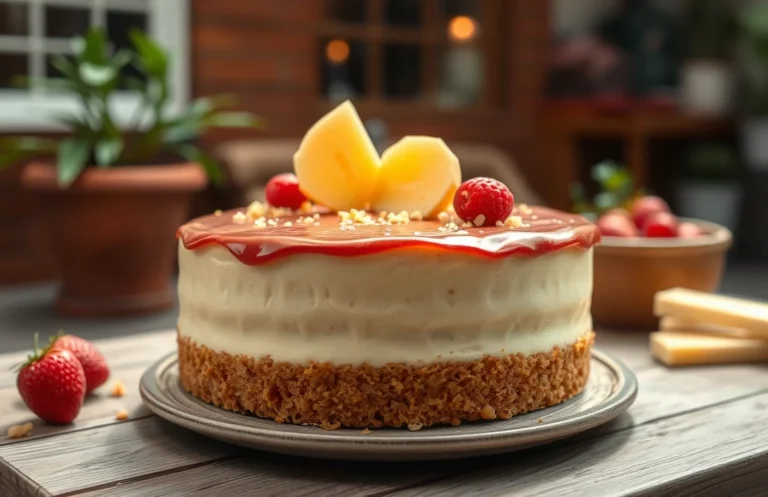
Serving and Plating Suggestions
Presenting your cheesecake with an appealing crust can elevate the dessert experience significantly. Choosing the right flavors and presentation techniques can enhance not only the taste but also the visual appeal of your cheesecake. Here are some tips for pairing and serving your cheesecake crusts.
Pairing Flavors
- For a classic cheesecake, a graham cracker crust is perfect. Pair it with a rich cream cheese filling and top with fresh berries or a berry compote for a burst of color and flavor.
- If you opt for an Oreo crust, complement it with a chocolate or cookies and cream filling. Drizzle with chocolate ganache and sprinkle crushed Oreos on top for added texture.
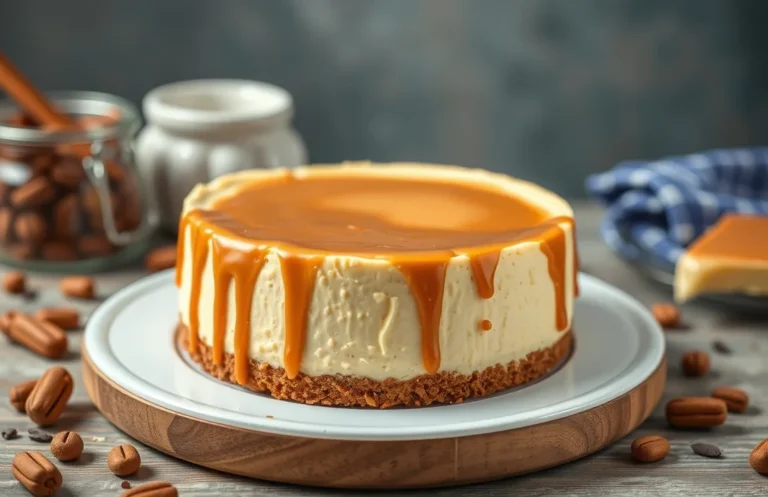
- Nut-based crusts, such as almond or pecan, work wonderfully with flavors like caramel or pumpkin. A dollop of whipped cream and a sprinkle of cinnamon can enhance the nutty sweetness.
Presentation Tips
- Use a clean, sharp knife to slice your cheesecake, ensuring each piece has a neat edge. Wipe the knife with a damp cloth between cuts for a polished look.
- Consider plating individual slices on dessert plates, garnishing with a sprig of mint or a drizzle of sauce. This adds a touch of elegance and makes serving easier.
- For a rustic look, serve your cheesecake directly from the springform pan. Dust the top with powdered sugar and surround it with fresh fruit for a beautiful centerpiece.
Quick Summary
| Prep Time | 10 minutes |
|---|---|
| Cook Time | 10 minutes |
| Total Time | 20 minutes |
| Servings | 8 servings |
- Crust Base: Use 1 ½ cups of graham cracker crumbs.
- Sweeten: Mix in ¼ cup granulated sugar for added flavor.
- Butter Binding: Melt ½ cup unsalted butter to hold the crust together.
- Press Firmly: Ensure an even layer by pressing the mixture firmly into the pan.
- Bake: Preheat oven to 350°F and bake for 10 minutes until lightly golden.
- Tip: Use a springform pan for easy release.
- Tip: Let the crust cool completely before adding filling.
Frequently Asked Questions
Can I make this crust ahead of time? How to store and reheat?
You can definitely make this cheesecake crust ahead of time! Store it in an airtight container at room temperature for up to 3 days, or refrigerate it for up to a week; just re-crisp it in the oven at 350°F for about 5 minutes before using.
What can I substitute for graham crackers?
If you don’t have graham crackers, you can use digestive biscuits or even crushed vanilla wafers for a similar flavor and texture. Just make sure to adjust the sugar level if your substitute is sweeter.
How do I know when the crust is done baking?
Your cheesecake crust is done when it’s golden brown around the edges and feels firm to the touch, which usually takes about 10-12 minutes at 350°F. Let it cool completely before adding your cheesecake filling.
Can I freeze this crust? How long does it last?
Yes, you can freeze the cheesecake crust for up to 3 months. Wrap it tightly in plastic wrap and then in aluminum foil to prevent freezer burn.
What if I don’t have a food processor?
If you don’t have a food processor, you can crush the graham crackers in a zip-top bag using a rolling pin or a heavy pan until finely crushed. Just make sure there are no large chunks for a smooth crust texture!

- Make Cheesecake Up to 3 Days Ahead: Tips for Best Flavor & Texture - March 4, 2026
- Easy No-Bake Cool Doen Cheesecake: Quick Recipe & Tips - March 4, 2026
- Decadent Dulce de Leche Cheesecake: Easy Step-by-Step Recipe - March 4, 2026