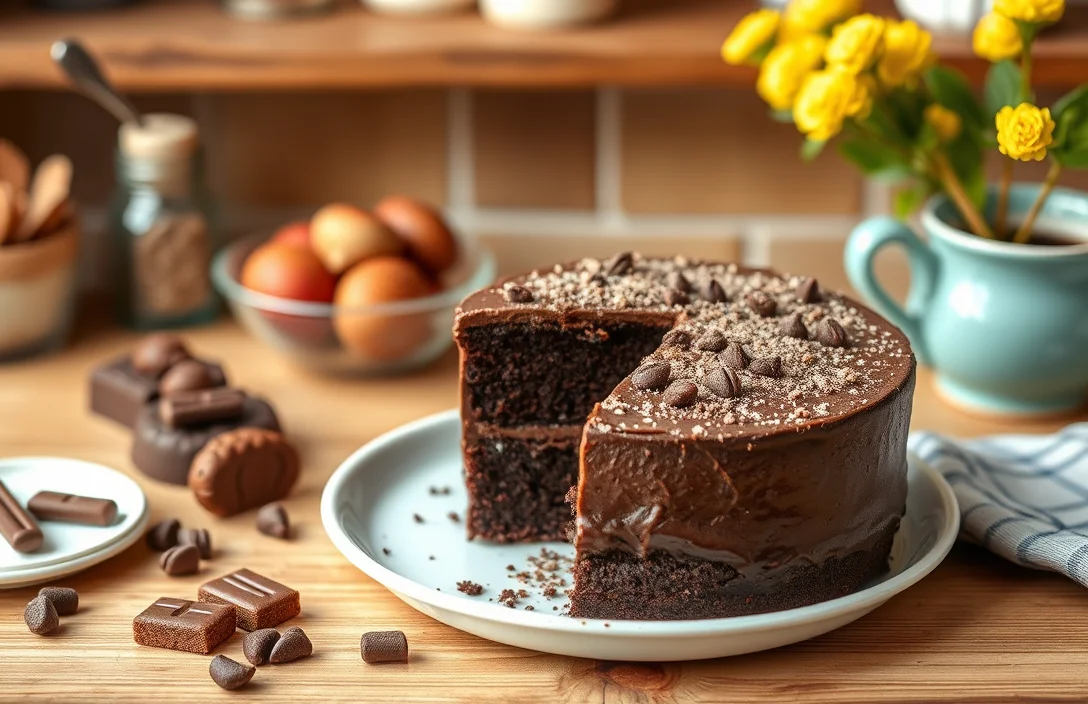
Elegant Moist Chocolate Cake: Perfect Recipe for Any Occasion
There’s something undeniably satisfying about a slice of perfectly moist chocolate cake that just melts in your mouth. This recipe has become my go-to for birthdays, celebrations, or even a cozy night in. The rich, velvety chocolate flavor paired with a light, airy texture makes it a true crowd-pleaser that everyone will rave about.
Key details: Total time: 1 hour, Difficulty level: Easy, Servings: 12.
| Prep Time | Cook Time | Total Time | Servings | Difficulty |
|---|---|---|---|---|
| 20 minutes | 30 minutes | 1 hour | 12 | Easy |
Chocolate Cake Origins
Chocolate cake is more than just a dessert; it holds a special place in celebrations and traditions worldwide. Its rich, decadent flavor and moist texture make it a favorite for birthdays, weddings, and other special occasions, embodying joy and indulgence.
- Historical Roots: Chocolate cake traces its origins back to the early 18th century when chocolate began to be used in baking. The first chocolate cake recipes emerged in the United States in the 19th century, thanks to the advent of cocoa powder, making it more accessible and popular among home bakers.
- Symbol of Celebration: Over the years, chocolate cake has become synonymous with celebration. Its luxurious taste and appearance have made it a go-to dessert for marking significant milestones, from weddings to anniversaries, and even casual gatherings.
- Modern Variations: Today, chocolate cake recipes abound, ranging from the rich, fudgy varieties to lighter, airy cakes. The preppy aesthetic often embraces a more refined approach, incorporating high-quality ingredients and elegant presentation, distinguishing it from more casual versions.
- Global Appeal: Across different cultures, chocolate cake has adapted to local tastes and ingredients. From the dense, flourless chocolate cakes of Europe to the moist, layered cakes popular in American bakeries, each version tells a story of tradition and innovation.
Ingredients List
To create the perfect moist chocolate cake, having the right ingredients is essential. Each component contributes not only to the flavor but also to the texture and overall presentation of the cake. Here’s a detailed list of everything you’ll need to ensure your cake is both delicious and visually appealing.
| Item | Amount/Specification | Notes |
|---|---|---|
| All-purpose flour | 1¾ cups (220g) | Sifted for lightness |
| Cocoa powder | ¾ cup (75g) | Unsweetened, high-quality for a rich flavor |
| Baking powder | 1½ teaspoons | Check expiration date for potency |
| Baking soda | 1½ teaspoons | Gives rise and texture |
| Salt | ½ teaspoon | Enhances chocolate flavor |
| Sugar | 2 cups (400g) | Granulated for sweetness |
| Eggs | 2 large | Room temperature for better incorporation |
| Milk | 1 cup (240ml) | Whole milk preferred for richness |
| Vegetable oil | ½ cup (120ml) | Keeps the cake moist |
| Vanilla extract | 2 teaspoons | Pure extract for the best flavor |
| Boiling water | 1 cup (240ml) | Intensifies the chocolate flavor |
- For a gluten-free option, substitute the all-purpose flour with a gluten-free flour blend.
- If you need a dairy-free version, use almond milk or coconut milk in place of whole milk.
- Make sure all ingredients are at room temperature for optimal mixing.
Essential Kitchen Tools
To create the perfect moist chocolate cake, having the right tools at your disposal will make the process smoother and more enjoyable. These essential kitchen tools will help ensure precision, consistency, and a touch of elegance in your baking experience.
- Mixing Bowls: Use a set of mixing bowls in various sizes, preferably glass or stainless steel. The larger bowl is ideal for combining dry ingredients, while a smaller one can be used for wet ingredients. This prevents the need to transfer ingredients multiple times.
- Measuring Cups and Spoons: Accurate measurements are crucial for baking. Invest in a set of dry measuring cups for flour and cocoa powder, as well as liquid measuring cups for milk and oil. Keep a set of measuring spoons handy for precise measurements of baking powder, vanilla, and salt.
- Whisk and Spatula: A medium-sized whisk is perfect for blending ingredients smoothly, while a silicone spatula is great for folding batter without deflating it. Both tools ensure a light and airy texture in your cake.
- Electric Mixer: A stand mixer or handheld electric mixer will save you time and energy when creaming butter and sugar together. This step is vital for incorporating air into the batter, leading to a fluffy cake.
- Cake Pans: Use two 9-inch round cake pans for even baking. Make sure they are non-stick or greased and lined with parchment paper to prevent sticking. This also aids in a clean release after baking.
- Cooling Rack: Once your cakes are out of the oven, a cooling rack allows air circulation around the cakes, preventing sogginess. Let them cool completely before frosting for the best results.
Baking Instructions
This section provides step-by-step instructions to bake your perfect moist chocolate cake. Following these precise steps will ensure your cake turns out wonderfully fluffy and rich, embodying that preppy aesthetic we all love.
- Preheat your oven: Set your oven to 350°F (175°C). This is a crucial step as it ensures that your cake bakes evenly. Let the oven preheat for at least 15 minutes to reach the desired temperature.
- Prepare the cake pans: Grease two 9-inch round cake pans with butter or non-stick spray, then dust with cocoa powder to prevent sticking. You want a thin, even layer that ensures easy release after baking. Line the bottoms with parchment paper for extra security.
- Mix dry ingredients: In a medium bowl, whisk together 1 ¾ cups (220g) all-purpose flour, 1 ¾ cups (350g) granulated sugar, ¾ cup (65g) unsweetened cocoa powder, 1 ½ teaspoons baking powder, 1 ½ teaspoons baking soda, and 1 teaspoon salt. The mixture should be well combined and have a rich chocolate aroma.
- Combine wet ingredients: In a large bowl, beat together 2 large eggs, 1 cup (240ml) whole milk, ½ cup (120ml) vegetable oil, and 2 teaspoons vanilla extract. Mix until smooth and creamy, about 2 minutes. The batter should feel thick and silky.
- Incorporate dry into wet: Gradually add the dry mixture to the wet ingredients, mixing on low speed until just combined. Scrape down the sides of the bowl if necessary. The batter should be thick but pourable, with no dry flour visible.
- Add boiling water: Carefully stir in 1 cup (240ml) boiling water into the batter. This will make the batter thin, but it’s necessary for moisture. Mix until smooth—your batter should be glossy and slightly runny.
- Pour and bake: Divide the batter evenly between the prepared pans. Bake in the preheated oven for 30-35 minutes, or until a toothpick inserted into the center comes out clean. The cakes should rise beautifully and have a slight dome.
- Cool the cakes: Once baked, remove the pans from the oven and let them cool on a wire rack for about 10 minutes. Then, gently remove the cakes from the pans and let them cool completely on the rack. They should feel firm but spring back slightly when touched.
Pro Tips for Moisture
Maintaining the perfect moisture in your chocolate cake is crucial for achieving that soft, rich texture we all crave. Here are some expert tips to ensure your cake remains delightfully moist and avoids common pitfalls that can lead to dryness.
- Use high-quality cocoa powder: Opt for Dutch-processed cocoa powder for a deeper flavor and enhanced moisture retention. Brands like Valrhona or Ghirardelli can make a noticeable difference in the final product.
- Incorporate sour cream or yogurt: Replace ½ cup of milk with sour cream or plain yogurt in the batter. This not only adds moisture but also gives a slight tang that enhances the chocolate flavor.
- Don’t overmix the batter: Once you combine your dry and wet ingredients, mix until just combined. Overmixing can create a dense, dry cake. Aim for a thick batter with a few lumps still visible.
- Check oven temperature: Always use an oven thermometer to ensure your oven is at the correct temperature. Baking at 350°F (175°C) is ideal, but an oven that runs hot can cause your cake to dry out quickly. Invest in a reliable oven thermometer for accuracy.
- Use oil instead of butter: Substitute melted coconut oil or vegetable oil for butter in your recipe. Oil retains moisture better than butter, resulting in a softer cake. Use about ½ cup oil for every ¾ cup of butter called for.
- Cool properly: Allow your cake to cool in the pan for about 10-15 minutes before transferring it to a wire rack. This helps retain moisture and prevents it from drying out from exposure to air.
Variations and Substitutions
This section highlights various ingredient alternatives and substitutions to cater to different dietary preferences and restrictions while still achieving that perfect moist chocolate cake. Whether you’re looking to make it gluten-free or vegan, these options ensure that everyone can enjoy a slice of your delicious creation!
| Item | Amount/Specification | Notes |
|---|---|---|
| Flour | 1 ¾ cups all-purpose flour (220g) | For gluten-free, substitute with a 1:1 gluten-free flour blend. |
| Sugar | 1 ½ cups granulated sugar (300g) | For a healthier option, use coconut sugar or a sugar substitute. |
| Cocoa Powder | ¾ cup unsweetened cocoa powder (75g) | Try Dutch-processed cocoa for a richer flavor. |
| Eggs | 2 large eggs | For vegan, replace with ½ cup unsweetened applesauce or 1 flax egg (1 tbsp flaxseed meal + 2.5 tbsp water). |
| Butter | ½ cup unsalted butter (115g) | Substitute with coconut oil or a plant-based butter for dairy-free. |
| Milk | 1 cup whole milk (240ml) | Use almond milk, oat milk, or soy milk for dairy-free options. |
- For a richer flavor, add 1 teaspoon of instant coffee granules to the batter.
- Enhance the cake’s elegance by folding in ½ cup of mini chocolate chips before baking.
- If you find the batter too thick, add more milk, one tablespoon at a time, until desired consistency is reached.
- Do not overmix the batter, as it can lead to a dense cake.
Serving and Plating Ideas
Elevating the presentation of your perfect moist chocolate cake can transform it from a simple dessert to a show-stopping centerpiece. With a few thoughtful touches, you can create an elegant display that complements the cake’s rich flavors and preppy aesthetic.
Plating Suggestions
- Use a classic white cake stand to showcase the cake’s rich cocoa color and glossy frosting.
- Dust the top with a light sprinkle of powdered sugar or cocoa powder for a refined finish.
- Garnish with fresh berries such as raspberries or strawberries for a pop of color and freshness.
- Drizzle a warm chocolate ganache over the top, letting it cascade down the sides for a dramatic effect.
Complementary Pairings
| Pairing | Flavor Profile |
|---|---|
| Vanilla Ice Cream | Creamy and sweet, balances the cake’s richness |
| Espresso | Bitter notes enhance the chocolate flavor |
| Mint Leaves | Refreshing contrast to the chocolate |
Chef’s tip: Serve the cake at room temperature to fully appreciate the moist texture and rich flavors.
For an added touch of elegance, consider adding a decorative element like chocolate shavings or edible flowers around the base of the cake. Remember, presentation is key, so take your time to arrange these elements thoughtfully.
Quick Summary
| Prep Time | 20 minutes |
|---|---|
| Cook Time | 30 minutes |
| Total Time | 50 minutes |
| Servings | 8 |
- Preheat oven: Set to 350°F (175°C).
- Mix dry ingredients: Combine flour, cocoa, baking powder, baking soda, and salt.
- Blend wet ingredients: Cream butter and sugar, then add eggs and vanilla.
- Combine mixtures: Gradually add dry ingredients to wet, alternating with buttermilk.
- Bake: Pour batter into greased pans and bake for 30 minutes.
- Cool: Let cakes cool in pans for 10 minutes before transferring to a wire rack.
- Tip for moisture: Use room temperature ingredients.
- Tip for flavor: Choose high-quality cocoa powder.
- Tip for texture: Don’t overmix the batter; stop when just combined.
Frequently Asked Questions
Can I make this ahead of time? How to store and reheat?
You can absolutely make this cake ahead of time! Store it in an airtight container at room temperature for up to 3 days, or refrigerate it for up to a week; reheat individual slices in the microwave for about 10-15 seconds.
What can I substitute for eggs in this recipe?
You can use 1/4 cup unsweetened applesauce or 1/4 cup Greek yogurt per egg as a substitute, which will help maintain moisture and structure.
How do I know when it’s done?
The cake is done when a toothpick inserted into the center comes out clean or with a few moist crumbs, usually around 30-35 minutes at 350°F (175°C).
Can I freeze this? How long does it last?
Yes, you can freeze the cake wrapped tightly in plastic wrap and then aluminum foil for up to 3 months; just thaw it in the refrigerator overnight before serving.
What if I don’t have a round cake pan?
If you don’t have a round cake pan, you can use a 9×13 inch baking dish instead; just adjust the baking time to about 25-30 minutes, checking for doneness as described above.

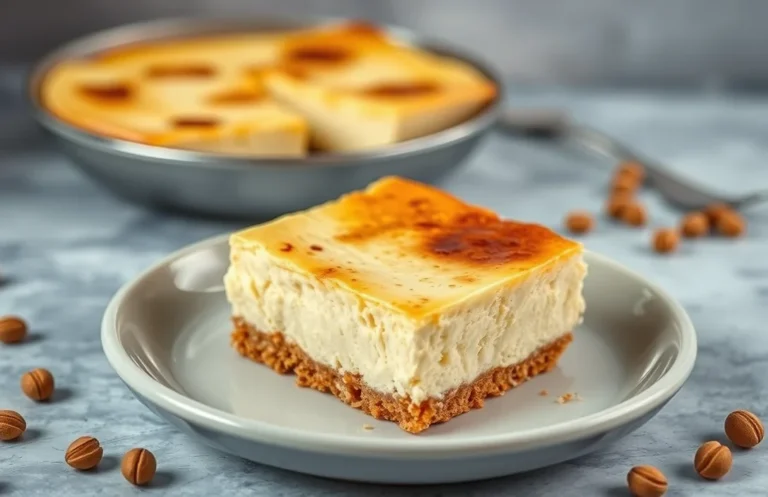
- Make Cheesecake Up to 3 Days Ahead: Tips for Best Flavor & Texture - March 4, 2026
- Easy No-Bake Cool Doen Cheesecake: Quick Recipe & Tips - March 4, 2026
- Decadent Dulce de Leche Cheesecake: Easy Step-by-Step Recipe - March 4, 2026