Easy Philadelphia No-Bake Cheese Filling for Delicious Desserts
If you’re looking for a creamy, dreamy filling that elevates any dessert, this Philadelphia no-bake cheese filling is your go-to recipe. It’s perfect for last-minute gatherings or a sweet treat on a cozy weeknight. Picture luscious cheesecake, velvety tarts, or delightful pastries—this filling will make your taste buds sing.
Key details: Total time: 15 minutes, Difficulty level: Easy, Servings: 8.
| Prep Time | Cook Time | Total Time | Servings | Difficulty |
|---|---|---|---|---|
| 15 minutes | 0 minutes | 15 minutes | 8 | Easy |
Origin of No-Bake Cheese Filling
No-bake cheese fillings have become a staple in many dessert recipes, celebrated for their creamy texture and refreshing taste. This section delves into the history of no-bake desserts and highlights the significance of Philadelphia cream cheese in creating a luscious filling that requires no time in the oven.
- History of No-Bake Desserts: No-bake desserts emerged as a practical solution for busy home cooks looking to save time without sacrificing flavor. These desserts gained popularity in the mid-20th century, especially in the United States, where home refrigeration became more common. The convenience of combining ingredients without the need for baking made these treats accessible and appealing to many.
- Why Philadelphia Cream Cheese? Philadelphia cream cheese, introduced in 1872, quickly became the gold standard for cream cheese due to its smooth, rich flavor and creamy consistency. Its ability to blend seamlessly into no-bake recipes gives fillings a delightful texture and taste. This cream cheese is preferred by many bakers and home chefs for its reliable performance in both sweet and savory dishes.
Understanding the origins and significance of no-bake cheese fillings not only enriches your culinary knowledge but also enhances your appreciation for this delightful dessert component. It’s the perfect choice for creating rich, creamy fillings without the fuss of baking.
Ingredients for Cheese Filling
This section provides the complete list of ingredients you’ll need to create a luscious no-bake cheese filling using Philadelphia cream cheese. Each ingredient plays a crucial role in achieving the perfect creamy texture and flavor in your dessert, so let’s make sure you have everything ready!
| Item | Amount/Specification | Notes |
|---|---|---|
| Philadelphia Cream Cheese | 8 ounces (226g) | Softened to room temperature for easy mixing |
| Granulated Sugar | ½ cup (100g) | Adjust to taste if you prefer a less sweet filling |
| Vanilla Extract | 1 teaspoon (5ml) | For added flavor |
| Heavy Whipping Cream | 1 cup (240ml) | Chilled, for whipping |
| Lemon Juice | 1 tablespoon (15ml) | Freshly squeezed for brightness |
- For a lighter filling, consider substituting half of the cream cheese with Greek yogurt.
- Make sure the cream cheese is fully softened to avoid lumps in your filling.
- If you prefer a flavored filling, you can add cocoa powder or fruit puree to the mixture.
- Be cautious not to overwhip the cream; it should hold soft peaks but remain fluffy.
Essential Kitchen Equipment
Before diving into making your Philadelphia no-bake cheese filling, it’s essential to gather the right tools. Having the appropriate kitchen equipment on hand will ensure a smooth preparation process and help you achieve the perfect texture and flavor for your filling.
- Mixing Bowls: Use a large mixing bowl to combine your ingredients. A glass or stainless steel bowl is ideal as it allows you to see the mixture’s consistency clearly. Make sure the bowl is big enough to hold at least 4 cups (950 ml) to accommodate all ingredients comfortably.
- Electric Mixer: An electric mixer, either handheld or stand, is crucial for achieving a light and fluffy texture. Beat the cream cheese until smooth and creamy, which usually takes about 2-3 minutes on medium speed. This step is vital to prevent any lumps in your filling.
- Spatula: A silicone spatula is perfect for folding in additional ingredients like whipped cream or flavorings. It allows you to gently mix without deflating the air you’ve incorporated, ensuring your filling remains airy and light.
- Measuring Cups and Spoons: Accurate measurements are key to a successful no-bake filling. Use dry measuring cups for solids and liquid measuring cups for liquids to ensure you’re using the right amounts, such as 8 ounces (226 g) of cream cheese and ½ cup (60 g) of powdered sugar.
Chef’s tip: Always ensure your cream cheese is at room temperature for easier mixing and to avoid lumps in your filling.
Step-by-Step Preparation
In this section, we’ll guide you through the detailed steps to create a creamy and luscious Philadelphia no-bake cheese filling. Following these instructions carefully will ensure you achieve the perfect texture and flavor for your desserts!
- Gather your ingredients: You will need 8 ounces (225g) of Philadelphia cream cheese, ½ cup (60g) powdered sugar, 1 teaspoon vanilla extract, and 1 cup (240ml) heavy whipping cream. Make sure your cream cheese is at room temperature for easy mixing.
- Mix the cream cheese: In a large mixing bowl, using a hand mixer or stand mixer, beat the cream cheese on medium speed for about 2-3 minutes until it becomes smooth and creamy. You should not see any lumps, and it should have a spreadable consistency.
- Add sugar and vanilla: Gradually add the powdered sugar and vanilla extract to the cream cheese. Continue to mix on low speed for another 1-2 minutes until fully combined. The mixture should be sweetened to your taste, and the vanilla aroma should be prominent.
- Whip the cream: In a separate bowl, pour in the heavy whipping cream. Using the mixer, whip the cream on high speed until stiff peaks form, which usually takes about 3-5 minutes. When you lift the beaters, the cream should hold its shape and not droop.
- Fold the mixtures: Gently fold the whipped cream into the cream cheese mixture using a spatula. Do this in batches to maintain the lightness of the whipped cream. The filling should be fluffy and well combined without any streaks of cream.
- Chill the filling: Transfer the filling into a covered container and refrigerate for at least 2 hours. This chilling time allows the flavors to meld and the filling to firm up, making it easier to spread or pipe into desserts.
Pro Tips for Best Results
Creating the perfect Philadelphia no-bake cheese filling requires attention to detail, especially in achieving that creamy texture and avoiding lumps. Here are some expert tips to ensure your filling turns out smooth and delicious every time.
Achieving Creaminess
- Use room temperature cream cheese: Let 8 ounces (226g) of Philadelphia cream cheese sit out for about 30 minutes before you start. This helps it blend more easily and creates a smoother filling.
- Whip it well: Use an electric mixer on medium speed for about 2-3 minutes to beat the cream cheese until it’s light and fluffy. This step is crucial for achieving the desired creamy consistency.
- Incorporate other ingredients gradually: When adding ½ cup (60g) powdered sugar and 1 teaspoon vanilla extract, do it slowly while mixing to avoid lumps. Mix until just smooth.
Avoiding Lumps
- Sift the sugar: Sifting your ½ cup (60g) powdered sugar before adding it to the mixture helps eliminate any clumps, ensuring a smoother texture.
- Use a rubber spatula: After mixing, fold the mixture gently with a rubber spatula to incorporate air without over-mixing, which can deflate the filling.
- Check texture: The filling should be smooth, without any visible lumps. If you notice lumps, consider using a fine-mesh strainer to strain the mixture before use.
Chef’s tip: If the filling is too thick, you can add 1-2 tablespoons of heavy cream to loosen it up while mixing until you achieve the desired consistency.
Variations and Substitutions
When making Philadelphia no-bake cheese filling, it’s essential to know how to adapt the recipe to meet different dietary needs or preferences. Whether you’re looking for vegan alternatives or need gluten-free options, there are plenty of swaps you can make without sacrificing flavor or texture.
Vegan Alternatives
| Item | Amount/Specification | Notes |
|---|---|---|
| Cream Cheese | 8 oz (226g) | Use vegan cream cheese, such as Tofutti or Kite Hill |
| Sour Cream | ½ cup (120g) | Replace with coconut yogurt or cashew cream |
| Powdered Sugar | ½ cup (60g) | Ensure it’s vegan; most brands are, but check labels |
Gluten-Free Options
| Item | Amount/Specification | Notes |
|---|---|---|
| Graham Crackers | 1 ½ cups (150g) | Use gluten-free graham crackers or almond flour |
| All-Purpose Flour | ⅓ cup (40g) | Swap for a gluten-free flour blend |
- For a lighter filling, consider adding whipped coconut cream for fluffiness.
- If you prefer a different flavor, try adding a splash of vanilla or almond extract.
- Always taste as you go, especially when making substitutions, to adjust sweetness or tanginess.
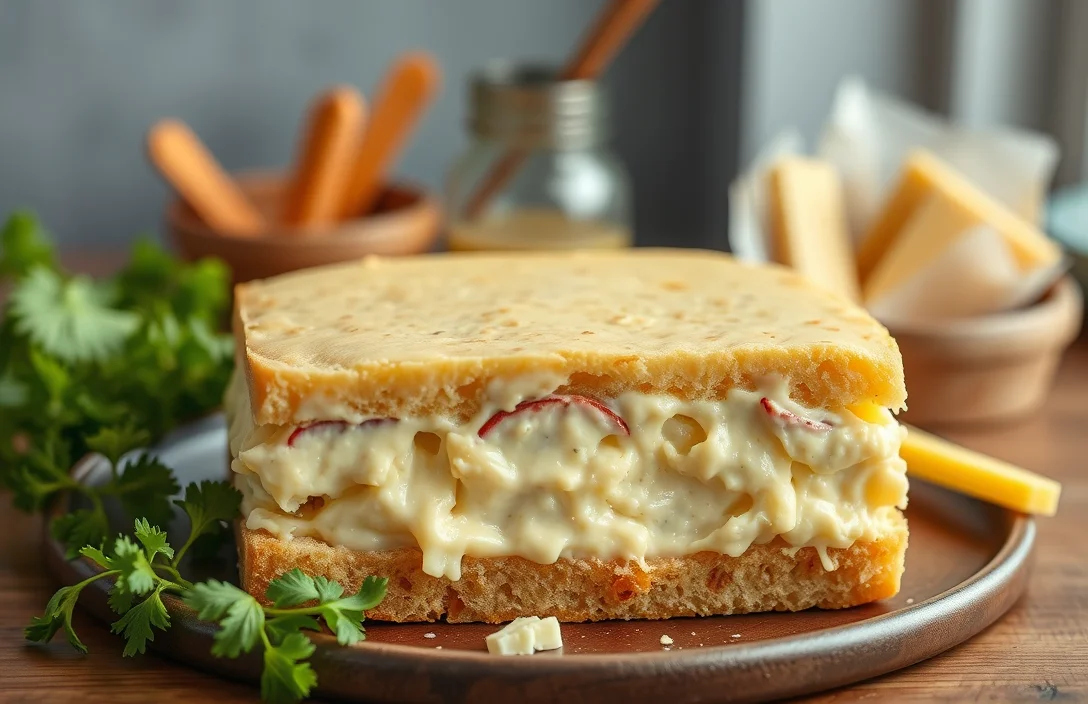
Serving Ideas and Pairings
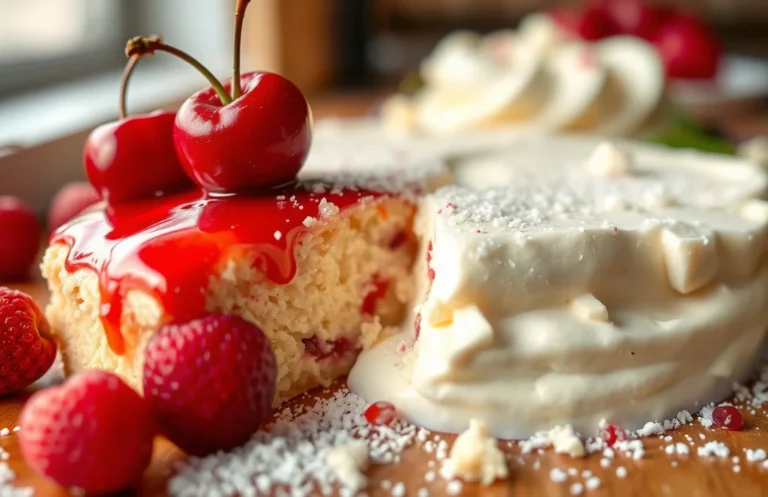
The Philadelphia no-bake cheese filling is incredibly versatile and can elevate various desserts, making them both delectable and visually appealing. Here are some delightful ways to use this creamy filling in cheesecakes, tarts, and pastries that are sure to impress your friends and family.
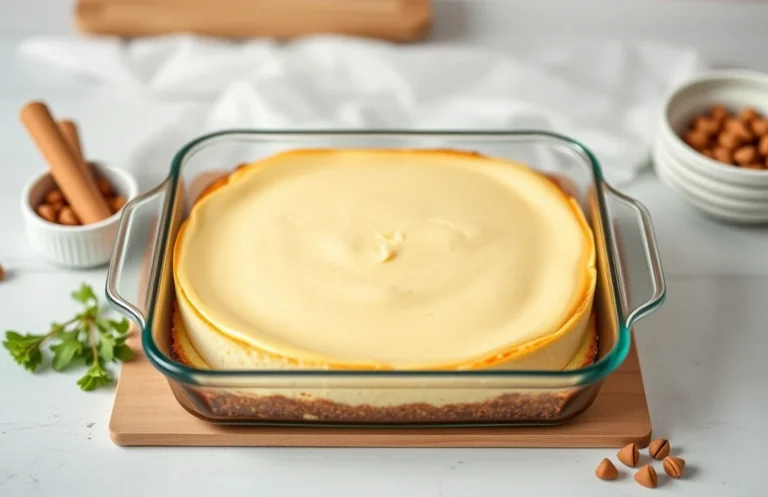
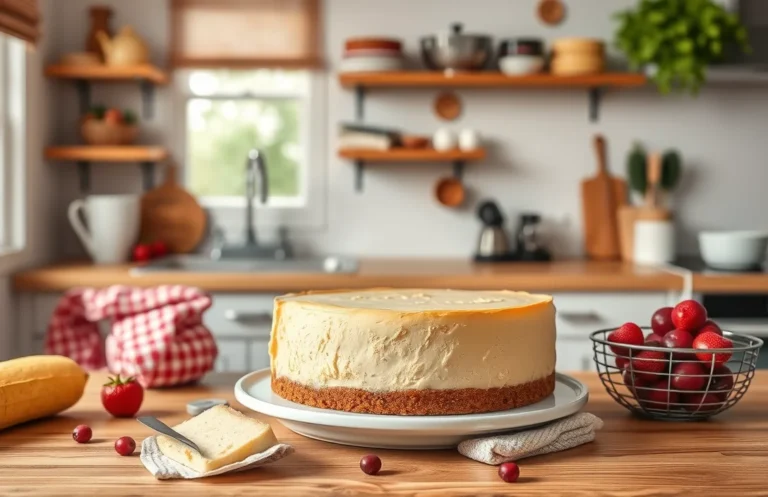
1. Cheesecakes
- Prepare a classic no-bake cheesecake by mixing the Philadelphia no-bake cheese filling with ½ cup powdered sugar and 1 teaspoon vanilla extract. Whisk until smooth and creamy.
- Pour the filling into a pre-made graham cracker crust (about 9 inches) and smooth the top with a spatula. Refrigerate for at least 4 hours until set, and it should feel firm when touched.
- For a fruity twist, top the cheesecake with a layer of fresh berries or a fruit compote just before serving to add color and flavor.
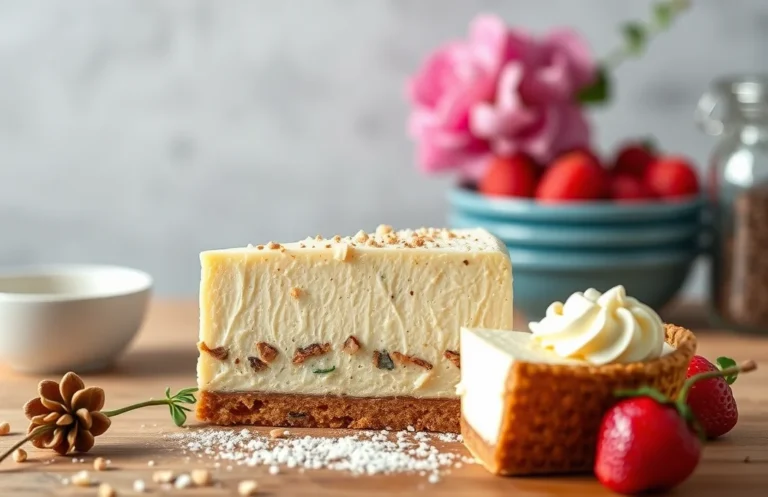
2. Tarts and Pastries
- Use the no-bake cheese filling as a luscious tart filling by spreading it into a pre-baked tart shell. You can use a store-bought shortcrust pastry or make your own using 1 ½ cups all-purpose flour, ½ cup butter, and ¼ cup sugar.
- After filling the shell, let it chill in the refrigerator for at least 2 hours. The filling should feel slightly set but still creamy to the touch.
- Garnish with chocolate shavings, fresh mint, or a drizzle of caramel sauce for an elegant presentation that will wow your guests.
These serving ideas make the Philadelphia no-bake cheese filling an easy choice for special occasions or a sweet treat any day of the week. Enjoy your creations!
Quick Summary
| Prep Time | 15 minutes |
|---|---|
| Cook Time | 0 minutes |
| Total Time | 15 minutes |
| Servings | 8 |
- Blend cream cheese: Beat 16 oz of Philadelphia cream cheese until smooth.
- Add sugar: Mix in 1 cup powdered sugar and 1 tsp vanilla extract until combined.
- Incorporate whipped cream: Gently fold in 2 cups of whipped cream until no streaks remain.
- Chill: Refrigerate for at least 2 hours before using.
- Serve: Use as a filling for cakes, pies, or as a dip with fruit.
- Tip: Ensure the cream cheese is at room temperature for easy blending.
- Tip: Fold in the whipped cream gently to maintain a fluffy texture.
- Tip: Taste and adjust sweetness as needed before chilling.
Frequently Asked Questions
Can I make this ahead of time? How to store and reheat?
You can make the Philadelphia no-bake cheese filling up to 2 days in advance. Store it in an airtight container in the refrigerator, and there’s no need to reheat; just give it a good stir before using.
What can I substitute for cream cheese?
If you’re looking for a substitute, you can use mascarpone cheese for a similar creamy texture or Greek yogurt for a lighter option. Keep in mind that the flavor will be slightly different with each substitute.
How do I know when it’s done?
Your filling is ready when it’s smooth and creamy, with no lumps, and holds its shape when piped or spread. It should also cling to a spatula without being runny, indicating it has the right consistency.
Can I freeze this? How long does it last?
You can freeze the cheese filling for up to 2 months in an airtight container. Just thaw it in the refrigerator overnight before using it again, and give it a good stir to restore its texture.
What if I don’t have a mixer?
If you don’t have a mixer, you can use a sturdy whisk or a fork to mix the ingredients by hand, although it will take a bit more effort. Just ensure you beat the mixture until it’s completely smooth and creamy to achieve the best results.

- 10 Best Cheese Knife With Holes For Smooth Slice 2026 - March 9, 2026
- Make Cheesecake Up to 3 Days Ahead: Tips for Best Flavor & Texture - March 4, 2026
- Easy No-Bake Cool Doen Cheesecake: Quick Recipe & Tips - March 4, 2026