Can You Freeze Lemon & Lime Cheesecake? Tips & Thawing Guide
If you’re craving a dessert that’s both tangy and creamy, lemon and lime cheesecake is a must-try. This delightful treat is perfect for celebrations or cozy weeknight dinners. Its zesty flavor and smooth texture will make your taste buds sing, leaving everyone asking for seconds!
Wondering if you can freeze this cheesecake? Yes, you can! This guide will provide you with step-by-step instructions for freezing, optimal storage tips, and how to properly thaw your cheesecake. Total prep time is about 30 minutes, with a chilling time of 4 hours. It serves 8 and is easy to make!
| Prep Time | Cook Time | Total Time | Servings | Difficulty |
|---|---|---|---|---|
| 30 minutes | 0 minutes | 4 hours | 8 | Easy |
Origin of Cheesecake
The origins of cheesecake can be traced back to ancient Greece, where it was served to athletes at the first Olympic Games. Over the centuries, this delightful dessert has evolved, giving rise to various regional interpretations, including the refreshing lemon and lime cheesecake we cherish today. Understanding its history enriches our appreciation for this zesty treat and its potential for freezing.
- History of Cheesecake: Cheesecake’s roots date back to around 2000 B.C. in Greece, but the Romans are credited with spreading the concept throughout Europe. The classic cheesecake we know today began to take shape in the 18th century, particularly in New York City, where cream cheese became a staple ingredient. This evolution paved the way for the introduction of citrus flavors, which added a bright twist to the traditional recipe.
- Lemon and Lime Variants: Lemon and lime cheesecakes emerged as popular variations, celebrating the fruits’ vibrant acidity that beautifully balances the creaminess of the cheese. These flavors not only enhance the dessert’s taste but also make it a refreshing option, especially during warmer months.
- Occasions for Serving: Lemon and lime cheesecake is often served at celebrations, such as birthdays, holidays, and summer gatherings. Its light flavor profile makes it an excellent choice for warm-weather events, and it can also serve as a delightful finale to a hearty meal, leaving guests feeling satisfied yet refreshed.
Ingredients for Cheesecake
This section outlines the precise ingredients required to create a delicious lemon and lime cheesecake, which is essential to know if you’re considering freezing it. The quality and balance of these ingredients will affect both the flavor and texture of your cheesecake, particularly after freezing.
| Item | Amount/Specification | Notes |
|---|---|---|
| Graham cracker crumbs | 1 ½ cups (150g) | For a classic crust; can substitute with digestives for a different flavor. |
| Granulated sugar | ¼ cup (50g) | Sweetens the crust; adjust to taste if using sweeter toppings. |
| Unsalted butter | ½ cup (113g), melted | Bind the crust; use coconut oil for a dairy-free version. |
| Cream cheese | 24 oz (680g), softened | Base of the filling; must be at room temperature for smooth mixing. |
| Sour cream | 1 cup (240g) | Adds creaminess; Greek yogurt can be used as a substitute. |
| Granulated sugar (for filling) | 1 cup (200g) | Adjust based on preference for sweetness. |
| Lemon juice | ½ cup (120ml) | Freshly squeezed for best flavor; bottled can alter taste. |
| Lime juice | ¼ cup (60ml) | Freshly squeezed; enhances the citrus flavor. |
| Vanilla extract | 1 teaspoon (5ml) | Adds depth to the flavor. |
| Eggs | 3 large | Room temperature; helps in achieving a creamy texture. |
- Tip: Ensure all dairy ingredients are at room temperature to avoid lumps.
- For a lighter cheesecake, consider using Neufchâtel cheese instead of cream cheese.
- After freezing, allow the cheesecake to thaw in the refrigerator overnight for the best texture and flavor.
Kitchen Equipment Needed
To successfully freeze lemon and lime cheesecake, having the right kitchen equipment is essential. This ensures that your cheesecake maintains its delicious flavor and texture after being frozen. Here’s a breakdown of the tools you’ll need for making and storing your cheesecake.
| Item | Amount/Specification | Notes |
|---|---|---|
| Baking Pan | 9-inch (23cm) springform pan | Allows for easy removal of the cheesecake after baking. |
| Mixing Bowl | 1 large bowl | For mixing the cheesecake batter. |
| Electric Mixer | 1 unit | A stand or hand mixer works well for blending ingredients smoothly. |
| Spatula | 1 rubber or silicone spatula | For folding in ingredients and scraping the bowl. |
| Plastic Wrap | Enough to cover the cheesecake | To protect the cheesecake from freezer burn. |
| Freezer-Safe Container | 1 large container or resealable bag | For storing the cheesecake once it’s frozen. |
- Tip: To prevent sticking, line the bottom of the springform pan with parchment paper before pouring in the batter.
- Make sure your mixing bowl is large enough to handle the volume of ingredients without spilling.
- Label your freezer-safe container with the date and type of cheesecake for easy identification later.
Freezing Instructions
Freezing lemon and lime cheesecake can be a great way to preserve its freshness and extend its shelf life. Proper preparation and wrapping are essential to maintain its delicious flavor and creamy texture. Follow these steps to ensure your cheesecake freezes beautifully.
- Preparation for Freezing: Before freezing, make sure your cheesecake has completely cooled to room temperature. This typically takes about 1-2 hours after baking. Once cool, slice the cheesecake into individual portions for easier thawing later on.
- Wrapping Techniques: To prevent freezer burn and maintain flavor, wrap each cheesecake slice tightly in plastic wrap. Make sure to cover all surfaces completely. Place the wrapped slices in an airtight freezer-safe container or a heavy-duty freezer bag. Squeeze out any excess air before sealing.
- Freezing Duration: Your lemon and lime cheesecake can be frozen for up to 3 months without significant loss of quality. For best results, label the container or bag with the freezing date. If you notice any signs of freezer burn or ice crystals upon opening, it’s best to discard those portions.
Chef’s tip: Freeze the cheesecake on a flat surface before transferring it to a container. This helps maintain its shape.
Texture and Flavor Changes
Understanding how freezing affects the texture and flavor of lemon and lime cheesecake is crucial to ensuring your dessert remains delightful after storage. Freezing can alter the creamy consistency and bright taste of this cheesecake, so let’s break down what to expect.
Post-Freezing Texture
When you freeze lemon and lime cheesecake, the texture can change slightly. Here’s what you might notice:
- Initial Texture: Right after freezing, the cheesecake should feel firm yet creamy. It may be slightly denser than fresh cheesecake.
- After Thawing: Once thawed, the cheesecake may have a softer, silkier texture. However, if it has been frozen for too long, it can become grainy due to ice crystals.
Flavor Preservation
Flavor is one of the most important aspects when it comes to cheesecakes. Here’s how freezing affects it:
- Freshness: The bright citrus flavors of lemon and lime can diminish slightly, but they usually remain vibrant if the cheesecake is stored correctly.
- Time in Freezer: For optimal flavor preservation, consume the cheesecake within 1-2 months of freezing.
Chef’s tip: To enhance the flavor post-thawing, consider serving the cheesecake with a fresh citrus glaze or zest to brighten it up!
Best Practices
Follow these best practices to maintain the quality of your cheesecake:
- Wrap Properly: Use plastic wrap followed by aluminum foil to prevent freezer burn.
- Label and Date: Always label your cheesecake with the date it was frozen to track freshness.
Thawing the Cheesecake
Thawing your frozen lemon and lime cheesecake properly is crucial to maintain its delightful texture and flavor. Incorrect thawing can lead to a watery cheesecake or one that loses its beautifully creamy consistency. Here’s how to do it right.
- Refrigerator Method: This is the best method for thawing your cheesecake. Place the frozen cheesecake in the refrigerator for approximately 6-8 hours or overnight. The slow thawing process helps retain its texture and flavor, ensuring it remains creamy and delicious.
- Countertop Method: If you need your cheesecake thawed more quickly, you can use the counter method. Leave the cheesecake out at room temperature for about 1-2 hours. Be careful not to leave it out too long, as this can cause it to become too soft or spoil.
- Check Consistency: After thawing, gently press the surface of the cheesecake with your fingertip. It should feel soft but not overly mushy. If it’s too firm, it may need more time to thaw; if it’s excessively soft, it may have thawed too quickly.
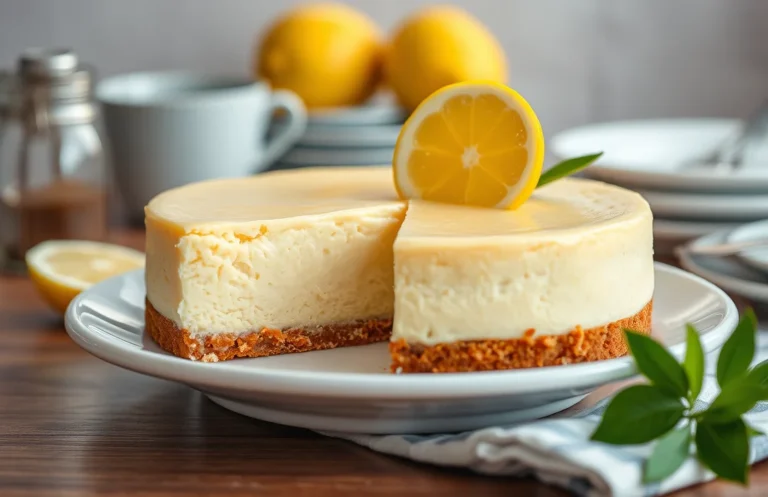
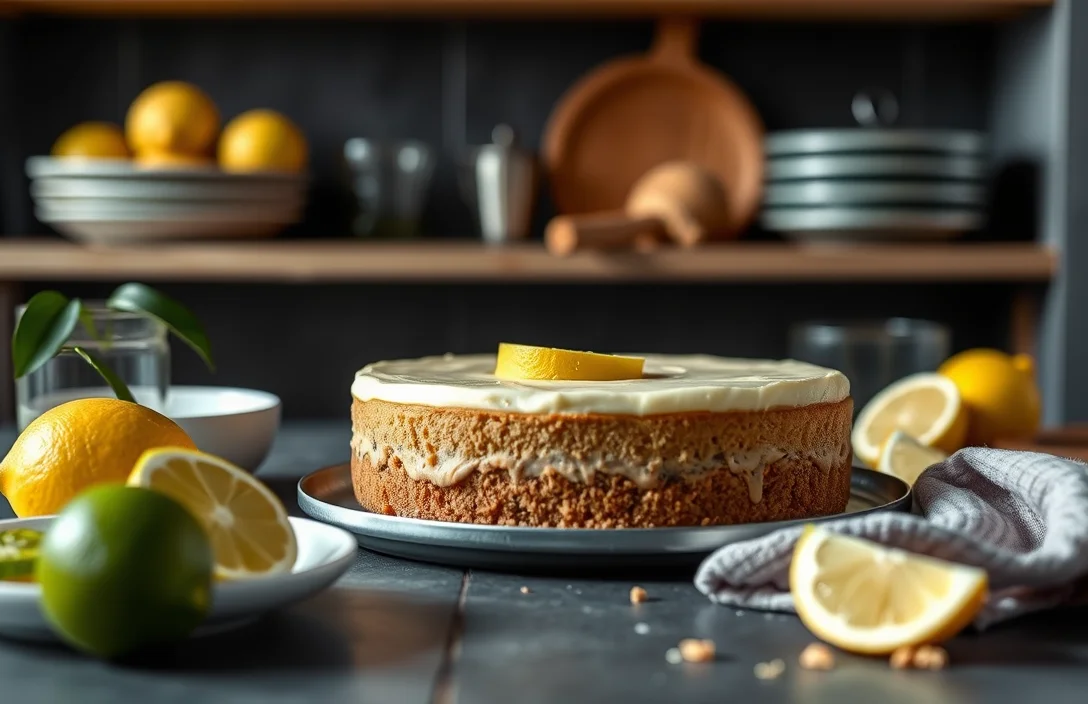
- Serving After Thawing: Once your cheesecake has thawed, it’s best to serve it chilled. You can garnish it with fresh lemon or lime zest, whipped cream, or even a fruit compote for added flavor. Always slice with a hot knife for clean edges — simply dip the knife in hot water, wipe it dry, and make your cut.
Serving Suggestions
Once you’ve successfully thawed your lemon and lime cheesecake, it’s time to elevate its presentation and flavor. Here are some thoughtful garnishing tips and pairing suggestions that will enhance your cheesecake experience, making it even more delightful for your guests.
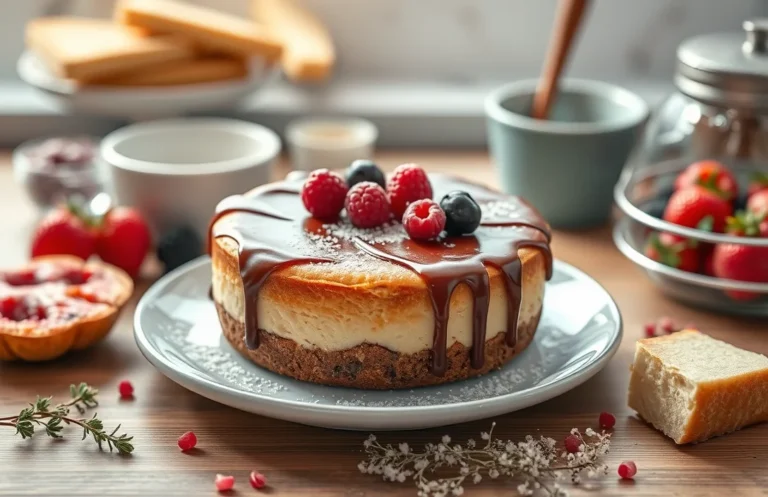
- Garnishing Tips: Top your cheesecake with a light dusting of powdered sugar for a touch of sweetness and elegance. You can also add thinly sliced lemon and lime zest, which not only adds color but also enhances the citrusy aroma. For a creamy finish, consider dolloping whipped cream on each slice just before serving.
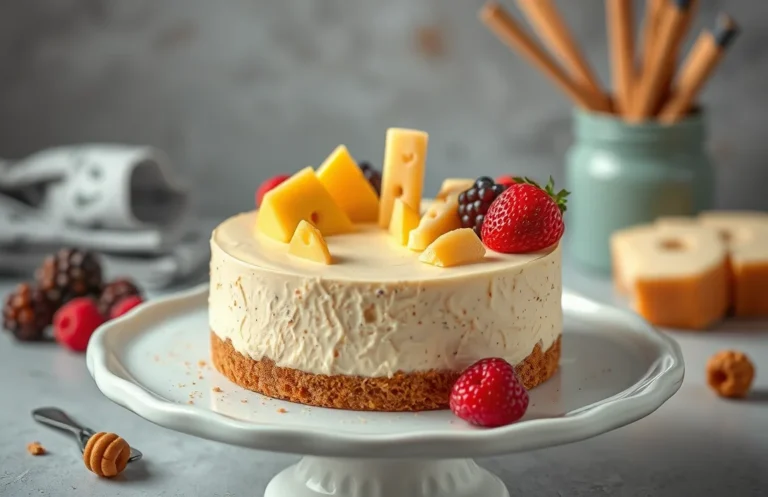
- Pairing Suggestions: A fresh fruit salad featuring berries—strawberries, blueberries, and raspberries—makes a beautiful side that complements the tangy cheesecake. Alternatively, serve with a drizzle of raspberry or blueberry sauce for a pop of color and flavor. A light herbal tea, such as mint or chamomile, can balance the richness of the cheesecake.
- Serving Temperature: For the best flavor and texture, serve your cheesecake chilled but not frozen. Allow it to sit at room temperature for about 15-20 minutes before serving to soften slightly. This will enhance the creamy texture and bring out the bright flavors of the lemon and lime.
Chef’s tip: If you have any extra lemon or lime slices, freeze them in a tray with water for a refreshing garnish in drinks!
Quick Summary
| Prep Time | Cook Time | Total Time | Servings |
|---|---|---|---|
| 20 minutes | 60 minutes | 80 minutes | 8 |
- Prepare the crust: Combine crushed graham crackers, melted butter, and sugar, then press into a springform pan.
- Make the filling: Blend cream cheese, sugar, eggs, lemon, and lime juice until smooth.
- Bake: Cook in a preheated oven at 325°F (160°C) for 60 minutes.
- Cool: Let the cheesecake cool completely before freezing.
- Wrap properly: Use plastic wrap and aluminum foil to prevent freezer burn.
- Thawing: Defrost in the fridge overnight for best texture.
- Tip: Use room temperature cream cheese for a smoother filling.
- Tip: Avoid overbaking to prevent cracks in the cheesecake.
- Tip: Freeze individual slices for easier serving later.
Frequently Asked Questions
Can I make this ahead of time? How to store and reheat?
You can definitely make lemon and lime cheesecake ahead of time. Store it in an airtight container in the refrigerator for up to 3 days, or freeze it for up to 2 months, and simply thaw it in the fridge overnight before serving.
What can I substitute for cream cheese?
If you need a substitute for cream cheese, you can use mascarpone cheese or a vegan cream cheese alternative, keeping in mind that the texture and flavor might vary slightly.
How do I know when it’s done?
Your cheesecake is done when the edges are set and the center is slightly jiggly; it will firm up as it cools. A slight golden hue on the edges also indicates it’s ready to come out of the oven.
Can I freeze this? How long does it last?
You can absolutely freeze lemon and lime cheesecake for up to 2 months. Make sure to wrap it tightly in plastic wrap and aluminum foil to prevent freezer burn.
Why did my cheesecake turn out runny?
If your cheesecake turned out runny, it may not have been baked long enough or the filling was overmixed. Ensure to bake until the edges are set and avoid overmixing after adding eggs to maintain the right consistency.

- Decadent Peanut Butter No-Bake Cheesecake: Easy Recipe to Indulge - April 3, 2026
- Delicious Mango No-Bake Cheesecake: Step-by-Step Recipe - April 3, 2026
- Decadent Raspberry No-Bake Cheesecake: Easy Step-by-Step Recipe - April 3, 2026