Delicious Cheesecake Phyllo Cups: Easy 30-Minute Recipe
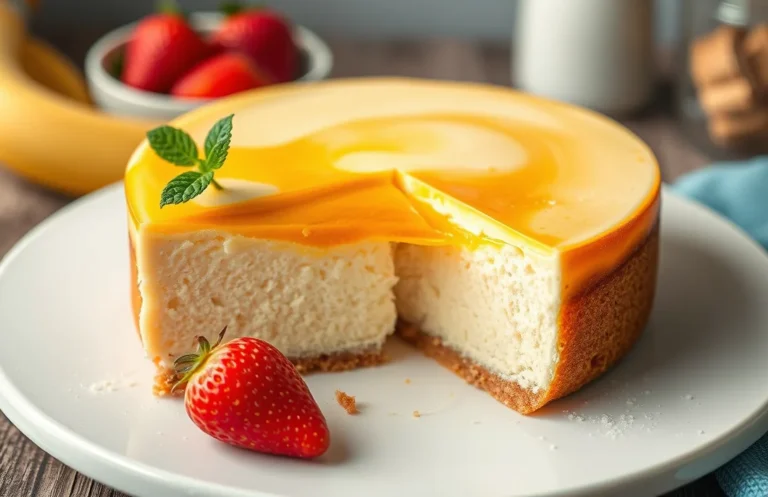
Cheesecake phyllo cups are the perfect bite-sized treat that combine the creamy indulgence of cheesecake with the delightful crunch of phyllo pastry. They’re incredibly versatile, making them a favorite for everything from casual weeknight desserts to elegant gatherings. Just imagine sinking your teeth into a crisp cup filled with luscious cheesecake filling—pure bliss!
Get ready to make 12 servings of these scrumptious cups in just 30 minutes with a difficulty level of easy. This recipe provides every detail you need, including exact measurements and tips to ensure your phyllo cups turn out perfectly every time.
| Prep Time | Cook Time | Total Time | Servings | Difficulty |
|---|---|---|---|---|
| 15 minutes | 15 minutes | 30 minutes | 12 | Easy |
Origin of Cheesecake Phyllo Cups
Cheesecake phyllo cups blend the rich, creamy tradition of cheesecake with the delicate, flaky texture of phyllo pastry. This delightful combination not only showcases diverse culinary influences but also adds a touch of elegance to any occasion.
- Cultural Background: The origins of cheesecake can be traced back to ancient Greece, where it was enjoyed by athletes during the first Olympic Games. Over centuries, variations emerged across cultures, with the New York-style cheesecake gaining prominence in the United States. Phyllo pastry, on the other hand, has its roots in Middle Eastern cuisine, often used in dishes like baklava. The fusion of these two traditions in phyllo cups creates a unique dessert that honors both its Greek and Middle Eastern heritage.
- Special Occasions: Cheesecake phyllo cups are a versatile dessert, perfect for celebrations like birthdays, weddings, or holiday gatherings. Their individual servings make them an appealing option for entertaining, allowing guests to enjoy a delightful treat without the need for slicing or serving. The elegant presentation and delicious flavor make them a favorite for both casual and formal events.
Ingredients for Cheesecake Cups
This section provides a complete list of the ingredients you’ll need to create delicious cheesecake phyllo cups. Each ingredient is essential for building layers of flavor and texture, so be sure to gather everything before you start cooking!
| Item | Amount/Specification | Notes |
|---|---|---|
| Phyllo Dough | 1 package (about 16 oz) | Thawed in the refrigerator overnight before use. |
| Unsalted Butter | ½ cup (115g) | Melted, for brushing on phyllo layers. |
| Cream Cheese | 8 oz (226g) | Softened at room temperature for easy mixing. |
| Sour Cream | ¼ cup (60g) | Adds creaminess to the filling. |
| Granulated Sugar | ⅓ cup (67g) | Sweetens the cheesecake filling. |
| Vanilla Extract | 1 teaspoon | Enhances the flavor of the filling. |
| Egg | 1 large | Room temperature, helps to bind the filling. |
| Toppings (optional) | To taste | Fresh berries, chocolate drizzle, or caramel sauce. |
- If you’re looking for a gluten-free option, consider using gluten-free phyllo dough.
- For a lighter option, you can substitute Greek yogurt for sour cream.
- Make sure your cream cheese is fully softened; this prevents lumps in the filling.
- Check the phyllo dough packaging for specific thawing instructions to avoid tearing.
Kitchen Tools and Prep Steps
Gathering the right kitchen tools and completing your prep steps are crucial for making delightful cheesecake phyllo cups. This section will provide you with a comprehensive list of necessary equipment and a series of preparation steps that will set you up for success in the kitchen.
Tools Needed
- 1 muffin tin (12-cup size)
- 1 mixing bowl (medium size)
- 1 whisk or electric mixer
- 1 sharp knife
- 1 pastry brush
- 1 measuring cup
- 1 measuring spoons set
- 1 rolling pin (optional, for phyllo dough)
- 1 baking sheet
Preparation Steps
- Preheat your oven to 350°F (175°C). This step is essential to ensure that your phyllo cups bake evenly and get crispy.
- Thaw 1 package (8 oz) of phyllo dough in the refrigerator overnight, or leave it out at room temperature for about 30 minutes before using. Make sure to keep it covered with a damp cloth to prevent it from drying out.
- Prepare the muffin tin by lightly greasing each cup with non-stick cooking spray or a brush of melted butter. This will help the phyllo cups easily release after baking.
- Cut the phyllo dough into squares, approximately 4×4 inches. You’ll need about 6-8 squares for each cup, so plan accordingly. Stack them with a layer of parchment paper in between to keep them from sticking.
- Gather your cheesecake filling ingredients, such as cream cheese, sugar, vanilla extract, and eggs. Having everything ready will streamline the process and keep you organized.
Cooking Instructions Step-by-Step
This section provides detailed steps to create your cheesecake phyllo cups, including baking the phyllo shells, preparing the creamy filling, and assembling everything together. Following these steps will ensure your dessert turns out perfectly and impressively delicious.
- Baking the Phyllo Cups: Preheat your oven to 350°F (175°C). While the oven is heating, brush 12 sheets of phyllo dough (thawed) with 1/2 cup of melted butter. Layer them in a muffin tin, crumpling the edges to create a cup shape. Bake for 10-12 minutes, or until golden brown and crispy. Keep an eye on them to avoid burning; they should smell nutty and feel crisp to the touch.
- Making the Filling: In a mixing bowl, combine 8 oz (227g) of cream cheese (softened), 1/2 cup (100g) of granulated sugar, 1 teaspoon of vanilla extract, and 1/4 cup (60ml) of sour cream. Use an electric mixer on medium speed to blend until the mixture is smooth and creamy, about 2-3 minutes. The filling should be thick but spreadable, with no lumps remaining.
- Assembling the Cups: Once the phyllo cups have cooled slightly, spoon about 1 tablespoon of the cheesecake filling into each cup. Use a spatula to gently spread it evenly if needed. Top with your choice of fresh berries, chocolate shavings, or a sprinkle of powdered sugar. Chill the assembled cups in the refrigerator for at least 30 minutes before serving to allow the filling to set.
Pro Tips for Perfect Cups
To create the ultimate cheesecake phyllo cups, mastering the phyllo dough and preventing sogginess is crucial. These tips will help ensure your cups are crispy, flaky, and ready to impress.
Perfecting Phyllo
- Keep it covered: Phyllo dough dries out quickly. Always keep the sheets covered with a damp cloth while you work to maintain moisture and prevent cracking.
- Use melted butter: Brush each layer of phyllo with melted butter—about 2 tablespoons per sheet. This adds richness and ensures a crisp texture as it bakes.
- Layer wisely: Use at least 4-6 layers of phyllo for each cup. This will give you the desired flakiness and support for the cheesecake filling.
Avoiding Soggy Cups
- Pre-bake the cups: Bake the phyllo cups at 375°F (190°C) for about 8-10 minutes until golden brown. This step creates a barrier that helps prevent sogginess from the filling.
- Cool before filling: Allow the phyllo cups to cool completely after baking. Filling warm cups can create steam, leading to sogginess.
- Choose the right filling consistency: Use a thicker cheesecake filling. If your filling seems too runny, consider adding an extra tablespoon of cream cheese to achieve a sturdier texture.
Variations and Substitutions
Exploring variations and substitutions for your cheesecake phyllo cups allows you to cater to different dietary needs while still enjoying a delicious treat. Whether you’re looking for gluten-free options or vegan alternatives, these adjustments can help ensure everyone can enjoy this delightful dessert.
Gluten-Free Options
If you’re looking for a gluten-free version of cheesecake phyllo cups, consider the following substitutions:
- Use gluten-free phyllo dough, which is widely available in most grocery stores. Brands like Athena or Fillo Factory offer great options.
- Ensure that your cream cheese is labeled gluten-free, as some brands may include additives that contain gluten.
- Replace regular granulated sugar with a gluten-free sweetener, like coconut sugar or agave syrup, for a different flavor profile.
Vegan Alternatives
For a vegan-friendly cheesecake phyllo cup, you can make the following swaps:
- Use vegan cream cheese, such as Tofutti or Violife, to maintain the creamy texture.
- Replace eggs (if included in your original recipe) with flaxseed meal (1 tablespoon flaxseed meal mixed with 2.5 tablespoons water equals one egg) or silken tofu blended smooth.
- Opt for a vegan sweetener like maple syrup or agave nectar instead of honey or regular sugar.
Chef’s tip: Always check labels when choosing substitutes to ensure they meet your dietary needs.
| Ingredient | Regular | Gluten-Free | Vegan |
|---|---|---|---|
| Phyllo Dough | Regular phyllo | Gluten-free phyllo | Vegan phyllo (check for egg-free) |
| Cream Cheese | Regular cream cheese | Gluten-free cream cheese | Vegan cream cheese |
| Sugar | Granulated sugar | Gluten-free sweetener | Maple syrup or agave |
Serving Suggestions and Pairings
When you serve your cheesecake phyllo cups, presentation and complementary flavors can elevate your dessert experience. Here are some thoughtful plating tips and drink pairings to make your treats shine at any gathering.
Plating Tips
- Arrange the phyllo cups on a decorative platter, leaving some space between each to showcase their delicate structure.
- Garnish with fresh berries, such as raspberries or blueberries, which add a pop of color and a tart contrast to the sweet cheesecake.
- Drizzle a balsamic reduction or a homemade fruit sauce around the cups for an artistic touch that enhances both flavor and visual appeal.
- Sprinkle with powdered sugar right before serving for a touch of elegance.
Best Drink Pairings
Choosing the right drink can complement the flavors of your cheesecake phyllo cups beautifully. Here are some fantastic options:
| Drink | Description |
|---|---|
| Espresso | The rich, bold flavor of espresso contrasts perfectly with the sweet, creamy filling. |
| Sparkling Wine | The bubbles cut through the richness, making it a delightful pairing. |
| Herbal Tea | Flavors like chamomile or mint provide a soothing balance to the dessert. |
Chef’s tip: If serving at a party, consider pairing the cups with a signature cocktail that incorporates similar flavors, such as a lemon or berry spritzer.
Quick Summary
| Prep Time | Cook Time | Total Time | Servings |
|---|---|---|---|
| 15 minutes | 12 minutes | 27 minutes | 12 cups |
- Preheat oven to 350°F (175°C) before starting.
- Layer phyllo dough with melted butter in a muffin tin for cups.
- Mix cream cheese with sugar, vanilla, and egg until smooth.
- Fill phyllo cups with cheesecake mixture, about 2/3 full.
- Bake for 12-15 minutes until set and lightly golden.
- Cool completely before serving, then top with fruit or chocolate.
- Tip 1: Keep phyllo dough covered to prevent it from drying out.
- Tip 2: Use room temperature cream cheese for a smoother filling.
- Tip 3: Experiment with toppings for added flavor and presentation.
Frequently Asked Questions
Can I make this ahead of time? How to store and reheat?
You can prepare the cheesecake filling a day in advance and store it in the refrigerator, but it’s best to fill the phyllo cups just before serving. To reheat, pop them in a preheated oven at 350°F (175°C) for about 5-7 minutes until warmed through.
What can I substitute for cream cheese?
If you’re looking for a lighter option, you can substitute cream cheese with mascarpone cheese or a blend of Greek yogurt and cottage cheese for a similar creamy texture.
How do I know when it’s done?
Your cheesecake filling should be set around the edges but slightly jiggly in the center, which usually takes about 20-25 minutes in the oven. Once cooled, it should firm up nicely as it chills in the fridge.
Can I freeze this? How long does it last?
Yes, you can freeze the filled phyllo cups for up to 2 months, but it’s best to freeze them unfilled to maintain the crispiness of the phyllo. If frozen, thaw in the fridge overnight before serving.
Why did my phyllo cups turn out soggy?
Soggy phyllo cups are often caused by adding the filling too early or not baking them long enough; make sure to bake them until they’re golden brown and crisp. Also, try to keep the filling chilled until just before serving to minimize moisture absorption.

- Top 10 Best Professional Home Espresso Machine 2026 - July 29, 2026
- Top 10 Best Lever Espresso Machine 2026 - July 29, 2026
- Top 10 Best Espresso Machine Under 2000 2026 - July 29, 2026