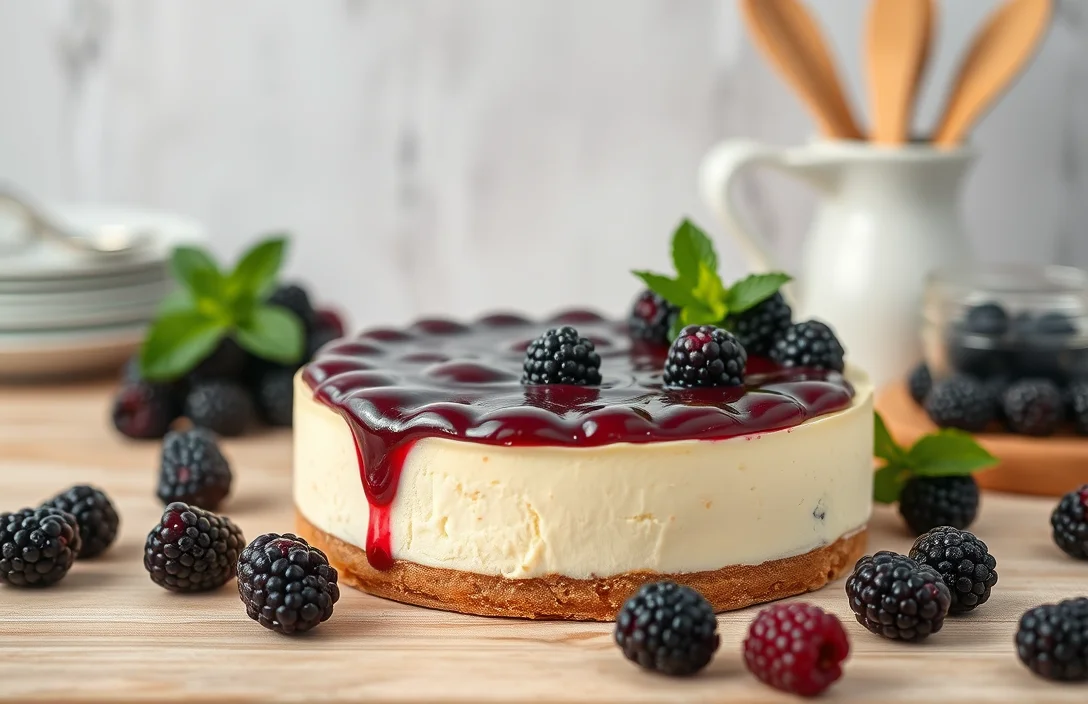
Decadent Blackberry No-Bake Cheesecake: Easy Recipe to Impress
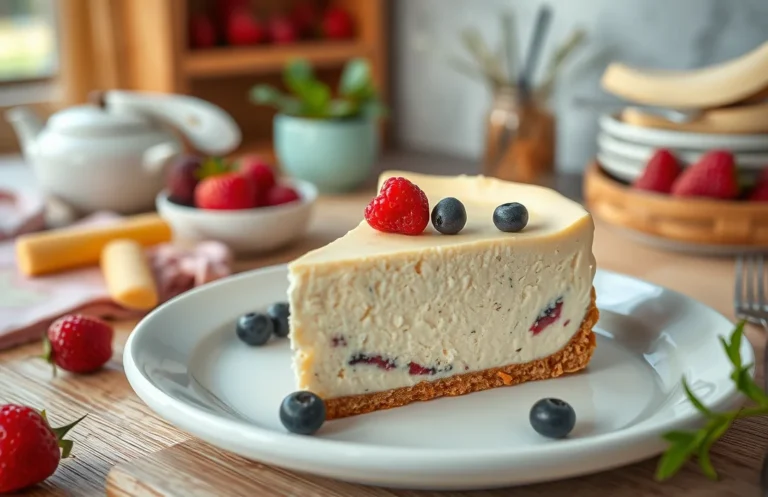
If you’re looking for a dessert that’s as luscious as it is simple, this blackberry no-bake cheesecake is about to become your new go-to. With a creamy filling that perfectly balances the tartness of fresh blackberries and a buttery graham cracker crust, it’s a delightful indulgence that will have everyone asking for seconds!
This recipe is straightforward and requires just 15 minutes of prep time, followed by a 4-hour chill. It serves 8 people and is rated easy in difficulty, making it perfect for both seasoned bakers and beginners.
| Prep Time | Cook Time | Total Time | Servings | Difficulty |
|---|---|---|---|---|
| 15 minutes | 0 minutes | 4 hours | 8 | Easy |
Blackberry Cheesecake History
Blackberry cheesecake is a delightful dessert that combines the rich creaminess of cheesecake with the sweet-tart flavor of blackberries. Its significance lies not only in its delicious taste but also in its association with summer gatherings and celebrations, making it a cherished treat for many.
- Origins of Cheesecake: Cheesecake has roots tracing back to ancient Greece, where it was served to athletes during the first Olympic Games in 776 B.C. Over time, it evolved through various cultures, leading to the diverse styles we enjoy today.
- Popularity of Blackberries: Blackberries are native to North America and have been enjoyed for centuries. Their natural sweetness and vibrant color make them a perfect pairing for cheesecake, adding a seasonal touch that resonates with summer festivities.
- Seasonal Treat: Blackberry cheesecake is often served during warm months, especially at family gatherings, picnics, and barbecues. The freshness of blackberries enhances the overall experience, making it a go-to dessert for occasions that celebrate togetherness.
- No-Bake Variation: The no-bake cheesecake variant gained popularity as home cooks looked for simpler methods to create this beloved dessert. This approach eliminates the need for baking, making it an accessible option for those who may not have extensive baking skills or equipment.
Ingredients for Cheesecake
This section details all the necessary ingredients to create a delicious blackberry no-bake cheesecake. Measuring your ingredients accurately is crucial for achieving the perfect texture and flavor, so let’s get started!
| Item | Amount/Specification | Notes |
|---|---|---|
| Graham cracker crumbs | 1 ½ cups (150g) | Crushed finely for the crust |
| Granulated sugar | ¼ cup (50g) | For crust and filling |
| Unsalted butter | ½ cup (115g) | Melted, for crust |
| Cream cheese | 16 oz (450g) | Softened to room temperature |
| Sour cream | 1 cup (240g) | For creaminess |
| Powdered sugar | ½ cup (60g) | For sweetness and texture |
| Vanilla extract | 1 teaspoon | For flavor |
| Fresh blackberries | 1 cup (150g) | Plus extra for garnish |
| Gelatin | 1 tablespoon | For setting the cheesecake |
| Water | 2 tablespoons | For blooming the gelatin |
- Ingredient substitutions: For a gluten-free option, use gluten-free graham cracker crumbs.
- Ensure your cream cheese is at room temperature; this helps in achieving a smooth filling.
- Be cautious with the gelatin; if overcooked, it may not set properly.
Essential Kitchen Equipment
To create a delicious blackberry no-bake cheesecake, you’ll need specific kitchen tools to ensure a smooth preparation process. Having the right equipment on hand not only makes the task easier but also helps you achieve the perfect texture and flavor in your cheesecake.
| Item | Amount/Specification | Notes |
|---|---|---|
| 9-inch springform pan | 1 | For easy removal of the cheesecake after chilling. |
| Mixing bowls | 2 | One for the crust and one for the filling. |
| Electric mixer or whisk | 1 | A hand mixer is ideal for achieving a smooth filling. |
| Rubber spatula | 1 | For folding in ingredients and scraping down the bowl. |
| Measuring cups and spoons | 1 set | For accurate measurement of ingredients. |
| Food processor or rolling pin | 1 | For crushing graham crackers into fine crumbs for the crust. |
| Plastic wrap | 1 roll | To cover the cheesecake while it chills in the fridge. |
- Tip: If you don’t have a springform pan, you can use a regular pie dish, but be sure to line it with parchment paper for easy removal.
- Make sure your mixing bowls are large enough to accommodate the volume of the filling.
- Keep your ingredients at room temperature for best mixing results.
Preparation Steps
In this section, we will outline the essential preparation steps to create your blackberry no-bake cheesecake. Following these steps will ensure that you have everything ready for a smooth assembly and a delightful dessert experience.
- Gather Your Ingredients: Before you start, make sure you have all your ingredients on hand. You will need 1 ½ cups (150g) of graham cracker crumbs, ½ cup (100g) of granulated sugar, ½ cup (115g) of unsalted butter (melted), 16 ounces (450g) of cream cheese (softened), 1 cup (240ml) of heavy cream, 1 teaspoon of vanilla extract, and 1 cup (150g) of fresh blackberries. This preparation will save you time during assembly.
- Prepare the Crust: In a medium bowl, mix the graham cracker crumbs, granulated sugar, and melted butter until the mixture resembles wet sand. Press this mixture evenly into the bottom of a 9-inch (23cm) springform pan using the back of a measuring cup. The crust should feel firm and hold together when pressed.
- Soften the Cream Cheese: Take the cream cheese out of the refrigerator and let it sit at room temperature for about 30 minutes. This step is crucial as softened cream cheese will blend more smoothly into the filling without lumps. You want it to feel soft and spreadable to ensure a creamy texture.
- Prepare the Blackberries: Rinse the blackberries under cold water and gently pat them dry with a paper towel. Set aside a handful for garnish later. The rest will be blended into the filling, giving it a lovely color and flavor.
- Chill Your Mixing Bowl: For best results when whipping the heavy cream, place your mixing bowl and beaters in the freezer for about 10 minutes before whipping. This helps the cream whip up faster and hold its shape better, resulting in a light and airy cheesecake.
Step-by-Step Instructions
In this section, you’ll find detailed, step-by-step instructions for creating a delightful blackberry no-bake cheesecake. Each step is crafted to ensure your cheesecake sets perfectly and tastes incredible, with tips to help you along the way.
- Prepare the crust: In a medium mixing bowl, combine 1 ½ cups of graham cracker crumbs (about 150g) with ½ cup of melted unsalted butter (115g) and ¼ cup of granulated sugar (50g). Mix until the crumbs are evenly coated and the texture resembles wet sand. Press this mixture firmly into the bottom of a 9-inch (23cm) springform pan using the back of a measuring cup. Chill the crust in the refrigerator for at least 30 minutes to set.
- Make the filling: In a large bowl, beat 16 ounces (450g) of cream cheese until smooth and creamy, about 2-3 minutes. Gradually add in ½ cup of powdered sugar (60g) and 1 teaspoon of vanilla extract, mixing until fully incorporated. The mixture should be thick and smooth without lumps.
- Add the whipped cream: In a separate bowl, whip 1 cup (240ml) of heavy cream until stiff peaks form, which usually takes about 3-5 minutes. Gently fold the whipped cream into the cream cheese mixture using a rubber spatula, being careful not to deflate the whipped cream. The filling should appear light and fluffy.
- Incorporate the blackberries: Puree 1 cup (150g) of fresh blackberries in a blender until smooth. If you prefer a seedless filling, strain the puree through a fine-mesh sieve. Gently fold the blackberry puree into the cream cheese mixture until fully combined, creating a beautiful swirl of color.
- Fill the crust: Pour the blackberry filling over the chilled crust, using a spatula to spread it evenly. Tap the pan gently on the counter to remove any air bubbles. Cover the cheesecake with plastic wrap and refrigerate for at least 4 hours, or overnight for best results. The cheesecake should be firm to the touch when ready.
- Serve: Once set, carefully remove the sides of the springform pan. Garnish with additional fresh blackberries and a light dusting of powdered sugar if desired. Slice with a sharp knife, wiping it clean between cuts for neat slices.
Expert Tips for Success
Creating the perfect blackberry no-bake cheesecake requires attention to detail and a few insider secrets. These tips will help you achieve a creamy texture and vibrant flavor, ensuring that your cheesecake is a standout dessert.
- Use room temperature cream cheese: Make sure your 16 ounces (450g) of cream cheese is at room temperature before mixing. This helps to achieve a smooth and lump-free filling.
- Whip your cream until stiff peaks: When whipping 1 cup (240ml) of heavy cream, stop once you see stiff peaks forming. This ensures your cheesecake is light and airy, rather than dense and heavy.
- Chill the cheesecake properly: After assembling your cheesecake, refrigerate it for at least 4 hours or overnight. This allows it to set properly, making it easier to slice and serve.
- Use fresh blackberries: Opt for fresh blackberries for the best flavor. If using frozen, thaw them and drain excess liquid to avoid a watery filling.
- Don’t skip the gelatin: If your recipe calls for it, use 1 tablespoon of unflavored gelatin dissolved in 3 tablespoons of water. This helps stabilize the cheesecake and prevents it from collapsing.
- Be gentle when folding: When incorporating the whipped cream into the cream cheese mixture, use a folding motion. This preserves the airiness of the whipped cream, resulting in a lighter cheesecake.
Variations and Substitutions
This section offers a variety of substitutions and modifications that can accommodate dietary restrictions or personal preferences while making your blackberry no-bake cheesecake. Whether you’re looking for a gluten-free option or want to reduce sugar, these ideas will help you tailor the cheesecake to your needs.
| Item | Amount/Specification | Notes |
|---|---|---|
| Crust | 1 ½ cups graham cracker crumbs | Substitute with gluten-free graham crackers for a gluten-free option. |
| Sugar | ½ cup granulated sugar | Use ⅓ cup honey or agave syrup for a healthier alternative. |
| Cream Cheese | 16 oz (450g) cream cheese | Opt for a dairy-free cream cheese for a vegan version. |
| Heavy Cream | 1 cup heavy cream | Replace with coconut cream for a dairy-free cheesecake. |
| Blackberries | 2 cups fresh blackberries | Substitute with raspberries or blueberries for different flavor profiles. |
- Tip: For a no-sugar added option, use unsweetened blackberry puree and adjust the sweetness with stevia or erythritol.
- Always taste and adjust the filling sweetness based on the tartness of your blackberries.
- If you’re short on time, pre-made crusts can save you a step; just make sure they fit your dietary needs.
Serving and Plating Ideas
Presenting your blackberry no-bake cheesecake beautifully can elevate the dessert experience. Here are some creative ideas for serving and garnishing your cheesecake, ensuring that each slice is as delightful to the eyes as it is to the palate.
Garnishing Techniques
- Top each slice with fresh blackberries for a burst of color and flavor.
- Drizzle a homemade blackberry sauce made by simmering 1 cup of blackberries with 2 tablespoons of sugar until thickened, about 10-15 minutes.
- Dust the cheesecake with a light sprinkle of powdered sugar just before serving for a touch of elegance.
- Add a dollop of whipped cream on the side or on top, flavored with a teaspoon of vanilla extract for added depth.
Complementary Flavors
To enhance the flavors of your cheesecake, consider pairing it with:
- A scoop of vanilla bean ice cream for a creamy contrast.
- Crumbled graham crackers or shortbread cookies sprinkled on top for added texture.
- Mint leaves for a fresh, vibrant garnish.
Pro tip: For an extra layer of flavor, consider adding a splash of lemon juice to the blackberry sauce to balance the sweetness.
Plating Suggestions
For a restaurant-style presentation:
- Serve each slice on a chilled plate to keep it firm and refreshing.
- Arrange fresh blackberries and mint leaves artfully around the cheesecake.
- Use a squeeze bottle to create artistic swirls of blackberry sauce on the plate.
Remember, presentation matters! A beautifully plated cheesecake not only tastes great but also impresses your guests. Enjoy your creation!
Quick Summary
| Prep Time | 20 minutes |
|---|---|
| Cook Time | 0 minutes |
| Total Time | 4 hours (chilling) |
| Servings | 8 |
- Crust preparation: Combine 1 ½ cups crushed graham crackers and ½ cup melted butter.
- Cheesecake filling: Beat 16 oz cream cheese, ½ cup sugar, and 1 tsp vanilla until smooth.
- Blackberry layer: Puree 2 cups fresh blackberries and mix with 1 tbsp lemon juice.
- Layering: Spread half of the cheesecake mixture, add blackberry puree, then top with remaining cheesecake mix.
- Chill: Refrigerate for at least 4 hours to set properly.
- Tip 1: Use room temperature cream cheese for a smoother filling.
- Tip 2: Ensure the crust is compact to prevent crumbling when slicing.
- Tip 3: Garnish with fresh blackberries for an appealing presentation.
Frequently Asked Questions
Can I make this ahead of time? How to store and reheat?
You can definitely make this cheesecake up to 2 days in advance. Store it covered in the refrigerator, and there’s no need to reheat it—just serve it chilled!
What can I substitute for cream cheese?
If you’re looking for a lighter option, you can substitute mascarpone cheese for cream cheese, which will still give you that creamy texture. Greek yogurt is another option, but use half the amount to avoid making it too tangy.
How do I know when it’s done?
The cheesecake should be set on the edges but still slightly jiggly in the center when you take it out of the refrigerator. After chilling for at least 4 hours, it should hold its shape when sliced.
Can I freeze this? How long does it last?
Yes, you can freeze the cheesecake for up to 2 months. Just make sure it’s tightly wrapped in plastic wrap and aluminum foil to prevent freezer burn.
What if I don’t have a springform pan?
If you don’t have a springform pan, you can use a 9-inch round cake pan lined with parchment paper, allowing for easy removal. Just be careful when slicing it to keep the edges intact!

- Decadent Peanut Butter No-Bake Cheesecake: Easy Recipe to Indulge - April 3, 2026
- Delicious Mango No-Bake Cheesecake: Step-by-Step Recipe - April 3, 2026
- Decadent Raspberry No-Bake Cheesecake: Easy Step-by-Step Recipe - April 3, 2026