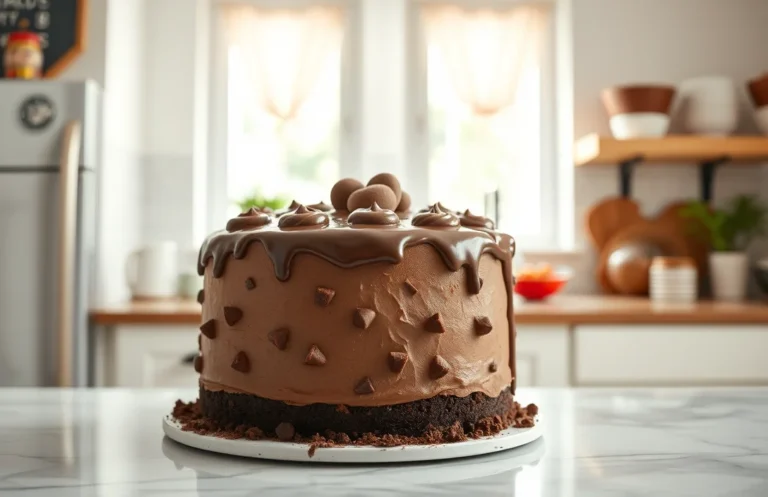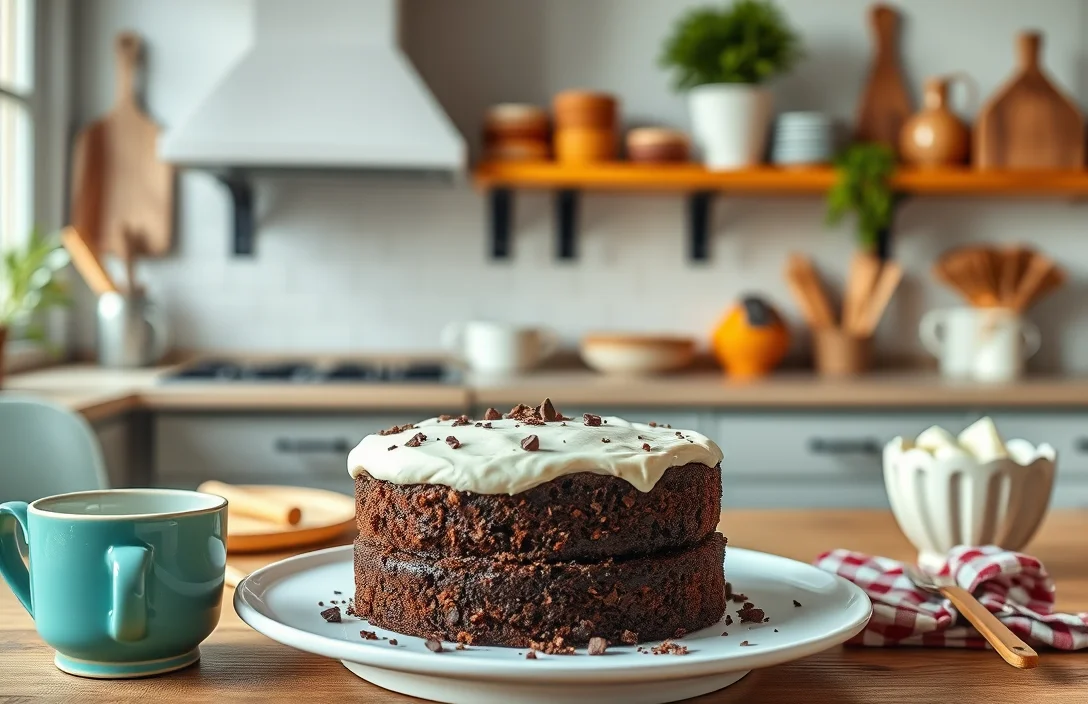
Decadent Chocolate Cake Recipe: Step-by-Step for Perfect Texture
Chocolate cake has a magical way of bringing people together, whether it’s for birthdays, celebrations, or simply indulging on a cozy evening at home. This rich, moist cake is a crowd-pleaser that will make your taste buds sing and your heart feel warm. Trust me, one slice won’t be enough!
Get ready to bake your new favorite dessert with this easy chocolate cake recipe that’s perfect for any occasion. Total time: 1 hour, Difficulty: easy, Servings: 8-10. You’ll find step-by-step instructions, precise measurements, and tips to ensure your cake turns out just right.
| Prep Time | Cook Time | Total Time | Servings | Difficulty |
|---|---|---|---|---|
| 20 minutes | 30 minutes | 50 minutes | 8-10 | Easy |
Chocolate Cake History
Chocolate cake has a rich heritage that dates back to its origins in ancient civilizations. Understanding its history not only enhances our appreciation for this beloved dessert but also inspires the way we create our own chocolate cake recipes today, especially ones that reflect the meticulous style of Preppy Kitchen.
- Origin of Chocolate Cake: The first recorded chocolate cake appeared in the 18th century when chocolate became available in solid form. Prior to this, chocolate was primarily consumed as a beverage. The introduction of cocoa powder in the 19th century by innovators like Joseph Fry and later, the invention of baking powder, allowed for lighter, fluffier cakes that could incorporate chocolate effectively.
- Special Features of This Recipe: The Preppy Kitchen chocolate cake recipe emphasizes a balance of rich flavors and a moist texture. This is achieved through precise measurements and techniques, such as using buttermilk for tenderness and incorporating both cocoa powder and melted chocolate for depth. The aesthetic is equally important; a well-decorated cake that showcases the cake’s layers and a glossy chocolate ganache creates an inviting presentation.
- When to Serve: Chocolate cake is a versatile dessert, perfect for celebrations like birthdays, weddings, or even casual gatherings. Its rich flavor pairs wonderfully with coffee or a scoop of vanilla ice cream, making it an ideal choice for both formal and informal occasions.
Ingredients List
This section outlines all the necessary ingredients you’ll need to create a delicious chocolate cake, from the essential dry components to the rich wet ingredients that will bring your cake to life. Having everything measured and prepared beforehand will streamline your baking process and ensure a perfect outcome.
| Item | Amount/Specification | Notes |
|---|---|---|
| All-purpose flour | 1 ¾ cups (220g) | Sifted for lightness |
| Cocoa powder | ¾ cup (75g) | Unsweetened, sifted |
| Baking soda | 1 ½ teaspoons | Ensure it’s fresh for proper rising |
| Baking powder | 1 ½ teaspoons | Double-acting recommended |
| Salt | ½ teaspoon | Enhances flavor |
| Granulated sugar | 2 cups (400g) | For sweetness and moisture |
| Eggs | 2 large | At room temperature |
| Whole milk | 1 cup (240ml) | Can substitute with almond milk for dairy-free |
| Vegetable oil | ½ cup (120ml) | For moisture; can use melted butter |
| Vanilla extract | 2 teaspoons | Pure extract for best flavor |
| Boiling water | 1 cup (240ml) | Adds moisture, do not skip! |
- Tip: Use high-quality cocoa powder for deeper chocolate flavor.
- Tip: Make sure all ingredients are at room temperature for better mixing.
- Note: If you’re allergic to eggs, consider using unsweetened applesauce as a substitute (¼ cup per egg).
Essential Kitchen Tools
Gathering the right kitchen tools is essential for creating a delicious chocolate cake that not only tastes great but also has the perfect texture and appearance. With the proper equipment, you’ll streamline your baking process and ensure consistent results. Below, I’ve outlined the necessary tools you’ll need to make this Preppy Kitchen chocolate cake.
- Baking Pans: You’ll need two 9-inch round cake pans. Grease them with butter or non-stick spray and line the bottoms with parchment paper for easy release. This will help ensure your cakes come out smoothly without sticking.
- Mixing Bowls: Use a large mixing bowl for combining the dry ingredients and a medium bowl for the wet ingredients. A glass or stainless steel bowl is ideal as it helps you see the consistency of your batter. Make sure to have a whisk and a spatula handy for thorough mixing.
- Measuring Cups and Spoons: Accurate measurements are crucial for baking success, so have a set of dry measuring cups, liquid measuring cups, and measuring spoons ready. Use a scale if you prefer weight measurements, as they provide even more precision.
- Electric Mixer: An electric stand mixer or handheld mixer will make whipping your batter effortless. Mix on medium speed until the ingredients are well combined and fluffy, which should take about 2-3 minutes. If you don’t have a mixer, a whisk can work, but it will require more elbow grease!
- Cooling Rack: After baking, let your cakes cool in the pans for about 10 minutes before transferring them to a cooling rack. This helps prevent sogginess and allows for even cooling. If you skip this step, the bottom can become sticky.
Step-by-Step Instructions
This section will guide you through the essential steps for mixing the batter, baking the cake, and cooling it before frosting. Following these detailed instructions will help ensure your chocolate cake turns out perfectly moist and delicious, embodying the aesthetic and techniques of Preppy Kitchen.
- Mixing the Batter: In a large mixing bowl, whisk together 1¾ cups (220g) all-purpose flour, 2 cups (400g) granulated sugar, ¾ cup (65g) unsweetened cocoa powder, 1½ teaspoons baking powder, 1½ teaspoons baking soda, and 1 teaspoon salt until well combined. The mixture should be uniform in color and texture, with no clumps. In a separate bowl, combine 2 large eggs, 1 cup (240ml) whole milk, ½ cup (120ml) vegetable oil, and 2 teaspoons vanilla extract; whisk until smooth. Gradually add the wet ingredients to the dry ingredients and mix until just combined, being careful not to overmix.
- Baking Time and Temperature: Preheat your oven to 350°F (175°C). Grease and flour two 9-inch round cake pans to prevent sticking. Divide the batter evenly between the pans, smoothing the tops with a spatula. Bake for 30-35 minutes or until a toothpick inserted into the center comes out clean. The cakes should rise nicely and have a slight dome shape, with the edges pulling away from the sides of the pans.
- Cooling and Frosting: Once baked, remove the cakes from the oven and let them cool in the pans for 10 minutes. Then, carefully turn them out onto wire racks to cool completely. This cooling process is crucial; if you frost them while warm, the frosting may melt. When fully cooled, you can frost with your favorite chocolate buttercream or ganache, ensuring an even layer for a polished finish.
Baking Tips and Troubleshooting
This section will help you achieve the perfect chocolate cake texture and address common baking mistakes that can occur along the way. Knowing how to troubleshoot while baking is essential for ensuring your cake turns out beautifully every time.
Achieving Perfect Texture
- Measure accurately: Use a kitchen scale for precision, especially when measuring flour. Too much flour can lead to a dry cake. Aim for 1 ¾ cups (220g) of all-purpose flour for the right balance.
- Room temperature ingredients: Ensure your eggs and butter are at room temperature (about 70°F or 21°C) before mixing. This helps create a smooth batter that traps air for a lighter texture.
- Don’t overmix: Mix your batter just until the dry ingredients are incorporated. Overmixing can lead to a dense cake. The batter should be smooth but slightly lumpy when finished.
Common Baking Mistakes
- Oven temperature issues: Always preheat your oven to 350°F (175°C). An oven thermometer can help ensure accuracy, as some ovens run hotter or cooler than indicated.
- Not using parchment paper: Greasing the pans is not enough. Line the bottom with parchment paper for easier removal and to prevent sticking.
- Opening the oven door: Do not open the oven door during the first 20 minutes of baking. This can cause the cake to collapse due to sudden temperature changes.
How to Fix Mistakes
- Dry cake: If your cake turns out dry, serve it with a rich chocolate ganache or a simple syrup (1 cup sugar dissolved in 1 cup water) to moisten it.
- Sunken middle: A sunken cake may be due to underbaking. To salvage, you can cut out the middle and fill it with whipped cream or frosting to disguise the imperfection.
- Overbaked edges: If the edges are too dark, cover them with frosting or ganache to mask any burnt areas.
Recipe Variations
If you’re looking to customize your chocolate cake to fit dietary needs or simply enhance its flavor, there are plenty of delicious options to choose from. Whether you’re gluten-free, vegan, or just want to try something new, these variations will ensure everyone can enjoy a slice of this decadent dessert.
Gluten-Free Options
To make a gluten-free chocolate cake, substitute all-purpose flour with a gluten-free flour blend. Here’s a quick switch:
- 1 ¾ cups gluten-free all-purpose flour blend (210g)
- 1 teaspoon xanthan gum (if not included in blend)
Mix the dry ingredients well to avoid clumping, and bake as directed. The texture should be moist and fluffy.
Vegan Substitutes
For a vegan chocolate cake, you can replace the eggs and dairy as follows:
- 3 tablespoons ground flaxseed mixed with 9 tablespoons water (let sit for 5 minutes for a flax egg)
- 1 cup unsweetened applesauce instead of butter
- 1 cup almond milk or any plant-based milk
The batter should have a smooth consistency, and the cake will rise beautifully while baking at 350°F (175°C) for about 25-30 minutes. You’re looking for a springy texture when gently pressed.
Flavor Variations
Spice up your chocolate cake with these flavor variations:
- Add 1 teaspoon of espresso powder to enhance the chocolate flavor.
- Incorporate ½ cup of chocolate chips for extra richness.
- Mix in 1 teaspoon of peppermint extract for a refreshing twist.
Chef’s tip: Always taste your batter before baking to adjust sweetness or flavors according to your preference!
| Variation | Substitution |
|---|---|
| Gluten-Free | Gluten-free flour blend |
| Vegan | Flax eggs, applesauce, plant milk |
Serving and Plating Ideas
Presenting your chocolate cake beautifully elevates the dessert experience. Here are some creative serving suggestions and plating techniques to make your cake a visual delight that complements its rich flavor.
Plating Techniques
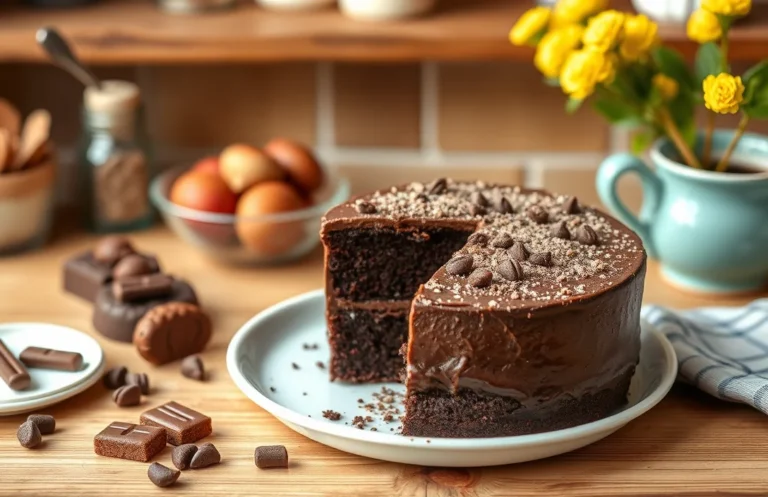
- Layered Slice: Cut a slice that shows off the beautiful layers of chocolate. Use a serrated knife for a clean cut.
- Dusting: Sift powdered sugar or cocoa powder over the top for a delicate finish, adding a touch of elegance.
- Garnishing: Add fresh berries, like raspberries or strawberries, and mint leaves on the plate to contrast the richness of the cake.
- Chocolate Drizzle: Melt 2 ounces of chocolate, then drizzle it over the slice for an indulgent touch.
Perfect Pairings
To enhance the flavors of your chocolate cake, consider these pairings:
- Coffee: Serve with a freshly brewed cup of coffee or espresso, as the bitterness complements the sweetness.
- Ice Cream: A scoop of vanilla or salted caramel ice cream adds creaminess and balances the cake’s richness.
- Fruit Sauces: A raspberry or cherry sauce can provide a tart contrast to the chocolate.
Serving Suggestions
Chef’s tip: For an extra special touch, warm individual slices in the microwave for 10-15 seconds before serving to enhance the chocolate flavor.
For an inviting presentation, consider serving the cake on a decorative cake stand. This not only showcases your work but also makes it easy for guests to serve themselves. Enjoy your creation and watch everyone delight in each rich, chocolaty bite!
Quick Summary
| Prep Time | 20 minutes |
|---|---|
| Cook Time | 30 minutes |
| Total Time | 50 minutes |
| Servings | 8 |
- Preheat oven: Set to 350°F (175°C) before mixing ingredients.
- Mix dry ingredients: Whisk together flour, cocoa powder, baking soda, and salt.
- Cream butter and sugar: Beat until light and fluffy for about 3-5 minutes.
- Add eggs one at a time: Ensure each is fully incorporated before adding the next.
- Bake in prepared pans: Use greased and floured round cake pans for best results.
- Cool completely: Let cakes cool in pans for 10 minutes before transferring to wire racks.
- Tip: Use room temperature ingredients for better blending.
- Tip: Don’t overmix the batter to keep the cake light and fluffy.
- Tip: Test for doneness with a toothpick; it should come out clean.
Frequently Asked Questions
Can I make this ahead of time? How to store and reheat?
You can make the chocolate cake up to 2 days ahead of time; store it in an airtight container at room temperature. If you want to reheat it, pop a slice in the microwave for about 10-15 seconds until just warm.
What can I substitute for eggs in this recipe?
You can use 1/4 cup unsweetened applesauce or 1/4 cup plain yogurt for each egg you want to replace in the chocolate cake recipe. Both alternatives will keep the cake moist and add a bit of sweetness.
How do I know when it’s done?
Your chocolate cake is done when a toothpick inserted in the center comes out clean or with a few moist crumbs attached, usually around 30-35 minutes at 350°F (175°C). The edges will also start to pull away from the pan slightly.
Can I freeze this? How long does it last?
You can freeze the chocolate cake for up to 3 months by wrapping it tightly in plastic wrap and then aluminum foil. To thaw, simply leave it in the fridge overnight before serving.
What if I don’t have a 9-inch round cake pan?
If you don’t have a 9-inch round cake pan, you can use an 8-inch pan but keep an eye on the baking time, as it may need an extra 5-10 minutes. Alternatively, you can use a square baking dish, just adjust the baking time similarly.