Decadent Chocolate No-Bake Cheesecake: Easy Recipe & Tips
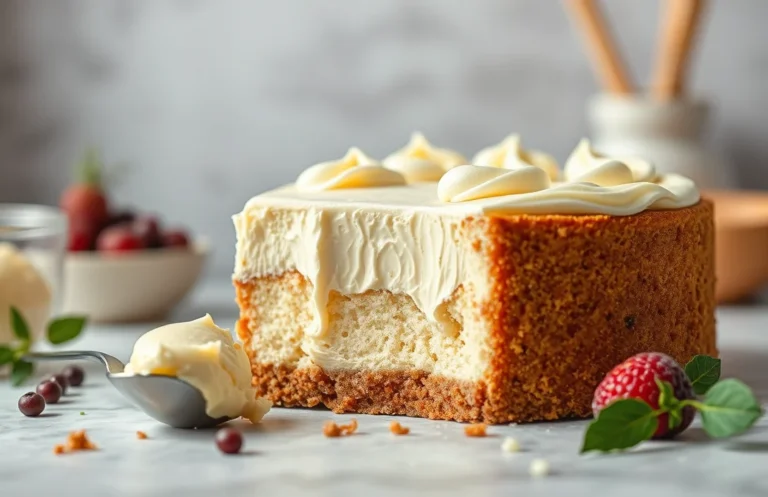
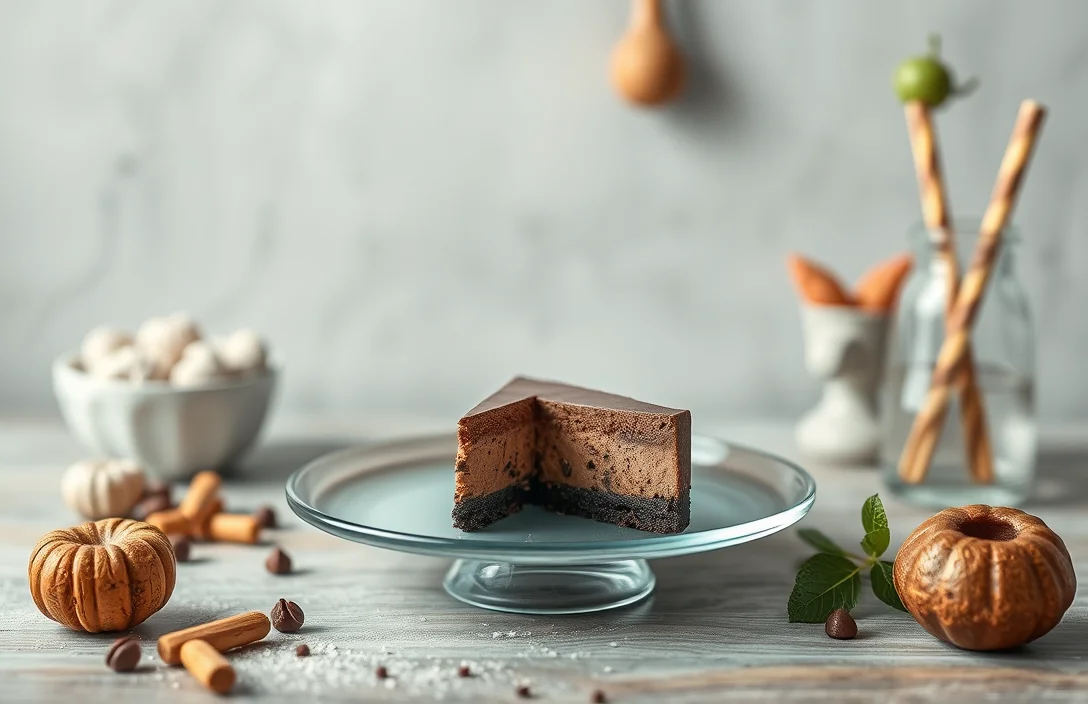
There’s something utterly delightful about a chocolate no-bake cheesecake that makes it a go-to dessert for any occasion. Rich, creamy, and decadently chocolatey, it’s an indulgent treat that transforms a simple gathering into a sweet celebration. Plus, who can resist a dessert that requires no oven?
Total time: 4 hours, Difficulty level: Easy, Servings: 8.
| Prep Time | Cook Time | Total Time | Servings | Difficulty |
|---|---|---|---|---|
| 30 minutes | 0 minutes | 4 hours | 8 | Easy |
Origin of No-Bake Cheesecake
No-bake cheesecake has a rich history rooted in the traditional cheesecake that dates back to ancient Greece. While the classic cheesecake typically requires baking, the no-bake version offers a simpler, quicker alternative that retains the creamy texture and delectable flavor without the need for an oven. This adaptation is especially popular for those looking for a hassle-free dessert option.
History of Cheesecake
Cheesecake has been enjoyed for centuries, with its origins traced back to the Greek island of Samos. The ancient Greeks made a simple cake using fresh cheese, flour, and honey. Over time, variations emerged across different cultures, leading to the diverse styles of cheesecake we know today. The introduction of cream cheese in the 19th century in the United States gave rise to the rich, creamy texture that many people adore.
Why No-Bake?
No-bake cheesecakes have gained popularity for several reasons:
- Convenience: They are easy to prepare and require minimal cooking skills.
- Time-saving: You can whip one up in under 30 minutes, and it sets in the refrigerator.
- Versatility: The no-bake method allows for endless flavor combinations, from chocolate to fruit-infused varieties.
“The beauty of no-bake cheesecake is its simplicity; it invites creativity while ensuring a delightful outcome.”
This method allows home chefs to enjoy a delicious dessert without the worry of overbaking or managing oven temperatures, making it perfect for gatherings, hot days, or simply when you want a sweet treat with less fuss.
Ingredients for Chocolate Cheesecake
Gathering the right ingredients is crucial for crafting a delicious chocolate no-bake cheesecake. This section provides a complete list of everything you’ll need, along with precise measurements to ensure your dessert turns out perfectly every time. Let’s dive into the essentials!
| Item | Amount/Specification | Notes |
|---|---|---|
| Cream Cheese | 16 ounces (450g) | Softened to room temperature for easy mixing |
| Granulated Sugar | ½ cup (100g) | Adjust to taste if you prefer it sweeter |
| Heavy Whipping Cream | 1 cup (240ml) | Chilled for better whipping |
| Unsweetened Cocoa Powder | ½ cup (50g) | For rich chocolate flavor |
| Chocolate Chips | ½ cup (90g) | Melted and cooled slightly |
| Graham Cracker Crumbs | 1 ½ cups (150g) | For the crust; can substitute with gluten-free crumbs if needed |
| Unsalted Butter | ½ cup (115g) | Melted for crust |
| Vanilla Extract | 1 teaspoon | Adds depth to the flavor |
- For a lighter taste, consider using mascarpone cheese instead of cream cheese.
- To enhance the chocolate flavor, you can add a pinch of espresso powder to the cocoa mix.
- Ensure all dairy ingredients are at room temperature to avoid lumps in your cheesecake mixture.
Kitchen Tools and Prep
Before diving into the delicious world of chocolate no-bake cheesecake, it’s essential to gather the right tools and prepare your kitchen. Having everything ready will make the process smoother and more enjoyable, ensuring you achieve that creamy, decadent cheesecake without a hitch.
- Mixing Bowls: You’ll need at least two mixing bowls—one large (at least 4 quarts) for the cheesecake filling and one medium for the crust. Glass or stainless steel bowls work best as they are sturdy and easy to clean. Ensure they are dry and free of grease to allow for proper mixing.
- Springform Pan: A 9-inch springform pan is ideal for this recipe. It allows for easy removal of the cheesecake once set, giving you that perfect presentation. Before starting, make sure to grease the bottom and sides lightly with butter or non-stick spray to prevent sticking.
- Chocolate Preparation: Use high-quality chocolate for the best flavor. You’ll need about 8 ounces (225g) of semi-sweet chocolate, chopped into small pieces. Melt the chocolate gently using a double boiler or in the microwave in 30-second intervals, stirring in between until smooth. Be cautious not to overheat it, as burnt chocolate can ruin your cheesecake.
Chef’s tip: If you prefer a lighter chocolate flavor, use milk chocolate instead, but keep in mind it may make the cheesecake sweeter.
Step-by-Step Instructions
This section provides you with detailed, step-by-step instructions for making your chocolate no-bake cheesecake, from preparing the crust to chilling the filling. Following these steps carefully will ensure a smooth process and a delicious outcome.
-
Making the Crust
Start by preheating your oven to 350°F (175°C). In a medium bowl, combine 1 ½ cups (150g) of graham cracker crumbs, ½ cup (100g) of granulated sugar, and ½ cup (115g) of melted unsalted butter. Mix until the crumbs are well-coated and the mixture resembles wet sand. Press this mixture firmly into the bottom of a 9-inch (23cm) springform pan using the back of a measuring cup to create an even layer.
-
Baking the Crust
Place the crust in the preheated oven and bake for 10 minutes. This step helps to set the crust, giving it a nice crunch. Once done, remove it from the oven and let it cool completely on a wire rack while you prepare the filling.
-
Filling Preparation
In a large mixing bowl, beat 16 oz (450g) of softened cream cheese with an electric mixer on medium speed until smooth and creamy, about 2-3 minutes. Gradually add in 1 cup (120g) of powdered sugar and ½ cup (50g) of unsweetened cocoa powder, mixing until fully incorporated and fluffy. This mixture should be thick and well-combined, with no lumps.
-
Incorporating Whipped Cream
In a separate bowl, whip 1 cup (240ml) of heavy cream until it forms stiff peaks, about 3-5 minutes. Gently fold the whipped cream into the chocolate mixture using a spatula; be careful not to deflate the whipped cream. The final mixture should be light and airy.
-
Chilling Time
Pour the filling into the cooled crust, smoothing the top with a spatula. Cover the cheesecake with plastic wrap and refrigerate for at least 4 hours or overnight if possible. This chilling time allows the cheesecake to set properly and develop its flavors. The filling should feel firm to the touch when set.
Pro Tips for Success
Making a chocolate no-bake cheesecake can be a rewarding experience, but a few common pitfalls can hinder your success. Here are some essential tips to ensure your cheesecake comes out perfectly creamy and free of cracks.
Avoiding Cracks
- Soften your cream cheese: Before you start mixing, let the cream cheese sit at room temperature for about 30 minutes. This ensures that it blends smoothly without lumps, which can lead to cracks in your cheesecake.
- Mix on low speed: When combining the cream cheese and sugar, use a low mixing speed. This prevents incorporating too much air, which can cause the cheesecake to puff up and crack during setting.
- Chill slowly: After pouring the filling into the crust, place it in the refrigerator for at least 4 hours, preferably overnight. Rapid temperature changes can lead to cracks as the cheesecake sets.
Whipping Cream Technique
- Use chilled equipment: For the best results, chill your mixing bowl and beaters in the freezer for about 10 minutes before whipping the cream. This helps achieve a stiff peak consistency without over-beating.
- Avoid over-whipping: Whip the cream until soft peaks form, typically around 2-3 minutes on medium speed. Over-whipping can lead to butter formation, which will affect the texture of your cheesecake.
- Gently fold: When incorporating whipped cream into the chocolate mixture, use a spatula to fold gently. This maintains the airiness of the whipped cream, giving your cheesecake a light and fluffy texture.
Flavor Variations and Substitutions
Customizing your chocolate no-bake cheesecake can make it more inclusive for different dietary needs or simply allow you to experiment with flavors. Here are some great options for creating a delicious cheesecake while considering gluten-free and vegan alternatives.
Gluten-Free Crust
If you’re looking to make this cheesecake gluten-free, you can easily substitute the typical graham cracker crust with gluten-free alternatives. Here’s a simple recipe for a gluten-free crust:
- 1 ½ cups gluten-free chocolate cookie crumbs (about 150g)
- ½ cup unsalted butter, melted (113g)
- 2 tablespoons granulated sugar (25g)
Mix the cookie crumbs, melted butter, and sugar in a bowl until combined. Press the mixture firmly into the bottom of your cheesecake pan and chill for at least 30 minutes to set before adding the filling. The crust should feel firm to the touch and hold its shape.
Vegan Options
For a vegan chocolate no-bake cheesecake, you can replace dairy ingredients with plant-based alternatives:
- Use 1 ½ cups raw cashews (soaked for 4-6 hours) instead of cream cheese.
- Replace the heavy cream with ½ cup coconut cream (120ml) for a rich texture.
- Use maple syrup instead of granulated sugar for sweetness.
Blend the soaked cashews, coconut cream, and maple syrup until smooth and creamy. This mixture should be thick and silky, resembling traditional cheesecake filling.
Chef’s tip: Ensure that your cashews are soaked well for at least 4 hours; this will help achieve a smoother texture.
| Ingredient | Traditional | Gluten-Free | Vegan |
|---|---|---|---|
| Crust | Graham crackers | Gluten-free chocolate cookies | Gluten-free chocolate cookies |
| Filling | Cream cheese | Cream cheese | Raw cashews |
| Cream | Heavy cream | Heavy cream | Coconut cream |
Serving and Pairing Suggestions
To elevate your chocolate no-bake cheesecake experience, consider these delightful serving and pairing ideas. The right toppings can enhance the creamy texture and rich flavor, while beverage pairings will complement the dessert perfectly.
Topping Ideas
- Whipped cream: Lightly sweetened with vanilla extract for a fluffy finish.
- Chocolate shavings: Use a vegetable peeler on a chocolate bar for elegant curls.
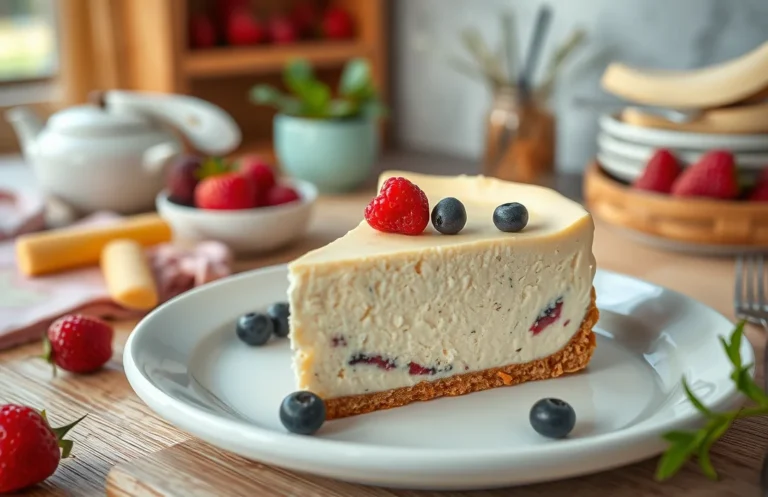
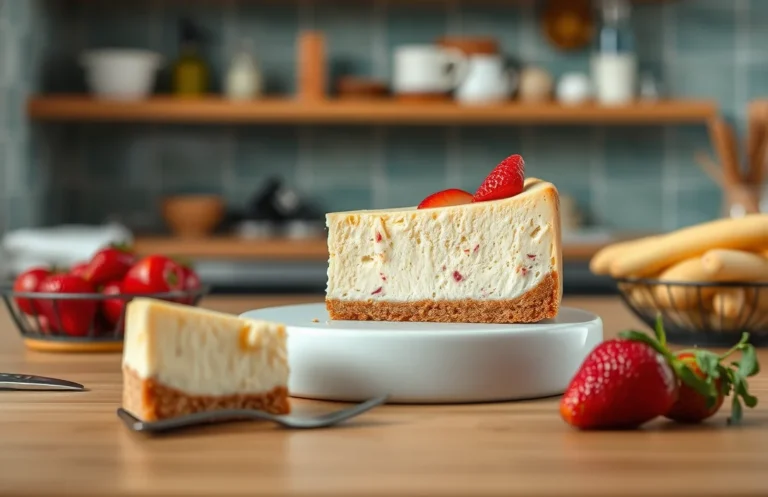
- Fresh berries: Raspberries or strawberries add a refreshing tartness that contrasts beautifully with the sweetness.
- Chocolate sauce: Drizzle a homemade ganache or store-bought chocolate sauce on top for extra indulgence.
- Crushed nuts: Almonds or hazelnuts add a crunchy texture and nutty flavor.
Beverage Pairings
Choosing the right drink can truly enhance your dessert experience. Here are some beverage options to consider:
| Beverage | Why It Pairs Well |
|---|---|
| Coffee | The bitterness of coffee balances the sweetness of the cheesecake. |
| Red wine | A rich Merlot or Cabernet Sauvignon complements the chocolate notes. |
| Milk | A classic choice that enhances the creaminess of the cheesecake. |
| Herbal tea | Lemon or mint tea provides a refreshing contrast. |
By mixing and matching these toppings and beverages, you can create a delightful dessert experience that will impress your friends and family!
Quick Recipe Summary
This quick recipe summary provides all the essential information you need for making a delicious chocolate no-bake cheesecake. It includes prep and chilling times, which are crucial for achieving the right texture and flavor, as well as total time so you can plan your baking session effectively.
- Prep Time: 20 minutes
- Chilling Time: 4 hours (minimum)
- Total Time: 4 hours 20 minutes
Ingredient Quick Reference
| Ingredient | Amount |
|---|---|
| Chocolate graham cracker crumbs | 1 ½ cups (150g) |
| Unsalted butter, melted | 6 tablespoons (85g) |
| Cream cheese, softened | 16 ounces (450g) |
| Powdered sugar | ½ cup (60g) |
| Cocoa powder | ½ cup (50g) |
| Heavy whipping cream | 1 cup (240ml) |
| Vanilla extract | 1 teaspoon |
Chef’s tip: For best results, allow the cheesecake to chill overnight to enhance the flavor and texture.
Common Mistake: Don’t skip the chilling time; the cheesecake needs it to set properly and develop the right firmness.
Quick Summary
| Prep Time | Cook Time | Total Time | Servings |
|---|---|---|---|
| 20 minutes | 0 minutes | 4 hours (chill time) | 8 servings |
- Crust Preparation: Combine 1 ½ cups crushed graham crackers with ½ cup melted butter.
- Cheese Mixture: Beat 16 oz cream cheese with 1 cup powdered sugar until smooth.
- Chocolate Addition: Stir in 8 oz melted chocolate until fully incorporated.
- Whipping Cream: Fold in 1 cup whipped cream gently to maintain lightness.
- Chill Time: Refrigerate for at least 4 hours to set properly.
- Tip 1: Use room temperature cream cheese for a smoother filling.
- Tip 2: Ensure chocolate is slightly cooled before mixing to prevent curdling.
- Tip 3: For a richer flavor, use high-quality dark chocolate.
Frequently Asked Questions
Can I make this ahead of time? How to store and reheat?
You can definitely make this chocolate no-bake cheesecake a day or two ahead of time. Just store it in the refrigerator, covered tightly with plastic wrap or in an airtight container, and it will stay fresh and delicious.
What can I substitute for cream cheese?
If you’re looking to substitute cream cheese, you can use mascarpone cheese or Greek yogurt for a lighter texture. Just keep in mind that the flavor will be slightly different, but still delicious!
How do I know when it’s done?
Your cheesecake is done when it’s set and firm to the touch but still has a slight jiggle in the center. After chilling for at least 4 hours, it should hold its shape when sliced.
Can I freeze this? How long does it last?
Yes, you can freeze your chocolate no-bake cheesecake for up to 2 months. Just wrap it tightly in plastic wrap, then aluminum foil, to prevent freezer burn.
Why did my cheesecake turn out too soft?
If your cheesecake turned out too soft, it likely didn’t chill long enough or you may have added too much liquid. Make sure to chill it for at least 4 hours and measure your ingredients accurately.

- Decadent Peanut Butter No-Bake Cheesecake: Easy Recipe to Indulge - April 3, 2026
- Delicious Mango No-Bake Cheesecake: Step-by-Step Recipe - April 3, 2026
- Decadent Raspberry No-Bake Cheesecake: Easy Step-by-Step Recipe - April 3, 2026