10 Creative Cheesecake Decorating Ideas to Wow Your Guests
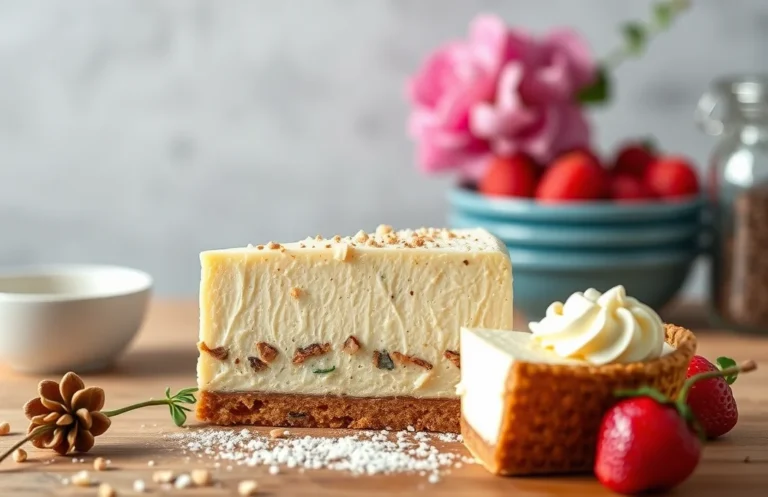
Decorating a cheesecake is like giving a canvas to your creativity, transforming a simple dessert into a stunning centerpiece for any occasion. The creamy, rich texture of cheesecake pairs beautifully with vibrant toppings and artistic designs, making it a perfect treat for celebrations or just a cozy night in. Trust me, your guests will be begging for seconds!
Total Time: 1 hour 30 minutes | Difficulty Level: Easy | Servings: 8
| Prep Time | Cook Time | Total Time | Servings | Difficulty |
|---|---|---|---|---|
| 30 minutes | 1 hour | 1 hour 30 minutes | 8 | Easy |
History of Cheesecake Decoration
Understanding the origins of cheesecake decoration provides a rich context for modern practices. Over the years, various cultures have contributed to the evolution of cheesecake, not just in flavor but also in presentation, creating a delightful canvas for creativity.
Cultural Significance
Cheesecake has a long and storied history, dating back to ancient Greece, where it was often served to athletes during the first Olympic Games. As it spread through Europe, especially in Italy and France, cheesecakes became more refined and decorative. Different regions adopted unique styles and toppings:
- Greek Cheesecake: Typically topped with honey and nuts, reflecting the ingredients of the region.
- Italian Ricotta Cheesecake: Known for its lightness, often garnished with fresh fruits.
- New York Style: Creamy and dense, often adorned with a fruit compote or chocolate drizzle.
Modern Trends
Today, cheesecake decoration has taken on a life of its own, influenced by social media and culinary innovation. Modern trends include:
- Flavored Whipped Cream: Using flavored extracts or fruit purees to create colorful toppings.
- Edible Flowers: Adding a touch of elegance and color to cheesecakes with blooms like pansies or violets.
- Drip Cakes: Incorporating ganache or caramel drips for a visually appealing effect.
Chef’s tip: Experiment with different textures, like crushed cookies or nuts, to add dimension to your cheesecake decoration.
Essential Decoration Ingredients
In this section, we’ll cover the essential ingredients you’ll need to create stunning decorations for your cheesecake. Having the right elements on hand will make it easier to craft a visually appealing dessert that tastes as good as it looks. Let’s dive into the fruits, toppings, chocolates, and sauces that can elevate your cheesecake to the next level!
| Item | Amount/Specification | Notes |
|---|---|---|
| Fresh Berries | 1-2 cups assorted (strawberries, blueberries, raspberries) | Choose ripe, firm berries for the best flavor and appearance. |
| Sliced Fruits | 1-2 cups (kiwi, peaches, or mango) | Cut into thin, even slices for an elegant look. |
| Chocolate Shavings | ½ cup (dark or white chocolate) | Use a vegetable peeler for fine shavings. |
| Chocolate Sauce | ½ cup | Store-bought or homemade; drizzle over cheesecake before serving. |
| Caramel Sauce | ½ cup | Great for drizzling; add a pinch of sea salt for contrast. |
| Whipped Cream | 1 cup (heavy cream) | Whip until soft peaks form, then pipe onto cheesecake. |
| Toasted Nuts | ½ cup (almonds or pecans) | Toast in a skillet for 5-7 minutes until golden for extra flavor. |
- For a gluten-free option, ensure that sauces and toppings are certified gluten-free.
- Experiment with different flavor combinations to match the cheesecake base.
- Prepare your toppings ahead of time to save time during presentation.
- Be mindful of the balance between sweet and tart; it enhances the overall taste.
Tools for Decorating Cheesecakes
Having the right tools on hand can make all the difference when it comes to decorating your cheesecake. These tools not only help you achieve a professional finish but also add creativity and flair to your presentation. Here are the essential tools you’ll need for decorating your cheesecake.
- Piping Bags: A good-quality piping bag is essential for creating beautiful designs with whipped cream or ganache. Use disposable piping bags for convenience, and if you’re using a reusable one, make sure it’s clean and dry. Pair it with different piping tips to achieve various designs — a star tip for rosettes or a round tip for smooth lines.
- Offset Spatula: This versatile tool is perfect for spreading toppings or smoothing out the cheesecake surface. The angled design allows you to get under the frosting without disturbing the cheesecake below. When using it, hold the spatula at a slight angle and apply gentle pressure to create a smooth finish. If you’re adding a layer of ganache, use the spatula to create a nice drip effect over the edges.
Chef’s tip: Warm your offset spatula slightly under hot water, then dry it off to help spread frosting smoothly without tearing the cheesecake.
Having these tools at your disposal will allow you to express your creativity and elevate your cheesecake decoration skills. With practice, you’ll become more comfortable using them, leading to even more impressive results.
Step-by-Step Decoration Techniques
Decorating a cheesecake can elevate it from a simple dessert to a stunning centerpiece. In this section, you will learn how to drizzle sauces and pipe cream to create visually appealing designs that will impress your guests and make your cheesecake even more delicious.
-
Drizzling Sauces
Select your favorite sauce, such as chocolate ganache or raspberry coulis. For a chocolate ganache, heat ½ cup (120ml) heavy cream over medium heat until it begins to simmer. Remove from heat and stir in 1 cup (175g) semi-sweet chocolate chips until melted and smooth.
-
Once the ganache has cooled slightly, use a spoon or a squeeze bottle to drizzle it over the cheesecake. Start from the center and work your way out, allowing the sauce to cascade down the sides. The sauce should have a glossy finish and a rich aroma.
-
Piping Cream
For piping cream, whip 1 cup (240ml) heavy cream with 2 tablespoons (25g) powdered sugar and 1 teaspoon vanilla extract until stiff peaks form. This usually takes about 3-5 minutes using a hand mixer on medium-high speed. The cream should be thick and hold its shape when you lift the beaters.
-
Transfer the whipped cream into a piping bag fitted with a star tip. Begin piping small rosettes or swirls along the edge of the cheesecake. Ensure your piping bag is at a 90-degree angle to the cheesecake for even shapes. The cream should be fluffy and light, adding a delightful texture to your dessert.
Pro Tips for Perfect Decorating
Decorating a cheesecake can elevate its presentation and impress your guests, but there are essential techniques to master. From avoiding smudges to selecting the right toppings, these expert tips will help you achieve a beautiful finish every time.
- Avoiding smudges: Use an offset spatula or a bench scraper to create clean edges and avoid touching the cheesecake’s surface. If you do get smudges from toppings or your fingers, a damp paper towel can gently wipe away imperfections without disturbing the cheesecake’s surface.
- Choosing the right toppings: Select toppings that complement the flavor of your cheesecake. For a classic vanilla cheesecake, fresh berries or a berry sauce can add vibrant color and acidity. For chocolate cheesecakes, consider crushed cookies or shaved chocolate for texture and visual appeal.
- Layering for height: Create visual interest by layering toppings. Start with a thin layer of fruit or sauce at the base, then pile on whipped cream or ganache for height. This adds dimension and makes the cheesecake more visually appealing.
- Color contrast: Use toppings that contrast in color with the cheesecake base. A lemon or key lime cheesecake pairs beautifully with deep red raspberries or dark chocolate curls, making the dessert pop on the plate.
- Garnishing wisely: A sprinkle of finely chopped nuts or a drizzle of caramel or chocolate sauce can enhance both flavor and presentation. Just be sure to apply them lightly to avoid overwhelming the cheesecake.
Creative Decoration Variations
Decorating your cheesecake can be a delightful way to express your creativity, and it’s easy to adapt decorations to fit various dietary needs. Whether you’re looking for vegan options or gluten-free alternatives, there are plenty of ways to elevate your cheesecake while keeping it delicious and inclusive.
Vegan Options
To create a vegan cheesecake, you can substitute traditional dairy ingredients with plant-based alternatives. Here are some ideas for decorating a vegan cheesecake:
- Top with a mixture of 1 cup coconut cream (chilled) whipped until fluffy and 2 tablespoons maple syrup for a creamy topping.
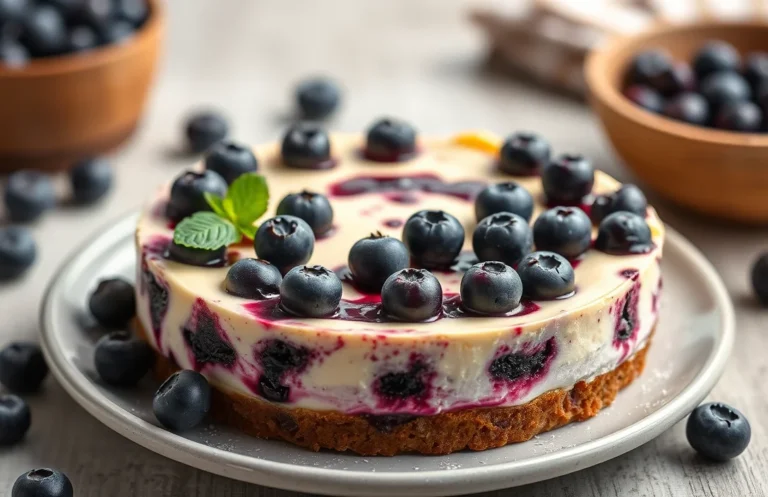
- Add fresh fruits like strawberries, blueberries, or kiwi slices for a vibrant look and fresh flavor.
- Sprinkle with dairy-free chocolate shavings or a drizzle of melted dark chocolate for a rich contrast.
- Use a fruit compote made from simmering 2 cups of your favorite berries with 2 tablespoons of sugar until thickened for a glossy finish.
Gluten-Free Alternatives
If you’re catering to gluten-free diets, consider these options for a stunning cheesecake presentation:
- Use a crust made from 1 ½ cups of gluten-free graham cracker crumbs mixed with ¼ cup melted butter.
- Top your cheesecake with crushed gluten-free cookies or nuts for added texture.
- Finish with a sprinkle of gluten-free powdered sugar for a sweet touch.
Chef’s tip: Always check labels to ensure all ingredients are gluten-free or vegan, as some processed items may contain hidden allergens.
| Decoration Type | Ingredients |
|---|---|
| Vegan Whipped Topping | 1 cup coconut cream, 2 tablespoons maple syrup |
| Fruit Compote | 2 cups berries, 2 tablespoons sugar |
| Gluten-Free Crust | 1 ½ cups gluten-free crumbs, ¼ cup melted butter |
Serving and Plating Suggestions
Presenting your cheesecake beautifully can elevate its appeal and enhance the overall dining experience. Here are some practical tips on how to serve and plate your cheesecake, along with delicious accompaniments that will complement its rich flavors.
- Choose the Right Plate: Select a clean, simple plate that allows the cheesecake to be the star. White plates are classic, but a colored plate can add a fun touch. Ensure the plate size is appropriate; a larger plate gives you room to add decorations and garnishes.
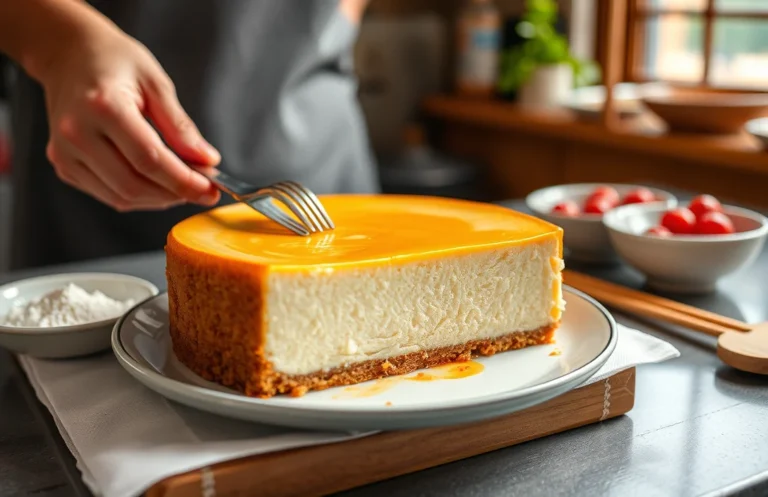
- Slice Perfectly: For clean, professional-looking slices, use a warm knife. Dip the knife in hot water, dry it off, and then cut through the cheesecake. Wipe the knife clean between each slice to maintain the edges, making each piece look neat and inviting.
- Add a Sauce: Drizzle a complementary sauce over the cheesecake just before serving. Popular choices include raspberry coulis, chocolate ganache, or caramel sauce. Use a squeeze bottle for precise application or a spoon for a more rustic look.
- Garnish Wisely: Top your cheesecake with fresh fruit like strawberries, blueberries, or kiwi for a pop of color. Alternatively, sprinkle crushed nuts or chocolate shavings for texture. A sprig of mint can add a refreshing finish.
- Pair with Sides: Serve your cheesecake with a scoop of ice cream or a dollop of whipped cream on the side. For added flair, consider a small fruit salad or a few biscotti for guests to enjoy alongside their slice.
Quick Summary
| Prep Time | Cook Time | Total Time | Servings |
|---|---|---|---|
| 30 minutes | 0 minutes | 30 minutes | 8 servings |
- Select a theme: Choose colors and flavors that complement your cheesecake.
- Use fresh fruit: Top with berries, citrus slices, or seasonal fruits for a vibrant look.
- Incorporate sauces: Drizzle chocolate, caramel, or fruit sauces for added flavor and appeal.
- Add texture: Sprinkle crushed cookies, nuts, or granola for crunch.
- Garnish wisely: Use mint leaves or edible flowers for a pop of color.
- Tip: Chill your cheesecake before decorating for a firmer base.
- Tip: Use a piping bag for precision when adding sauces or whipped cream.
Frequently Asked Questions
Can I make this ahead of time? How to store and reheat?
You can absolutely make your cheesecake ahead of time! Store it in the refrigerator, covered with plastic wrap, for up to 5 days, but avoid adding decorations until just before serving.
What can I substitute for cream cheese?
If you need a substitute for cream cheese, you can use mascarpone cheese or a vegan cream cheese alternative, which will still give you a creamy texture for your cheesecake.
How do I know when it’s done?
Your cheesecake is done when the edges are set and the center has a slight jiggle; it should look slightly puffed and not be completely firm.
Can I freeze this? How long does it last?
You can freeze your decorated cheesecake for up to 3 months, but it’s best to freeze it without decorations. Let it thaw in the refrigerator for a few hours before serving.
What if I don’t have a piping bag for decorations?
If you don’t have a piping bag, you can use a resealable plastic bag instead; just fill it with your frosting, seal it, and cut a small corner to pipe your decorations.

- Decadent Peanut Butter No-Bake Cheesecake: Easy Recipe to Indulge - April 3, 2026
- Delicious Mango No-Bake Cheesecake: Step-by-Step Recipe - April 3, 2026
- Decadent Raspberry No-Bake Cheesecake: Easy Step-by-Step Recipe - April 3, 2026