Perfect Cheesecake: 5 Key Signs It’s Ready to Serve
Cheesecake is the ultimate dessert that brings smiles and satisfaction to any gathering. Its creamy, rich texture paired with a buttery crust makes it a favorite, whether it’s a special occasion or a simple weeknight treat. Just the thought of that luscious, velvety slice makes my mouth water!
To help you master the art of cheesecake, I’ll share key indicators for doneness like visual cues, the jiggle test, and temperature guidelines. With this reliable guide, you’ll know exactly when your cheesecake is perfectly baked, ensuring that it’s a showstopper every time.
| Prep Time | Cook Time | Total Time | Servings | Difficulty |
|---|---|---|---|---|
| 20 minutes | 1 hour | 1 hour 20 minutes | 8 servings | Medium |
Cheesecake Origins
Understanding the origins of cheesecake adds depth to its preparation and appreciation, especially when learning to determine when it’s perfectly baked. This beloved dessert has a rich history and varies widely across cultures, making it a significant treat around the world.
- History of Cheesecake: The earliest known cheesecake dates back to ancient Greece, where it was made with simple ingredients like cheese, flour, and honey. It was served to athletes during the first Olympic Games as a source of energy. Over centuries, cheesecake recipes evolved, spreading through Europe and gaining popularity in America, where variations like New York-style cheesecake emerged.
- Regional Variations: Different cultures have their unique takes on cheesecake. For example, Italian cheesecake uses ricotta cheese and has a lighter texture, while Japanese cheesecake is fluffy and soufflé-like. Each variation has distinct flavors and textures, influencing how one might gauge doneness.
- Serving Occasions: Cheesecake is a versatile dessert served during celebrations, holidays, and casual gatherings alike. Whether it’s a birthday party or a family dinner, knowing when your cheesecake is ready ensures it will impress guests and elevate any occasion.
Ingredients List
To achieve the perfect cheesecake and determine when it’s ready, you need high-quality ingredients in the right proportions. Each component plays a crucial role in texture and flavor, which ultimately affects how you can tell when your cheesecake is perfectly baked.
| Item | Amount/Specification | Notes |
|---|---|---|
| Cream Cheese | 2 pounds (900g) | Softened to room temperature for a smooth texture |
| Sugar | 1 cup (200g) | Granulated sugar; can substitute with a sweetener for a low-calorie option |
| Sour Cream | 1 cup (240ml) | Adds creaminess and tang; full-fat recommended |
| Vanilla Extract | 2 teaspoons | Use pure vanilla for best flavor |
| Eggs | 4 large | Room temperature to prevent shock from cold ingredients |
| Graham Cracker Crumbs | 1 ½ cups (150g) | For a classic crust; can substitute with gluten-free crumbs |
| Butter | ½ cup (115g) | Melted for crust; can use coconut oil for a dairy-free option |
- Tip: Always use room temperature cream cheese to avoid lumps.
- Tip: When mixing, scrape down the sides of the bowl to ensure even blending.
- Tip: Check the internal temperature; it should be around 150°F (65°C) when done.
Essential Kitchen Tools
When baking a cheesecake, having the right tools on hand is crucial for achieving that perfect texture and consistency. This section outlines the essential kitchen equipment you’ll need to prepare and bake your cheesecake, ensuring you can assess its readiness accurately.
| Item | Amount/Specification | Notes |
|---|---|---|
| Mixing Bowl | 1 large (3-quart) | For mixing cream cheese and other ingredients smoothly |
| Electric Mixer | 1 | Handheld or stand mixer for creaming the cheese |
| Rubber Spatula | 1 | For folding ingredients and scraping down the bowl |
| Baking Pan | 9-inch springform pan | Allows for easy removal of the cheesecake after baking |
| Water Bath Pan | 1 large roasting pan | To create a moist baking environment, preventing cracks |
| Instant-Read Thermometer | 1 | For checking the internal temperature of the cheesecake |
| Cooling Rack | 1 | To cool the cheesecake evenly after baking |
- Ensure the mixer is on low speed to avoid incorporating too much air into the batter, which can cause cracks.
- Check the cheesecake’s doneness by gently shaking the pan; the center should still have a slight jiggle.
- Let the cheesecake cool gradually to room temperature before refrigerating to prevent condensation.
Baking Instructions
Understanding the proper baking process is crucial for achieving a perfectly set cheesecake. In this section, we’ll go through the steps to prep your crust, mix the filling, and bake your cheesecake while knowing exactly when it’s ready.
- Prepping the Crust: Start by preheating your oven to 350°F (175°C). In a mixing bowl, combine 1 ½ cups (150g) of graham cracker crumbs, ¼ cup (50g) of granulated sugar, and ½ cup (115g) of melted unsalted butter. Mix until the crumbs are evenly moistened, resembling wet sand. Press the mixture firmly into the bottom of a 9-inch (23cm) springform pan, creating an even layer. Bake for 10 minutes until golden and fragrant, then allow it to cool.
- Mixing the Filling: In a large mixing bowl, beat 24 ounces (680g) of softened cream cheese and 1 cup (200g) of granulated sugar until smooth, about 3-4 minutes. Scrape down the sides of the bowl and add 3 large eggs, one at a time, mixing on low speed after each addition. Finally, fold in 1 teaspoon of vanilla extract and ½ cup (120ml) of sour cream until the mixture is creamy and uniform. The filling should be thick but pourable.
- Baking and Cooling: Pour the filling into the cooled crust, smoothing the top with a spatula. Bake in the preheated oven for 50-60 minutes. The edges should look set while the center will slightly jiggle when you gently shake the pan. After baking, turn off the oven and crack the door open, letting the cheesecake cool in the oven for 1 hour. This helps prevent cracking. Refrigerate for at least 4 hours or overnight before serving.
Indicators of Doneness
Knowing when your cheesecake is ready is crucial for achieving that perfect creamy texture without overbaking. Several visual and textural indicators can help you determine the doneness of your cheesecake, ensuring it’s baked to perfection.
Color Changes
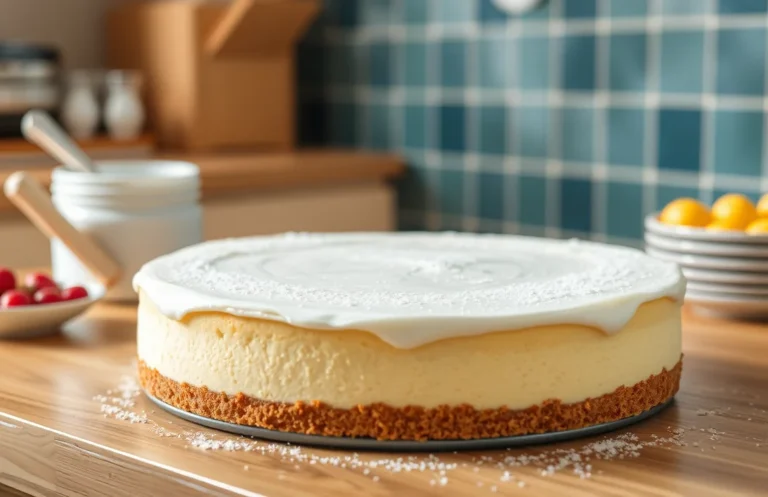
As your cheesecake bakes, pay attention to its color. The top should transition from a glossy sheen to a matte finish. Look for a light golden hue around the edges:
- Start with a pale yellow color when you place it in the oven.
- By the end of baking, the edges should have a subtle golden hue.
- The center will remain slightly lighter than the edges.
Edge Pulling Away
Another key visual cue is observing how the edges of the cheesecake behave:
- When the cheesecake is nearly done, the edges will begin to pull away from the sides of the pan.
- The center should still look slightly moist and not fully set, indicating that it will firm up as it cools.
Jiggle Test Explained
The jiggle test is a classic method for checking cheesecake doneness:
- Gently shake the pan; the center should jiggle slightly, while the edges should be firm.
- A firm center that barely jiggles means it’s overbaked.
Chef’s tip: If you’re unsure, a toothpick inserted in the center should come out with a few moist crumbs, not wet batter.
Temperature Guidelines
Knowing the internal temperature of your cheesecake is essential for ensuring it is perfectly baked. This will help you achieve that creamy, smooth texture while avoiding any cracks or dryness. Here’s how to check the temperature accurately and what to aim for.
- Using a Food Thermometer: To gauge the doneness of your cheesecake, invest in a reliable food thermometer. Insert the thermometer into the center of the cheesecake, ensuring it doesn’t touch the bottom of the pan, as that will give you an inaccurate reading. The probe should be in the thickest part of the cheesecake for the most precise measurement.
- Ideal Temperature Range: The ideal internal temperature for a fully baked cheesecake is between 150°F (65°C) and 160°F (71°C). At this range, the cheesecake should be set but still have a slight jiggle in the center. If the temperature exceeds 165°F (74°C), you risk overbaking, which can lead to a dry texture.
- Cooling Considerations: Once your cheesecake reaches the desired temperature, remove it from the oven and allow it to cool gradually. Place it on a wire rack and let it cool for at least an hour before transferring it to the refrigerator. A rapid temperature change can cause cracks, so avoid putting it directly into the fridge while it’s still warm.
Common Mistakes
Understanding when a cheesecake is perfectly baked is crucial for achieving that creamy, luscious texture we all love. However, there are common pitfalls that can lead you to underbake or overbake your cheesecake. Let’s explore these mistakes to help you create a flawless dessert every time.
Overmixing the Batter
While it might be tempting to mix vigorously to ensure everything is well combined, overmixing introduces too much air into the batter, which can lead to cracks during baking. The key is to mix just until the ingredients are incorporated and smooth.
- Gently fold in ingredients rather than whisking aggressively.
- Look for a silky, homogenous texture without lumps.
Incorrect Oven Temperature
Oven temperature plays a pivotal role in achieving the right consistency. If your oven runs hot, your cheesecake may cook too quickly on the outside while remaining undercooked in the center.
- Always use an oven thermometer to ensure your oven is set to the correct temperature at 325°F (160°C).
- Consider using a water bath (bain-marie) to help maintain an even temperature and prevent cracks.
Skipping Cooling Times
Cooling your cheesecake properly allows it to set and achieve the perfect texture. Skipping this step can lead to a soupy center.
Chef’s tip: After baking, turn off the oven and let the cheesecake cool inside with the door slightly ajar for about 1 hour to prevent sudden temperature changes.
Then refrigerate for at least 4 hours, preferably overnight, before slicing.
Troubleshooting Tips
Understanding how to troubleshoot an undercooked or overcooked cheesecake can save your dessert from disappointment. Here’s how to identify the issues and fix them effectively.
Fixing Undercooked Cheesecake
Symptom: The center of your cheesecake jiggles significantly when you gently shake the pan.
Cause: This usually means the cheesecake hasn’t set properly and needs more time in the oven.
Fix: If your cheesecake is undercooked, return it to the oven at 325°F (163°C) for an additional 10-15 minutes. Check for doneness by inserting a toothpick into the center; it should come out clean or with a few moist crumbs attached. Remember, the edges should be set, while the center may still have a slight jiggle.
Handling Overcooked Texture
Symptom: The surface of your cheesecake looks dry and cracked, and the texture is grainy.
Cause: Overbaking can cause the proteins in the cream cheese to tighten too much, leading to a dry texture.
Fix: If you notice this, consider using a sour cream topping to salvage the flavor. Mix 1 cup of sour cream, 2 tablespoons of sugar, and 1 teaspoon of vanilla extract, and spread it over the cooled cheesecake. Bake it at 350°F (175°C) for 10 minutes to help it adhere.
Storage Tips
To maximize the shelf life of your cheesecake, wrap it tightly in plastic wrap or aluminum foil and refrigerate. It can last for up to 5 days. For longer storage, freeze it for up to 3 months. Thaw in the refrigerator overnight before serving to maintain texture.
Quick Summary
| Prep Time | Cook Time | Total Time | Servings |
|---|---|---|---|
| 20 minutes | 60 minutes | 1 hour 20 minutes | 8 |
- Check the edges: They should be set and slightly puffed.
- Look for a slight jiggle: The center should still wobble gently when shaken.
- Use a toothpick: Insert it into the center; it should come out clean or with a few moist crumbs.
- Cool gradually: Turn off the oven and let the cheesecake cool inside for an hour.
- Chill before serving: Refrigerate for at least 4 hours for best texture.
- Tip: Avoid overmixing to prevent cracks.
- Tip: Use room temperature ingredients for a smoother batter.
Frequently Asked Questions
Can I make this ahead of time? How to store and reheat?
You can make cheesecake up to 2 days in advance. Store it covered in the refrigerator, and it’s best served chilled, so no need to reheat!
What can I substitute for cream cheese?
You can use mascarpone cheese or a vegan cream cheese alternative, but be aware that it might slightly change the texture and flavor. Use the same amount, which is typically 16 ounces for a standard cheesecake.
How do I know when it’s done?
Your cheesecake is ready when the edges are set but the center still slightly jiggles, usually around 50-60 minutes at 325°F. It will firm up as it cools, so don’t overbake!
Can I freeze this? How long does it last?
Yes, you can freeze cheesecake for up to 2-3 months if properly wrapped in plastic wrap and aluminum foil. Thaw it in the refrigerator overnight before serving for the best texture.
Why did my cheesecake crack on top?
Cracks often happen due to overbaking or baking at too high a temperature. To prevent this, always bake at 325°F and consider using a water bath for even cooking.

- Decadent Peanut Butter No-Bake Cheesecake: Easy Recipe to Indulge - April 3, 2026
- Delicious Mango No-Bake Cheesecake: Step-by-Step Recipe - April 3, 2026
- Decadent Raspberry No-Bake Cheesecake: Easy Step-by-Step Recipe - April 3, 2026