Make Cheesecake a Day Ahead: Tips for Perfect Storage & Types
Cheesecake is that creamy, dreamy dessert that has a way of making any gathering feel special. Whether it’s a birthday celebration or a cozy weeknight treat, its velvety texture and rich flavor always leave everyone wanting more. The best part? You can easily make it ahead of time, ensuring you spend less time in the kitchen and more time enjoying the company!
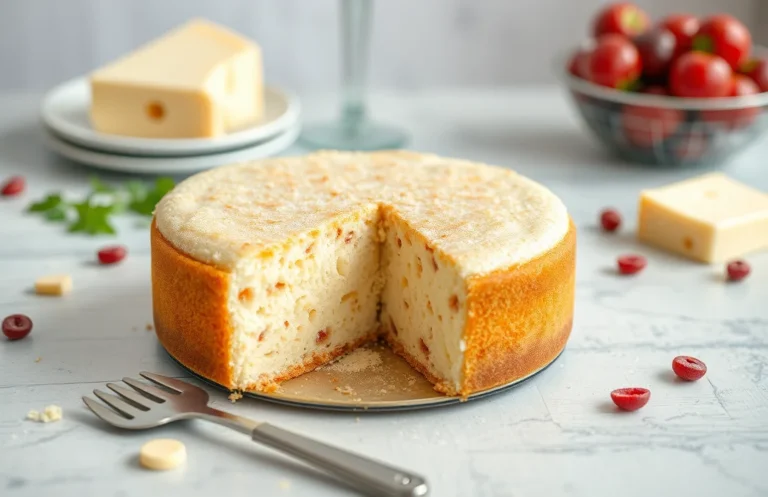
Yes, you can make cheesecake the day before! This recipe takes 30 minutes to prep and 60 minutes to bake, yielding 8 servings. It’s simple enough for beginners yet impressive enough for any occasion.
| Prep Time | Cook Time | Total Time | Servings | Difficulty |
|---|---|---|---|---|
| 30 minutes | 60 minutes | 90 minutes | 8 | Easy |
Cheesecake Origins
Cheesecake has a rich and diverse history that spans centuries, with roots in ancient Greece. Understanding its origins not only enhances our appreciation for this delightful dessert but also informs us about how it can be prepared and enjoyed today, including whether it can be made a day in advance.
- Historical Background: The earliest known cheesecake dates back to ancient Greece, where it was served to athletes during the first Olympic Games in 776 B.C. Made from simple ingredients like cheese, flour, and honey, it was a nourishing treat that showcased the available resources of the time.
- Cultural Variations: Over the centuries, cheesecake has evolved, with various cultures putting their own spin on the recipe. For example, the Italian ricotta cheesecake offers a lighter texture, while New York-style cheesecake is dense and creamy, often made with cream cheese. Each variation has its own unique characteristics that can influence how they are prepared ahead of time.
- Modern Significance: Today, cheesecake is a beloved dessert around the world, often associated with celebrations and special occasions. Its versatility means it can be made in advance, allowing for a stress-free serving experience. Understanding its origins may inspire you to try making it the day before an event, ensuring it has time to set properly and develop its full flavor.
Ingredients for Cheesecake
This section provides a complete list of ingredients for making a delicious cheesecake, whether you’re preparing it a day in advance or just for today. Understanding the exact measurements and specifications will help you achieve the perfect texture and flavor, essential for a make-ahead dessert.
| Item | Amount/Specification | Notes |
|---|---|---|
| Graham cracker crumbs | 1 ½ cups (150g) | Can substitute with crushed digestive biscuits |
| Granulated sugar (for crust) | 2 tablespoons (25g) | Enhances sweetness |
| Salted butter | ½ cup (113g), melted | Use unsalted butter for less saltiness |
| Cream cheese | 4 (8-ounce) packages (900g) | Ensure it’s softened to room temperature |
| Granulated sugar (for filling) | 1 cup (200g) | For sweetness and texture |
| Vanilla extract | 1 teaspoon (5ml) | Use pure vanilla for best flavor |
| Sour cream | 1 cup (240ml) | Can substitute with Greek yogurt |
| Large eggs | 4 | At room temperature for better mixing |
- Tip: If you’re making the cheesecake a day ahead, it’s best to store it in the refrigerator, covered tightly with plastic wrap.
- Let it sit at room temperature for about 30 minutes before serving to enhance the flavor and texture.
- Make sure your ingredients are at room temperature to avoid lumps in the filling.
- For a flavored cheesecake, consider adding lemon zest or chocolate chips to the filling.
Essential Kitchen Tools
Making cheesecake the day before can be a game-changer for your baking schedule. Having the right tools on hand ensures that your cheesecake comes out perfectly and stores well for the next day. Below are the essential kitchen tools you’ll need to create a delightful cheesecake that can be made in advance.
- Baking Pan: A 9-inch (23 cm) springform pan is ideal for cheesecake. This allows for easy removal of the cheesecake after it has set. Ensure that the pan is properly greased with butter or lined with parchment paper to prevent sticking.
- Mixer: An electric stand mixer or handheld mixer works best for achieving a smooth, creamy filling. Mix on medium speed for about 2-3 minutes until the cream cheese is light and fluffy, ensuring there are no lumps. A whisk can be used for mixing by hand, but it requires more effort and time.
- Mixing Bowls: You’ll need at least two mixing bowls—one for the crust and one for the filling. Use a medium bowl for the crust mixture, combining 1 ½ cups (150g) of graham cracker crumbs, ½ cup (100g) of granulated sugar, and ½ cup (115g) of melted butter.
- Spatula: A silicone spatula is perfect for folding in ingredients and scraping down the sides of the bowl. This ensures that all components are well combined, especially when adding eggs to the cream cheese mixture.
- Measuring Cups and Spoons: Accurate measurements are crucial for baking. Have a set of dry measuring cups (for flour and crumbs) and liquid measuring cups (for cream and sour cream). Use a kitchen scale for precise ingredient weights if preferred.
- Plastic Wrap or Airtight Container: After your cheesecake has cooled completely, wrap it tightly in plastic wrap or store it in an airtight container. This prevents it from absorbing any odors from the refrigerator and helps maintain its creamy texture.
Cheesecake Preparation Steps
Making cheesecake the day before is a fantastic way to ensure a stress-free dessert experience. Proper preparation and storage are crucial for achieving that creamy, dreamy texture and flavor. Follow these detailed steps to ensure your cheesecake is ready to impress when the time comes!
- Prepare the Crust: Preheat your oven to 350°F (175°C). In a medium bowl, combine 1 ½ cups (150g) of graham cracker crumbs, ⅓ cup (65g) of granulated sugar, and ½ cup (115g) of melted unsalted butter. Mix until the crumbs are evenly coated and the mixture resembles wet sand. Press this mixture firmly into the bottom of a 9-inch (23cm) springform pan. Bake for 8-10 minutes until lightly golden and fragrant. Let it cool completely.
- Mix the Filling: In a large bowl, beat 4 (8-ounce) packages of softened cream cheese with an electric mixer on medium speed until smooth, about 2 minutes. Gradually add 1 cup (200g) of granulated sugar and continue beating until well combined. Add 1 teaspoon of vanilla extract and 4 large eggs, one at a time, mixing on low speed until just incorporated. Be careful not to overmix as it can incorporate too much air into the batter.
- Bake and Cool: Pour the filling into the cooled crust and smooth the top with a spatula. Bake in the preheated oven for 50-60 minutes, or until the edges are set but the center still has a slight jiggle. Turn off the oven and crack the door open, allowing the cheesecake to cool for an hour. This helps prevent cracks. After cooling, cover the cheesecake with plastic wrap and refrigerate overnight. This resting period enhances the flavors and texture.
Chef’s tip: Ensure the cheesecake is completely cooled before refrigerating to avoid condensation.
Pro Tips for Cheesecake
Making cheesecake the day before can be a great time-saver, but to ensure you achieve the best results, it’s crucial to follow some specific tips. This section will guide you on how to prevent cracks and achieve a creamy texture, so your cheesecake is just as delicious the next day.
Preventing Cracks
- Use room temperature ingredients: Make sure your cream cheese, eggs, and sour cream are at room temperature before mixing. This helps create a smooth batter and reduces the chances of cracks.
- Mix gently: When combining ingredients, mix on low speed until just blended. Overmixing introduces too much air, which can cause the cheesecake to rise and crack during baking.
- Water bath method: Bake your cheesecake in a water bath (bain-marie) to promote even cooking. Wrap your springform pan in aluminum foil and place it in a larger pan filled with hot water. This keeps the temperature steady and prevents the cheesecake from cracking.
Achieving Creaminess
- Don’t overbake: Bake your cheesecake at 325°F (160°C) for about 55-70 minutes. It should be set around the edges but still slightly jiggly in the center when you take it out of the oven. It will continue to firm up as it cools.
- Chill properly: After baking, let your cheesecake cool at room temperature for at least 1 hour before refrigerating. This gradual cooling helps maintain its creamy texture.
- Cover loosely: When storing overnight, cover your cheesecake loosely with plastic wrap or parchment paper. This prevents moisture buildup that can make the surface soggy.
Variations and Substitutions
This section covers some fantastic options for adapting your cheesecake recipe to meet dietary needs while ensuring that you can still prepare it the day before. Whether you’re looking for gluten-free or vegan alternatives, these tips will help you create a delicious cheesecake without compromising on flavor or texture.
Gluten-Free Options
- For a gluten-free cheesecake, substitute the regular graham cracker crust with gluten-free graham crackers or almond flour. Use 1 ½ cups of crushed gluten-free graham crackers mixed with 5 tablespoons of melted butter.
- Ensure any additional flavorings or toppings are also gluten-free, such as certain fruit purees or chocolate sauces.
Vegan Alternatives
If you want to go vegan, you can still enjoy cheesecake that can be made a day ahead. Here’s how:
- Replace cream cheese with 1 ½ cups of soaked cashews (soak for at least 4 hours) blended with ½ cup of coconut cream and ½ cup of maple syrup.
- Instead of eggs, use a flaxseed meal substitute: mix 1 tablespoon of flaxseed meal with 2.5 tablespoons of water and let it sit until it thickens, about 5 minutes.
- For the crust, use 1 ½ cups of almond flour mixed with 5 tablespoons of coconut oil instead of butter.
Chef’s tip: Allow your vegan cheesecake to chill overnight to let the flavors meld together beautifully before serving.
| Ingredient | Regular | Gluten-Free | Vegan |
|---|---|---|---|
| Crust | 1 ½ cups graham crackers | 1 ½ cups gluten-free graham crackers | 1 ½ cups almond flour |
| Cream Cheese | 16 oz cream cheese | 16 oz cream cheese | 1 ½ cups soaked cashews |
| Sugar | 1 cup sugar | 1 cup sugar | ½ cup maple syrup |
Serving and Pairing Ideas
Making cheesecake a day in advance not only saves time but also allows the flavors to meld beautifully. As you prepare to serve your cheesecake, consider how to present it and what flavors can enhance the experience. Here are some ideas for plating techniques and flavor pairings that will elevate your cheesecake to a show-stopping dessert.
Plating Techniques
- Use a warm knife to slice the cheesecake neatly. Dip the knife in hot water and wipe it clean after each cut for smooth edges.
- Garnish each slice with a dollop of freshly whipped cream, adding a touch of elegance.
- Sprinkle a light dusting of powdered sugar over the top before serving to create a beautiful contrast against the creamy surface.
- For a colorful presentation, add a few fresh berries or edible flowers on the plate alongside the cheesecake.
Flavor Pairings
Pairing your cheesecake with complementary flavors can enhance its taste and create a delightful balance. Here are some classic and creative options:
| Flavor | Pairing Suggestions |
|---|---|
| Berry | Fresh raspberries, strawberries, or blueberries make a tart contrast to the creamy cheesecake. |
| Citrus | Drizzle with lemon or orange curd for a zesty kick. |
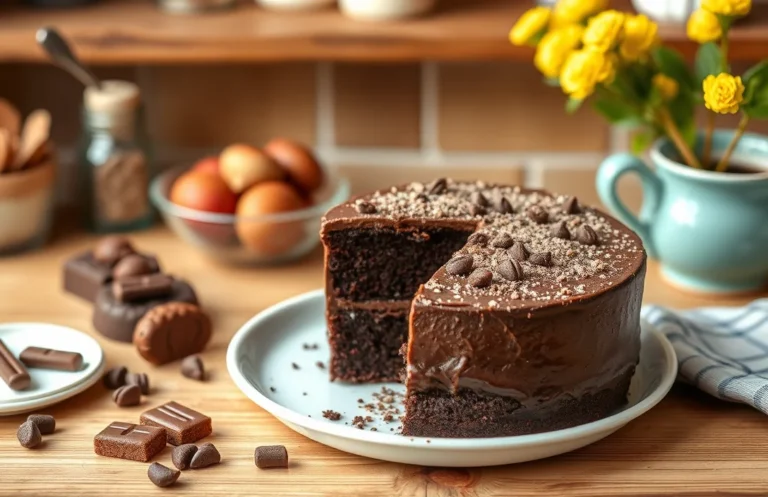
| Chocolate | Chocolate ganache or shavings add richness and decadence. |
| Nuts | Chopped pecans or walnuts can provide a crunchy texture and nutty flavor. |
Chef’s tip: To store leftover cheesecake, wrap it tightly in plastic wrap and refrigerate for up to 5 days for the best taste and texture.
Quick Summary
| Prep Time | 15 minutes |
|---|---|
| Cook Time | 60 minutes |
| Total Time | 1 day (including cooling) |
| Servings | 8 |
- Chill Time: Refrigerate the cheesecake for at least 4 hours, preferably overnight.
- Water Bath: Use a water bath during baking to prevent cracks.
- Room Temperature Ingredients: Ensure cream cheese and eggs are at room temperature for a smooth batter.
- Overmixing Warning: Mix just until combined to avoid a dense texture.
- Flavor Enhancement: Add a splash of vanilla extract for extra depth.
Frequently Asked Questions
Can I make this ahead of time? How to store and reheat?
You can definitely make cheesecake the day before serving. Store it tightly covered in the refrigerator for up to 3 days; there’s no need to reheat it!
What can I substitute for cream cheese?
You can substitute cream cheese with an equal amount of mascarpone or ricotta cheese for a different flavor and texture. Just keep in mind that the final consistency may vary slightly.
How do I know when it’s done?
Your cheesecake is done when the edges are set but the center still slightly jiggles when you gently shake the pan. It will continue to firm up as it cools, so avoid overbaking.
Can I freeze this? How long does it last?
Yes, you can freeze cheesecake for up to 3 months if wrapped tightly in plastic wrap and aluminum foil. Just thaw it in the refrigerator overnight before serving.
Why did my cheesecake turn out cracky?
Your cheesecake may have cracked due to rapid temperature changes or overmixing. To prevent this next time, bake it in a water bath and avoid mixing too vigorously after adding eggs.

- Decadent Peanut Butter No-Bake Cheesecake: Easy Recipe to Indulge - April 3, 2026
- Delicious Mango No-Bake Cheesecake: Step-by-Step Recipe - April 3, 2026
- Decadent Raspberry No-Bake Cheesecake: Easy Step-by-Step Recipe - April 3, 2026